Movavi Screen Recorder
The perfect way to record anything from your screen
Disclaimer: Please be aware that Movavi Screen Recorder does not allow capture of copy-protected video and audio streams.


Video content forms a huge part of the learning culture in the 21st century. The demand for instructional videos or online tutorials has only gone up in recent years, with 83% of internet users reporting that they regularly turn to videos to learn new things. But how do you create video tutorials that are effective and engaging?
What is a video tutorial?
Good video tutorials offer plenty of benefits to creators and viewers alike. For creators, these instructional videos become a platform to establish themselves as thought leaders or experts within a particular field, subject matter, or industry, enhancing their credibility and standing. Moreover, the internet's global reach allows these tutorials to be viewed all over the world, so learning how to create video tutorials will expose creators to a larger, more diverse audience. Some creators can even use video tutorials to generate income for themselves, making money through advertising, sponsorships, or by selling the tutorials directly. For businesses, these videos help with brand promotion and raising awareness about their products or services – ultimately leading to more sales.
On the other hand, viewers also benefit from video tutorials. Video instructional materials simplify learning by letting individuals learn new skills or grasp complex concepts at their own pace. It works well, since viewers can always pause, rewind, and rewatch content as many times as they need. Plus, video tutorials are flexible. They can be accessed from anywhere and at any time as long as an internet connection is available. Additionally, for visual learners, video tutorials provide an effective method of instruction, as they cater to their preferred learning style. Lastly, many video tutorials can be viewed for free or at a significantly lower cost compared to traditional learning options, providing a cost-effective solution for those wanting to acquire new skills or knowledge.
There are a few main types of tutorial videos:
Microvideo. A microvideo is a brief video clip, typically ranging from a few seconds to one minute long. Given its concise nature, a microvideos often communicate a simple message or idea quickly and effectively. The rise of social media platforms, such as TikTok, Instagram Reels, Snapchat, and YouTube Shorts, has fueled the popularity of this format. For tutorial content, microvideos can be incredibly effective for explaining simple tasks, demonstrating a single step of a process, or giving a quick overview or preview of a longer tutorial. This format allows creators to focus on one key aspect at a time, which often enhances comprehension for viewers. Also, because of their short length, microvideos can engage viewers who have limited time or shorter attention spans. Because of all this, when the tutorial content is straightforward and can be condensed into bite-sized pieces, microvideos are a prime choice
Standard tutorial video. A standard tutorial video is a detailed, step-by-step guide illustrating how to perform a certain task, utilize a specific tool, or understand a complex concept. Typically running from a few minutes to an hour, these videos provide comprehensive instructions and explanations, often employing screen recording, voice-over commentary, and sometimes even on-camera demonstrations. For creators, standard tutorial videos work well when the subject matter is complex or multifaceted and needs an in-depth explanation. For example, you could create how-to videos on your favorite craft. These videos allow the creators to elaborate on the topic, clarify common misconceptions, and provide helpful tips and tricks. They help greatly when teaching others how to use software, explaining multistep processes, or a situation where the viewer can follow along in real time.
Training video. Training videos are informational videos created for students or employees about policies, responsibilities, software use, safety procedures, and more. These videos can range from a few minutes to a couple of hours, depending on the complexity of the topic and the amount of material. They are typically comprehensive, using visuals, voice-overs, demonstrations, and sometimes even interactive elements like quizzes to facilitate learning. For businesses, these videos are typically used when onboarding new employees, introducing new procedures or software, or reinforcing company policies and standards. They ensure that all workers receive consistent information and instruction, regardless of their location or schedule. Additionally, these videos can be repeatedly accessed for refresher training or for new employees who join at a later date. For students, training videos can be used to explain how to use a specific piece of equipment or software, or explain school rules.
Explainer video. Explainer videos are short, engaging videos used to simplify complicated ideas or concepts. Typically lasting between one and three minutes, these videos employ compelling visuals, clear and concise language, and even storytelling or animation to explain a product, service, or concept. You should make an explainer video to elucidate something that is intricate or abstract. This could include presenting a new product's functionality, demonstrating a complex process, or clarifying a business model. They're particularly useful for businesses, because they can educate customers about a product or service, boost web engagement, and improve conversion rates. These videos transform complicated ideas into digestible, engaging content, making the viewer's learning journey enjoyable and effective.
Screencast. Screencasts are digital video recordings that capture actions taking place on a PC or laptop screen. Often accompanied by audio narration, they create a visual journey guiding viewers through a software application, website navigation, or any activity performed on a computer. The length of a screencast can vary, but it's generally dictated by the complexity of the subject. Creators and educators often use screencasts when they need to demonstrate software-related tasks or provide a walkthrough of a process executed on a computer. They are an excellent tool for tech tutorials, software demonstrations, and step-by-step guides for digital interfaces. Because viewers can see exactly what's occurring on the screen, screencasts help eliminate confusion and improve comprehension of the task at hand. They offer viewers a clear, direct view of the task at hand, making them highly effective for technical skills.
Benefits of making a tutorial video
Creating video tutorials is not only useful for sharing knowledge, but also provides several benefits to the creator:
Expand your reach. If you learn how to create tutorial videos, you can transcend geographical and language barriers, thereby reaching a global audience. With platforms like YouTube, a well-crafted tutorial can be accessed by anyone with internet access, thereby significantly expanding the reach of the content. The right tutorial video can even go viral, reaching thousands or even millions of people throughout the world.
Improve retention. The combination of visual and auditory stimuli in tutorial videos caters to different learning styles, enhancing viewer comprehension. By demonstrating principles in action, viewers are more likely to retain the information, making tutorials a highly effective educational tool. Not only do they retain the knowledge, but video has a way of keeping a watcher’s attention, especially when edited well.
Increase engagement. Tutorial videos offer a semi interactive and engaging learning experience, drawing viewers in more effectively than pure text-based instructions. They hold viewers' attention and often provoke active participation, whether through following along with a process or using integrated quizzes.
Builds the brand authority. Tutorial videos can position a brand or creator as an expert in their field, helping to build trust and credibility with their audience. By providing valuable knowledge and solving the audience's problems, these videos can enhance the brand's authority and reputation in the market. A good tutorial video will often get shared by those in a particular industry or field.
Leads to more sales. Tutorial videos also serve as a powerful marketing tool, promoting a product or service while providing useful information. By showing how a product works and the value it offers, these videos can guide potential customers down the sales funnel and contribute to increased sales. Many businesses have taken advantage of these concepts and begun helping customers along the buying journey through video tutorial content.
Common mistakes when creating video tutorials
While creating video tutorials, avoid the following common mistakes:
Too wordy. Avoid making your tutorial overly verbose. Be concise when explaining steps or concepts. Over-explaining or going off-topic can lose your viewers' interest and complicate your message. Stay focused and get to the point, making sure every piece of information directly contributes to the tutorial's purpose.
Too many details. Similar to verbosity, including too many intricate (or irrelevant) details can overwhelm viewers and make your tutorial confusing. Instead, be clear and speak simply. Don’t share any more information than necessary to get your points across. Break complex processes down into manageable steps, and ensure that each step is clear and easy to follow.
Not practicing or rehearsing. Failure to practice or rehearse your tutorial can lead to a disorganized and ineffective video. Spend time rehearsing what you're going to say and do before you start recording. This way, you’ll deliver a smooth and confident presentation and anticipate potential questions or points of confusion.
Not researching your target audience. Not understanding who your viewers are and what they need is a common pitfall leading to low views. Conduct thorough audience research to understand their level of knowledge, their pain points, and the kinds of questions they ask. This will help you tailor your tutorial to their specific needs, increasing its effectiveness and reach.
Poor recording or editing quality. Low-quality audio, video, or editing distracts viewers and hurts your overall delivery. Invest in good quality recording equipment and take the time to learn basic editing skills. Ensure that your audio is clear, your visuals are crisp, and your editing is smooth and professional.
Best tutorial video makers
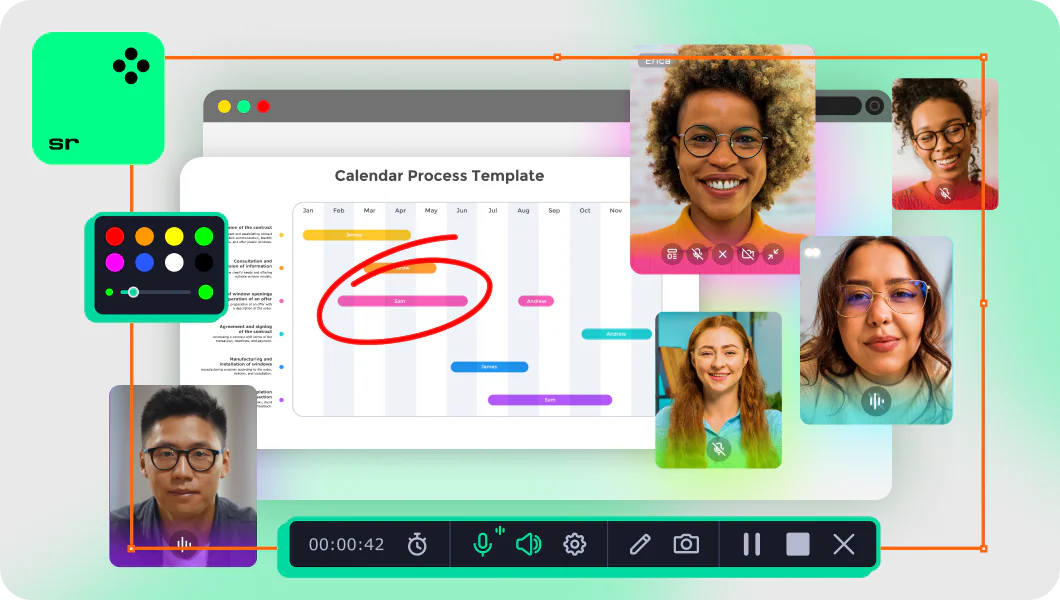
If you’re wondering how to make an instructional video with screen recording, Movavi Screen Recorder stands out as a fantastic tool for creating tutorial videos due to its ease of use, high-quality recording, and dual recording capability. Beginners and veterans alike will appreciate its intuitive interface on a computer, which allows for effortless navigation and quick mastery of its functionalities. This ease of use doesn’t hurt the quality of the output either; Movavi Screen Recorder has high-definition capture, making sure your tutorials are both professional and engaging.
Pros:
Capture button clicks and cursor movement for in-depth tutorials
Overlay the webcam preview and change its size and shape
Draw right on your screenshots and videos while recording live
Save your recordings in any popular audio or video format
Share links to your videos or upload them directly to the cloud
Cons:
The full version unlocks your limitless creativity
Additionally, the tutorial video maker can record both the screen and the camera simultaneously. By recording your screen with a webcam, you can bring a personal touch to your tutorial videos, as you can present on-camera while demonstrating on-screen. This increases viewer engagement and adds a layer of credibility to your tutorials. Overall, Movavi Screen Recorder offers an excellent blend of simplicity, quality, and versatility, making it an ideal choice for tutorial creators, with screen recording free to download. Get a macOS or Windows 7 day trial and see for yourself!
If you want to know how to make a video tutorial with wonderful visuals and effects, Movavi Video Editor is an outstanding tool. You can use it to create engaging and professional tutorial videos. Its large library of effects and filters provides endless customization options, allowing you to add a unique flair to your content. These features boost the visual appeal of your videos and convey your message more effectively, adding layers of sophistication and creativity to your tutorials.
Another exceptional feature of Movavi Video Editor is its AI-powered technologies. The software includes video background removal and noise cancellation tools, both powered by artificial intelligence. This means you can seamlessly remove unwanted elements from your videos and ensure that your audio is crisp and clear, even if there is some background noise during recording.
The interface of Movavi Video Editor is not just user-friendly, either – it's also fun to use! Its design makes the video-editing process enjoyable rather than daunting, encouraging creativity and exploration. All these features combined make Movavi Video Editor a highly capable and enjoyable tool for creating top-notch tutorial videos.
How to make a tutorial video
Want to know how to make a how-to video? Creating a tutorial video involves careful planning, recording, and editing. Here are step-by-step instructions on how to make a tutorial video.
Step 1. Choose the right type of tutorial video
Deciding on the appropriate type of tutorial video is crucial. Your choice is primarily driven by your unique needs and objectives. Begin by clearly defining your goal. What do you want your audience to learn or achieve through watching your tutorial video? Next, consider your audience's knowledge coming into it. Are they beginners needing a detailed walkthrough, or are they advanced users looking for specific tips?
For example, if you aim to teach a short, simple process, a microvideo might work. For a more complex task, a standard tutorial or a screencast might be more appropriate. If your content is for employees, a training video would be the ideal choice. Remember, the type of tutorial you choose should effectively communicate your message and resonate with your audience.
Step 2. Research your audience
Gaining a deep knowledge of your audience is a key step in creating a compelling tutorial video. Start by identifying the demographics of your target audience – things like age, profession, education level, and interests will affect the style and content of your tutorial.
Next, dive into their technological proficiency and familiarity with the topic at hand. Are they new, or do they have some foundational knowledge? This will change how you approach explaining concepts or demonstrating tasks.
Finally, consider the problems and pain points your audience faces, and how your tutorial can help solve them. Can you provide a more efficient method, clarify a misunderstood concept, or show off a helpful tool? The more you understand about your audience, the better you can tailor your tutorial to meet their needs and expectations.
Step 3. Plan your video
Once you know your audience and the type of tutorial you want to create, it's time to plan your video. Start by gathering the right equipment. Depending on your type of tutorial, this might include a quality camera, a microphone for clear audio, screen-recording software like Movavi Screen Recorder, and video-editing software such as Movavi Video Editor.
Next, you should outline your content. Writing a script or creating a storyboard can provide structure and ensure you cover all necessary points in a logical order. A script provides you with the exact wording to use, which is particularly helpful for voice-overs. Meanwhile, a storyboard offers a visual representation of how your tutorial will flow, capturing both the on-screen action and the accompanying narration.
Also, remember to plan out your visuals. Will you need additional graphics or animations? Are there specific screen actions you need to capture? Detailed planning at this stage will streamline the video creation process, ensuring a smoother production phase.
Here is a tutorial for getting started:
Step 4. Record the video
Recording the video makes your planning and preparation come to fruition. First, ensure that your recording environment is suitable – it should be quiet, well-lit, and free from potential interruptions. Set your equipment up correctly and double-check your camera and microphone are working properly. If you're recording your screen, ensure all unnecessary applications are closed, and your desktop is clean and organized.
Begin by following your script or storyboard with voice, but remember that it's okay if you don't get everything perfect in the first take. It's normal to need a few attempts to capture your content the way you planned. You can do multiple takes for each section and choose the best one during the editing process.
Learn more about how to use Movavi Screen Recorder for capturing your screen here:
Here’s a quick guide on how to make an instructional video suing Movavi Screen Recorder:
Step 5. Edit your video
Editing is a crucial stage in the video tutorial creation process. It’s where you turn your recorded content into a polished, engaging tutorial. Start by importing your footage into a video-editing software like Movavi Video Editor. Here, you can cut and arrange your clips, remove any mistakes or awkward pauses, and ensure the flow of your tutorial is smooth and logical.
Next, consider adding visual elements such as filters, graphics, text or drawing overlays, or animations to enhance viewer understanding and engagement. If your video features voice-over, ensure the audio aligns perfectly with the corresponding visuals.
Movavi Video Editor's AI-powered features can also assist in enhancing your tutorial's quality. The background noise removal feature can help ensure your audio is loud and clear, while the background removal tool can add a professional touch if you're featuring webcam footage in the video.
Finally, take the time to review your edited video thoroughly. Watch it back a couple of times. Check for any errors, ensure the sound levels are consistent, and that your messaging is clear and informative. Remember, there’s no need to rush during the editing process. This is where you add the final touches to make your tutorial stand out.
Learn more about how to use Movavi Video Editor for video editing here:
Step 6. Publish and promote the video
After all the effort to make an instructional video, it’s time to ensure it reaches your target audience. Begin by choosing the right platform or platforms to publish your video. This might be your own website, or a video-sharing platform like YouTube, depending on where your audience is most likely to look for such content.
When uploading your video, pay attention to SEO. Use relevant keywords in your title, description, and tags to help your video appear in search results. This is particularly important for YouTube tutorials, to get your content found by your target audience.
However, don't stop at just publishing. Make a plan to promote your video to ensure it reaches a wide audience. Share it on your social media channels, send it to your email list, or even consider using paid advertising if appropriate. Engage with all comments and feedback you receive, as this can improve your video's visibility and help you connect with your audience.
Remember, creating the video is just part of the process. Effective promotion is key to ensuring your tutorial gets the views it deserves.
Advantages of making a video tutorial yourself
Professional video tutorials can be costly, even as much as hundreds or thousands of dollars, if you hire someone to do it for you. Creating video tutorials yourself can save costs and allow you to personalize your content.
Beyond the financial savings, creating video tutorials yourself comes with a variety of benefits. Self-producing your video tutorials gives you the opportunity to personalize and custom-tailor your content. You can design it to resonate specifically with your audience's needs and preferences, creating a connection that pre-packaged, impersonal videos struggle to achieve.
Having complete control over the video production process is also a significant benefit. From the planning phase to recording, editing, and publishing, you get to make all the decisions. This control lets you dictate the pace, tone, style, and overall direction of the tutorial, ensuring the final product aligns perfectly with your vision. It’s all yours, from start to finish.
Furthermore, creating video tutorials simply feels rewarding. There's a special sense of accomplishment that comes from turning a concept into a tangible, finished product that truly helps others. Every view, like, share, or positive comment becomes evidence of your effort and creativity, enhancing the sense of achievement.
Lastly, creating a tutorial takes a deep understanding of the content you're presenting. Because of this, the process reinforces and enhances your own knowledge of the topic. As the saying goes, “to teach is to learn twice,” and making tutorial videos can be a wonderful way to deepen your expertise. By sharing your knowledge with others, you also empower yourself.
Additional tips on making a how-to video
Keep it simple: avoid complicated jargon.
Engage your audience: interact with your audience throughout the video.
Be clear and concise: stay on point and avoid unnecessary details.
Summary
This guide offers detailed steps and tips for creating effective video tutorials, highlighting the benefits of self-production and powerful tools like Movavi Screen Recorder and Movavi Video Editor. By avoiding common mistakes and carefully planning, recording, editing, and promoting their videos, creators will engage their audience, increase their reach, and establish themselves as authorities in their field.
Movavi Screen Recorder
The perfect way to record anything from your screen
Disclaimer: Please be aware that Movavi Screen Recorder does not allow capture of copy-protected video and audio streams.
To make a video guide, follow these steps.
Step 1. Install software that enables you to make and edit high-quality videos.
Download Movavi Screen Recorder
Step 2. Record your tutorial if you haven’t done so yet.
Step 3. Open the video in the video-editing program. Trim it, add titles and transitions, apply special effects, and edit background sounds.
Step 4. Save the tutorial in any convenient format or upload it to YouTube.
The length of the how-to video depends on the topic. Usually, educational video clips last from 5 to 10 minutes. If the tutorial is longer, there’s a risk that people won’t watch it to the end.
If the topic is complex and cannot be explained in 10 minutes, you can make a series of videos – which is even better for increasing your video blog popularity.
Software like Movavi Screen Recorder and Movavi Video Editor are fantastic tools for creating video tutorials. They allow for easy screen recording and video editing.
To learn more, follow the link below:
Tutorial creator software refers to programs used to create instructional videos or guides. For example, Movavi Screen Recorder can be used to film tutorial videos and screencasts.
Absolutely! Video tutorials are an effective way to share knowledge. They are engaging, easy to understand, and accessible at any time to the viewers.
They certainly can. If your tutorial videos gain popularity and your YouTube channel meets certain criteria, you can earn money through ad revenue and sponsorships. Plus, your video content can direct viewers toward others offers you may have.
Similar guides
Join for how-to guides, speсial offers, and app tips!
1.5М+ users already subscribed to our newsletter