Step 1. Install Movavi’s desktop video recorder
Download Movavi Screen Recorder, save the installation file to your hard drive, then run it and follow the instructions to install the program on your PC or Mac.

Use Movavi Screen Recorder!
There are many reasons you may need to create desktop screencasts: a software bug report, a demo, a video tutorial for clients, friends, or parents who need help working with their computers. Read the guide below to learn how to record your desktop.
One of the best ways to capture desktop video is to use Movavi Screen Recorder. This desktop recorder is designed for recording screen activities, complete with sound and voiceover, as well as editing recordings and saving them in different file formats. Try our desktop video capture tool and start recording desktop video right now!
Download Movavi Screen Recorder, save the installation file to your hard drive, then run it and follow the instructions to install the program on your PC or Mac.
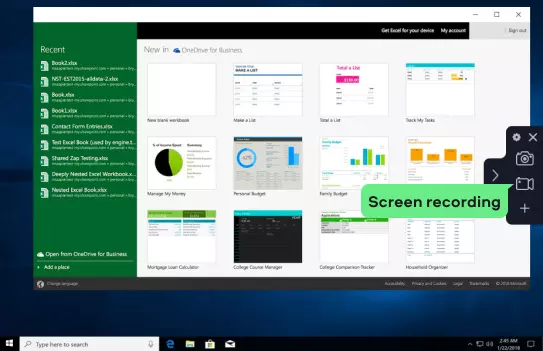
To start recording your screen activities, launch the program and hit the Screen recording button. Alternatively, you can just press F10 in Windows or ⌥ ⌘ 2 on Mac. To draw a capture frame, hold down the left mouse button and drag the cursor. You can resize and move the frame if you wish. You can record full screen or any smaller area of the screen.
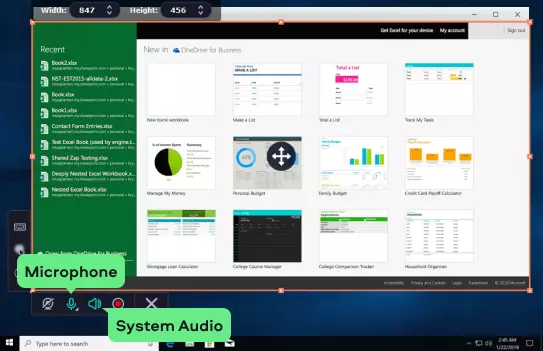
The program also enables you to capture input or output sound, or both simultaneously. Just make sure the required audio source is highlighted in green to indicate it is active.
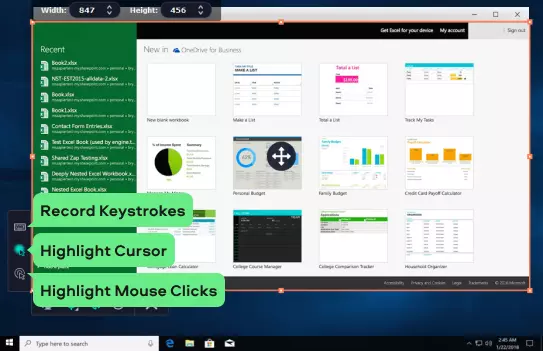
You can make your video more informative by showing the mouse cursor and keyboard actions: to set this up, click the appropriate icons in the sidebar.
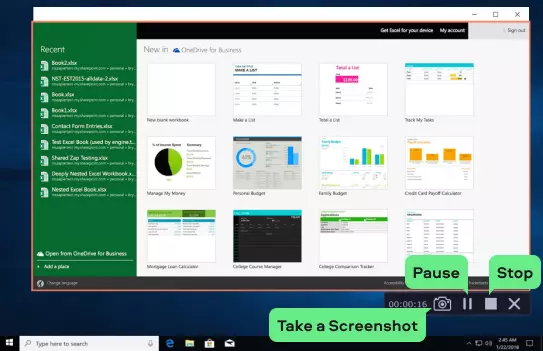
Click REC to start capturing the software you’re working with. Click Stop to finish the recording. You can also use hotkeys: in Windows, hit F9 to pause and F10 to stop the capturing process. Mac users should press ⌥ ⌘ 1 and ⌥ ⌘ 2 respectively. You can also take snapshots during recording: hit the appropriate icon in the control panel or use a hotkey – F8 on a Windows PC or ⌥ ⌘ 3 on a Mac.
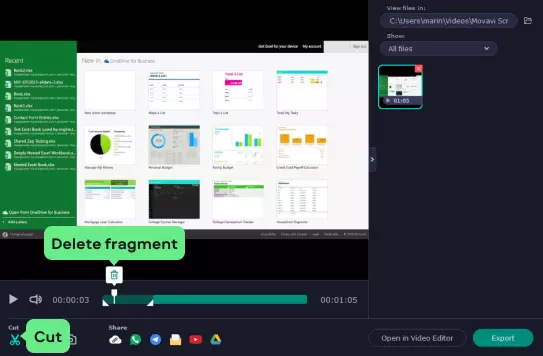
After you stop recording, you’ll see a preview window where you can either save the resulting video in a different format right away or cut out unwanted parts with the built-in video-editing tool first. Click the Cut button, select points on the timeline where you want to make a cut, and hit Delete fragment.
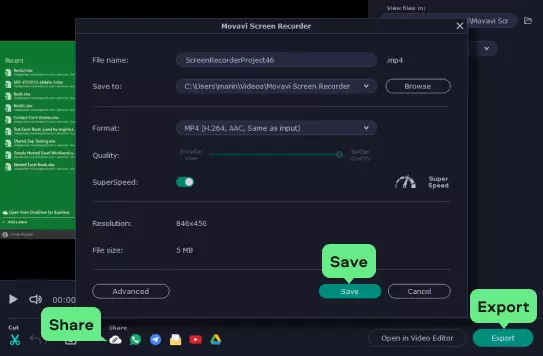
You have two options as to what to do with your recorded video: save it on your computer to watch later or share it with anyone who wants to see the recording (or you can do both). To save the video, click Export, enter the file name, select the target folder and format, and click Save. To send the video to another person, select one of the available options in the Share section. If you’re not sure which option to choose, select Movavi Cloud: the video will be uploaded to our cloud server and will be available only through a specific link. You can send the link to anyone you want to see your video.
Disclaimer: Please be aware that Movavi Screen Recorder does not allow capture of copy-protected video and audio streams. Learn more


1.5M+ users already subscribed to our newsletter