1. Install Movavi Video Editor
Open the file you’ve just downloaded and follow the onscreen instructions.

Edit and enhance videos easily
Add stylish transitions, titles, and filters
Stabilize and reverse video, equalize sound, and more
You’ve probably seen professional camera operators wearing futuristic-looking costumes with their camera attached to their clothing. They do this to stabilize the camera while they move freely around the movie set. There are many less‑complex means (mechanical, optical and digital) to prevent camera shake. If you don’t use video stabilizers while filming, you will probably be unpleasantly surprised by the shaky, blurry images you end up with. But even then, all is not lost! In this situation, the best way to fix your footage is to use video stabilization software. We recommend you try Movavi Video Editor – a multi‑talented program with a built-in stabilizing function. If you want to learn how to stabilize video in post-production, just download our app and follow the simple guide below.

Open the file you’ve just downloaded and follow the onscreen instructions.
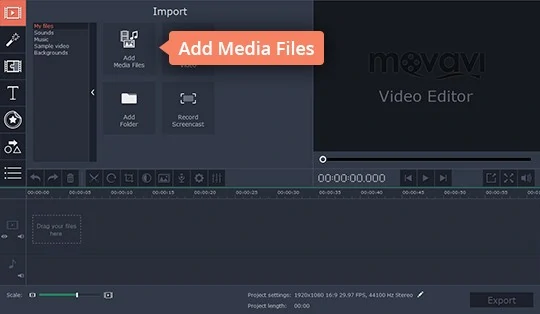
Launch the program and select Create project in full feature mode in the welcome window. Then click Add Media Files, and choose the video you want to stabilize. You can also drag and drop the file from the source folder into the program window. Movavi Video Editor supports all the popular formats (AVI, MP4, MOV, etc.) and resolutions (including Ultra HD).
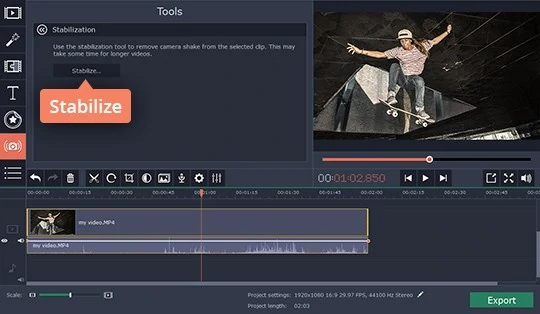
Double-click the video on the timeline and choose the Stabilization option from the Tools menu. Then click Stabilize.
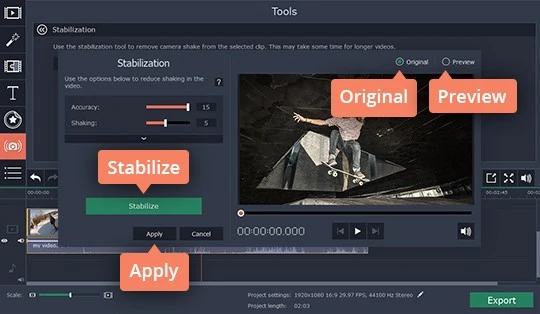
In the window that opens you'll see different stabilization settings. Adjust the Accuracy slider to set how precisely the video will be analyzed. Use the Shaking slider to set the amount of shaking visible in the video. To start the stabilization process, click Stabilize. When the process is finished, switch between the Original and Preview screens to see the result. If you're satisfied with the result, hit Apply.
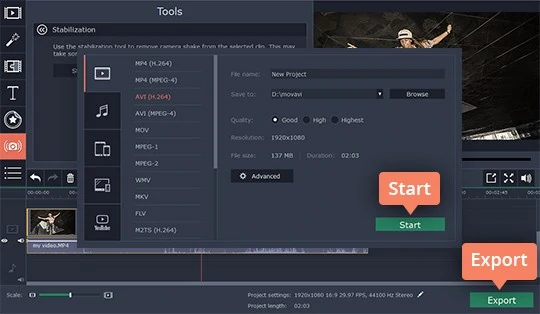
To save the video click the Export button, choose the appropriate format and hit Start.
*The free version of Movavi Video Editor may have the following restrictions depending on the build: watermark on exported clips, 60-second video or 1/2 audio length limit, and/or some advanced features unavailable when exporting videos.


An easy way to record from your screen in HD. Make video footage of any application, record online streaming video, webinars, even Skype calls, and save clips in all popular formats.
An intuitive photo-editing app that lets you retouch any photo on the fly. Improve quality, add filters and captions, remove unwanted objects, change backgrounds, and more!


1.5M+ users already subscribed to our newsletter