How to Use Splice Video Editor

Use Movavi Video Editor as a desktop alternative!

  • Edit and enhance videos easily

  • Add stylish transitions, titles, and filters

  • Stabilize and reverse video, equalize sound, and more

By clicking the download button, you're downloading a trial version of the program.*

Splice is a powerful mobile video editor developed by GoPro, designed to help anyone create smooth, professional-looking edits in minutes. Whether you're trimming travel footage, assembling a highlight reel, or creating content for social media, Splice packs a desktop-level feature set into an intuitive mobile interface.

This guide walks you through everything you need to know – from importing your first clip to exporting a finished video – in six clear steps.

Step 1. Download Splice and create a new project

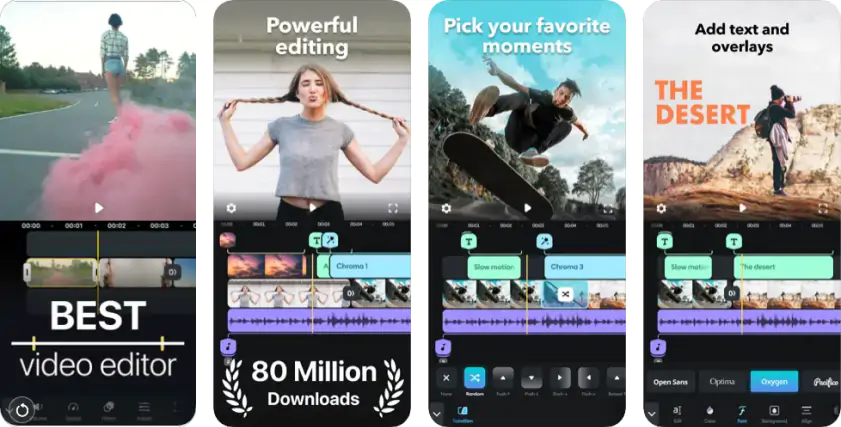
Install Splice from the App Store (iOS) or Google Play Store (Android). Open the app and tap the + button to start a new project. You'll be prompted to choose an aspect ratio – pick 16:9 for YouTube or landscape, or 9:16 for Instagram Reels and TikTok.

Step 2. Import your clips and photos

Tap Add Media to browse your camera roll, albums, or cloud storage. Select the videos and photos you want in your edit – they'll be added to your timeline in the order you select them. You can reorder clips by long-pressing and dragging them.

Step 3. Trim, cut, and arrange your timeline

Tap any clip on the timeline to select it. Drag the yellow handles on either end to trim the in and out points. To split a clip at the playhead, tap the scissors icon. Use the drag handles between clips to rearrange the order of your footage and build your narrative flow.

Step 4. Add transitions, text, and effects

Tap the gap between two clips to add a transition – Splice offers fades, slides, wipes, and more. To add text, select a clip and choose Text from the editing panel; you can customize font, size, color, and timing. The Filters panel lets you apply color grades across the whole video or on individual clips.

Step 5. Add music and adjust audio

Tap Music to browse Splice's built-in royalty-free library, or import a track from your device. Once added, you can trim the audio, fade it in and out, and adjust volume levels per clip. To fix loud background noise, select a clip and lower its audio level in the clip settings panel.

Step 6. Preview, export, and share

Tap the play button to preview your full edit from the beginning. When you're happy with the result, tap Export in the top-right corner. Choose your resolution (up to 1080p on the free plan) and frame rate, then save it to your camera roll or share directly to Instagram, TikTok, YouTube, or any platform.

How to edit videos with Movavi Video Editor

Movavi Video Editor is the step-up choice when you want more control – cleaner cuts, better pacing, stronger sound, and visuals that feel intentional instead of “assembled,” making it a powerful alternative to mobile video editors for desktop creators. The big advantage is flexibility: multi-track editing, richer effects, precise audio tools, and a workflow that stays comfortable even when your project grows past a few clips. It’s built for creators who want speed without sacrificing polish, and it’s especially handy when you’re editing regularly for YouTube, Instagram, or client work.

Step 1. Get the editor up and running

Install Movavi Video Editor on your desktop and launch it. The process is straightforward, and before you have time to overthink it, a blank timeline is waiting for your first clip.

Step 2. Drop in your footage

Click Add Files and bring in your videos, photos, and audio files, then start cutting things down to size. The tools are laid out logically, so video editing feels more like decision-making than technical problem-solving.

Step 3. Edit your video

This is where titles, transitions, effects, an auto subtitles generator, and even text-to-speech video tools come into play. You can keep things subtle or lean into style, while built-in ai features quietly handle repetitive tweaks and cleanup in the background.

Step 4. Export the final cut

Click Export and pick your format and resolution. With the full version activated, the finished video is saved exactly as intended – clean, complete, and watermark-free.

Movavi Video Editor
Create awesome videos easily

*The free version of Movavi Video Editor may have the following restrictions depending on the build: watermark on exported clips, 60-second video or 1/2 audio length limit, and/or some advanced features unavailable when exporting videos.

Have questions?
If you can’t find the answer to your question, please feel free to contact our Support Team.
Join us for discounts, editing tips, and content ideas

1.5M+ users already subscribed to our newsletter

By signing up, you consent to receive our marketing emails and agree to Movavi using your personal data in accordance with our Privacy Policy. You also confirm that you meet the minimum age requirements.