From a video file and a photo to a finished, export-ready video with an overlay – in minutes.

Add Image to Video: Insert Photos into a Video Easily
Movavi Video Editor is a practical tool for Windows and Mac that lets you add a photo to a video by dragging it onto the timeline – then overlay, resize, and position the image anywhere in the frame with simple visual controls.
Whether you want to insert a picture into a video as a watermark, a reaction image, a branded logo, or a full-frame photo slide, the same drag-and-drop workflow handles all of these use cases – free to download for a 7-day trial.
Trusted by 70 million creators worldwide
70M+


users
countries
updates per year
effects to choose from
Key features – add photo to video on Windows and Mac
Everything you need to add an image to a video, overlay it precisely, and export a finished file – in one free app.
Drag-and-drop image import directly onto the timeline
Adding a photo to a video in Movavi is as simple as clicking Add Files, selecting the image, and dragging it from the Project Files panel onto an overlay track above the video clip on the Timeline. No separate import wizard, no conversion step, and no limit on how many images you can add to a single project. JPEG, PNG, WebP, BMP, and other common image formats are all supported.

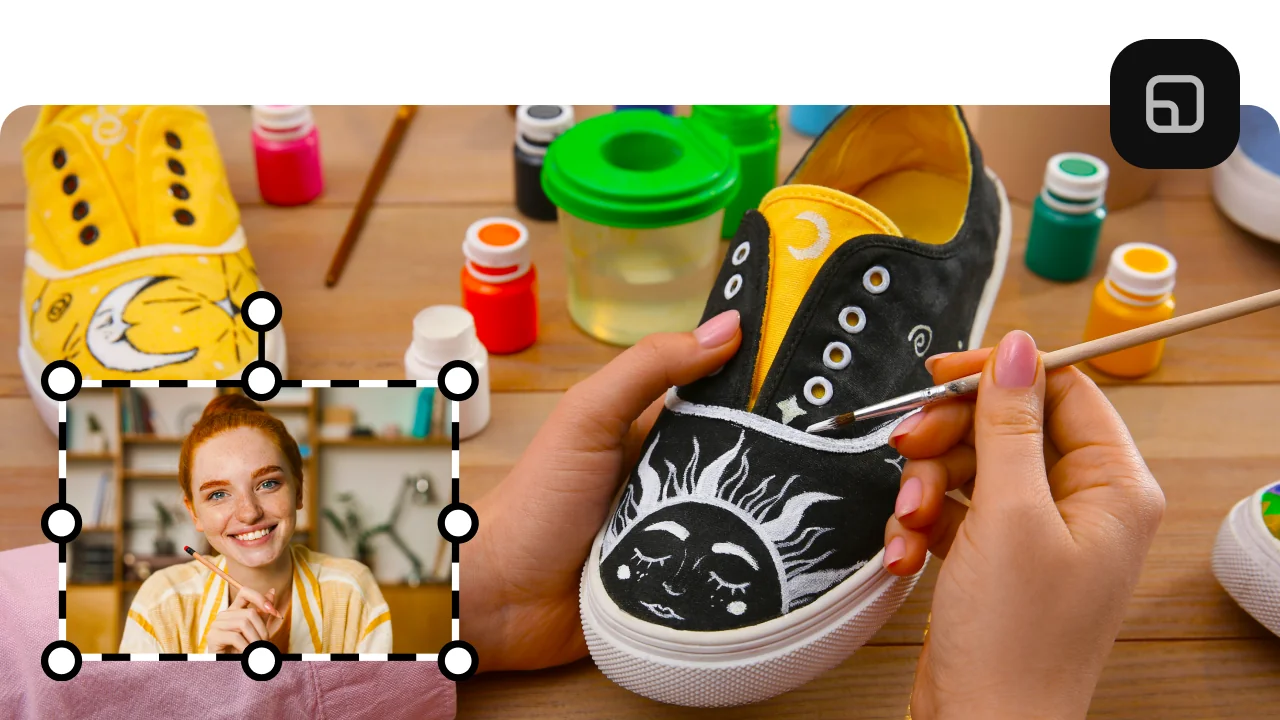
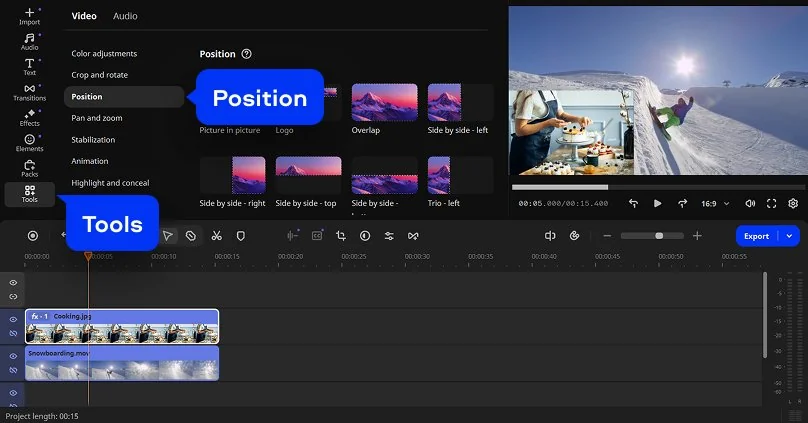
Picture-in-picture overlay with visual positioning
Once the image is on the Timeline, open Tools → Position and choose Picture in Picture or Overlay mode. A resize handle appears on the image in the preview window – drag its corners to scale it, and drag the image itself to reposition it anywhere in the frame. This is the standard method to add a picture to a video as a watermark, a logo, a reaction image, or a decorative element without any need to enter pixel coordinates.
Set exactly when the image appears and disappears
Every image on the Timeline has an independent start time and end time controlled by dragging its clip edges left and right. Slide the image's position along the Timeline to set when it appears relative to the video, and trim its edges to set precisely how long it stays on screen. This timing control is what distinguishes a properly edited photo-in-video from a quick browser tool that can only place a static watermark for the entire clip duration.
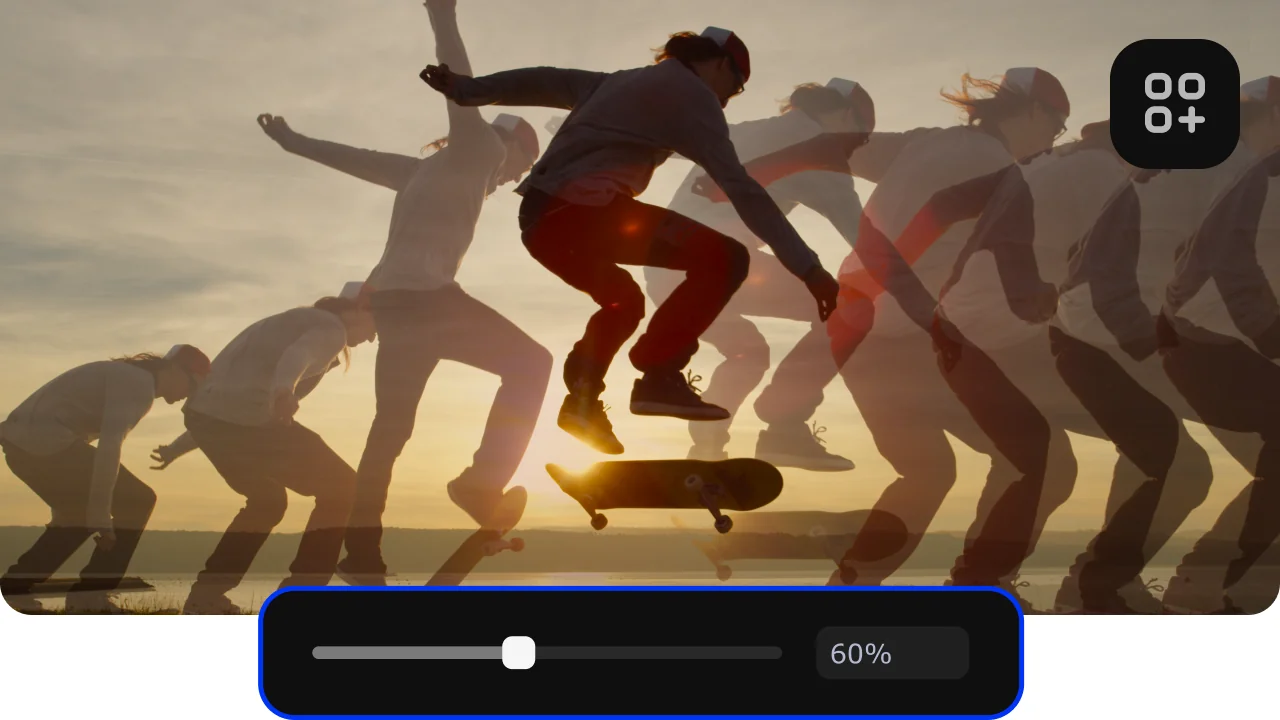
Transparency control and creative effects
Select the image overlay on the Timeline and adjust its Opacity slider to make it semi-transparent – useful for watermarks, brand logos, and subtle decorative elements that should be visible but not dominate the frame. Apply colour filters, animation stickers, and motion effects on top of the image layer to create more dynamic compositions. All image overlays work alongside Movavi's full 10,000+ effects library.

Why use Movavi to add images to video
Three reasons Movavi is the practical choice over online image-on-video tools.
How to add a picture to a video with Movavi – 3 steps
Step 1. Install and launch Movavi Video Editor
To learn how to put a picture over a video, start by downloading the installation file and setting up Movavi Video Editor on your Mac or Windows computer. Once everything is installed, open the program and get ready to work on your project and add a pic in a video.
Step 2. Add an image to your video
To overlay an image on your video, click Add Files and pick the video where you want to place the picture. Drag it from the Project files to the Timeline to begin editing. Then add your image the same way and drag it onto a track above the video. This creates the overlay layer, and you can add several images if you want so. If you plan to place a logo, it’s better to use a PNG file with a transparent background.

Open the Tools tab and go to Position settings. There, you choose how the image should appear, like picture-in-picture or overlay mode. You can resize the image or change its angle. Move it anywhere in the preview window.
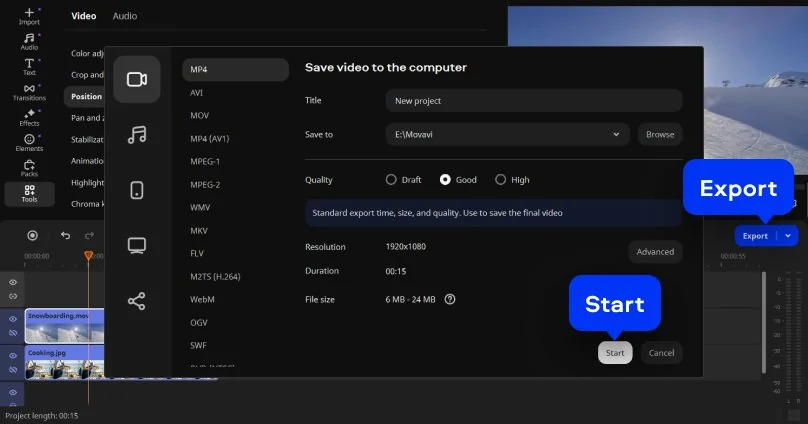
Step 3. Export the video
When everything looks right, click Export, choose format and quality settings, then press Start. After processing, your final video will be saved and ready to use. That is the ultimate answer to how to add an image in a video.
Who needs to add photos to videos
Inserting pictures into videos is a common need across personal and professional projects.
Content creators adding branding and watermarks · CONTENT CREATION
YouTubers, streamers, and social media creators add logo watermarks, channel icons, and sponsor graphics to their videos as recurring overlay elements. Movavi makes it straightforward to add a PNG image with a transparent background to any clip as a semi-transparent watermark positioned in the corner – and the timing controls ensure it appears and disappears exactly where needed in the edit.
Educators adding diagrams and reference images · EDUCATION
Teachers producing video lessons use the image overlay feature to add diagrams, charts, photographs, and annotated screenshots on top of their screen recordings or camera footage. Movavi allows multiple images to appear at different times in a single clip, which means an educator can build a visual presentation that unfolds as they explain – without needing to pre-produce slides in a separate application.
Businesses adding product photos and graphics · BUSINESS
Small businesses producing promotional videos, product demos, and social media content use the photo overlay feature to add product images, pricing graphics, and call-to-action visuals directly onto their video footage. Movavi's timing controls ensure each graphic appears at the right moment in the presentation, and the opacity and position tools let the business integrate images that feel native to the video rather than pasted on top.
Movavi Video Editor
Create awesome videos easily

Frequently asked questions
Common questions about adding photos and images to video on Windows, Mac, and iPhone.
How do I add a picture onto a video?
How do I add a picture onto a video?
To add a picture to a video in Movavi Video Editor on Windows or Mac:
- Click Add Files and import your video and image.
- Drag the video to the Timeline's main track.
- Drag the image to an overlay track above the video.
- Open Tools → Position and choose Picture in Picture mode.
- Drag the image in the preview window to position it and resize it as needed.
- Adjust the clip edges on the Timeline to set when the image appears and how long it stays visible.
- Click Export and save the finished file. For a logo or watermark, use a PNG file with a transparent background — this keeps only the visible elements of the image and lets the video show through around it. The whole process of how to insert a picture into a video typically takes under five minutes for a single image overlay.
How to insert photo in video on iPhone?
How to insert photo in video on iPhone?
To add a photo to a video on iPhone, the most accessible app is iMovie (free, Apple): create a project, add your video, then tap the + button to add a photo from your library – it appears as a slide in the sequence or as a picture-in-picture overlay depending on the mode you choose.
CapCut is the most popular free app for this task: import your video, tap Overlay → Add Overlay, select your photo from the gallery, then resize and reposition it in the canvas.
InShot and FilmoraGo also support photo-in-video overlays on iOS. For projects that started on iPhone but need more control over timing and position – particularly when you want to add a picture to a video with precise opacity and duration settings – exporting the footage and finishing in Movavi Video Editor on Windows or Mac gives significantly more editorial control.
How do I merge a photo into a video?
How do I merge a photo into a video?
Merging a photo into a video means either:
- Inserting the photo as a slide that plays between video clips
- Overlaying the photo on top of the video as a simultaneous layer
Both approaches are supported in Movavi Video Editor. For a photo slide: import the image and drag it onto the main video track at the desired position between clips – it becomes a still frame that plays for a set duration you control by dragging its edges. For an add image to video overlay: drag the image onto a track above the video clip – it sits on top of the footage and appears simultaneously. The Position and Opacity tools control how it looks. Using a PNG with a transparent background is the recommended approach when you want only part of the image to be visible, such as a logo or a graphic element, rather than a full rectangular photo frame covering the video.
Can you overlay pics on an iPhone?
Can you overlay pics on an iPhone?
Yes – adding a picture to a video as an overlay on an iPhone is supported by several free apps. CapCut is the most widely used: import your clip, tap Overlay, select Add Overlay, choose a photo from your gallery, and drag to resize and reposition it on the canvas. iMovie supports picture-in-picture overlay in its video editing mode. InShot has a sticker and photo overlay feature that works similarly. For simple overlays on short clips, iPhone apps are fast and convenient. For longer projects, precise opacity control, frame-accurate timing of when the image appears and disappears, or PNG transparency on a complex background – desktop software like Movavi Video Editor on Windows or Mac provides significantly more control and produces cleaner results, particularly when the add photo to video task is part of a larger editing project rather than a standalone job.
See other useful how-to guides
Join us for discounts, editing tips, and content ideas


1.5M+ users already subscribed to our newsletter