Step 1. Import your files
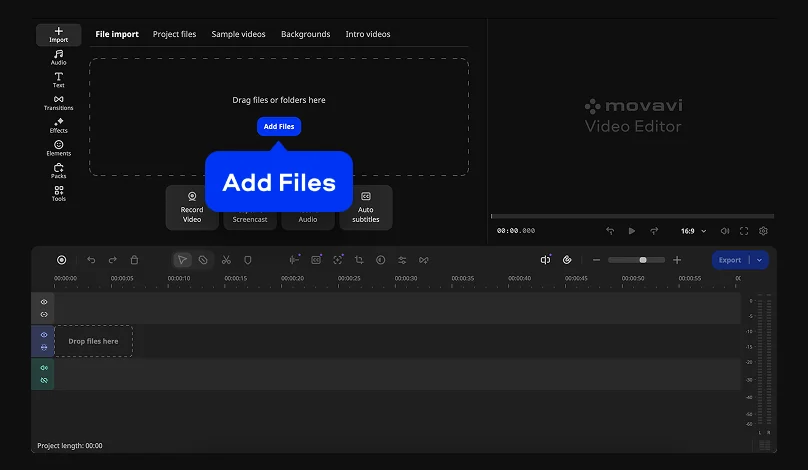
Launch Movavi Video Editor and click Add Files to import your video. Drag it onto the Timeline so you can start editing.

A visual watermark is the fastest way to make your content instantly recognizable and secure across YouTube and other platforms. For creators, vloggers, and YouTubers, adding a subtle logo or channel name acts as permanent branding, deters unauthorized reposts on TikTok or Instagram Reels, and gives even quick screen recordings a professional finish.
Add your custom logo or text overlay in Movavi Video Editor, adjust its size directly on screen, and export clean video with only your mark attached.

How to add a watermark in 5 steps
Launch Movavi Video Editor and click Add Files to import your video. Drag it onto the Timeline so you can start editing.
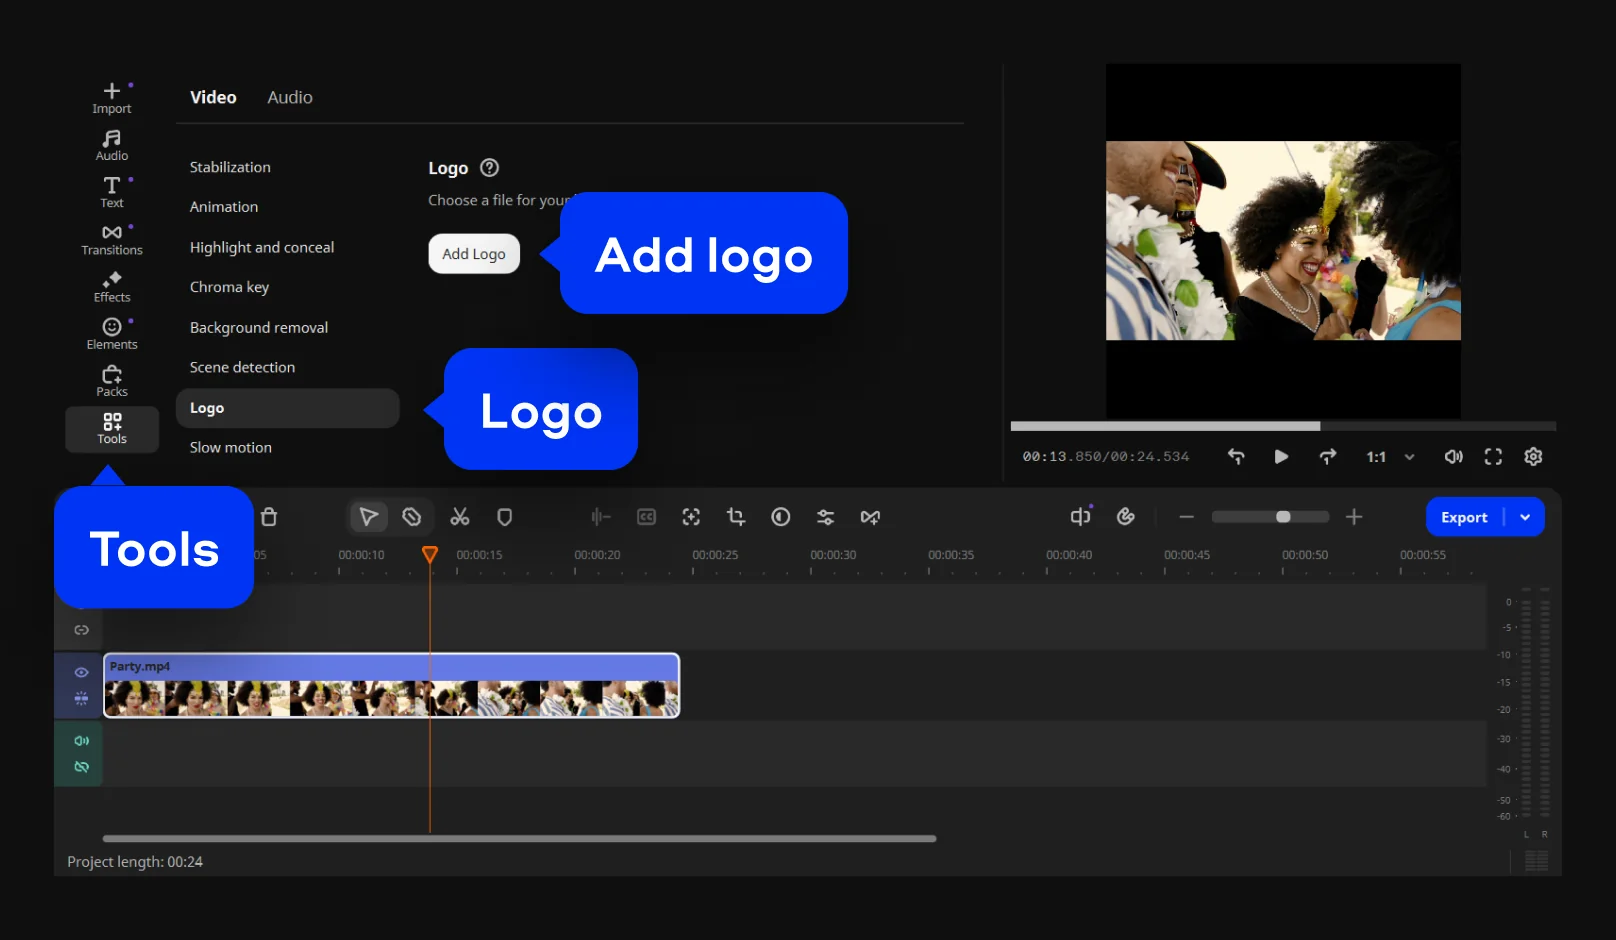
Click Tools, than choose Video and click Logo. Click Add Logo to import your logo image.
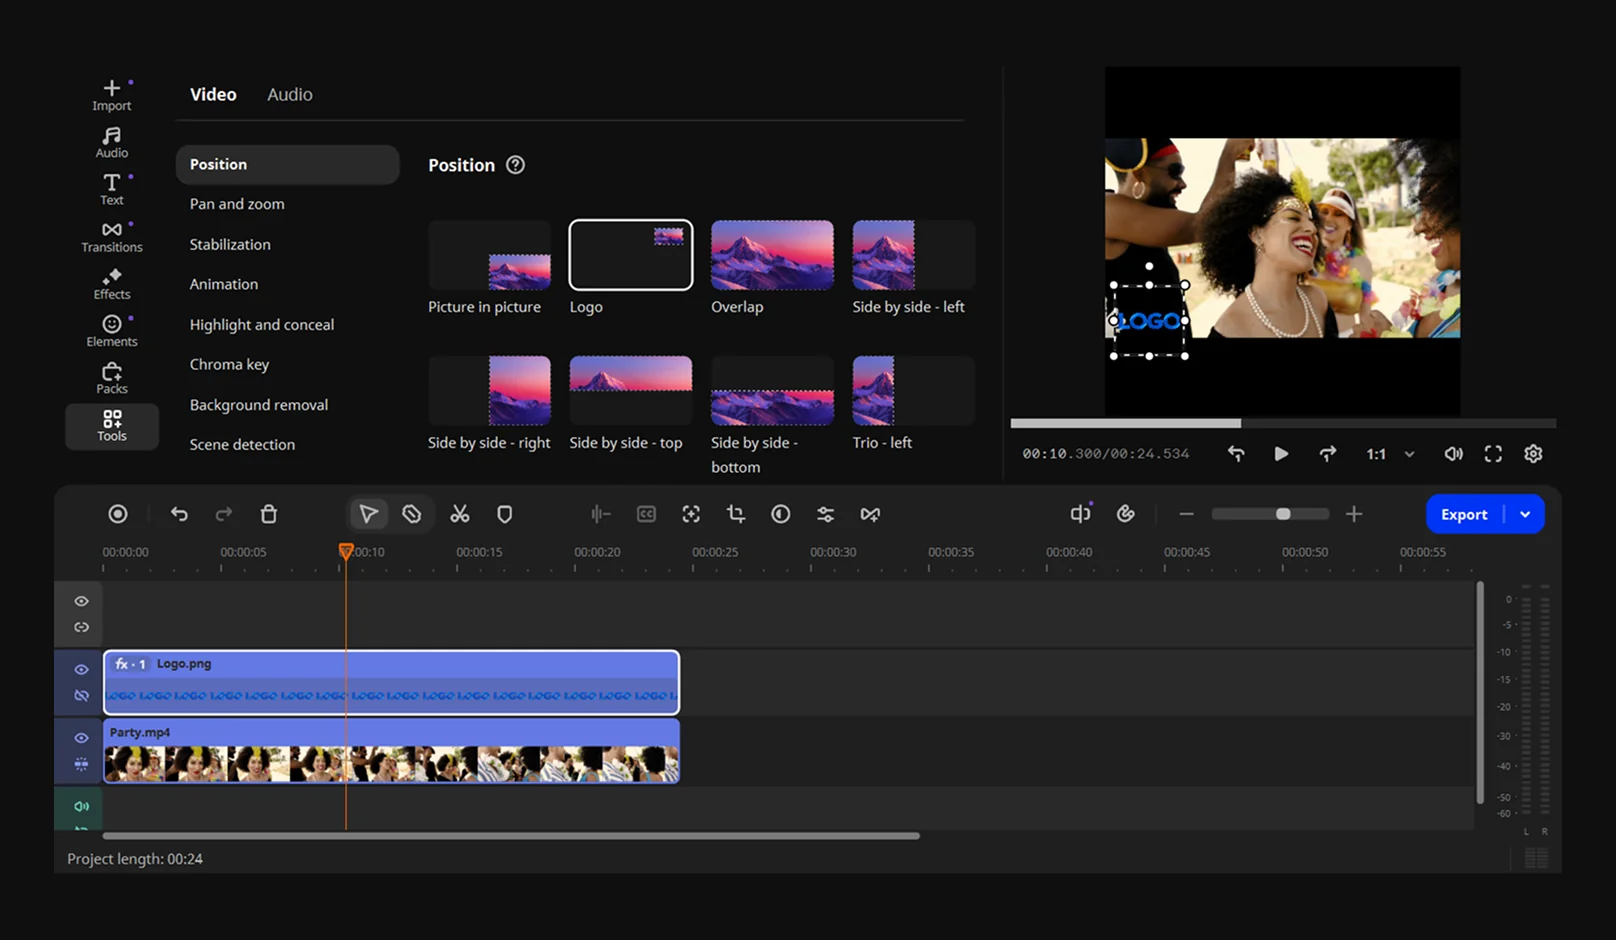
Use the handles in the preview display to resize it and position it in your chosen corner.
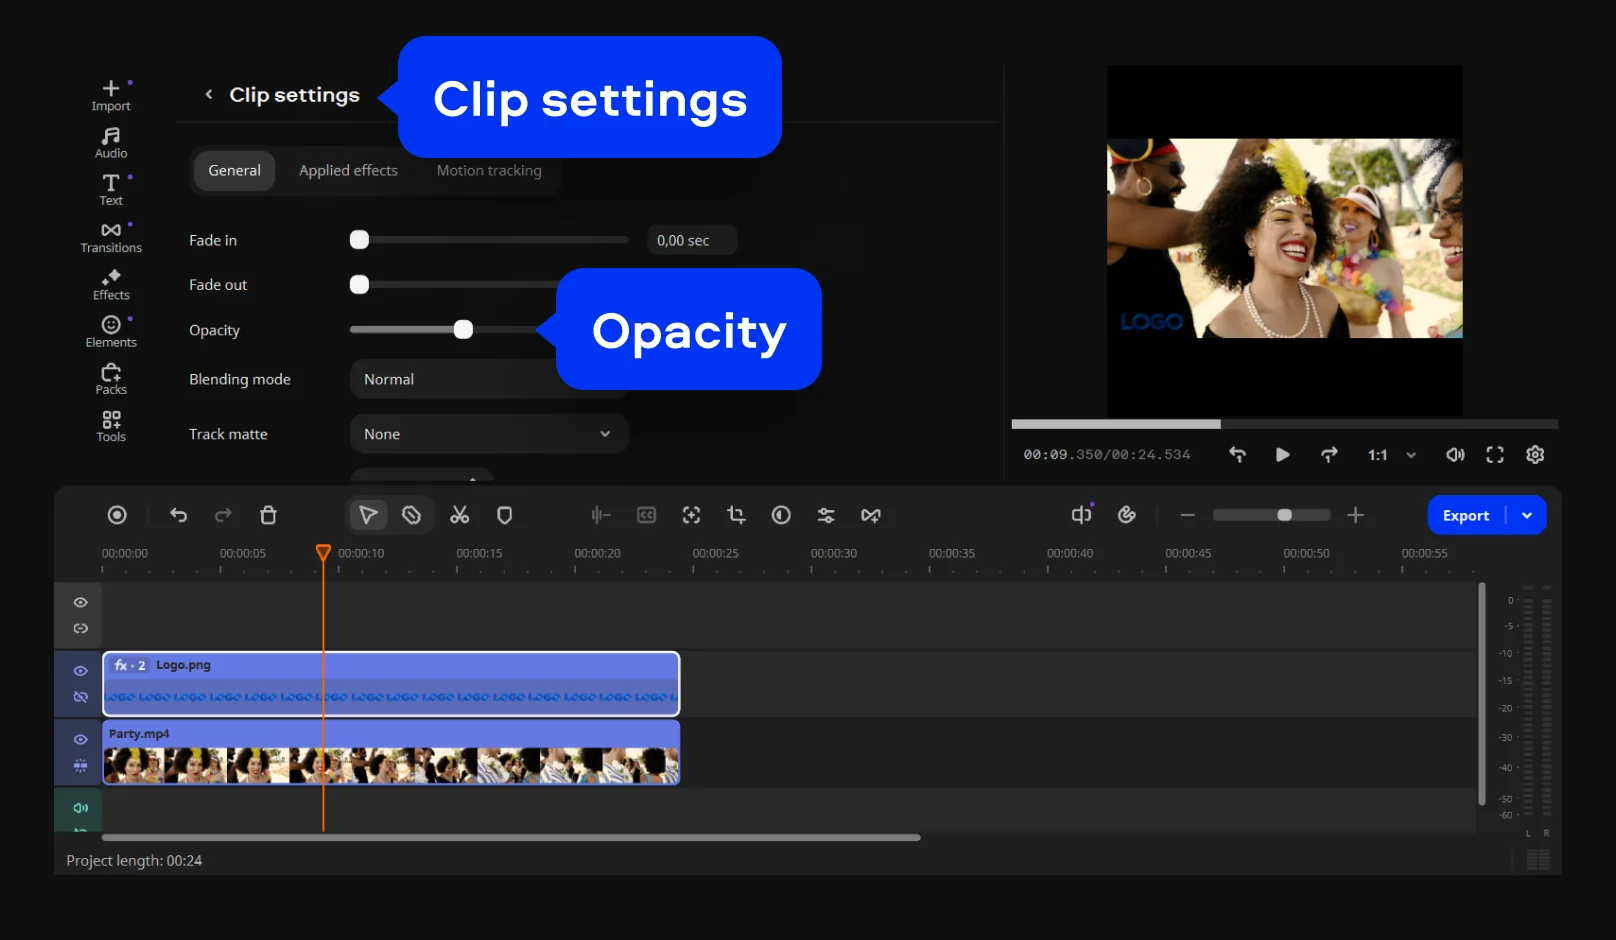
Open the logo's Clip settings to lower the Opacity slider, giving your watermark a clean, subtle look.
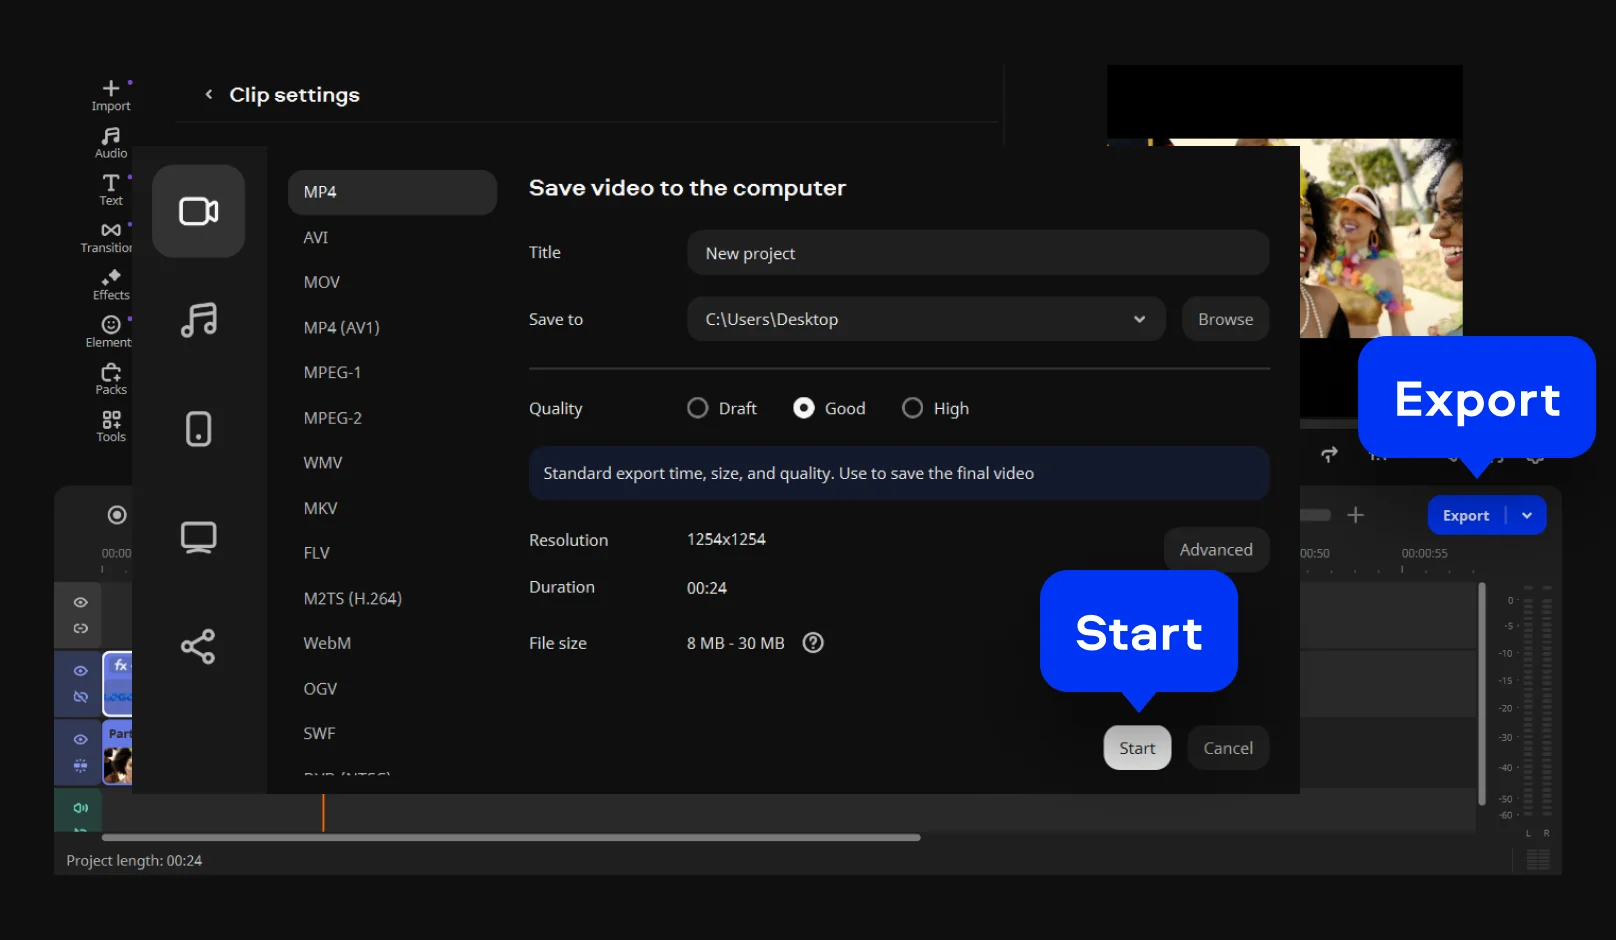
Click Export, pick your preferred video format and quality settings, and save the final file.
Talking-head creators need to take extra care when positioning watermarks to avoid obscuring important visual elements or UI components:
If a logo feels like more than you need right now, plain text works just as well – a channel name or short tagline tucked into a corner reads as deliberate branding rather than clutter. The steps don't change: pick the text option in that same panel instead of loading an image, then position, resize, and set opacity exactly as before.
A handful of placement habits matter specifically for talking-head content:
Movavi Video Editor ships in a few tiers, and the tier you pick decides whether your own watermark ends up alone on the exported file:
One line sums up the tradeoff: the full version is the only tier where your logo replaces Movavi's rather than sitting beside it. Start on the free tier to get familiar with the interface, then step up once you're ready to publish for real.
A few habits are what separate a watermark that reads as branding from one that reads as an afterthought:
Once the watermark's settled, it's worth a couple more minutes in the same editor. Movavi Video Editor also includes one-click AI tools – auto subtitles, background noise removal, and others – built to actually save time rather than pad out a feature list, so the same freshly branded video can come out sounding and reading cleaner before it ever reaches YouTube.

For talking-head creators, one small overlay covers a few jobs at once: it stamps your channel name or logo on every upload, it makes a reposted clip traceable back to you, and it gives even a quick screen recording a finished look. Movavi Video Editor keeps this kind of task short – the whole approach is meant to be simple and quick, so a five-minute job doesn't drag on for hours.
If a logo feels like more than you need right now, plain text works just as well – a channel name or short tagline tucked into a corner reads as deliberate branding rather than clutter. The steps don't change: pick the text option in that same panel instead of loading an image, then position, resize, and set opacity exactly as before.
Only in Free and Lite. Export from the full version and the only watermark on the file is the one you added.
Yes – the whole process is buildable and previewable in the free download. Just expect Movavi's own watermark on anything exported from that tier.
No. Once Movavi Video Editor is installed, importing, positioning, and exporting a watermark all happen offline.
A PNG with a transparent background – it won't leave a visible box around the logo.
Same steps, either platform.
Export from the full version. Free and Lite both add a small Movavi watermark on top of yours regardless, so full is the only tier that leaves nothing but your own mark on the file.
Yes – the same overlay tool can lock a watermark to a moving subject, so it tracks a person or object instead of staying fixed in one spot.



1.5M+ users already subscribed to our newsletter