
How to edit WMV videos on a Mac without converting

Use Movavi Video Editor!

  • NEW: Adjustable video templates for any vibe – made of Blocks

  • NEW: Blocks – pre-edited video segments you can customize

  • Fast and easy editing: cut, crop, adjust colors and speed

  • Auto subtitles, noise removal, hundreds of effects, and more

By clicking the download button, you're downloading a trial version of the program.*

Edited by
Ben Jacklin
6,651

You can edit WMV files on a Mac without converting them first. WMV is a Microsoft format, and Macs lost a longtime workaround when Telestream stopped selling Flip4Mac, a QuickTime component that let them play WMV. The files still turn up, though: a travel video you want to post as a lifestyle blogger, a training recording from a colleague on Windows, or old family road trip footage.

Movavi Video Editor is an intuitive video editor with customizable video templates, one-click AI tools, and hundreds of drag-and-drop effects. It’s a desktop app for Windows and macOS, and the Mac version takes WMV files directly. That means one project and no extra apps between you and a finished clip.

What you need to work with WMV on a Mac

You need a Mac, a WMV file, and an editor that opens WMV directly. Movavi Video Editor for Mac accepts WMV V7, V8, WMV 9, and WMV 9 Advanced profile files.

If you're new to editing, Movavi Ideas is a free tutorial hub with new editing ideas every week, each with a step-by-step tutorial. Inside the editor, hover previews show a clip, effect, or transition before you apply it, and drag-and-drop does the applying.

How to edit WMV files on a Mac

Movavi Video Editor ships with hundreds of built-in titles, transitions, and effects, plus copyright-free music tracks, for almost any style of video. If you want more, Movavi Effects is an optional subscription with 10,000+ extra effects across themes like blogs, business, family, and holidays. It also includes 1,500+ music tracks, and you can preview everything on your own footage for free before you buy.

You can also skip the build and start from a template. Movavi Video Templates is a multi-style library of customizable, pro-looking, modular templates for any kind of video. Each template is built from Blocks, short segments of the video where you drop in your own clips, photos, and text. Several are included in the full version at no extra charge.

Movavi has more than 70 million users worldwide. It ships over 25 updates a year, so the editor keeps getting new tools.

Pricing is flexible, too. Movavi Video Editor Free is handy for testing the tools, though its exports carry a watermark and a 60-second length cap. The full version unlocks every feature with no watermark or export limits, and the Movavi Effects and Movavi Templates subscriptions are optional add-ons. You pay only for what your project needs.
Step 1. Install Movavi Video Editor

Download Movavi Video Editor for a Mac. Open the downloaded installer file and complete the installation.

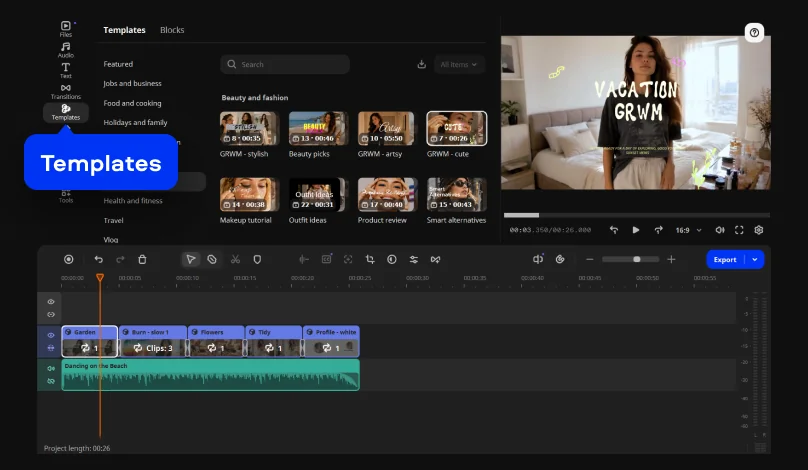
Step 2. Select a template and fill the Blocks

Choose a suitable template in the Templates tab. Then drag it onto the timeline.

Double-click a Block and replace the placeholder video or photo with your own files. Then retype the text in each Block.

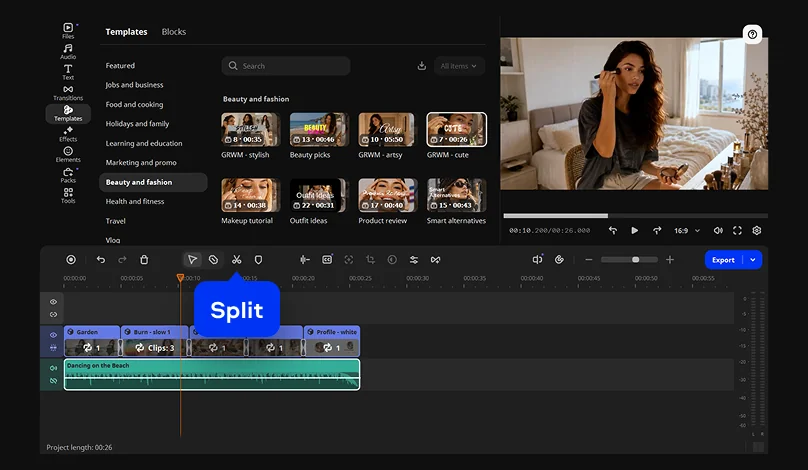
Step 3. Trim and split

To edit your WMV video, drag the edge of the clip on the timeline inward to shorten its start or end. To cut from the middle, move the playhead to the spot where you want a cut and click Split. Then cut out the part you don’t need.

Step 4. Crop and rotate

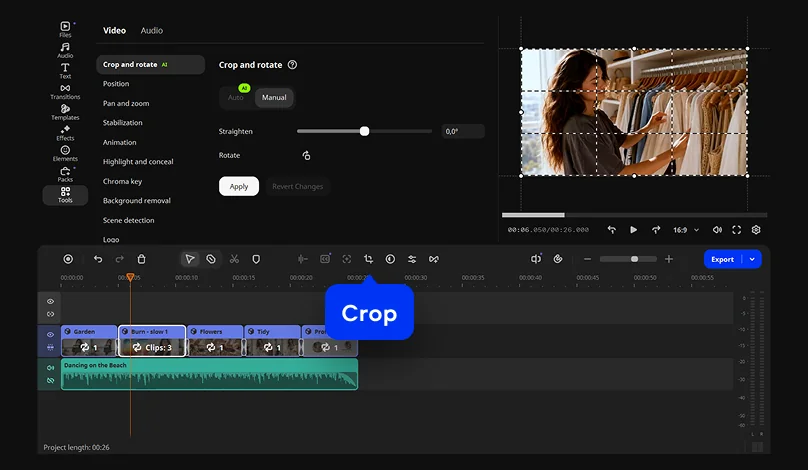
Select the clip on the timeline and open the Crop tool. Choose Manual mode and drag the crop frame over the part of the picture you want to keep. To turn or straighten the clip, use the Rotate button.

Step 5. Add text, music, and transitions

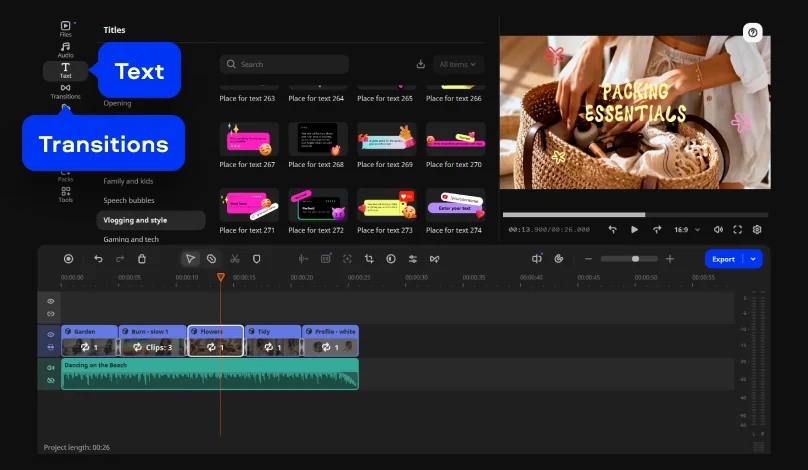
Choose a title style in Text and drag it onto the timeline. Retype the default text. Next, drag a music track onto the timeline. Finally, drag a transition from Transitions between two clips.

Step 6. Export

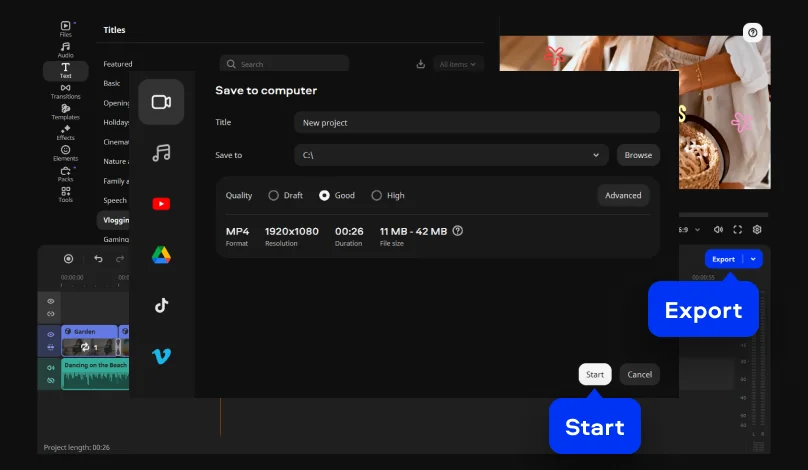
Click Export and choose your export format. Then click Start.

That’s how to edit WMV files on a Mac. Once the basic edit is done, the one-click AI tools can take over the tedious parts. A training recording with background hum goes through AI audio noise removal, and a travel video gets auto subtitles in more than 100 languages. Silence removal and auto-tracked cropping are there too. Every AI tool comes with the full version, so there are no credits to count.

Keep WMV or convert?

Skip converting before you edit. The format choice comes at export, where Movavi Video Editor offers MP4, MOV, and WMV. AVI sits on the export list too. MP4 is the recommended pick for broad compatibility, a sensible default for a clip you plan to upload to YouTube. Pick WMV when the person you’re sending it to needs a WMV file.

Typical mistakes and how to fix them

The file won’t open. Check the WMV version first: the editor accepts WMV V7, V8, WMV 9, and WMV 9 Advanced profile. Movavi uses AVFoundation on macOS to read media, so codec availability can vary with your macOS version, and some codecs may need to be installed separately.

Codec confusion. A file’s extension doesn’t reveal its codec. WMV video can also sit inside AVI or MKV containers, so a .avi file may hold WMV video.

Wrong export format. The format is set before you click Start, so check it first. Exporting MP4 when the recipient asked for WMV, or the reverse, means doing the export twice.

Your WMV clip is now a finished video, and the timeline can do more with it. Try slow motion on the best moment of a road trip, or build the next one from a template. Movavi Ideas posts fresh tutorials every week for whatever you try next.

Movavi Video Editor
Create awesome videos easily

*The free version of Movavi Video Editor may have the following restrictions depending on the build: watermark on exported clips, 60-second video or 1/2 audio length limit, and/or some advanced features unavailable when exporting videos.

Frequently asked questions

Can I slow down a WMV clip?

Yes. Movavi Video Editor has a dedicated slow-motion tool, and the general speed control runs from 0.01x to 100x. The original tone option keeps the pitch of the audio steady.

Can I trim a long WMV file before adding it to the project?

Yes. Pre-timeline trimming pulls short segments out of long source files before they reach the timeline.

Can Windows Movie Maker still edit WMV video?

Windows Movie Maker came in the Windows Essentials 2012 suite. Per Microsoft Support, that suite reached end of support on January 10, 2017, and it is no longer available for download. On a Mac, it was never an option.

Have questions?
If you can’t find the answer to your question, please feel free to contact our Support Team.
Join us for discounts, editing tips, and content ideas

1.5M+ users already subscribed to our newsletter

By signing up, I agree to receive marketing emails from Movavi and agree to Movavi's Privacy Policy.