Step 1. Import your clips
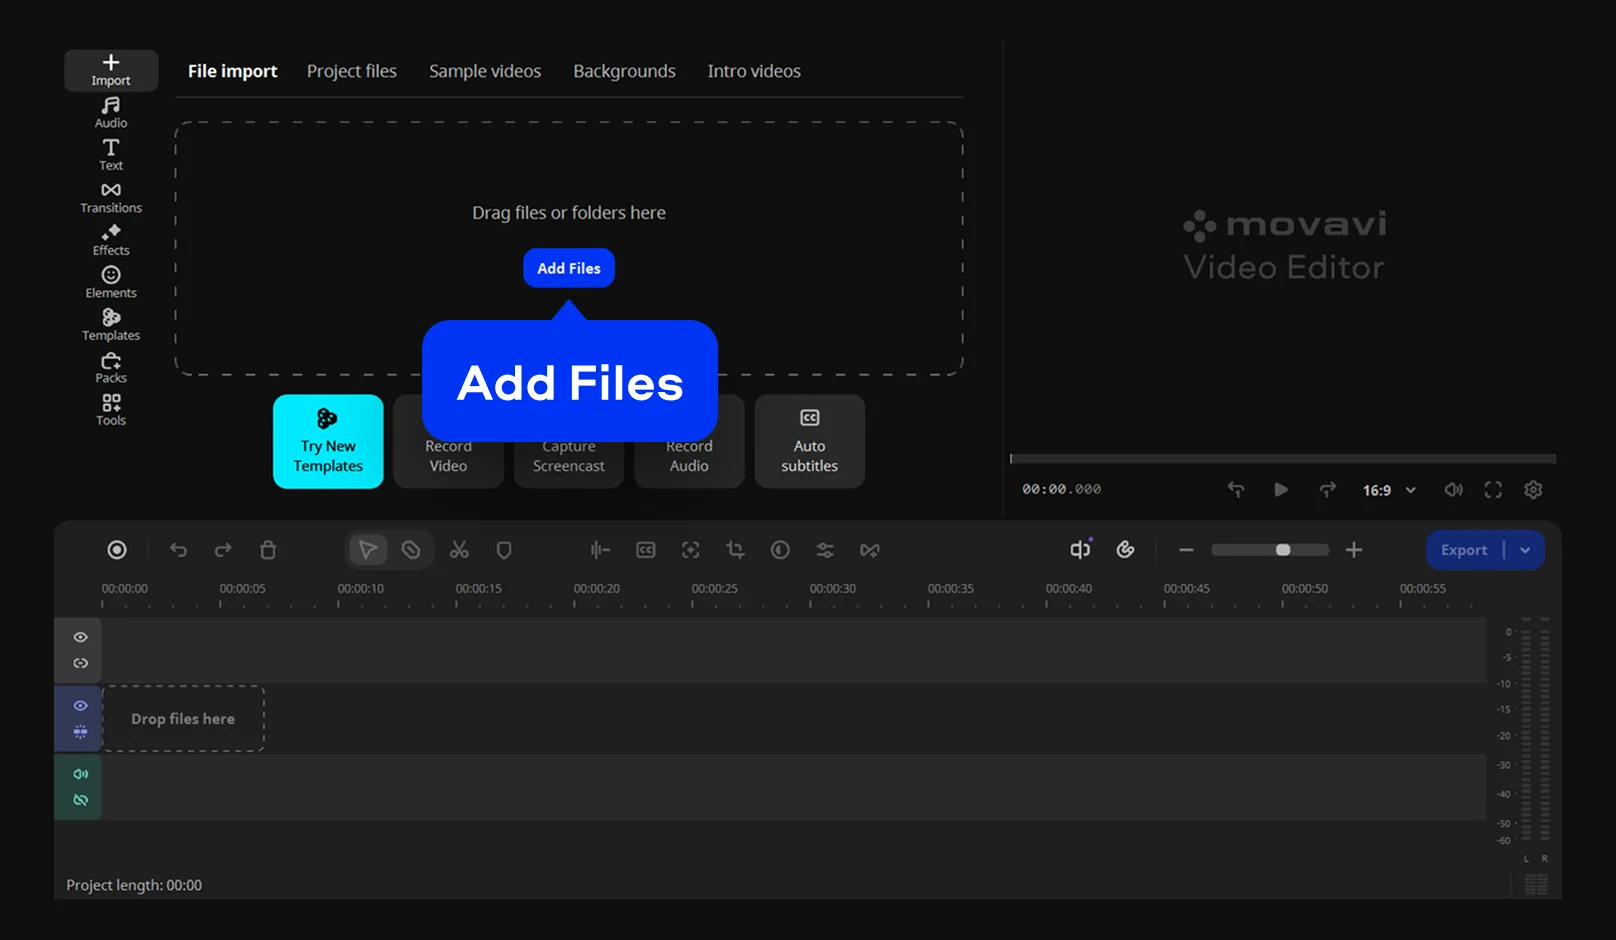
Click Add Files to bring in your own footage.

Here's how to make an educational video without starting from a blank timeline: outline what you're teaching, then let the software do the heavy lifting. You already have the knowledge – a history deep dive for your channel, a lesson for your students, or a training clip for new hires.
Movavi Video Editor is an intuitive video editor with customizable video templates, one-click AI tools, and hundreds of drag-and-drop effects. It's a desktop app for Windows and macOS with an intuitive interface where most tools work in one click, so you can edit a complete video on your first try.

If the video is for a class, your team, or your own channel, the fastest way to a clean first draft is starting from a template instead of a blank timeline. Movavi Video Templates is a multi-style library of customizable, pro-looking, modular templates for any kind of video. You'll find templates for reviews, business promos, vlogs, and more, so a history lesson or a team recap has a ready-made starting point.
How to Make an Educational Video
Click Add Files to bring in your own footage.
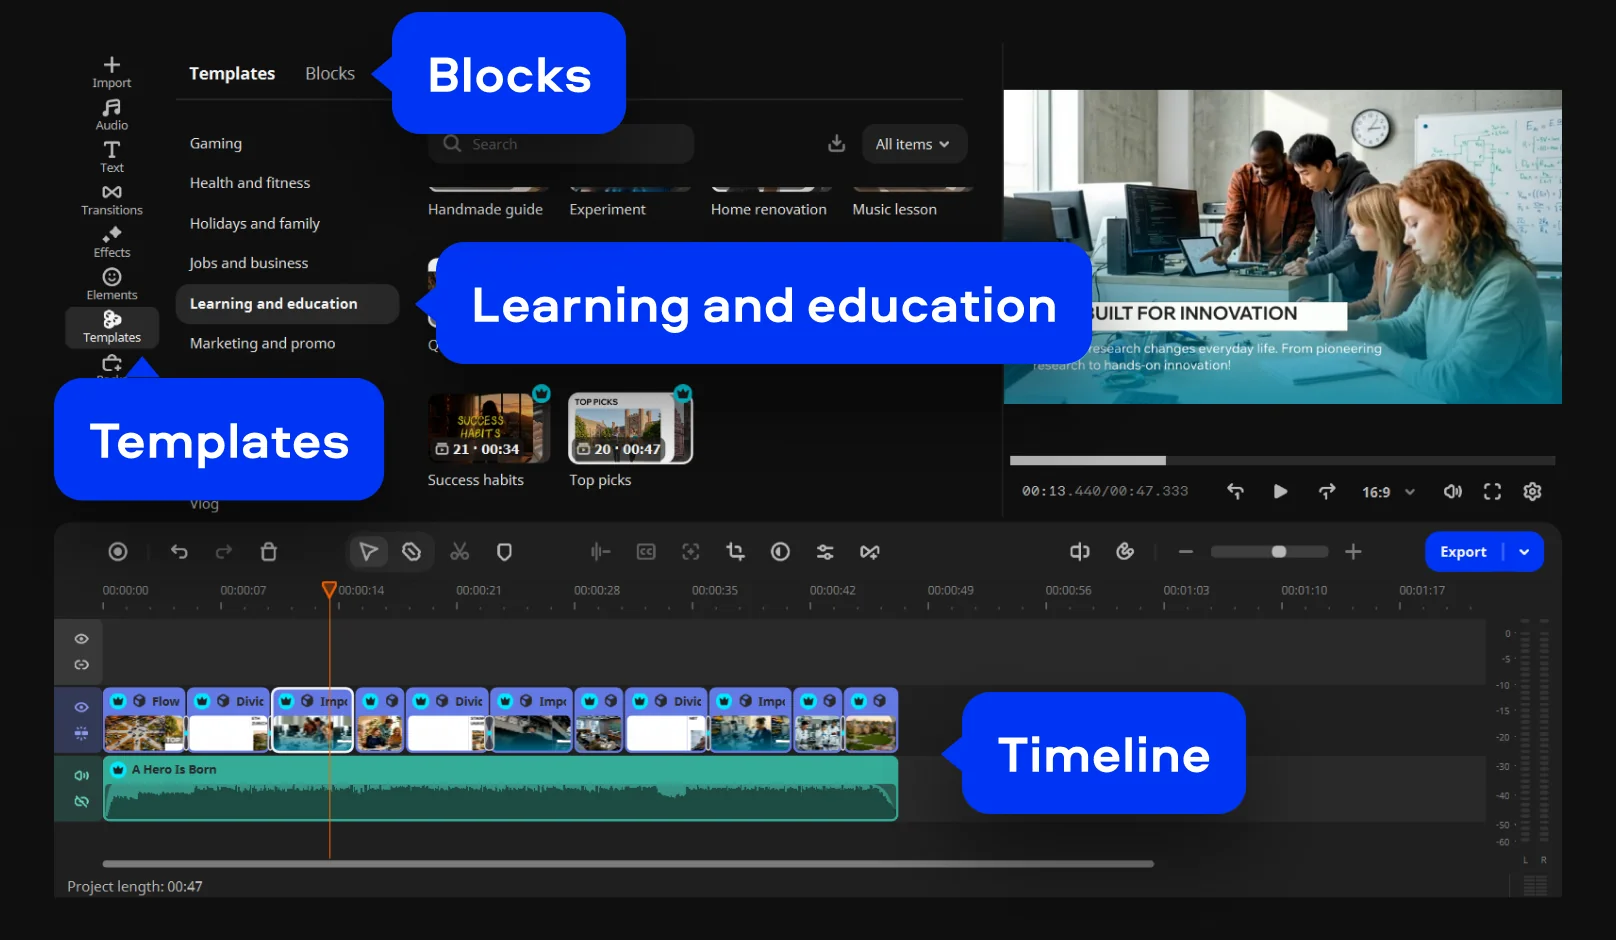
Go to the Learning and education category. Pick a template like Science in details for a complex breakdown, or a Handmade guide for a practical tutorial, and drop it onto the Timeline. Each template is split into modular Blocks – short, pre-edited parts like an intro, a countdown, or an animated collage, already carrying transitions, music, and text. Drop your lesson footage into the Blocks that fit, then freely reorder, add, or remove Blocks to match your script.
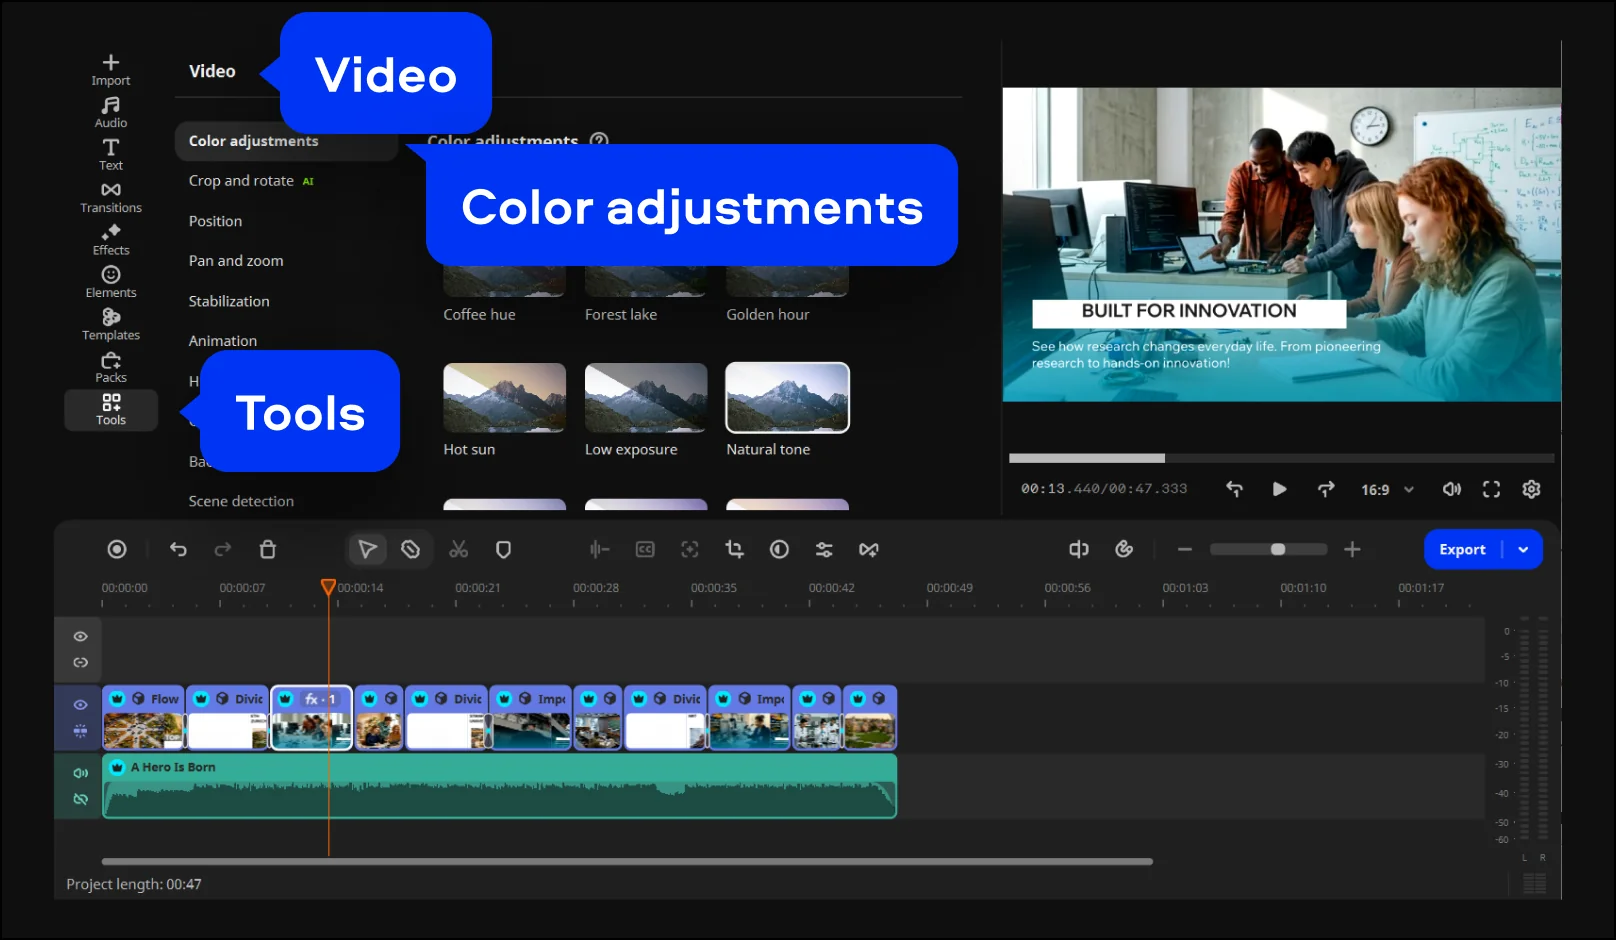
Smooth out cuts with drag-and-drop transitions, and go to the Text tab to label sections with on-screen titles. Apply color presets or filters under Tools > Video > Color adjustments to match your channel's look. Movavi Video Editor ships with hundreds of built-in effects, so you can keep the visual style consistent from your intro through your closing thought.
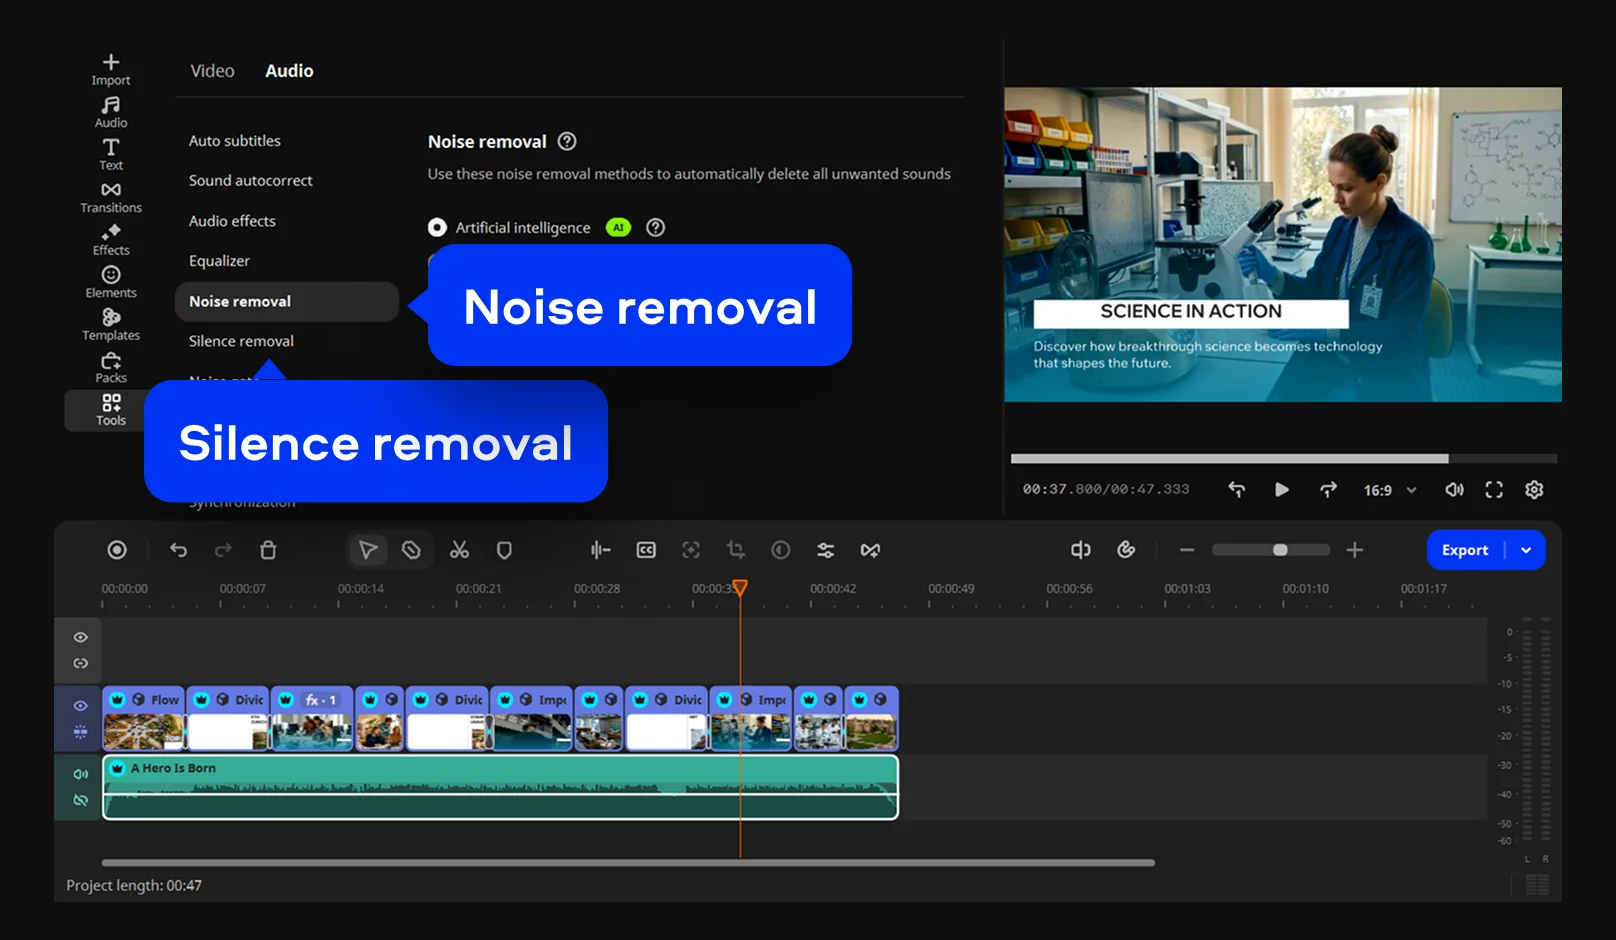
Go to Tools > Audio and run the Noise removal tool to clear background hums or room echo in one click, and use Silence removal to automatically tighten the pauses between sentences.
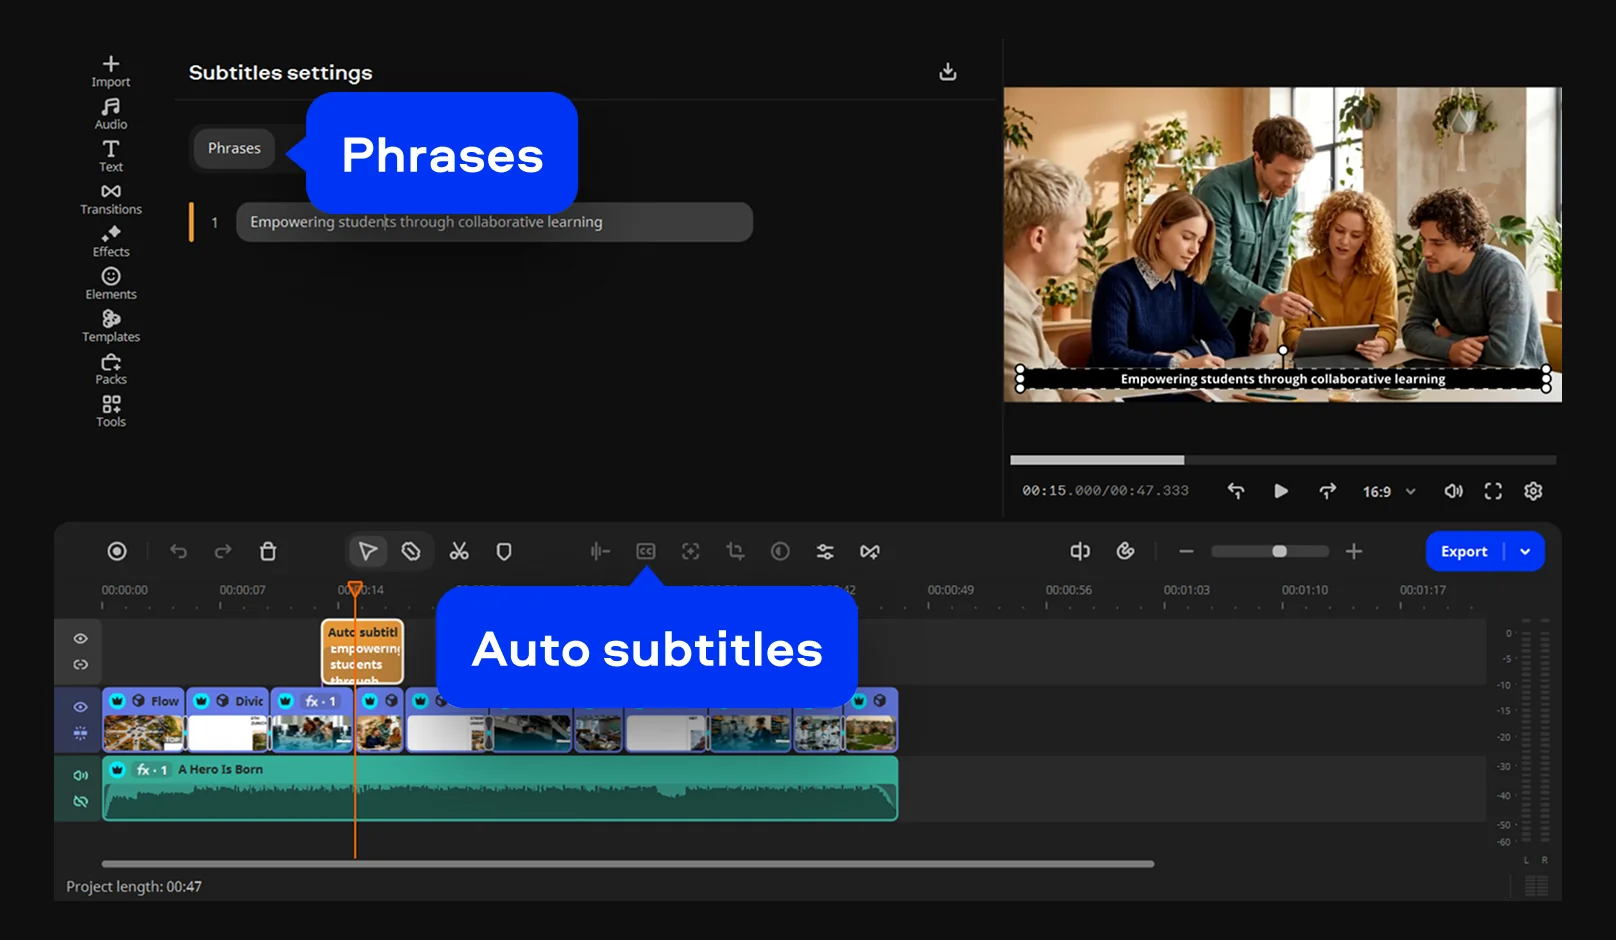
Next, turn on the Auto subtitles tool to caption your narration automatically – it converts speech to text across more than 100 recognized languages, and you can fine-tune individual lines afterward in the Phrases panel. Subtitles help viewers follow unfamiliar terms and make the video usable for students who prefer to read along or watch without sound.
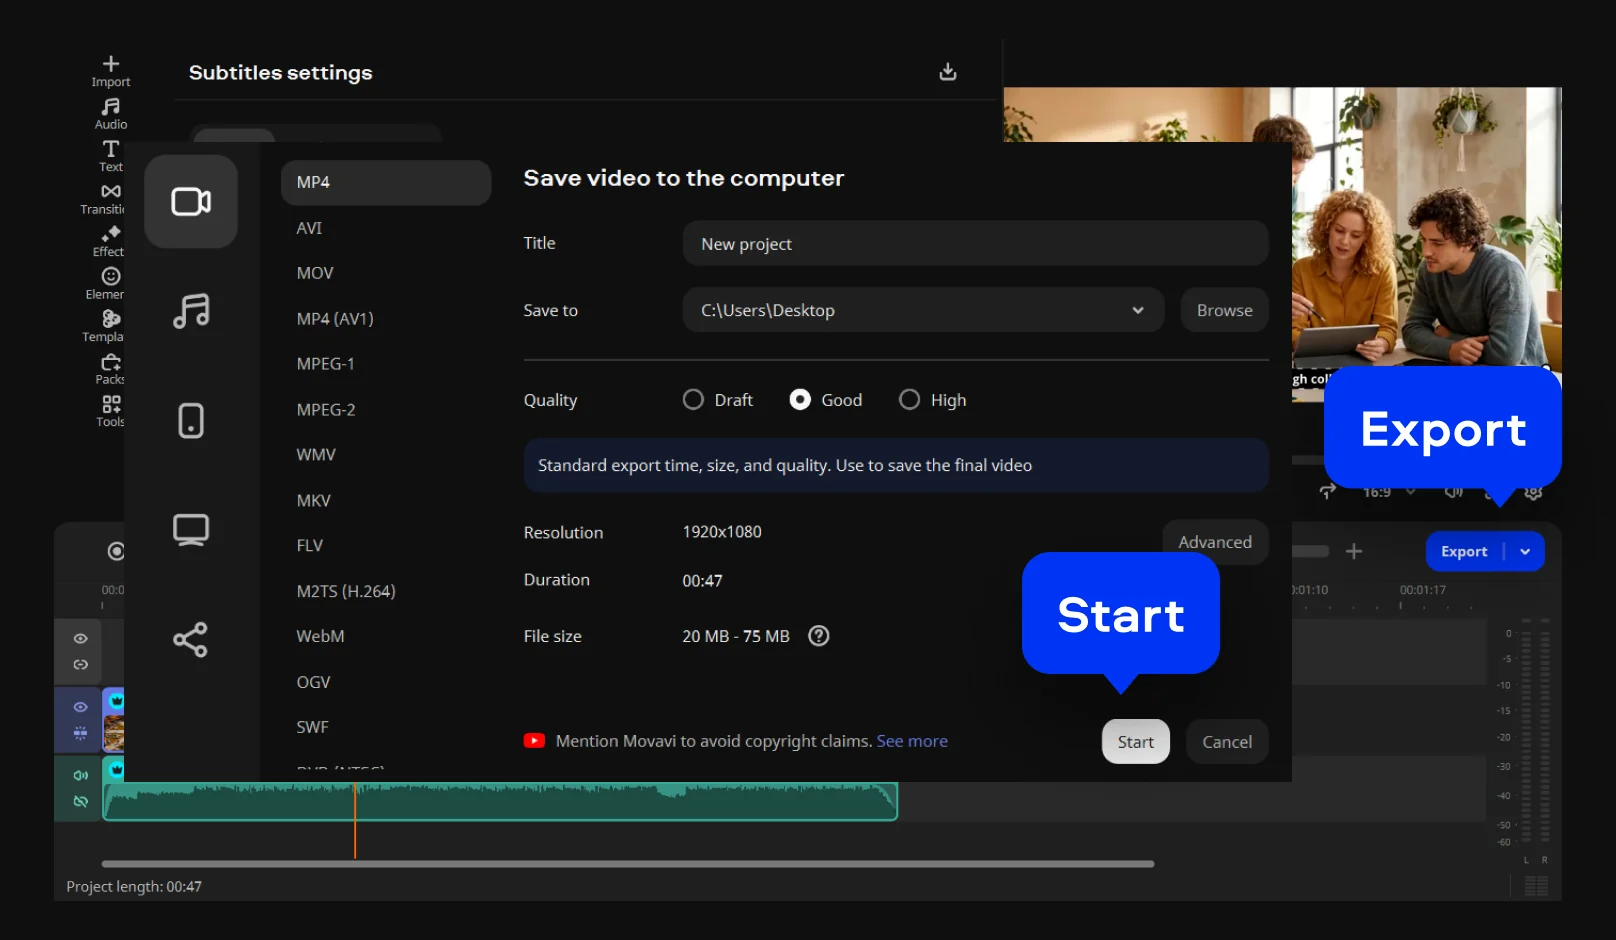
Click Export, choose MP4 for the widest compatibility across YouTube, your school's platform, or an internal drive, and click Save. To post it right away, you can also send it straight to YouTube from inside the program.
That's it: your lesson now has captions, clean audio, and a clear structure. The template took care of the transitions, music, and text, and our one-click AI tools handled the subtitles, background noise, and pauses. Once you've exported your first lesson or review video, keep an eye on Movavi Ideas – a free tutorial hub updated every week with new step-by-step guides for creators who want more than the basics.

Movavi Video Editor works well because it's built for beginners rather than professional editors, and the program runs as a desktop app for both Windows and Mac. If you want to try it before paying, Movavi Video Editor Free is a free download with a 60-second export cap and a watermark – enough to test every step in this guide.
You can use a template exactly as it ships, or treat it as a starting point – swap out Blocks, reorder them, or drop in your own titles and footage. You can also add new Blocks or build a video from Blocks alone, so your review follows your own structure, even if a classmate picked the same template.
Not a full script – a short outline covering your main points, one or two examples, and your closing takeaway is usually enough for a talking-head lesson. It keeps your knowledge organized and your takes short, which speeds up editing later.
Yes – the auto subtitle tool transcribes your narration in one click, with more than 60 customizable designs for how the captions look on screen. It's especially useful for lesson videos aimed at students following along with unfamiliar vocabulary.
MP4 is the safest choice for compatibility with YouTube, school platforms, and most devices. Movavi Video Editor also includes ready-made presets if you're exporting for a specific phone, tablet, or TV instead.



1.5M+ users already subscribed to our newsletter