Step 1. Download and install the app
Download the installation file from the official website and run it. Install Movavi Video Editor, then launch it.

Download and install Movavi Video Editor.
Add your video to the program.
Run the stabilization tool.
Preview and export your video.
By clicking the download button, you're downloading a free version of the program.*

How to stabilize a video comes down to four moves: add the clip to Movavi Video Editor, run the stabilization tool, preview the result, and export. This guide is for you if you film lifestyle vlogs, unboxings, or travel videos, and for anyone who records family road trips and weekend getaways on a phone or camera. Nobody’s hands stay perfectly still on a street-food walk or in the back seat on a winding road, so a little wobble is normal. Movavi will help you smooth it out.
Movavi Video Editor is an intuitive video editor with customizable video templates, one-click AI tools, and hundreds of drag-and-drop effects. It’s a desktop app for Windows and macOS, and its stabilization tool reduces handheld camera shake, so a wobbly clip comes out less shaky and easier to watch. The software is aimed at beginners and everyday creators – most of its tools work in just a click, so you spend your time creating, not figuring out the software. The guide below explains how to fix a shaky video in a few easy steps.
Download the installation file from the official website and run it. Install Movavi Video Editor, then launch it.
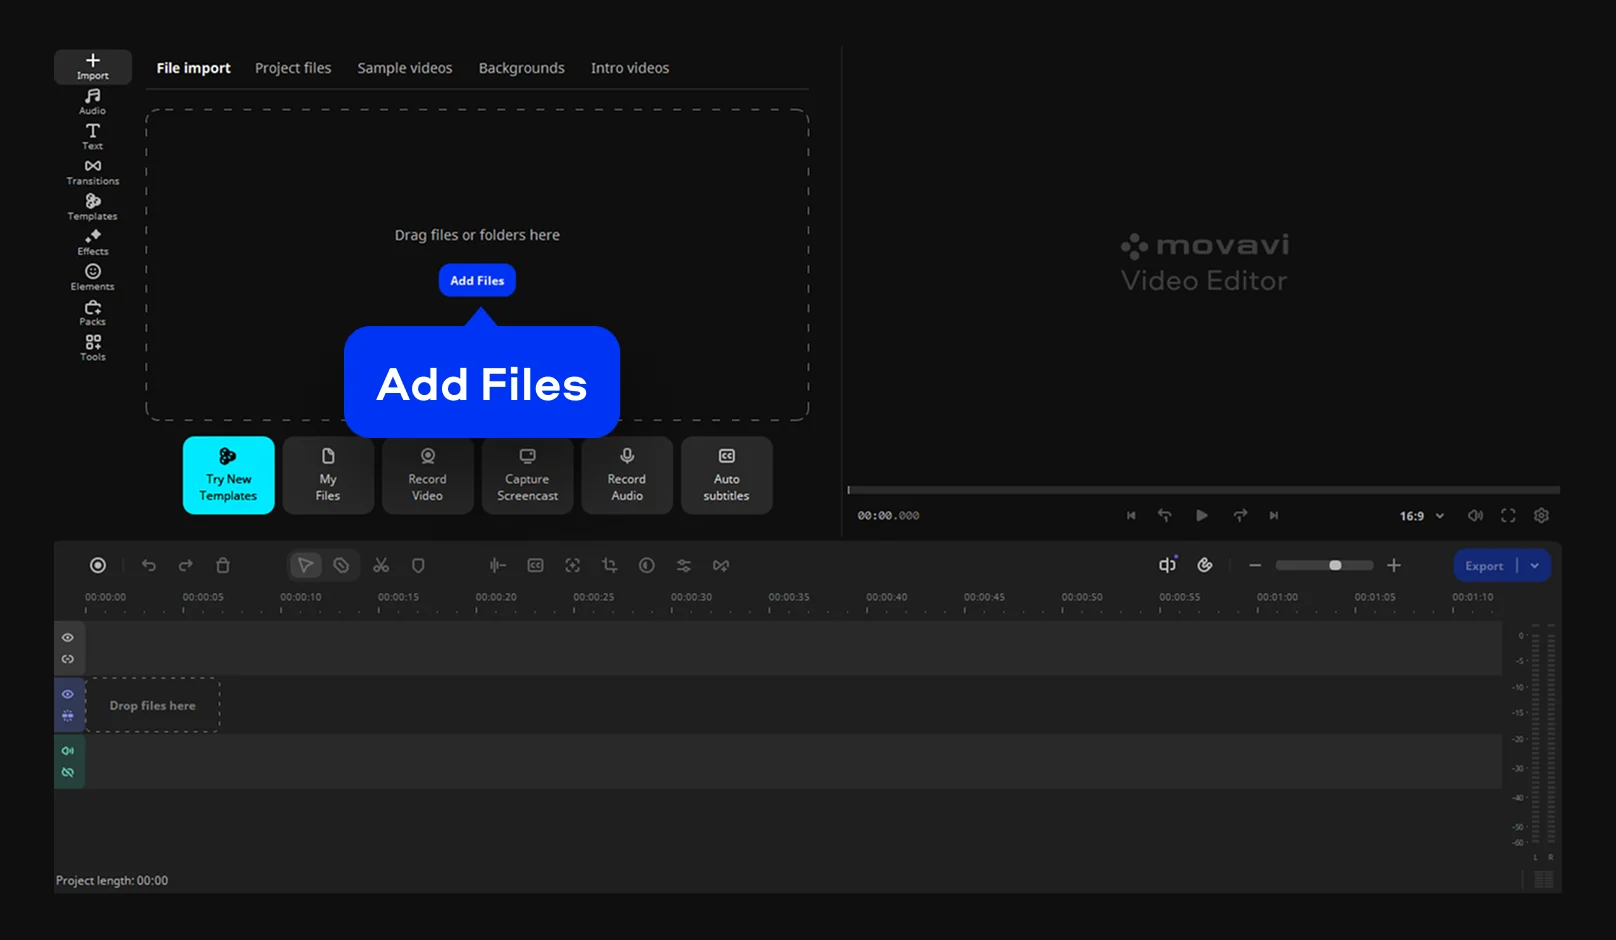
Click Add Files and select the video you want to stabilize. It appears in Project files. Drag it onto the Timeline. Hover over the clip and Movavi Video Editor shows an instant preview, which helps you pick the take that needs the most help. Pre-timeline trimming pulls out just the segment you want before it joins the project.
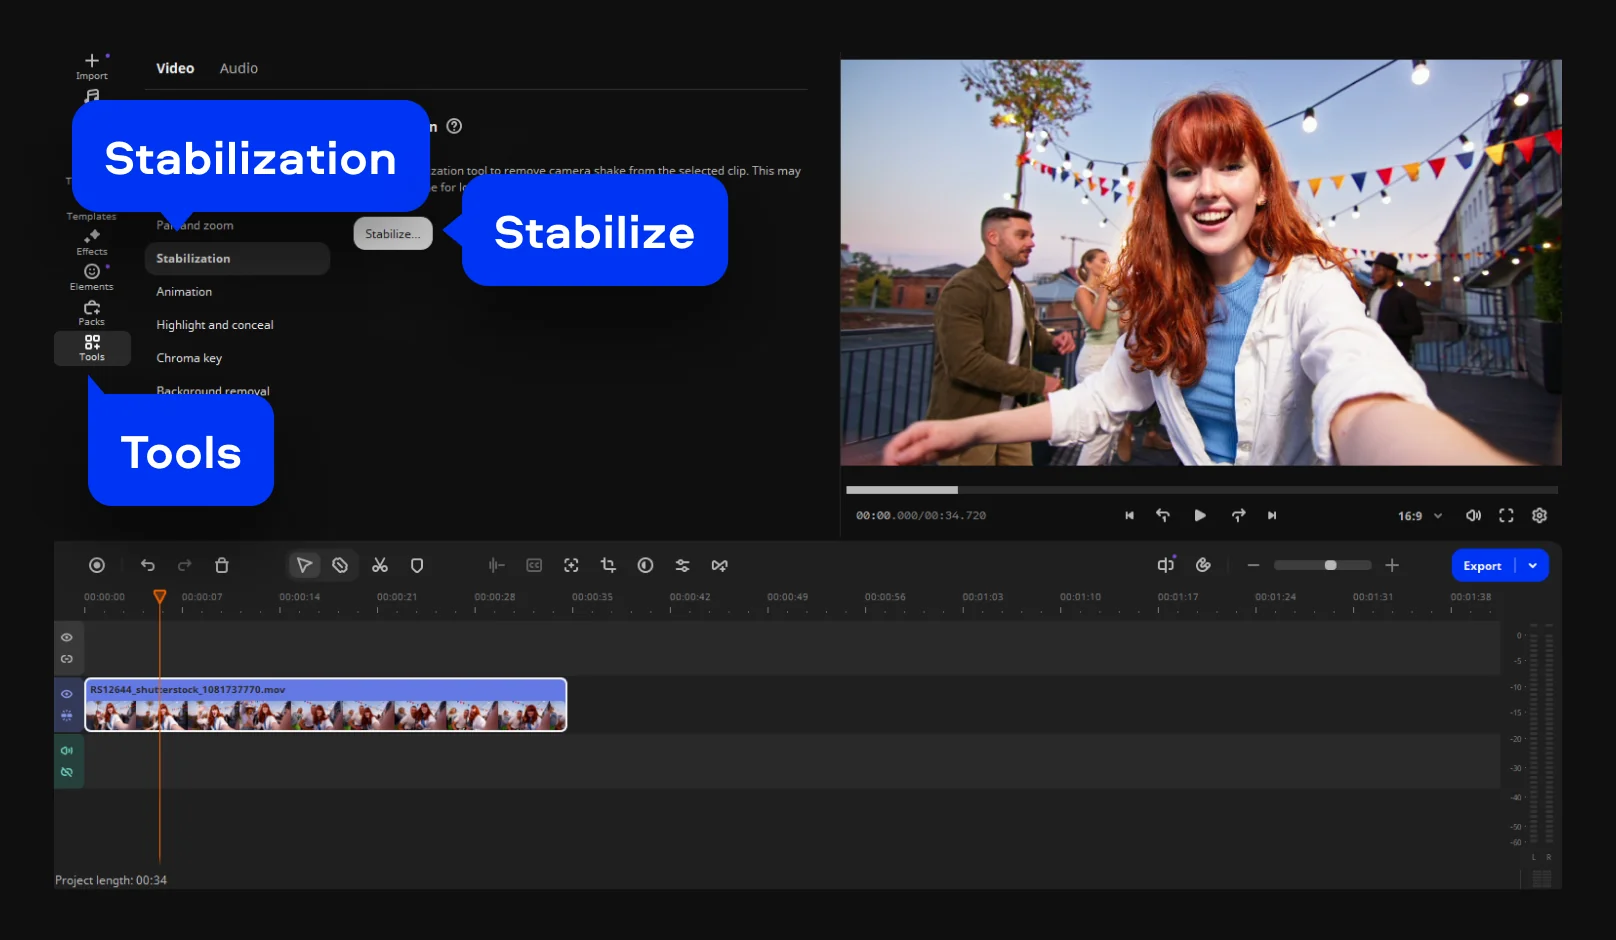
In the menu on the left, select Tools. Pick Stabilization from the list of editing tools and click Stabilize. A dialog window opens with the settings.
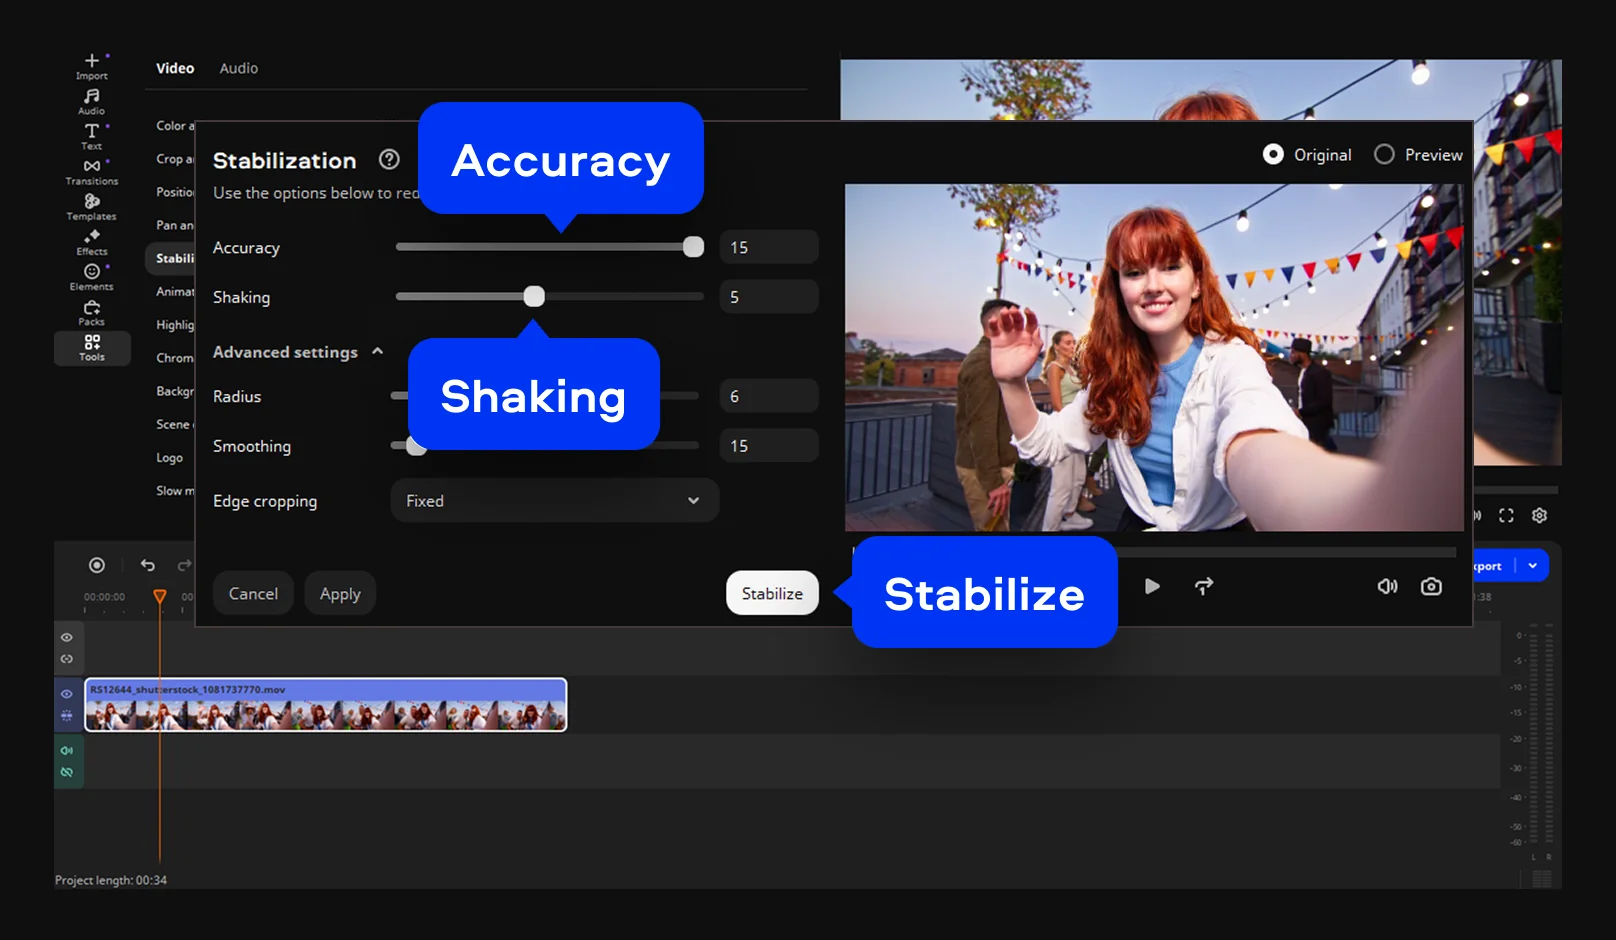
Drag Accuracy to decide how precisely the program analyzes your clip for shaking. A higher value gives a better result but takes more time. Shaking sets how much shaking is visible in the video.
Open Advanced settings to reach Radius and Smoothing. For a more dynamic clip, such as a walk or a ride, smaller values give a better result. Then open the Edge cropping drop-down list and choose one of its options (None, Fixed, or Adaptive). Cropping the edges helps when the clip shows distortions, such as blurred areas. Click Stabilize and wait while the video is processed.
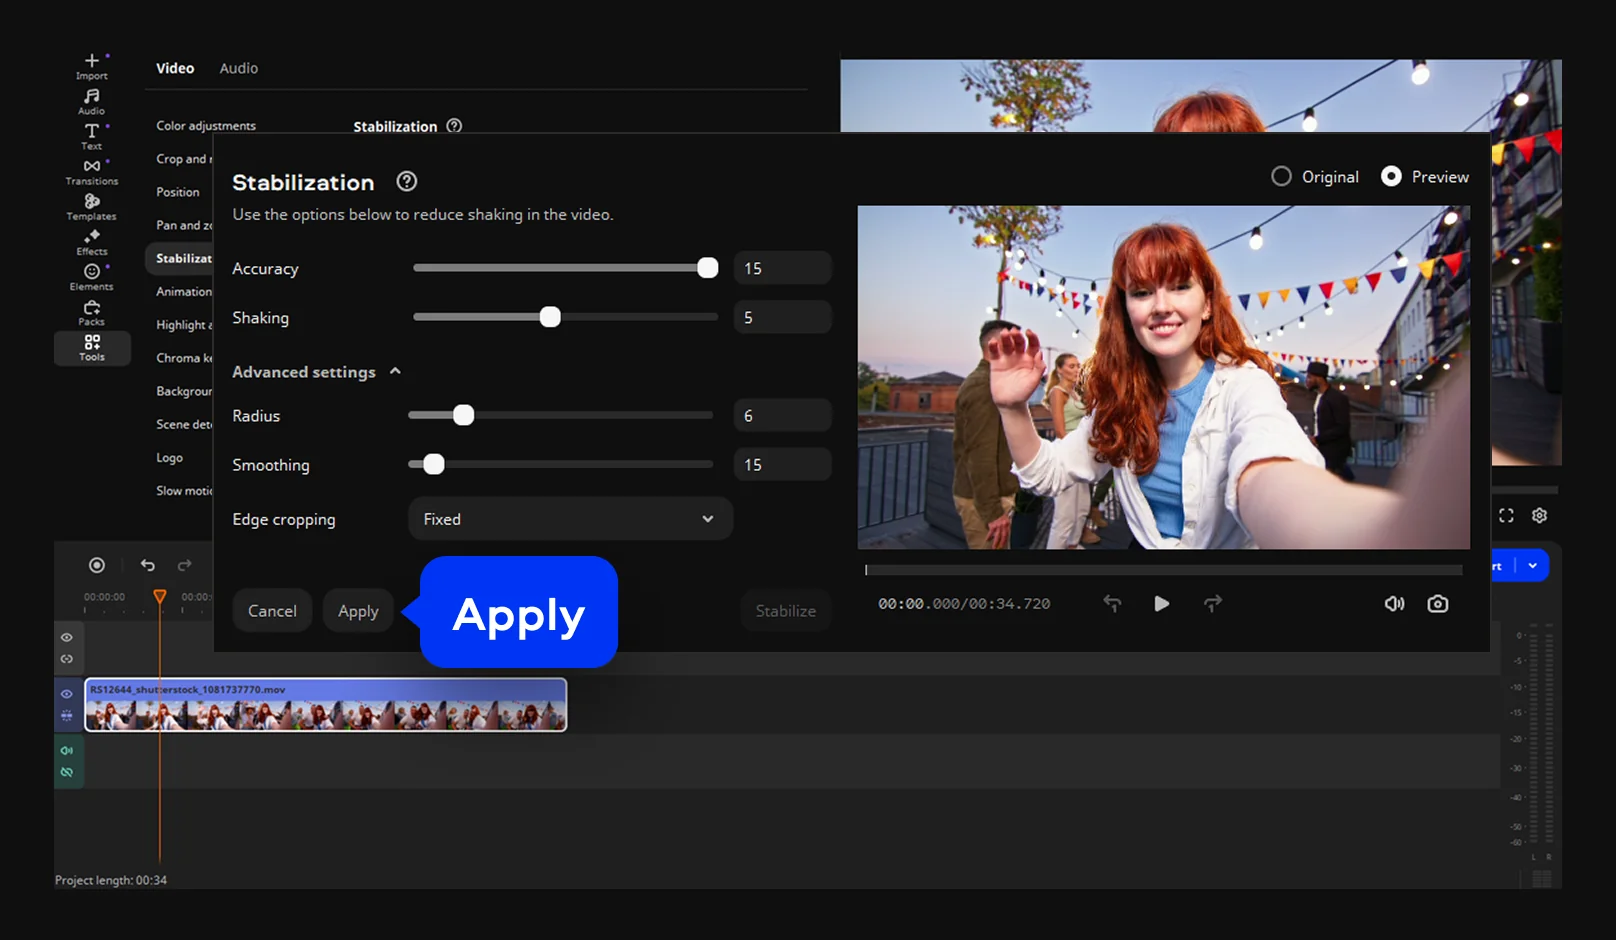
Now, you can preview the result. If it looks right, click Apply.
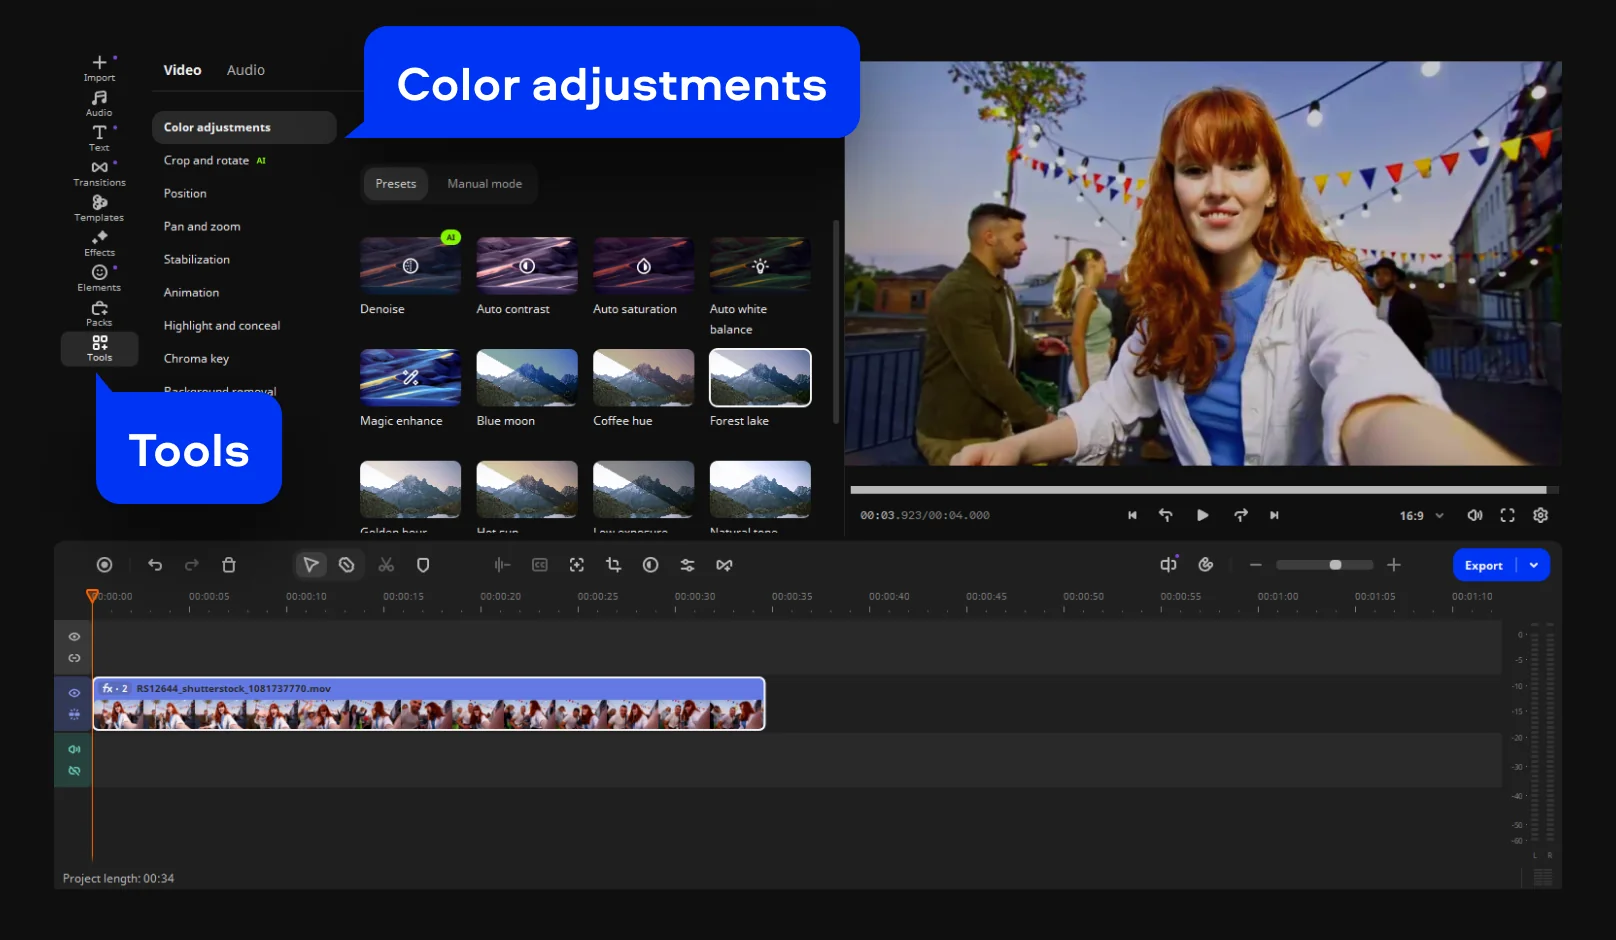
Movavi Video Editor has ready-made color presets, plus manual controls for tone, contrast, and saturation. Apply a preset to set the mood of your travel clip, then fine-tune it by hand.
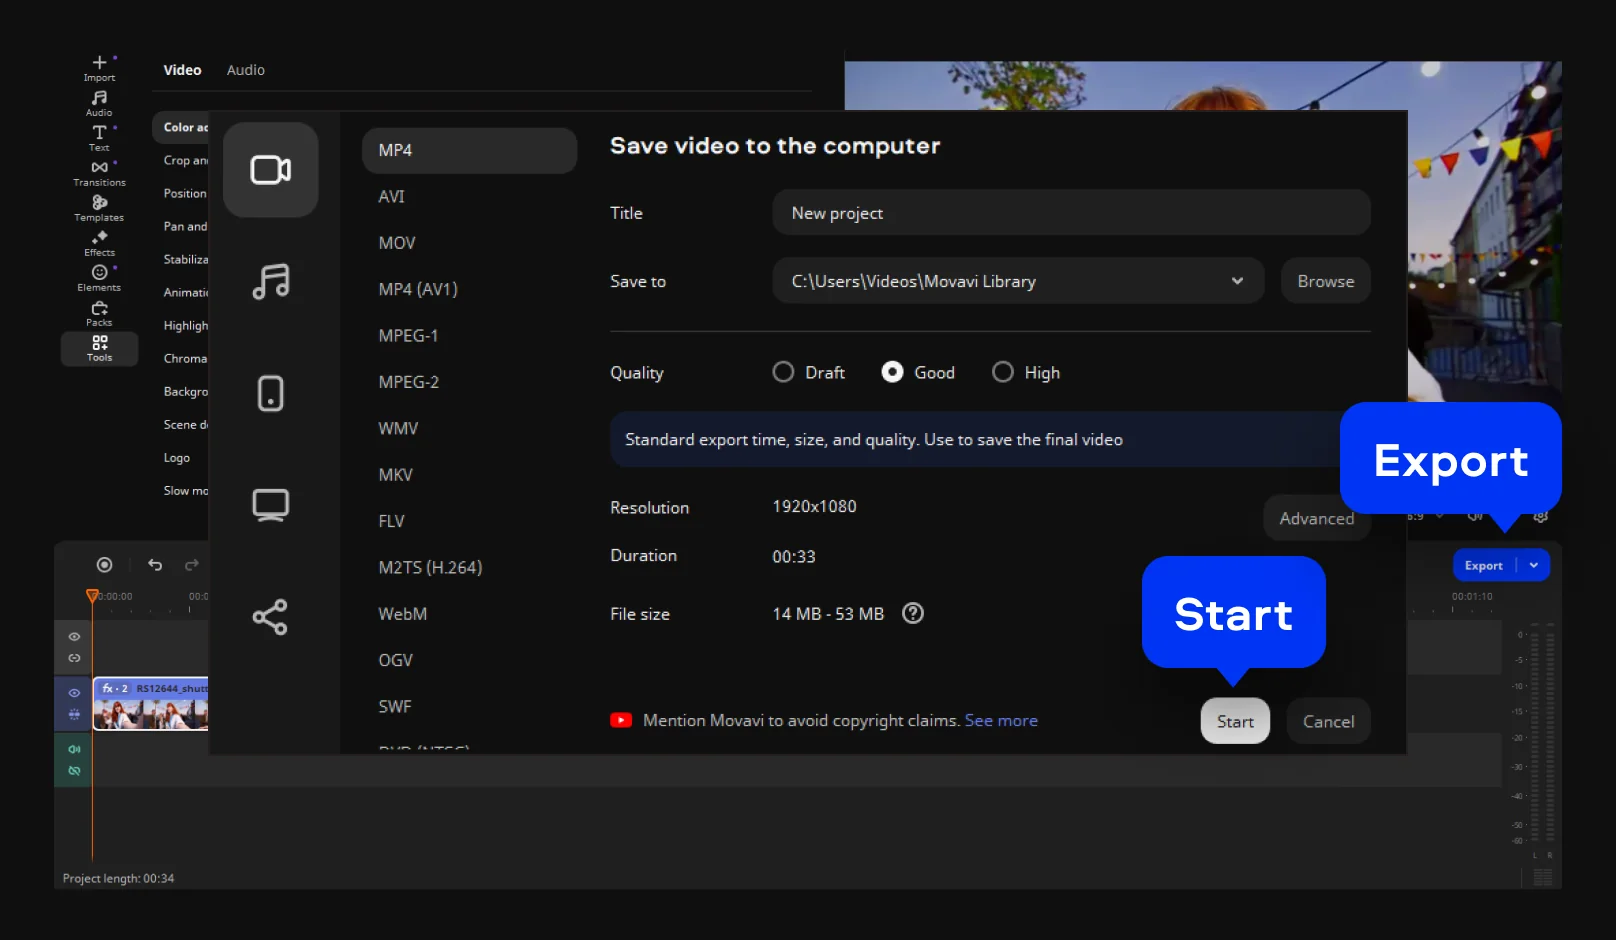
Click Export, set the quality and other parameters for your output video, and click Start. MP4 is the pick for the broadest compatibility. Movavi Video Editor can also upload the finished video straight to YouTube, Vimeo, Google Drive, or TikTok.
Create videos with templates
If you have several clips and a few photos to turn into one video, check out Movavi Video Templates – a multi-style library of customizable, pro-looking, modular templates for any kind of video. Every template is built from Blocks: short, pre-edited parts such as an intro, a countdown, a quick cut, or an animated collage. Your street-food walk can open a vlog as an intro Block. A road-trip clip can sit in an animated collage Block beside photos from the trip. Transitions, music, and text come pre-set, and you can reorder, add, or remove Blocks. The full version of Movavi Video Editor includes several templates at no extra charge.
If you’re new to editing, stabilizing is a friendly first edit to learn. Say you filmed a cooking video with one hand free or a birthday party in a crowded room. All you need to do to stabilize shaky videos is set a few sliders, check a preview, and click apply the settings. Adding a title, transition, or filter afterwards is just as quick: hover over it to see how it looks, then drop it onto the clip on the Timeline, and it applies instantly.
Ready for your next edit? Open Movavi Ideas, a free tutorial hub that adds a new step-by-step editing idea every week, each short enough to follow in under a minute.
*The free version of Movavi Video Editor may have the following restrictions depending on the build: watermark on exported clips, 60-second video or 1/2 audio length limit, and/or some advanced features unavailable when exporting videos.

Yes, Movavi Video Editor has a free download on the official website. You can test all its tools in the app. The free version applies a watermark on output videos, and using paid features restricts export.
It does. macOS 12.0 or higher is supported, with native support for ARM-based processors, including Apple M1 and newer. Fast Track HD acceleration speeds up processing.
Movavi Video Editor can import video, audio, and image files. It supports many popular formats, including MP4, MOV, AVI, MKV, and WMV.
Stabilization steadies the frame. Grain from low light is a separate job for AI Video Denoise, which removes grain and low-light artifacts while keeping faces, textures, and edges sharp. It also helps enhance older mobile footage.
Yes. Video speed control accelerates footage up to 100x, and the Original tone option keeps the pitch of the audio when you speed a clip up or slow it down.
Yes. In Movavi Video Editor, auto subtitles turn speech into text with 99% accuracy across more than 100 recognized languages, and you can pick from 60+ designs. Word-by-word highlighting syncs with the audio, which makes a vlog easier to follow. The tool also lets you set the screen position of the captions.
Yes, after you’ve downloaded and installed the app, you don’t need an Internet connection to edit videos.



1.5M+ users already subscribed to our newsletter