Step 1. Install the software
Download Movavi Video Editor for Windows or macOS and open it.

If you make YouTube reviews or you're prepping a class presentation, you can make an infographic video from customizable Blocks in Movavi Video Editor, with no separate design app needed. It’s an intuitive video editor with customizable video Templates, one-click AI tools, and hundreds of drag-and-drop effects. It's a desktop app for Windows and macOS, so everything below happens in one program you install once.
By clicking the download button, you're downloading a trial version of the program.*

Movavi Video Templates is a multi-style library of customizable, pro-looking, modular Templates for any kind of video. Each Template is built from Blocks: short, pre-edited segments like an intro, a countdown, or an animated collage, with the transitions, music, and on-screen text already set. Blocks already have the pacing, music, and transitions worked out, so dropping in your own clips, photos, or numbers is usually enough to get a result that looks finished on the first export. You can use a Block as-is, swap it for a different one, or reorder, add, and remove Blocks until the structure fits what you're explaining. Since your own videos, photos, and text go into each Block, a Block built around one topic works for yours.
Several Templates come with the full version of Movavi Video Editor at no extra charge. The Movavi Templates subscription unlocks the whole library of Templates and Blocks, with styles for vlogs, business promos, family videos, holidays, and more.
You don't need one. Our Templates already cover that ground. Depending on what you're explaining, you'll find these Blocks:
You can mix a timeline Block with a comparison Block in one project and the program keeps the visual style consistent between them. Hovering over a Block previews it before you commit, so swapping options costs a glance instead of a render.
Download Movavi Video Editor for Windows or macOS and open it.
Open the Templates menu, click Blocks, then choose Presentations, and pick a Block whose layout matches what you're building – a timeline for a sequence, a comparison Block for two or three options, or a data Block for a single stat.
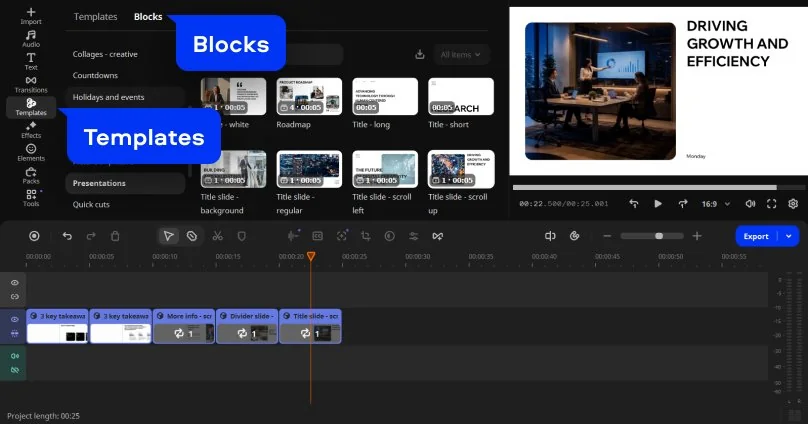
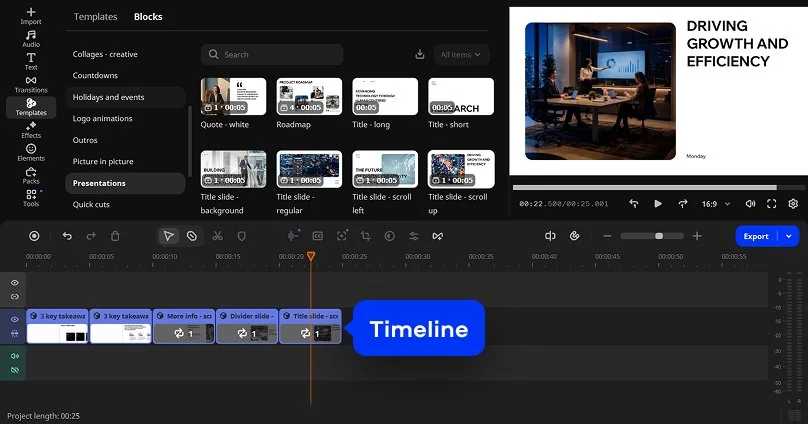
Reorder, add, or remove Blocks to match how much ground you need to cover.
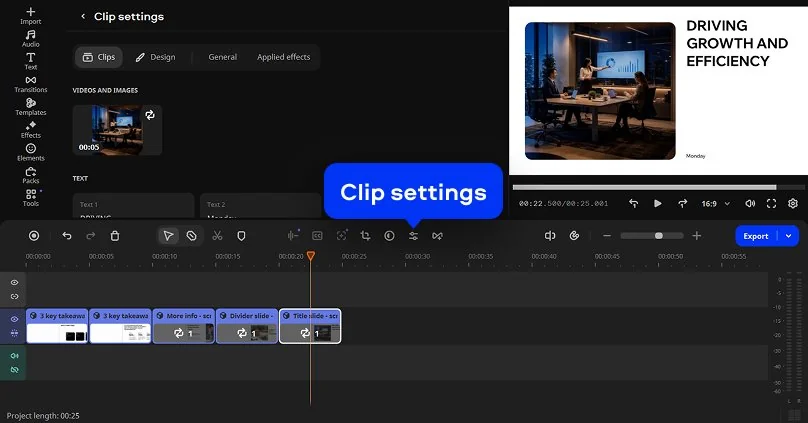
Go to Clip settings and import your own video clips, photos, or data points into the Block's placeholders.
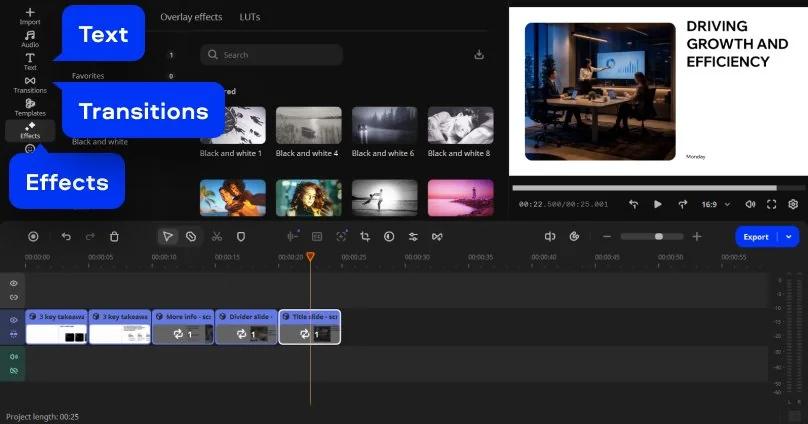
Label numbers or names with titles in the Text menu, and pull from the built-in library of drag-and-drop effects, transitions, or filters.
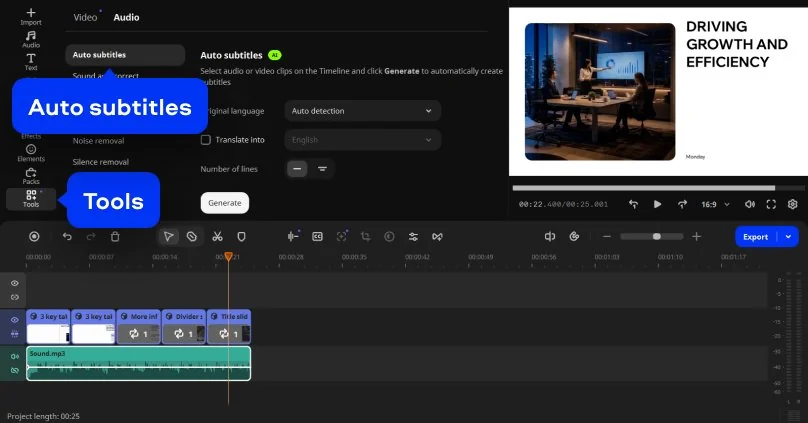
If your video has narration, our auto subtitles turn your speech into captions with over 99% accuracy. Simply go to Tools and choose Auto subtitles.
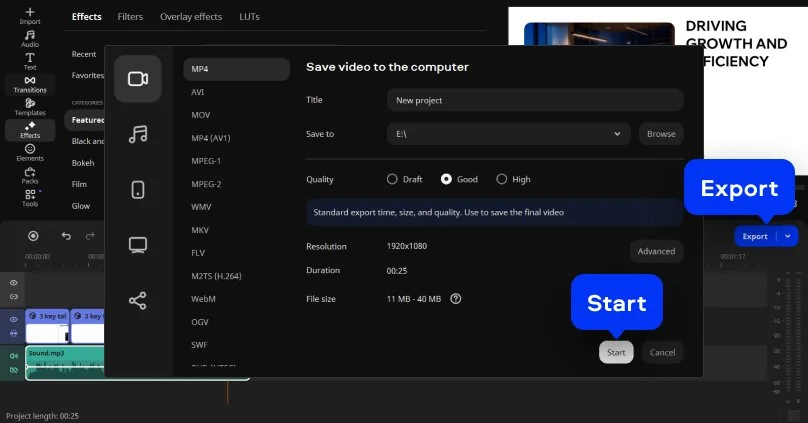
Click Export to open the export menu. MP4 is the recommended format for the final file, and it plays back the same on Windows or Mac. Click Start to save the result.
If your channel covers cinema or music reviews, a comparison Block can line up three films, albums, or picks side by side. Viewers see the difference at a glance, and your review gets a clear side-by-side structure.
If you teach or study, you get a different payoff. A timeline Block walks your class through events in order, with no wall of bullet points. A data Block carries a single stat through a school or university project presentation, so there's no graph to build in a spreadsheet.
You now have an infographic video with your own footage and stats, plus the pre-set editing, transitions, and music that come with each Block. For your next video, check out Movavi Ideas, our free tutorial hub. New editing ideas arrive every week, and each step-by-step tutorial takes less than a minute.
*The free version of Movavi Video Editor may have the following restrictions depending on the build: watermark on exported clips, 60-second video or 1/2 audio length limit, and/or some advanced features unavailable when exporting videos.

No. Templates are made with beginners and everyday creators in mind: the editing, music, and text are pre-set, so you're customizing an existing design.
Yes, scrolling and timeline Blocks live in the same category as the comparison and data-style ones, and they take titles and auto-generated captions the same way as any other Block in your project.
MP4 is the recommended format for a broad compatibility, from YouTube to a school's learning platform, and it's supported for both import and export.
It's a desktop app for Windows 10/11 and macOS 12.0 or later, including native support for Apple's M1 and newer chips, so you install it once and edit offline rather than in a browser tab. You can download Movavi Video Editor Free from our website and test every tool, including Blocks. Videos that use paid features can't be exported from the free version. Free exports have a 60-second length cap, limited codec support, low output quality, and a watermark. The full version removes the watermark and export limits, and the Movavi Templates subscription unlocks the whole library of Templates and Blocks.
Yes. Blocks sit on the same timeline as any other clip, so you can drop a comparison or data Block between two talking-head segments, then drag clips or effects onto either one the same way you'd edit the rest of the video.



1.5M+ users already subscribed to our newsletter