Whether you make travel video content every week or just want one great edit from a single trip, these five steps take you from raw clips to a finished export.

Travel Video Maker: How to Edit with Templates
Your best clips, a solid structure, and the right pacing – that's the foundation of a great travel recap. Movavi Video Editor features a multi-style library of customizable, pro-looking, modular templates for any kind of video.
The fast and simple route is using one of Movavi's customizable templates, each built from editable Blocks – a snappy intro, a mid-reel highlight montage, and dynamic transitions between destinations.
Movavi Video Editor keeps this process simple for beginners and everyday creators with a clean interface and an intuitive drag-and-drop workflow.

Edited by
31,385
Creating a engaging travel video shouldn't start with staring at a blank timeline. By choosing a Movavi template, you can instantly assemble your clips, photos, and voiceover, while one-click color presets and auto subtitles handle the technical steps for you. The editor is designed to streamline the process, letting you transform hours of raw trip footage into a clean, finished recap in just one session.
Travel content brings a unique challenge: turning gigabytes of mismatched phone clips, flights, food spots, and scenic views into a clean narrative so viewers don't get lost between cities. Movavi solves this by combining a modular Block structure with built-in travel titles, filters, and cinematic overlays, helping creators deliver high-quality results on their very first try.
Travel video templates: What’s inside the blocks
A Movavi template is a customizable stack of modular segments called Blocks. Each Block is a short, pre-edited piece – an intro, a countdown, a quick-cut sequence, an animated collage – with its own transitions, titles, and music already set up to look professional. You just drop your own videos, photos, or text into the slots.
For example, say you shot a week of street food stalls, a sunrise hike, and a hotel check-in on your phone. Drop the hike clips into an intro Block, the food shots into a quick-cut Block, and a few candid photos into a collage Block, and the pacing is already handled for you. That's the same modular design whether the Block is built for a slow travel diary or a fast highlight reel – only the content inside changes. Every Block is editable on its own, too: reorder them, swap one out, or delete it if it doesn't fit your trip. Several templates come included with the full version of Movavi Video Editor at no extra charge; the complete template and Blocks library sits behind a Movavi Effects subscription. If you want to layer on more style beyond a template, hundreds of built-in drag-and-drop effects – extra transitions, filters, overlays – are already in the program, with thousands more available through a separate Movavi Effects subscription.
How to Make a Travel Video
Step 1. Import your trip footage
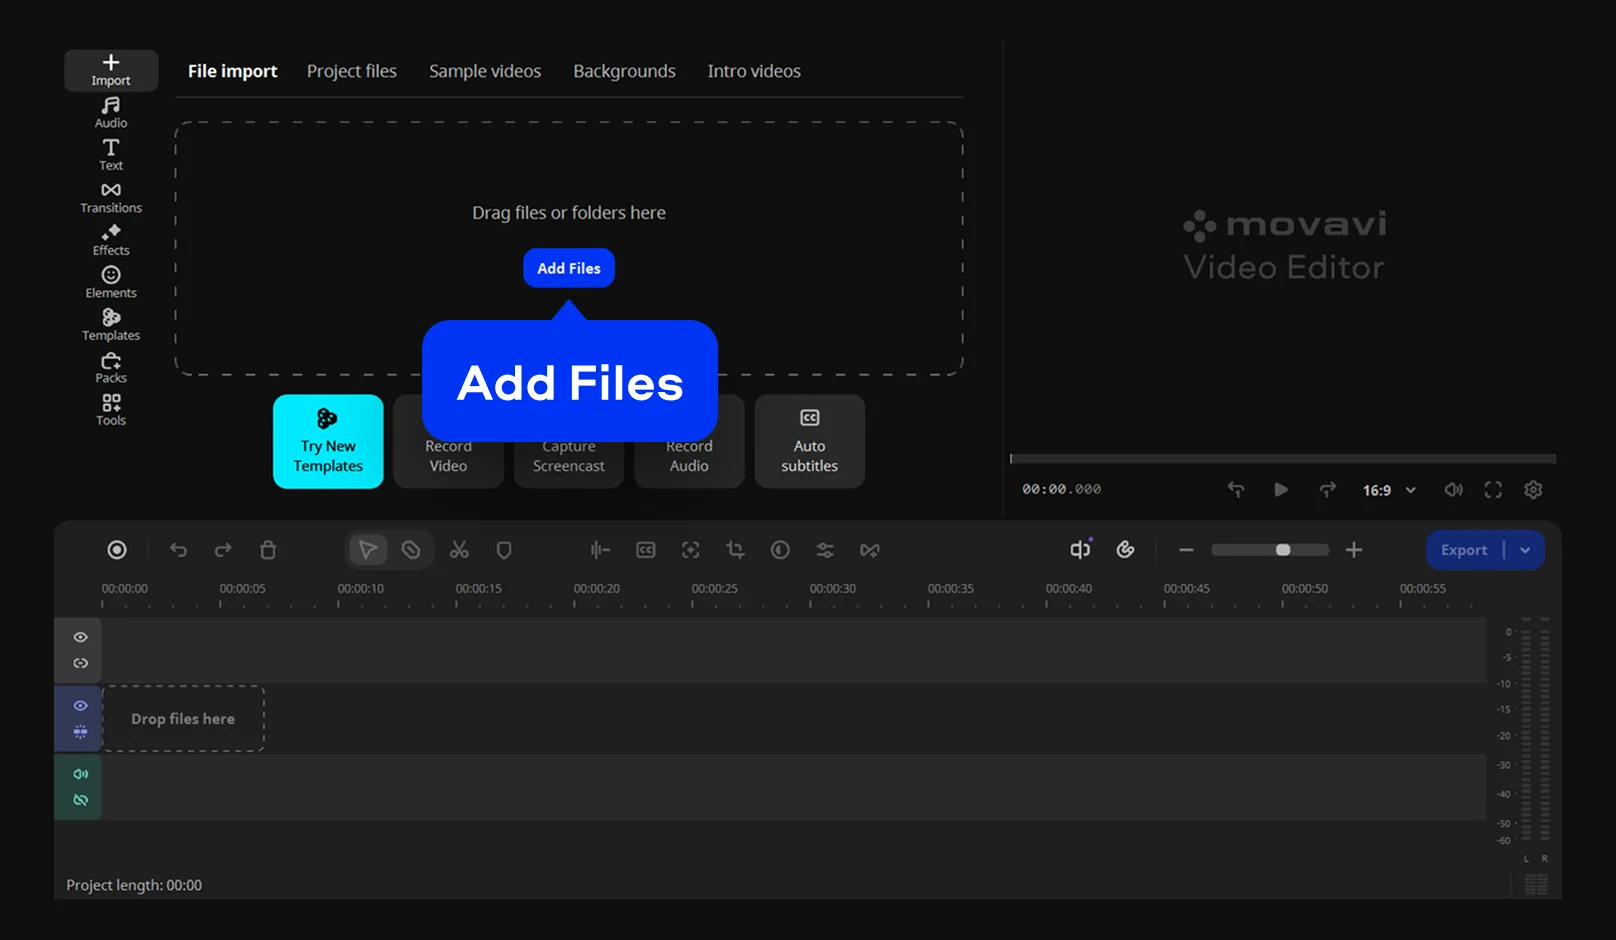
Click Add Files to bring in video from your phone or camera, photos, and audio. You can also record narration straight onto the Timeline if you'd rather add your voiceover after the fact.
Step 2. Pick a template and fill its Blocks
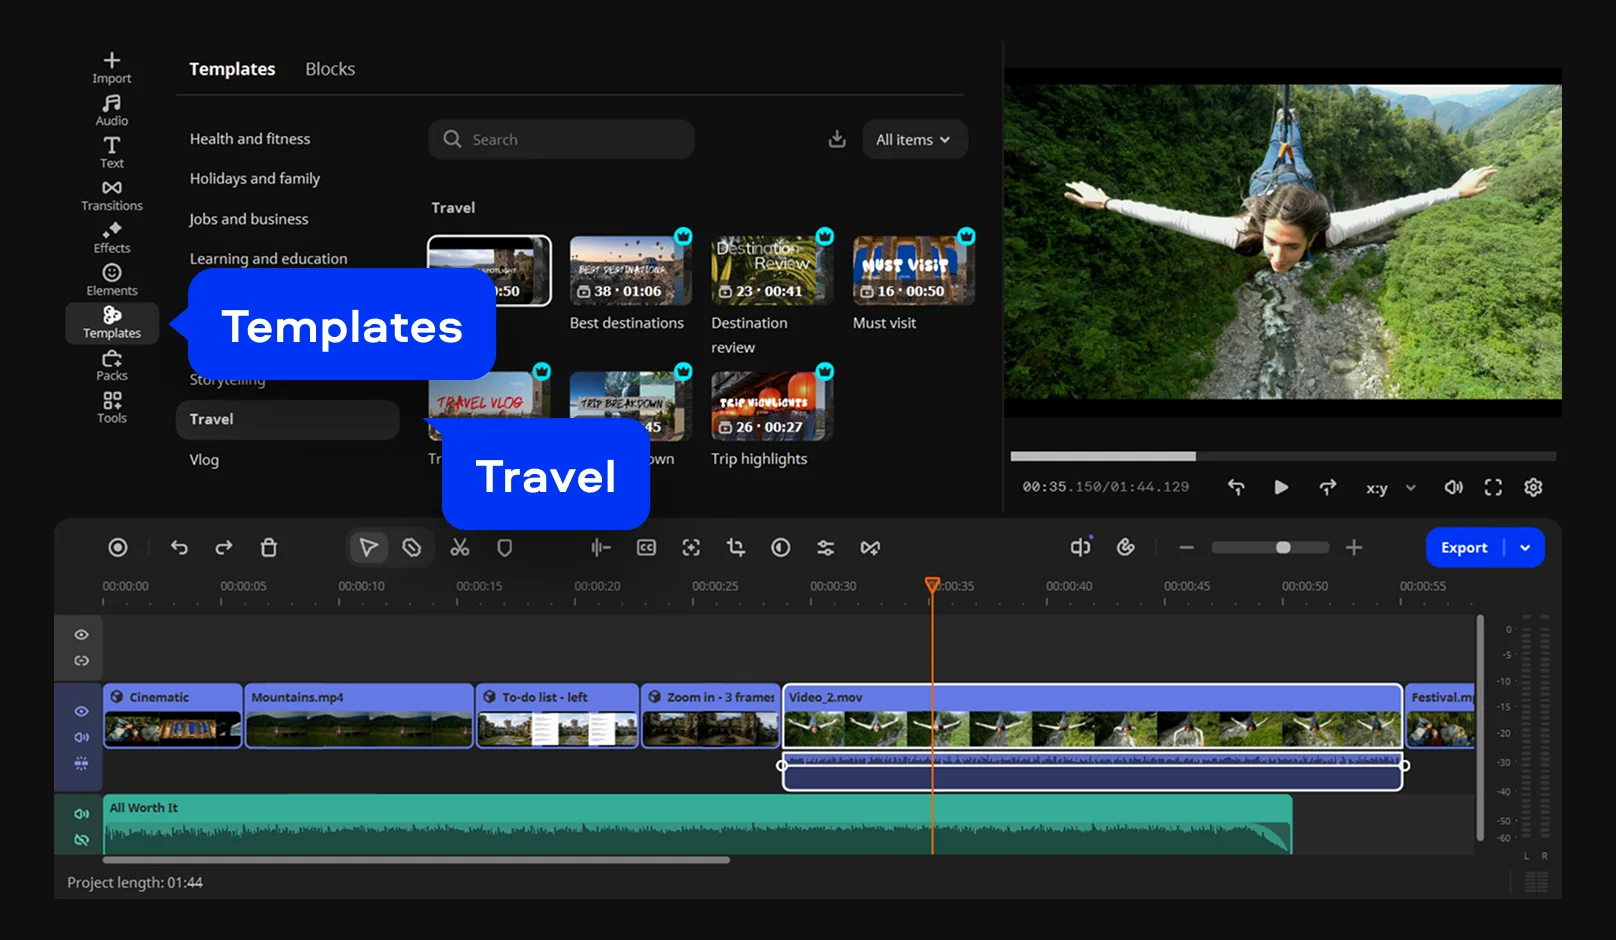
Open the Templates tab and pick a Travel template that matches your trip's mood and drag your best clips and photos into place. Drop the template onto the Timeline, then swap the placeholder clips inside each Block for your own. You can reorder them to change the pacing of your travel recap or delete any Block that doesn't fit your story.
Step 3. Add voiceover, music, and subtitles
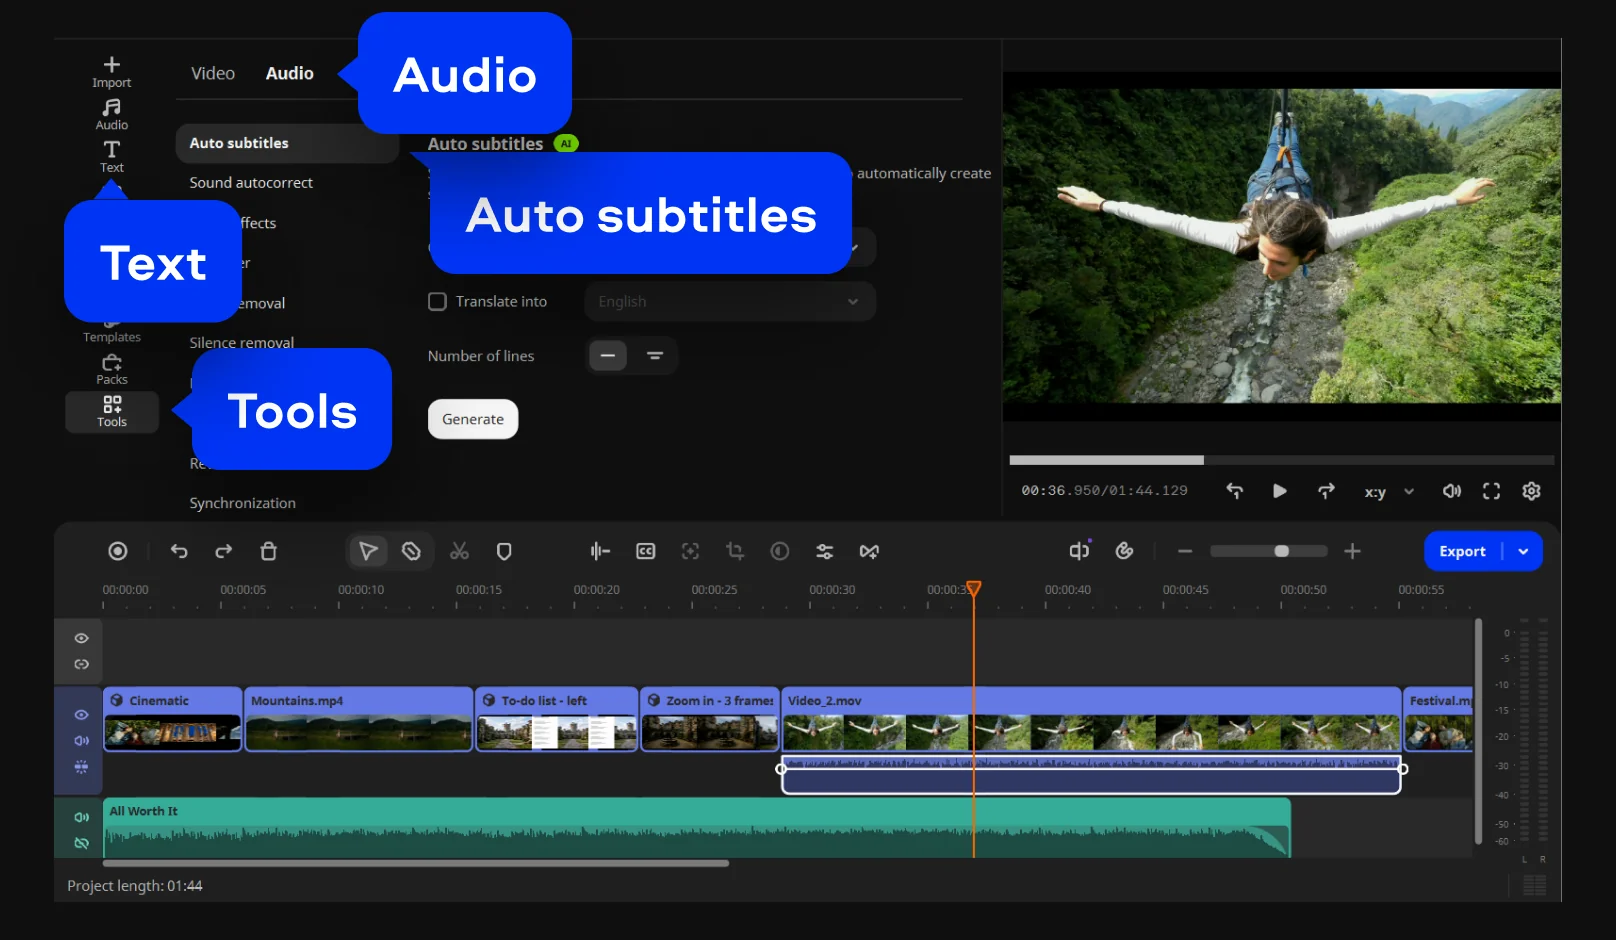
Record your voiceover through a connected microphone, drop in a copyright-free track from the built-in library, and run the auto subtitle tool for captions – it converts speech to text across 100+ languages, in one click, with 60+ caption styles to match your video's tone. A title over the intro clip with your destination name makes a clean opening card, too.
Step 4. Trim and color-grade
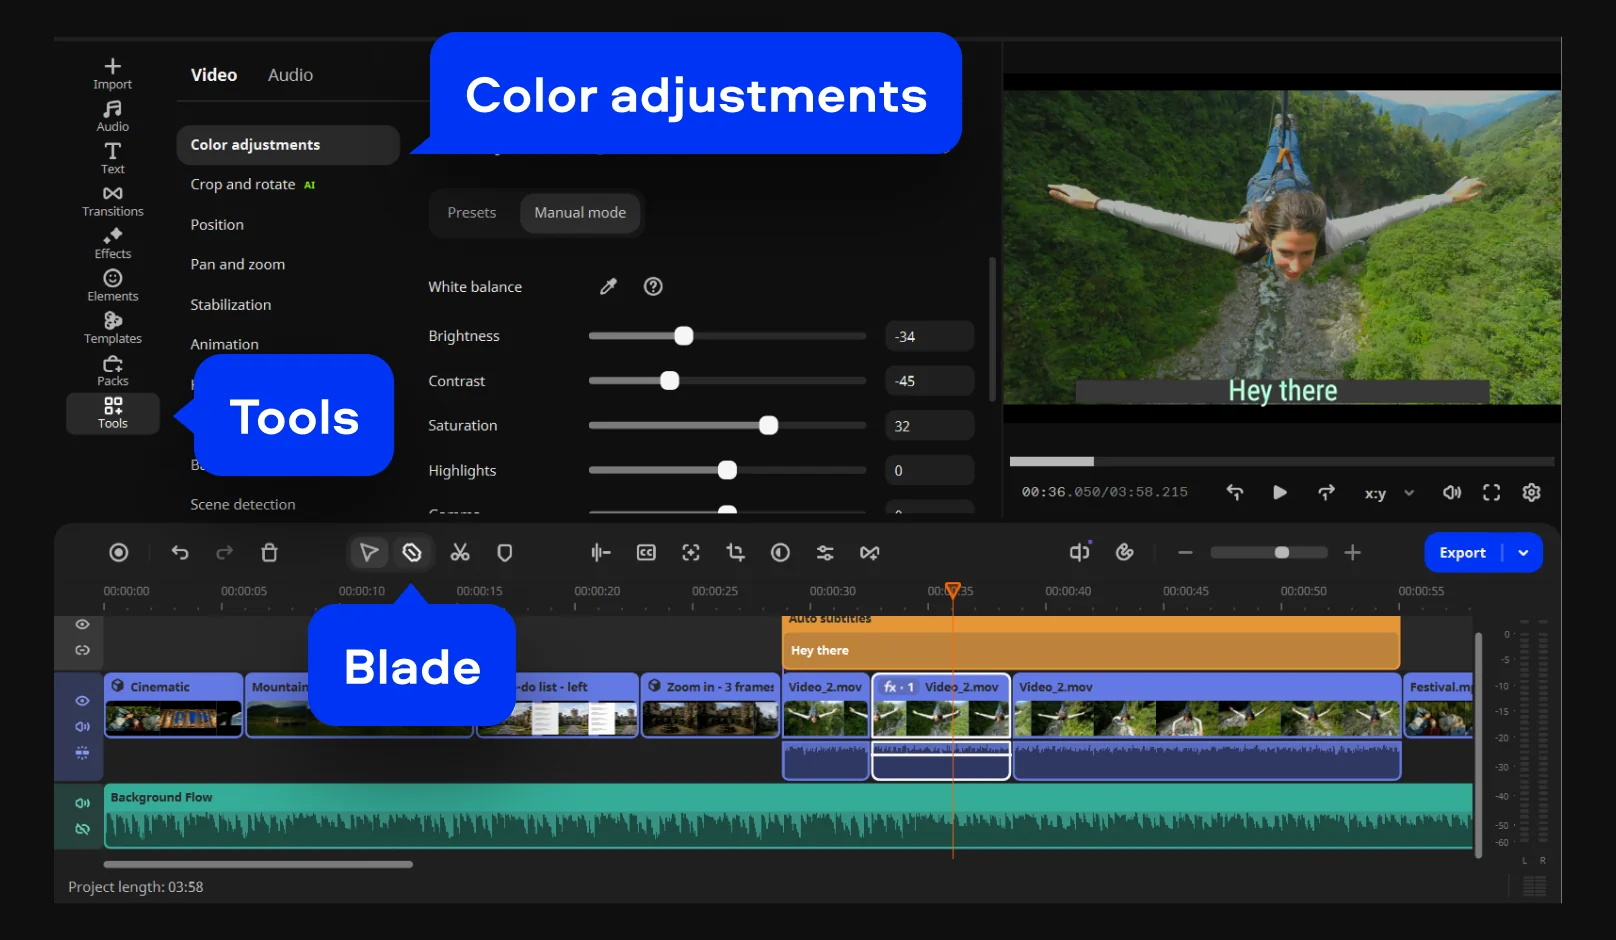
Use the Blade tool for quick cuts on any clip that runs long, then go to Tools > Color adjustments, choose a ready-made option under Presets – or switch to Manual mode to fine-tune tone, contrast, and saturation – so footage shot in different lighting looks like one consistent video.
Step 5. Export as MP4
Export as MP4. It is the recommended format for wide compatibility across YouTube, Instagram, and TikTok.
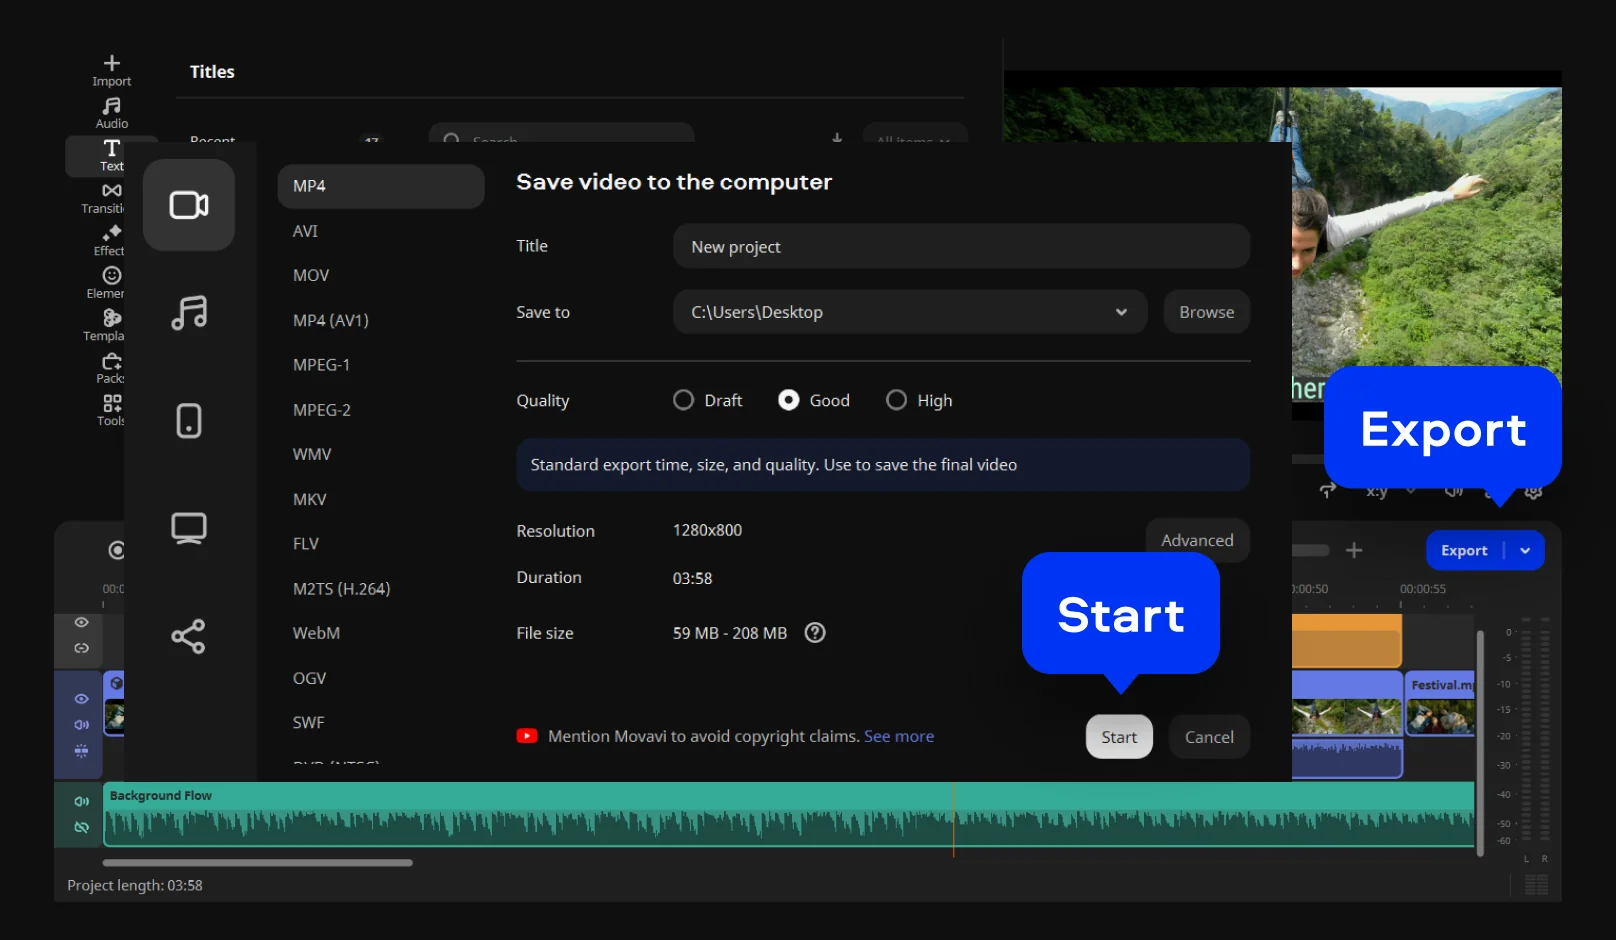
None of this needs prior editing experience. The drag-and-drop workflow and instant hover previews let you see how a clip, effect, or transition looks before it's actually applied, so there's no guessing and redoing.
Once your first trip video is done, Movavi Ideas publishes a new creative editing shortcut every week, free to browse – worth a look before your next trip if you want to try a different template style next time.
Which Movavi version do you need?
Movavi Video Editor Free is a genuine free download from the official site: every editing tool, including auto subtitles, auto crop, and silence removal, can be tested inside the program before you commit to anything. The catch is on export – paid features are blocked, and free exports are capped at 60 seconds with reduced quality and a watermark. Several templates are included in the full version at no extra charge, and the entire template and Blocks library is a separate Movavi Templates subscription. Move up to the full version whenever you're ready, and both the watermark and the export cap disappear.
Because it's desktop software with no web version or cloud syncing, Movavi Video Editor also works offline once it's installed – handy for editing between flights before you're back on stable Wi-Fi.
Quick specs
Movavi Video Editor
Create awesome videos easily

Frequently asked questions
How to make a vacation video from phone footage?
How to make a vacation video from phone footage?
Import your clips straight from your phone into the app, drop them into a template's Blocks in whatever order tells the story, then add subtitles and music before exporting as MP4. No separate transfer or format conversion needed first.
Can I use my own photos and clips in a travel video template?
Can I use my own photos and clips in a travel video template?
Yes – every Block in a template is built to take your own video, photos, or text. The pre-set transitions and music stay in place; only the content inside each Block changes.
What file format should I export my travel video in?
What file format should I export my travel video in?
MP4 is the recommended format for the widest playback and platform compatibility. Movavi Video Editor also exports to MOV, AVI, MKV, and WMV if you need a specific format for a device or client.
Is there a free version of Movavi Video Editor?
Is there a free version of Movavi Video Editor?
Yes. Movavi Video Editor Free lets you test every tool, including templates and auto subtitles, but restricts exports to 60-second clips with a watermark. The full version removes both limits.
Does Movavi Video Editor work on Mac?
Does Movavi Video Editor work on Mac?
Yes, on macOS 12.0 and higher, with native support for Apple M1 and newer chips. It also runs on Windows 10 and 11 (64-bit).

Have questions?
If you can’t find the answer to your question, please feel free to contact our Support Team.
Join us for discounts, editing tips, and content ideas


1.5M+ users already subscribed to our newsletter