Movavi Video Editor is an intuitive video editor with customizable video templates, one-click AI tools, and hundreds of drag-and-drop effects. Everything happens on a drag-and-drop timeline with instant hover previews, so none of the steps below assume you've edited before. Here’s how to make a wedding invitation video in a fast and simple way.

Wedding Invitation Video Templates: Customizable and Ready in Minutes
Use Movavi Video Editor!
NEW: Adjustable video templates for any vibe – made of Blocks
NEW: Blocks – pre-edited video segments you can customize
Fast and easy editing: cut, crop, adjust colors and speed
Auto subtitles, noise removal, hundreds of effects, and more
By clicking the download button, you're downloading a trial version of the program.*

Edited by
9,631
A wedding invitation video doesn't need to be complicated: a handful of photos, a line or two of text, and a song that means something to your family – sent instead of, or alongside, a paper invite. Movavi Video Editor takes those pieces and builds a finished clip around ready-made, editable wedding invitation video templates.
Movavi provides a multi-style library of customizable, pro-looking, modular templates for any kind of video. The templates do the stylistic work for you, so the finished clip looks great and on-trend on the first try even if you're a complete beginner.
How to make a wedding invitation video
Step 1. Install the wedding invitation maker
Download Movavi Video Editor for your PC or Mac and install the app following on-screen instructions.
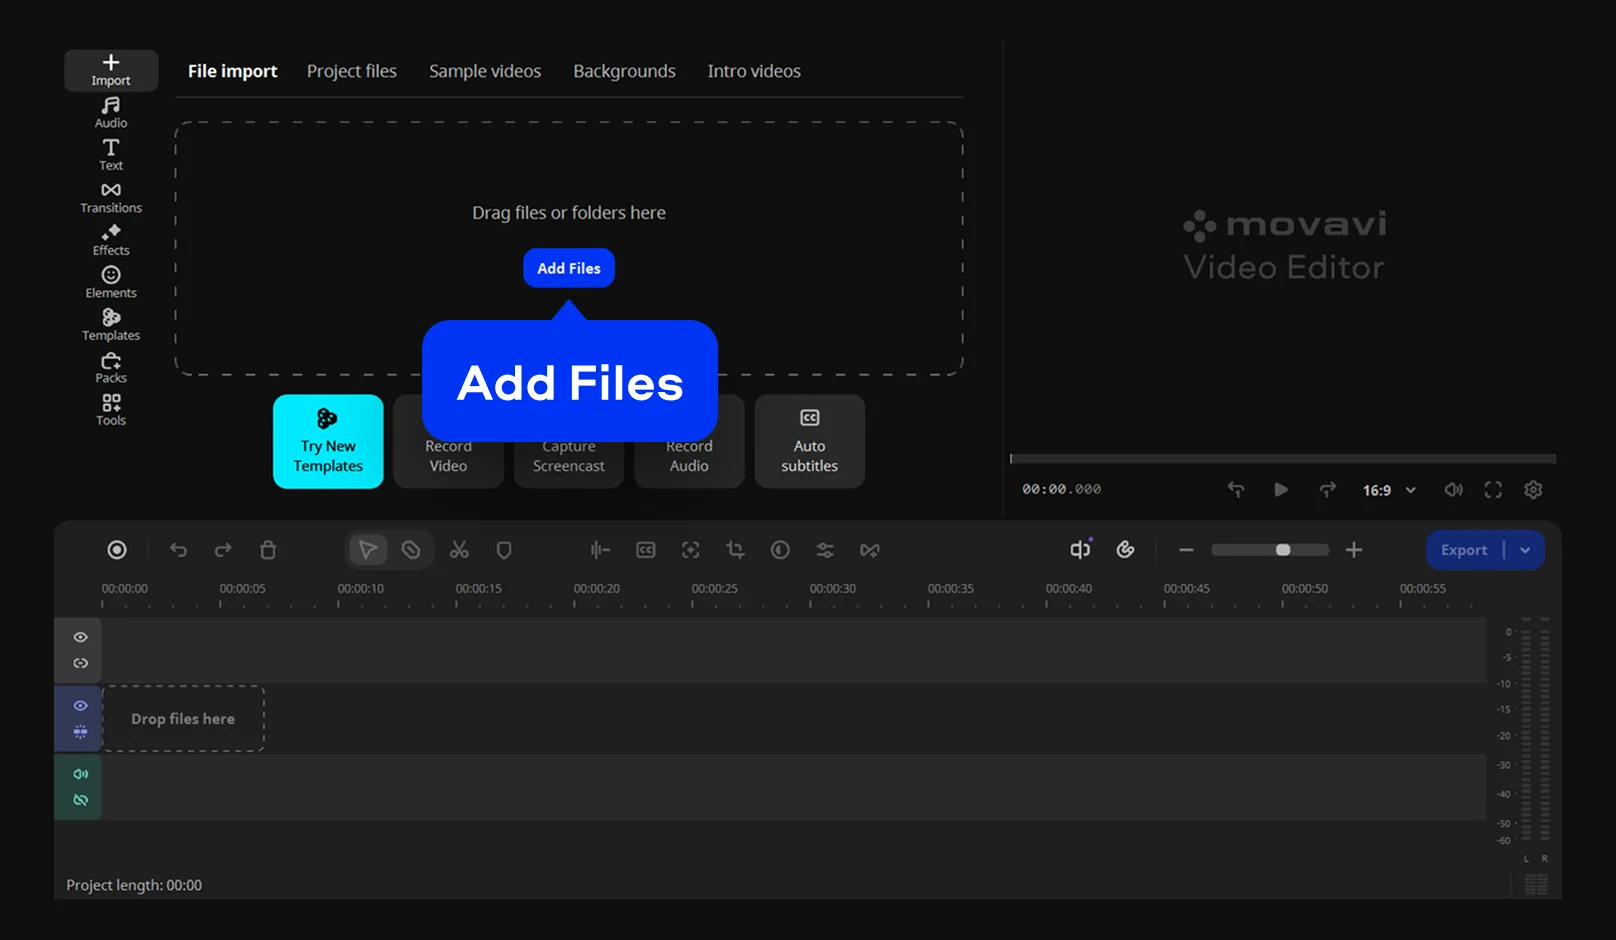
Step 2. Import your photos and clips
Upload all your files – engagement shoots, save-the-date footage, even the dog in a bow tie.
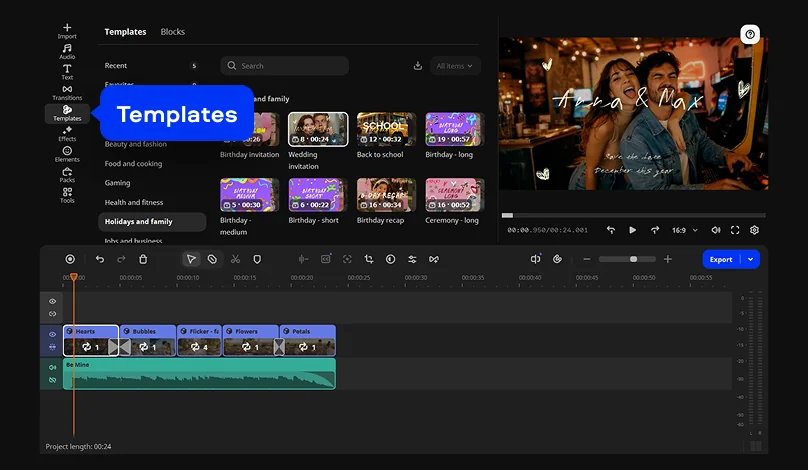
Step 3. Pick a video template
Open Templates and select a wedding invitation template. Movavi builds customizable templates from modular Blocks – an intro, a photo montage, a closing title card. Keep the template as-is, or swap, add, and reorder Blocks until it fits your story. Every template stays fully editable.
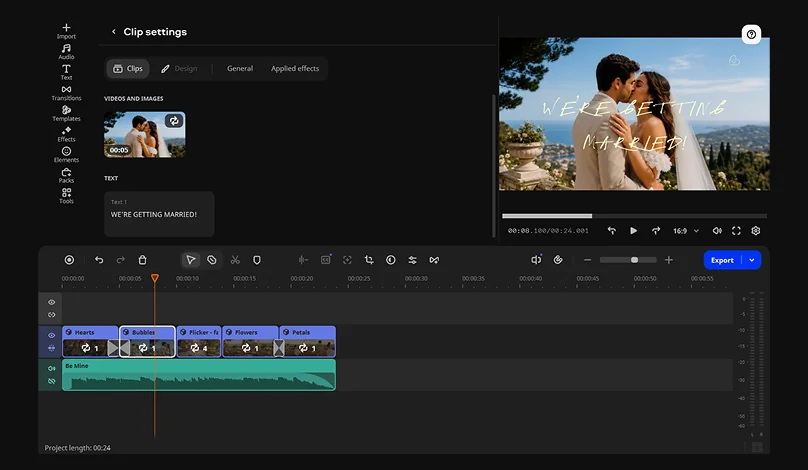
Step 4. Customize the Blocks
Work through each Block on the timeline: swap the placeholder for your own photo or video, reorder Blocks if your story runs differently, delete any that don't apply. Retype default text like "Save the Date" with the couple's names, change the font, or restyle the whole thing.
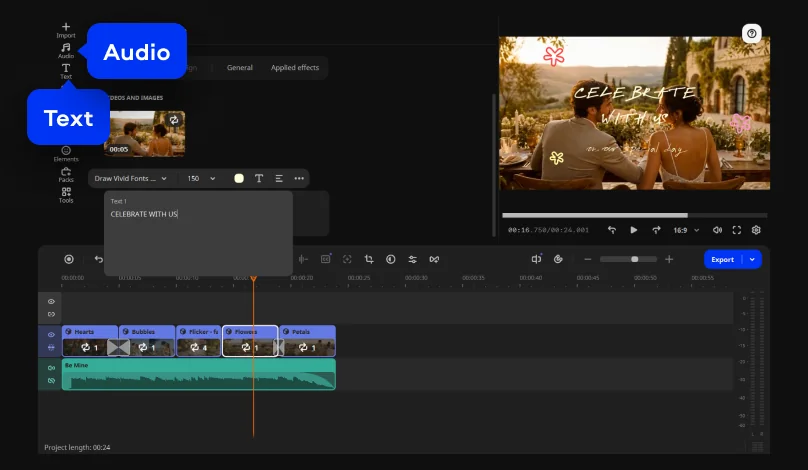
Step 5. Add music and titles
Edit Block's captions directly, or drop new titles anywhere on the timeline: names, date, venue, an RSVP link, or a caption on one photo. If part of the video has you speaking to the camera, the auto-caption tool turns that into on-screen text automatically.
Each template comes with a pre-chosen audio track. You can keep it or change to a different one. For example, pull a track from the built-in copyright-free library, or drop in your own song, then trim it to match the photos.
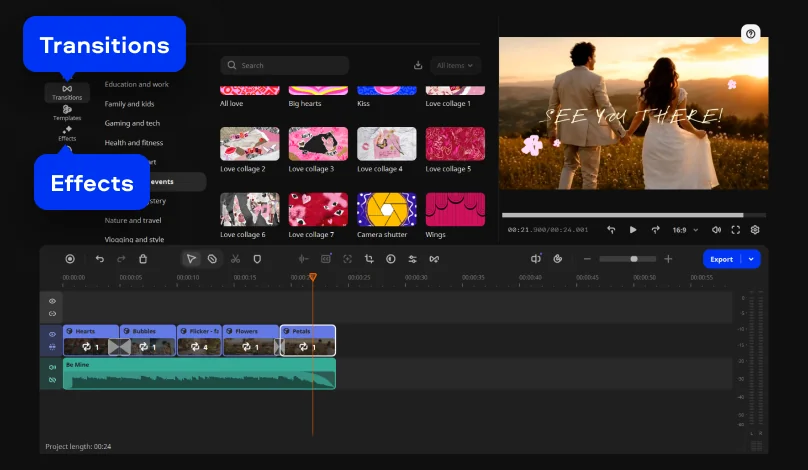
Step 6. Apply transitions and effects
Every template has transitions and effects already applied, but none of it is fixed. Swap a hard cut for a soft dissolve for something more romantic, or strip an effect that feels too busy.
Step 7. Export the finished video
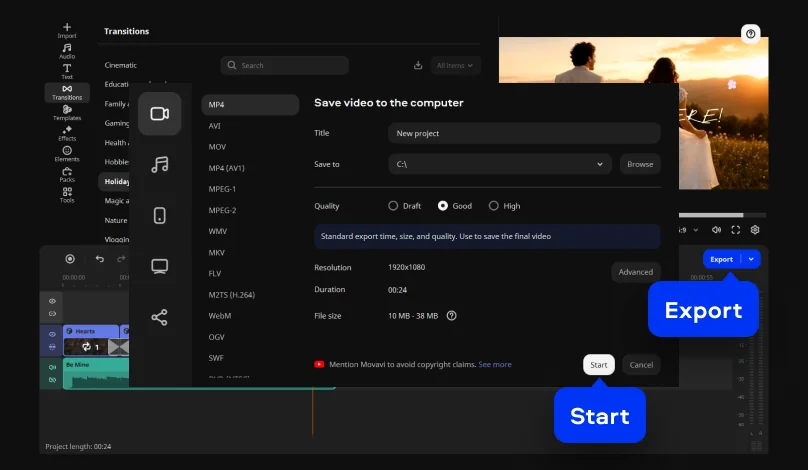
Click the Export button. For group chats, Instagram, or email, MP4 is the safest format choice, though the export settings offer other formats and resolutions too. Finally, hit the Start button.
Wedding video templates you can customize
Hundreds of built-in, drag-and-drop effects and templates ship with Movavi Video Editor across a range of styles, and an optional Movavi Effects subscription adds 10,000+ more effects plus 1,500+ music tracks across themes for a bigger library to draw from.
A romantic, classic template with soft transitions and elegant titles, for instance, suits a milestone announcement post, while something playful – a countdown Block, upbeat music – fits a save-the-date reel meant for your followers on social media. Both start from the same editable Block system, so you're rearranging existing pieces rather than starting from a blank timeline.
AI tools and extra content
Movavi Video Editor is a free download for Windows and Mac that works offline once installed, so editing doesn't depend on your connection.
The one-click AI tools handle the tedious parts of editing in a single click: auto subtitles at over 99% accuracy across 100+ languages, audio and video noise removal, silence removal, and auto-crop that keeps your subject centered when you reframe a horizontal clip for a vertical post. All of that happens automatically, so more of your time goes into picking better photos and getting the invite out the door.
Anyone who wants a bigger library can add an optional Movavi Effects subscription or a Movavi Templates subscription, which gives access to the full collection of templates and Blocks beyond what comes with the full version.
The software is used by 70M+ people in 190+ countries, with 25+ updates released a year, so the toolkit keeps growing.
Movavi Video Editor
Create awesome videos easily
*The free version of Movavi Video Editor may have the following restrictions depending on the build: watermark on exported clips, 60-second video or 1/2 audio length limit, and/or some advanced features unavailable when exporting videos.

Frequently asked questions
Do I need to be online to edit?
Do I need to be online to edit?
No. Editing happens entirely offline once the app is installed; a connection only matters for downloading the program and sharing the finished MP4.
Do I need editing experience?
Do I need editing experience?
No. The templates and drag-and-drop workflow don't assume prior experience, and a new Movavi Ideas tutorial lands every week for anyone who wants to go beyond the invite.
Can I use my own music or photos?
Can I use my own music or photos?
Yes. Bring in your own photo and video files, or your own song, alongside anything already in the built-in library.

Have questions?
If you can’t find the answer to your question, please feel free to contact our Support Team.
Join us for discounts, editing tips, and content ideas


1.5M+ users already subscribed to our newsletter