Step 1. Download and install the YouTube outro maker
Since Movavi Video Editor is desktop software for Windows and macOS, the installer comes first. Pick the version that matches your system and run it before anything else.

Use Movavi Video Editor!
NEW: Adjustable video templates for any vibe – made of Blocks
NEW: Blocks – pre-edited video segments you can customize
Fast and easy editing: cut, crop, adjust colors and speed
Auto subtitles, noise removal, hundreds of effects, and more
By clicking the download button, you're downloading a trial version of the program.*

Want an outro that points viewers to your next upload? Make it in Movavi Video Editor – an intuitive video editor with customizable video templates, one-click AI tools, and hundreds of drag-and-drop effects. And it's a desktop app built for a PC and Mac, not a browser tab.
This guide walks through how to make a YouTube outro that nudges people toward subscribing, whether you're closing a daily vlog, wrapping up a game review, or signing off a brand video for work.
Before getting into the step-by-step, there's a shortcut worth knowing: start from a template. Plenty of generic YouTube outro templates turn up in a search, but Movavi builds its own directly into the program. Movavi Video Templates is a multi-style library of customizable, pro-looking, modular templates for any kind of video. Each template is built from Blocks: short pre-edited parts like an intro, a countdown, a quick cut, or an animated collage, where you drop in your own videos, photos, and text. Grab an outro Block, swap in your channel name, and a professional sign-off is ready without ever touching a blank timeline – simple and fast by design.
Since Movavi Video Editor is desktop software for Windows and macOS, the installer comes first. Pick the version that matches your system and run it before anything else.
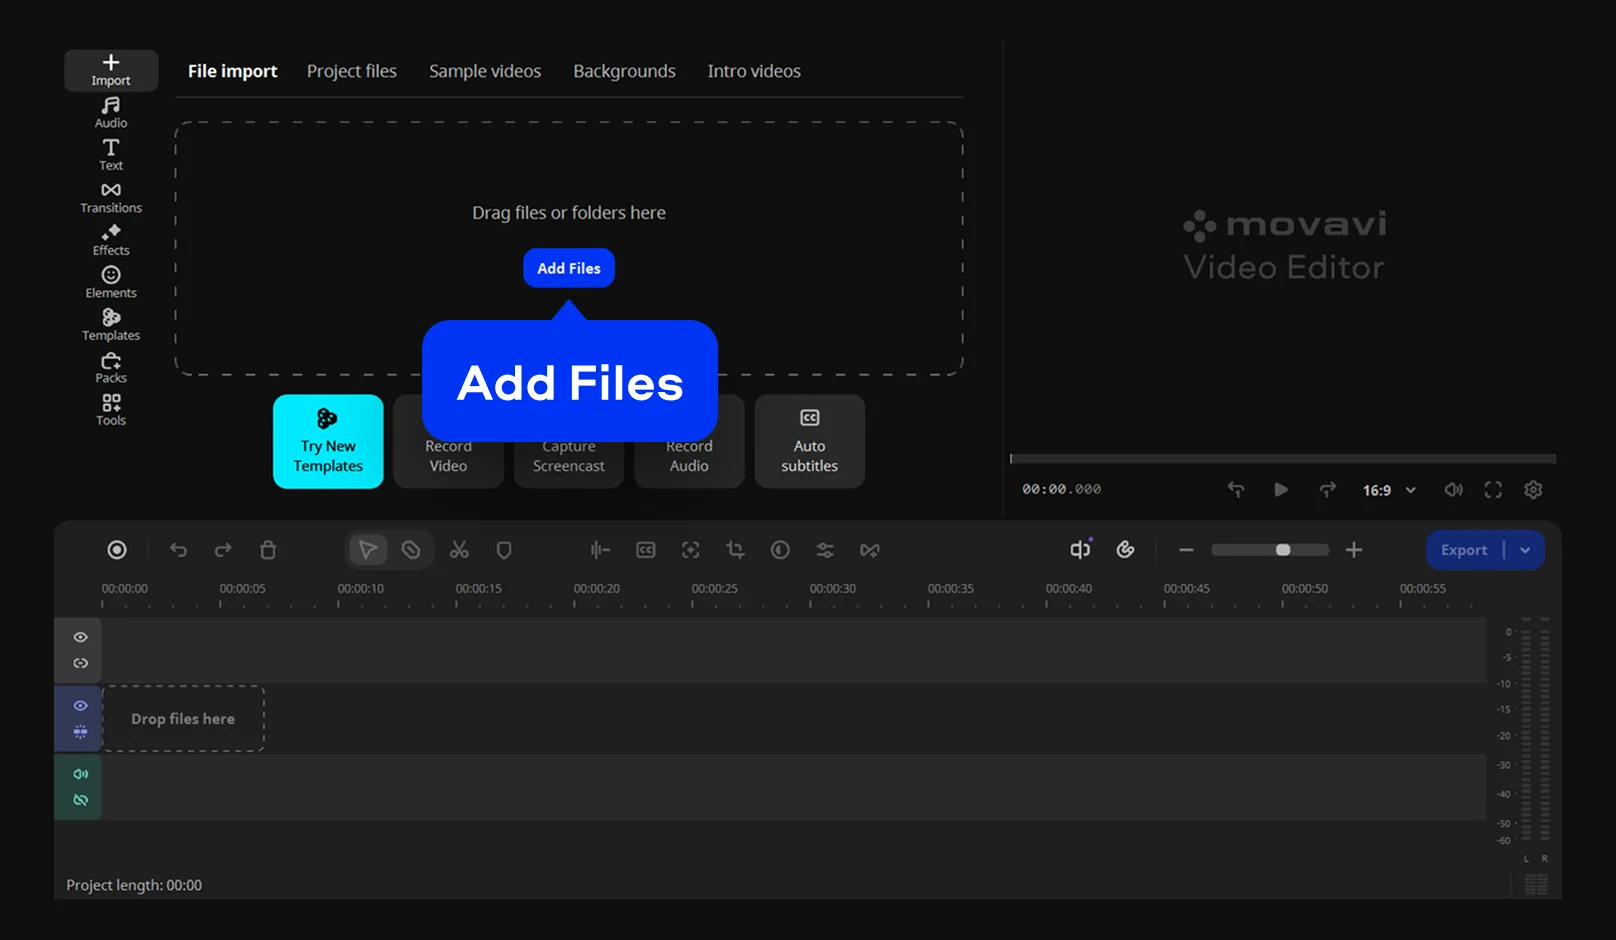
Open the program and click Add Files. Bring in the clip you'll use for the outro or your raw footage, if the outro is going to live inside a larger edit. Your own video, photo, or audio file works, and so does a clean background pulled from the built-in sample clips if all you need is a background behind your logo.
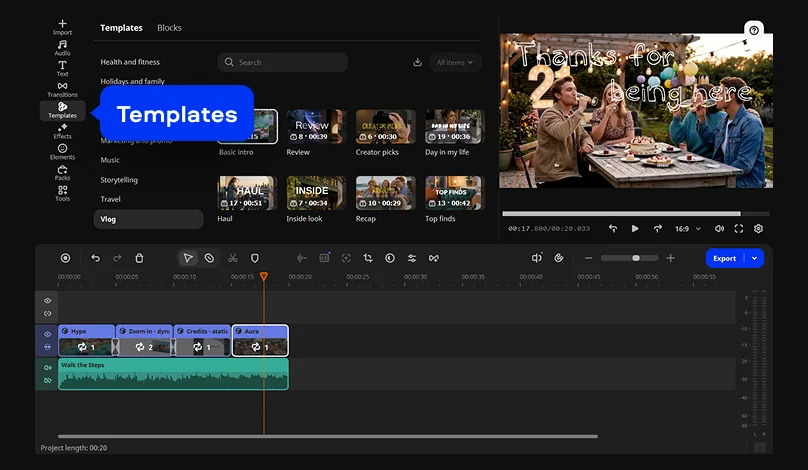
Open the Templates tab, pick a suitable one for outros, and drag it onto the Timeline right where your main content ends. Editable text and swappable media placeholders come built into every Block, so dropping your own clip or photo over the placeholder is a quick swap.
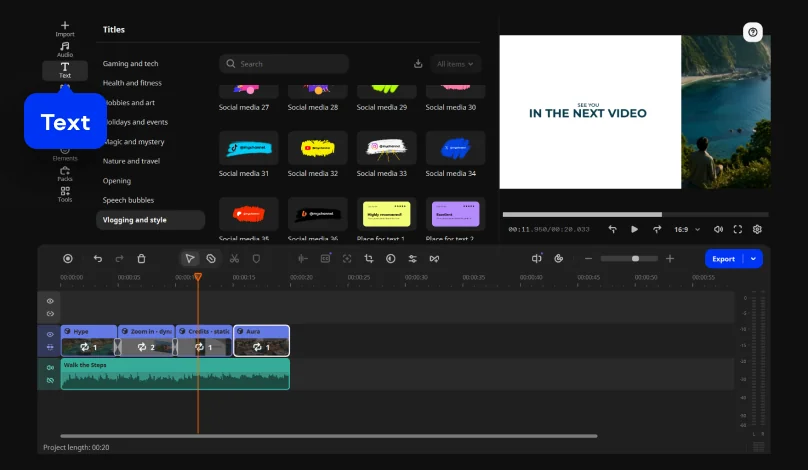
Update the text layer with a double-click and the Text tool, then add your channel name, a short call to action, or next Friday's upload date. Style presets ship with titles alongside custom fonts, colors, and outlines, and once you settle on something your channel will reuse weekly, you can save it as your own preset.
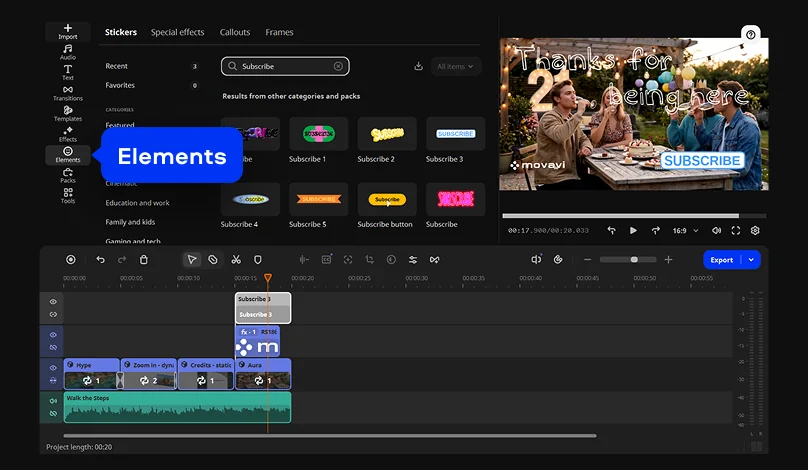
Drop in your channel logo. Use the Position tool to adjust its position, size, and opacity, and set up motion tracking if the shot behind it moves. On a daily vlog, this is also the moment for a "subscribe" sticker.
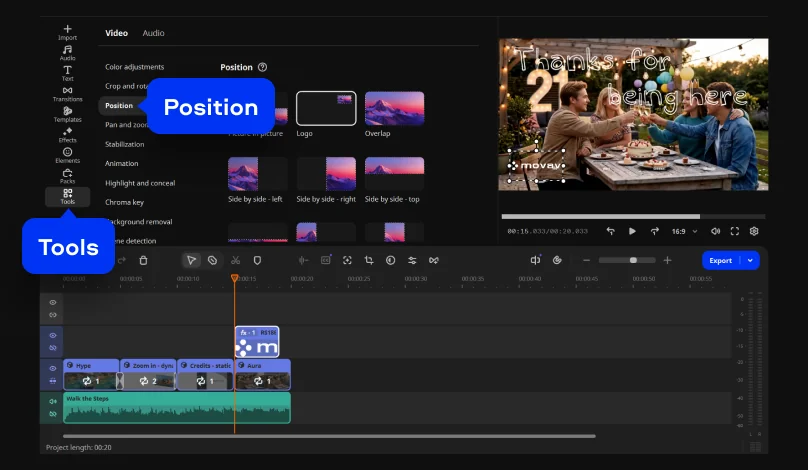
Pull one in from Elements and place it on the overlay track above your Block. A brand or business channel benefits here too: a logo that lands in the same spot every time is what makes an outro feel recognizable before it even finishes playing.
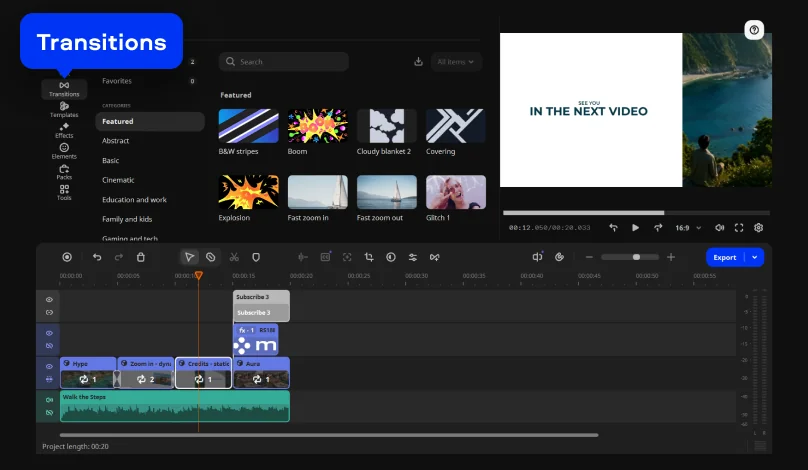
Go to the Transitions tab and pick one you like the most. A transition between your last clip and the outro Block keeps the cut from feeling abrupt – usually a simple fade is all it takes. Adjustable duration and a few fill options come with every transition, so softening the cut doesn't mean reworking anything else in the edit.
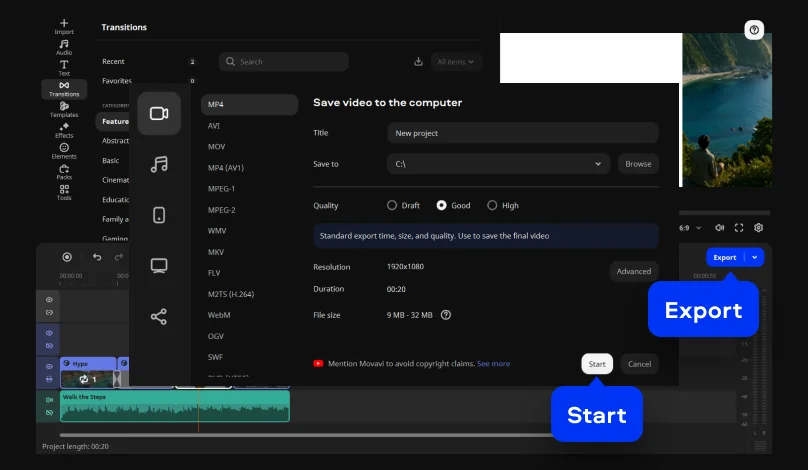
Export the finished video as an MP4 once the outro looks right or skip straight to the direct upload option and send the file to YouTube with its title, description, and tags already in place.
A static end card isn't the only option for an outro. Dust particles, light leaks, retro VHS looks, color filters, overlays, and LUTs all live in Movavi Video Editor's effects library, leaving plenty of room to match whatever your channel is known for. For example, a gaming channel closing out a highlight reel might land on something glitchy with neon edges; a cooking or travel vlog might fade out somewhere warmer, using a soft color-pop filter or a desaturated LUT for a more cinematic feel. Whatever creative style fits your channel, there's an effect built for it, and when ideas run short, Movavi Ideas posts a new, free editing trick every week on the Movavi site.
Save one outro Block the way you like it, and reusing it going forward is just a drag from your project library into each new upload. From here, an intro Block in the same style is the natural next move, giving your channel matching bookends from the first frame to the last.
*The free version of Movavi Video Editor may have the following restrictions depending on the build: watermark on exported clips, 60-second video or 1/2 audio length limit, and/or some advanced features unavailable when exporting videos.

No. Movavi Video Editor is built for beginners, and the layout, text placement, and pacing are already worked out inside an outro Block – all that's left is swapping in your own clip, photo, or logo.
MP4 is the safe default. Movavi Video Editor exports to it directly, and YouTube accepts it without extra conversion. Because Movavi Video Editor runs offline as desktop software, you can wrap up the export anywhere and upload once you're back online.
There’s no fixed rule for this. Just keep it short enough to avoid eating into watch time, and let it match the pace of the rest of your video. Trim the Block on the timeline until it sits right next to your main content.
Movavi Video Editor is a free download so you can try every tool in the app at no cost. The free edition has a 60-second length cap, limited codec support, low output quality, and a watermark, and using paid features restricts export. The full version removes the watermark and all export limits. Several templates come with the full version at no extra charge, and the Movavi Templates subscription unlocks the whole library.



1.5M+ users already subscribed to our newsletter