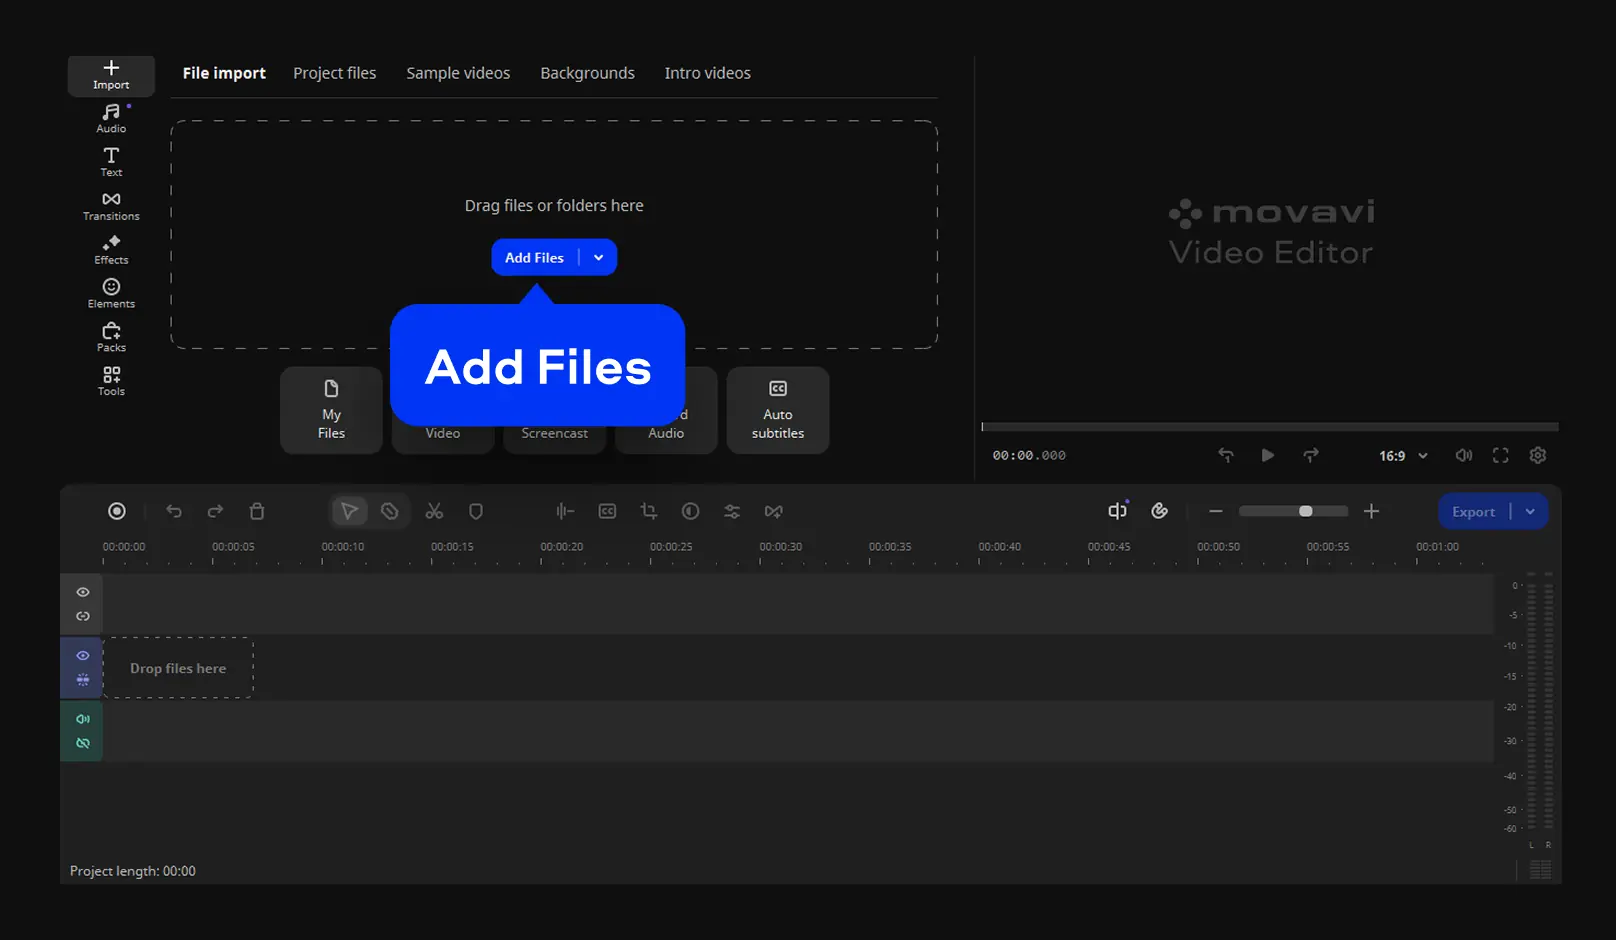
Step 1. Add a video file
Click Add Files and select your video. Then move the imported video onto the timeline.

Need a Video Compressor?
Movavi Video Editor can help!
Trim, cut, crop, and rotate videos
Add titles, stickers, and transitions
Apply visual effects
How to reduce video size
Nobody wants to delete a favorite movie just because of its file size. When a video file takes up too much space, you might consider compressing it.
If you like watching films in a good quality, you should probably go with lossless compression. Plus, for smartphones or tablets, you’ll need to convert your files to a format supported by that particular device.
The best way for downsizing large video files is using the right tool. More on that further down.
But first, here’s a few cases in which you might need to compress video files:
How to compress videos using Movavi Video Editor
With Movavi Video Editor, you won’t need a degree in video engineering to compress MP4s or other video files for web upload. To reduce the file size of your videos with Movavi Video Editor, follow the simple steps below.
Step 1. Add a video file
Click Add Files and select your video. Then move the imported video onto the timeline.
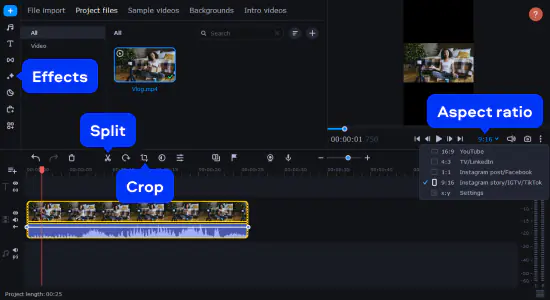
Step 2. Edit your video (optional)
If you want, you can edit your video before compressing it.
Simply cut and trim your footage and then add in your transitions and titles. From there, you can adjust coloration, apply filters, and make use of the platform’s stabilization feature to smooth out shaky camera work. To change the aspect ratio of your video, open the list with aspect ratios under the preview window and choose the one you need.
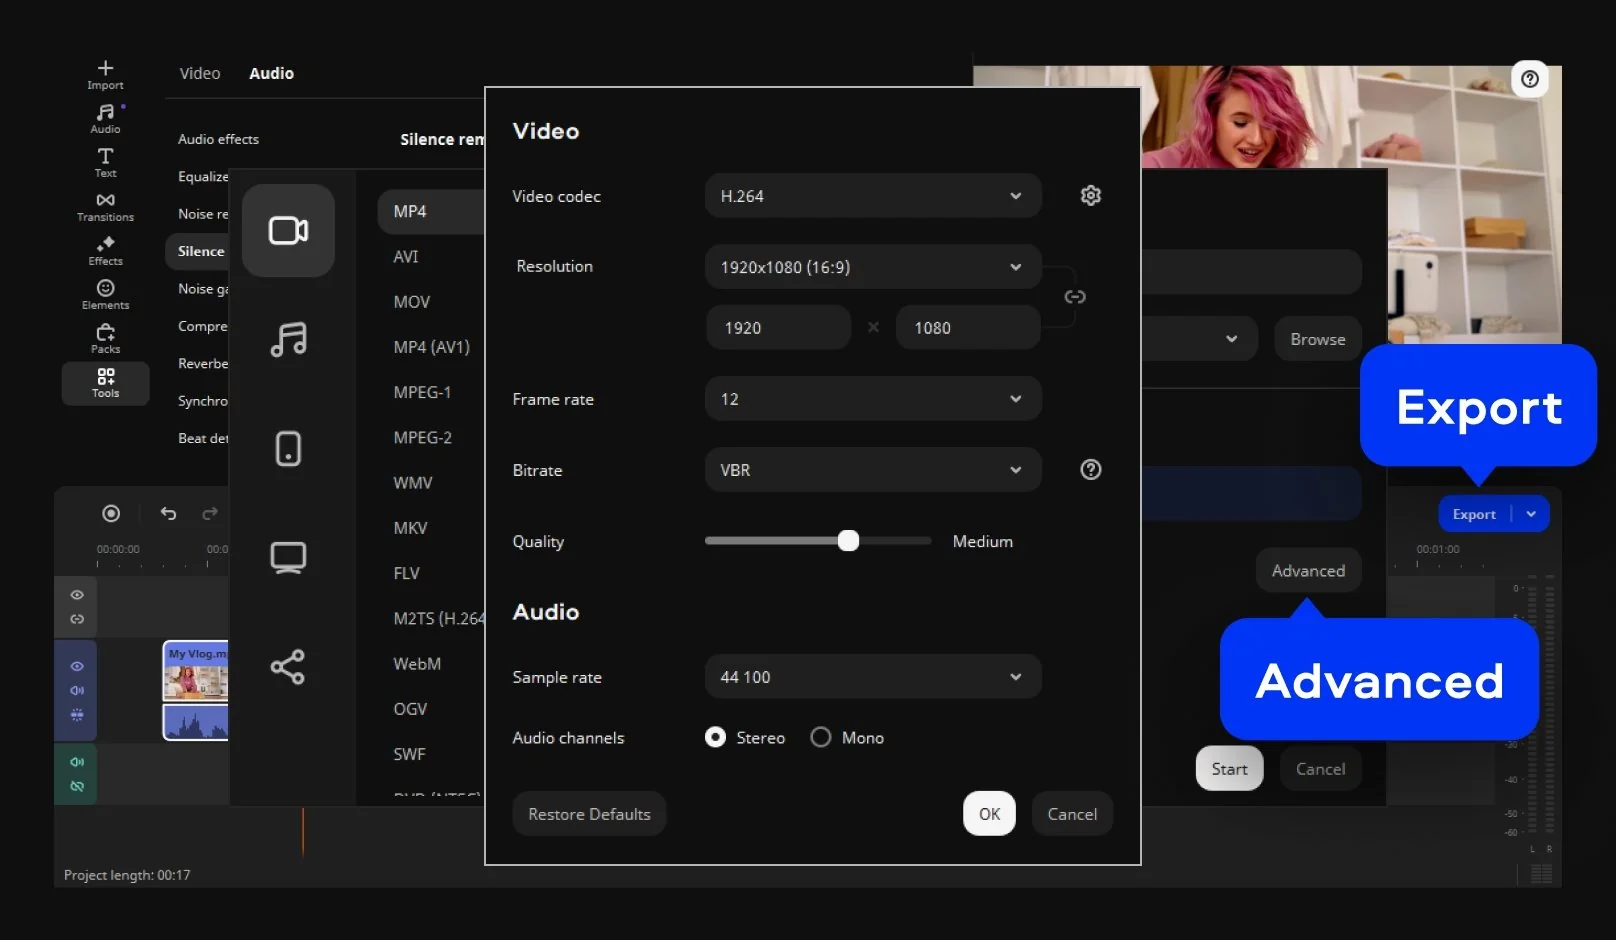
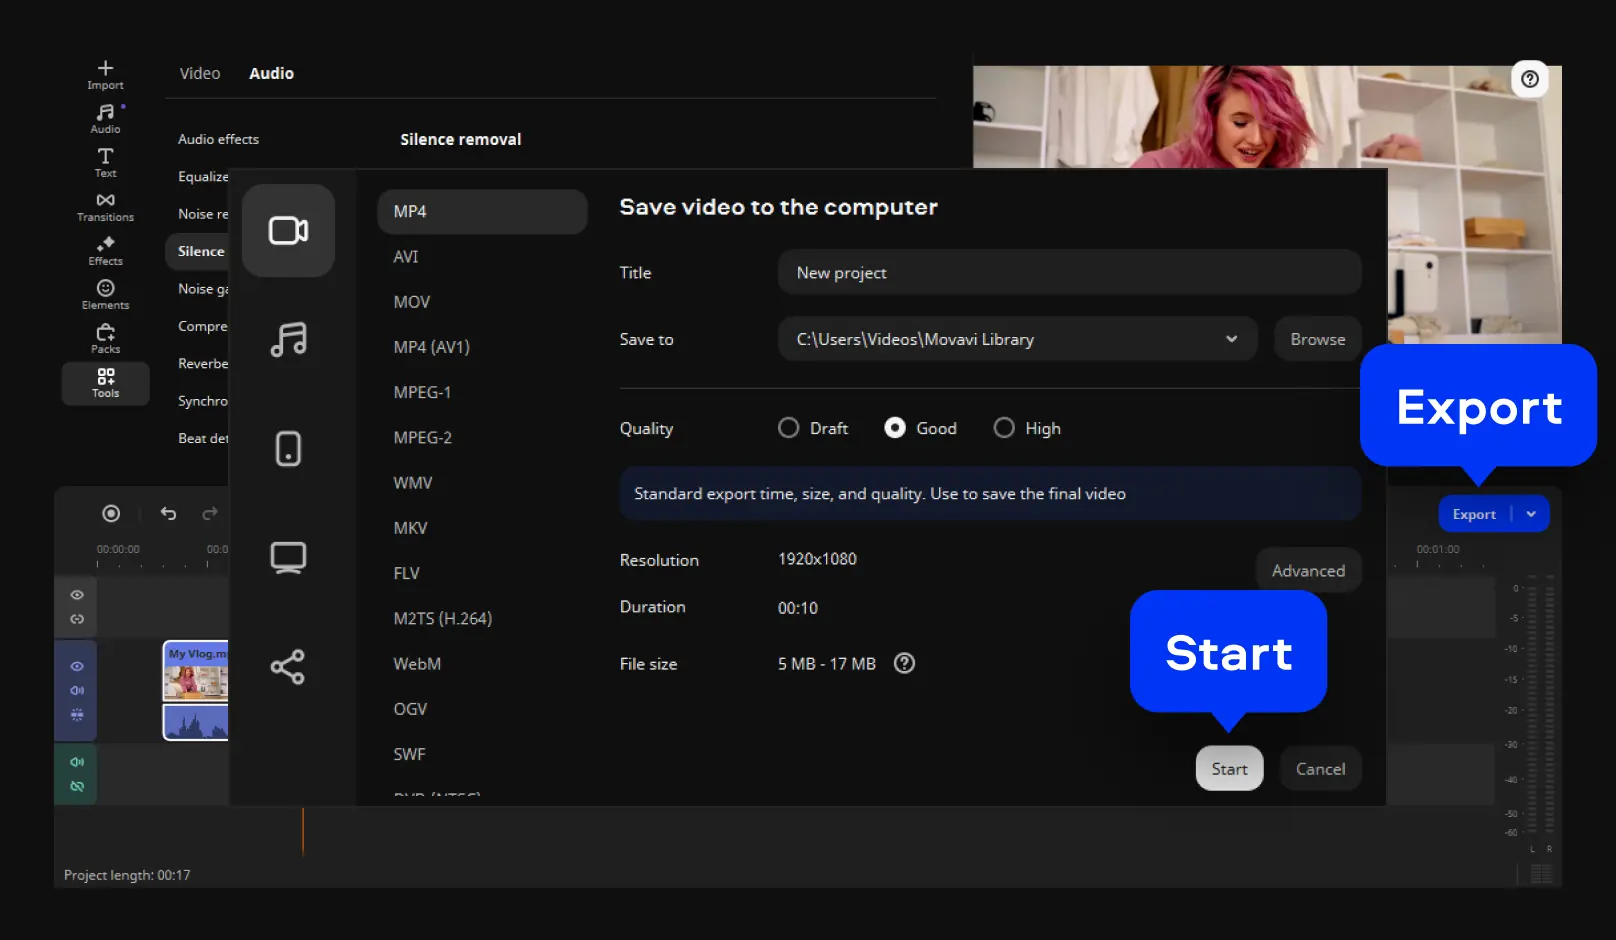
Step 3. Compress your video and save it
Click Export. In the window that appears, click Advanced. Here, you can compress your video by changing resolution, frame rate, or by lowering video quality. Press OK to apply changes. You will be returned to the previous window where you can see the expected file size.
Finally, click Start to save your compressed file. That’s it! You’ve learned how to shrink video file size using Movavi Video Editor.
*The free version of Movavi Video Editor may have the following restrictions depending on the build: watermark on exported clips, 60-second video or 1/2 audio length limit, and/or some advanced features unavailable when exporting videos.


1.5M+ users already subscribed to our newsletter