[Solved] How to Crop a Video in QuickTime

Try an alternative – Movavi Video Editor!

  • Trim, cut, crop, and rotate videos

  • Add titles, stickers, and transitions

  • Apply visual effects

By clicking the download button, you're downloading a free version of the program.*

Edited by Ben Jacklin
5,243

When learning how to crop a video on a Mac, you might instinctively turn to QuickTime, the media player that comes pre-installed in all Mac products. While the basic QuickTime Player only supports trimming, not cropping, a workaround lets you crop a video in QuickTime Pro.

How to crop a video in QuickTime

QuickTime Player is a free, lightweight media player that comes pre-installed on Mac. It’s perhaps best known as the default app when playing multimedia content on macOS devices. It supports many major file formats, including MP4, and offers the option of exporting a file in different qualities.

What it doesn’t offer is a crop tool. Historically, Apple offered a paid version of QuickTime called QuickTime Pro. This application cost around $30 and was essentially an upgraded version of QuickTime that was pre-installed on all Mac devices. Users with QuickTime Pro could crop videos, though the process required creating a custom mask in an image editor and then applying that mask to the video to crop it. However, Apple no longer supports QuickTime Pro.

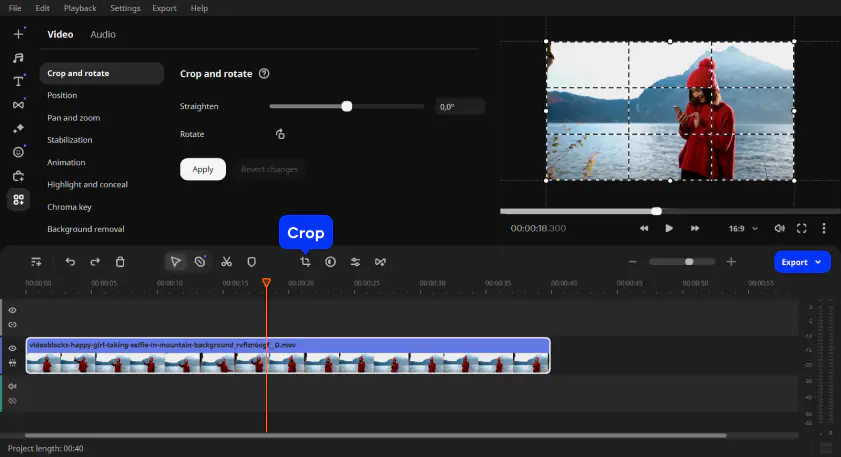
As the use of a custom mask implies, cropping a video involves a reduction in what is included in the frame. The length of the video is unaffected by cropping. It’s the size of the frame of the video that is being changed. As an example, have you ever noticed how some videos have black bars on the top and bottom? That’s because the videos were either shot at or cropped to an aspect ratio that is wider than the screen you are watching them on. If you want your video footage to appear cinematic, you can crop the top and bottom out to create the same effect.

What if you’re happy with the framing of your video but want to crop the length? That is called trimming. Trimming a video does not affect the size of the frame. It involves cutting out unwanted parts of the footage at the beginning or the end. It’s easy to confuse this with cropping, as both usually involve cutting out unwanted content from your video. For example, you might have started recording your video before the action actually began or stopped recording a few seconds after the action ended. You don’t want your viewers to sit through seconds of preparation before the video actually starts. Fortunately, you can use QuickTime Player to trim out any unwanted sections of your video. The process is simple:

1. Open QuickTime Player. It should already be installed on your Mac. If it isn’t, you can download it from the Apple Mac App Store. 

2. Import your video into QuickTime by clicking File in the top menu header, then selecting Open. Alternatively, you can locate the video in Finder and double-click to open it. QuickTime is usually the default application, meaning the video will automatically open in QuickTime. If QuickTime is not the default application, you can right-click the video file, select Open with, then choose QuickTime.

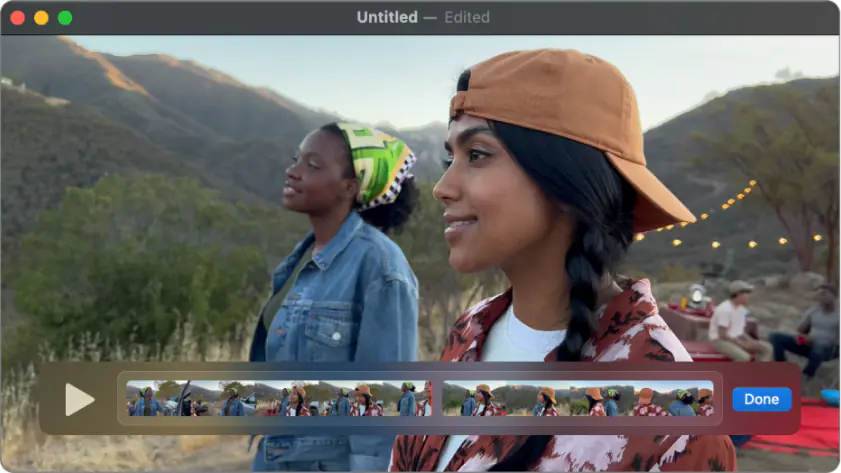
3. With your video successfully opened in QuickTime, it’s time to get trimming. Click Edit in the top menu header, then select Trim. This will open the trimming tool.

4. The trimming tool is actually a yellow bar that runs along the bottom of the application window. Everything included within the yellow lines is content that will be kept. Anything outside will be trimmed. So, for example, if you wanted to remove the first few seconds of a video, you would drag the left-hand side of the trimming bar to the right until you reached the point at which you want your video to begin.

5. Adjust the trimming bar to your preferences. When you’re satisfied, click the Trim option to confirm your changes. 

6. Your video will now be trimmed! Feel free to play it back to double-check you’re happy. Once you are, it’s time to save and share. Click File and Save to save your video. Alternatively, click Share to immediately send it to a friend or publish it to your audience.

Simple! Trimming is a great tool to know. However, it is fundamentally different from cropping. If it’s cropping you want, perhaps consider an alternative program like Movavi Video Editor. Or try the following workaround to crop screen-recorded content.

How to make a cropped screen recording

One of the best features of QuickTime Player is the ability to make a screen recording. QuickTime can record the content on your screen, including internal and external audio. This is excellent for making tutorials, creating gaming videos, and saving calls with a client or loved one. 

Many of those use-cases require recording the entire screen. QuickTime can do this. However, what if you want to record only part of your screen? You may have multiple windows open, one with sensitive information. Or maybe you don’t want to include your application toolbar in your recording. 

Fortunately, QuickTime lets you record only a specific part of your screen. By cropping the recording window, you can record a cropped part of your screen without having to do any actual cropping in post. In other words, a few seconds of preparation can save you time in editing. Perfect! Like trimming, the process is very straightforward.

1. Open QuickTime Player. 

2. Click File in the top menu header, then select New Screen Recording. You’ll be presented with a toolbar of options.

3. This toolbar is technically called Screenshot. Accordingly, the first three options are all for different types of screenshots. These will only take a picture of your screen (or part of your screen), not an actual recording. You want the fourth and fifth options. These are distinguished by the presence of a circular recording symbol in the icon, located at the bottom-right-hand corner of the rectangular icon.

4. The first of these two recording options is for the entire screen. The lines of the rectangular icon are solid. The second option, called Record Selected Portion, is for recording a portion of your screen. This is the icon you want. It’s a rectangle composed of dashed lines with the circular recording symbol in the bottom-right-hand corner.

5. Select the Record Selected Portion option. This will create a frame, which will be overlaid on your screen. Adjust the boundaries of this frame to select which part of your screen you wish to record. Everything within the boundaries of the frame will be recorded. Everything outside of the boundaries will not be included in the recording.

6. With your frame determined, you might now want to adjust some other recording options. These are located under the Options dropdown window in the toolbar. Some good options to consider include the following:

a. Choose where to save your screen recording. You can select the exact location you want your new recording to be saved. 

b. Include various information in your screen recording. For example, you can make your mouse invisible if you don’t want it to appear in the final recording. Alternatively, you can highlight every time you click, which is an excellent option for making tutorials.

7. When you’re ready to start, click Record.

8. Make your video!

9. When you’re done, click the Stop Recording button. This will be located on the right-hand side of the top menu header. It looks like a stop button. Your video will automatically be saved to the location you specified. And it will automatically be cropped!

QuickTime alternative: Crop your videos with Movavi Video Editor

Cropping is just one of many editing tools available in Movavi Video Editor. You’ll also have access to thousands of effects, multiple blend modes, a streamlined timeline, and professional-level color correction. All these features give you precise control over every video clip you edit, letting you unleash your creativity.

AI tools can help you take that creativity to the next level. For years, motion tracking, background removal, and noise removal were some of the most challenging, labor-intensive edits. Now, Movavi Video Editor’s built-in AI can do all these for you.

Cropping in Movavi Video Editor is so simple that no AI is needed. Just follow these steps:

1. Download and install the program

Download and install Movavi Video Editor (if you haven’t already). Remember, it’s free to download.

2. Add your files

Add your video by clicking the Add Files button. Select the video(s) you want to crop. Your video files will first be imported into the program. Once they are loaded, drag them onto your timeline.

3. Crop your video

Now it’s time to get cropping. Select the Crop tool from the toolbar located above the timeline. Activating the Crop tool will generate a mesh over your video. Drag the corners until you have selected the area of your video that you wish to keep. 

When you’re satisfied, click Apply in the crop window to confirm changes. This will cut your video to the dimensions you specified.

4. Export the video

If that’s all you wanted to do, go ahead and save your video by exporting it. Hit the Export button, specify the export settings, and click Start.

Summary

Learning how to crop a QuickTime video required some time and patience, but you did it. If you love editing in QuickTime, adding this tool to your toolbelt will level up your editing game. There’s no single right way to crop videos, however, so feel free to choose a different program if you think it’ll suit your needs better.

Movavi Video Editor

Сreate awesome videos easily

*The free version of Movavi Video Editor may have the following restrictions depending on the build: watermark on exported clips, 60-second video or 1/2 audio length limit, and/or some advanced features unavailable when exporting videos.

Movavi Video Editor
Have questions?

Have questions?

If you can’t find the answer to your question, please feel free to contact our Support Team.

Join for how-to guides, speсial offers, and app tips!