
Step 1. Get the photo editing software
Click the button below, wait for the installation file to download, then launch it and go through the installation process. At the end, the app will launch automatically.
To unblur your photos, try Movavi Photo Editor!
Enhance your pictures with AI tools
Remove unwanted objects and swap backgrounds
Restore and colorize old photos
Taking a blurry picture is a flop that can happen to anyone. You get too excited to make a shot, don’t notice that the settings are off or your hands get shaky – and the photo you wanted so badly comes out fuzzy. How to make a blurry picture clear in post-editing? Let’s find out!
Quick summary
Movavi Photo Editor
Best for simple interface and AI-enhanced editing
Fotor
Best online option
BeFunky
Best for iPhone and Android photography

When selecting products to include in our reviews, we research both demand and popularity.
All the products in this article have been tested by Movavi Content Team.
We compare the key characteristics of every product, including photo scaling and cropping, object and background removal, image restoration, and other significant features.
We study user reviews from popular review platforms and make use of this information when writing our product reviews.
We collect feedback from our users and analyze their opinions of Movavi software as well as products from other companies.
To make a blurry photo clear, try Movavi Photo Editor. With it, you can sharpen the image and make other necessary edits: adjust the lighting, remove the noise, or simply apply the auto correct to make the photo more pleasing. To learn how to make a blurry picture clearer, read the guide below.
Click the button below, wait for the installation file to download, then launch it and go through the installation process. At the end, the app will launch automatically.
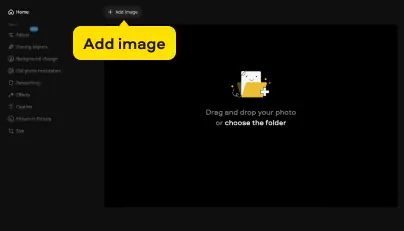
Drag and drop the photo into the program’s window. Alternatively, you can click Add image and select the file in the window that appears.
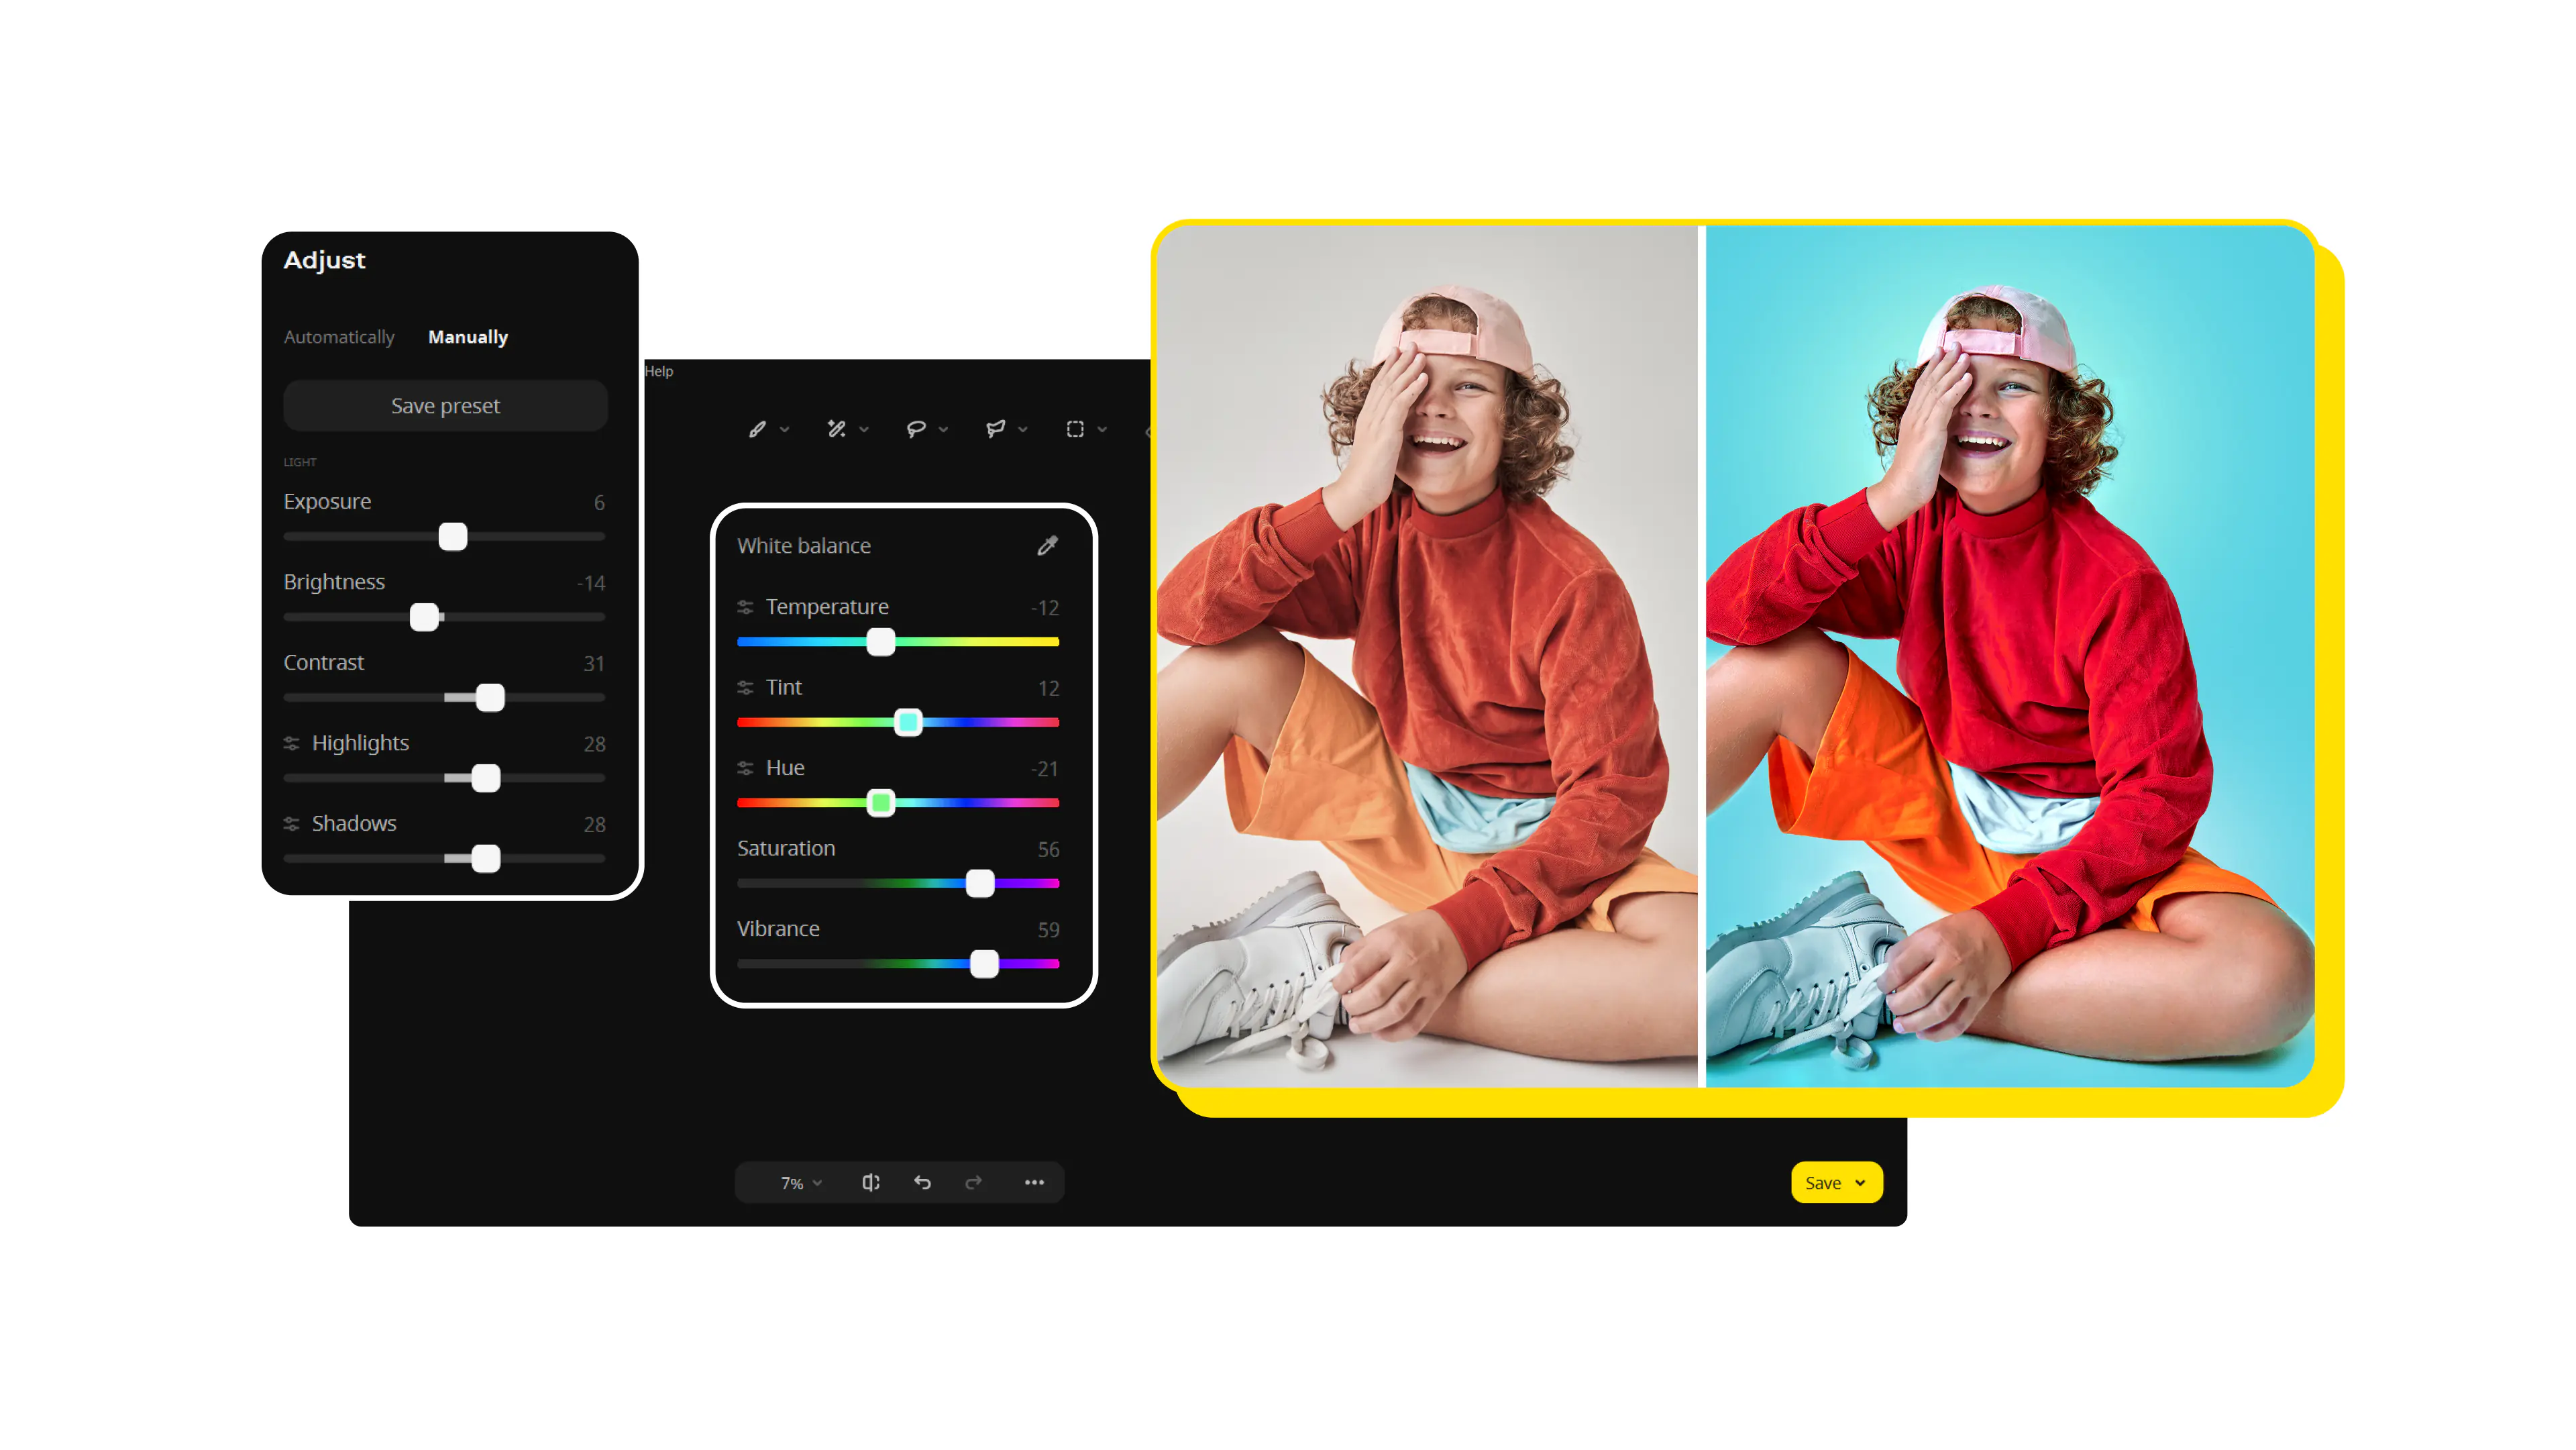
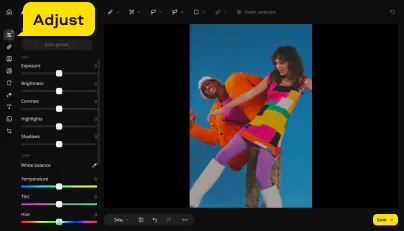
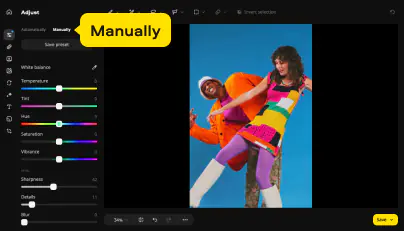
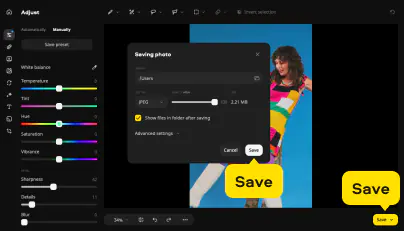
Click Adjust, then choose the Manually tab. Below, find the Detail section and move the Sharpness slider to the left. Make a note: if you move it too far left, the image may look choppy. Adjust the setting to make sure everything looks smooth.
You can also make other manual adjustments like white balance, exposure, and saturation.
When you’re satisfied with the result, click the Save button. In the pop-up window, choose the file saving location, the format. You can also edit the metadata. Finally, click Save.
The blurriness is especially noticeable when text. Blurry words may be hard to read, and with documents the readability is highly important. Movavi Photo Editor has a solution for this. So, here’s how you clear up a picture with blurry text.
Download the program’s file, launch it, and follow the on-screen instructions to set the app. The photo editor will be launched automatically.
Click Add image, locate the file on your computer, and confirm your choice. Or just drop the picture into the program window.
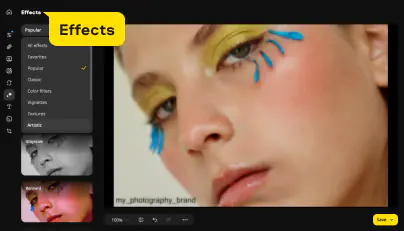
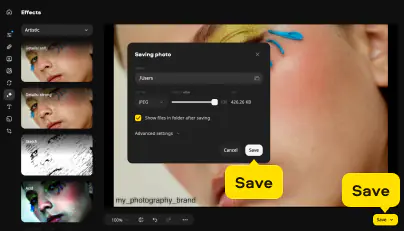
Go to the Effects tab, click the drop-down list, select Artistic, and choose the effect named Details: strong. By moving the slides right you can increase the readability of the blurred text. Don’t forget to click Apply when you’re done.
Click the Save button at the bottom-right corner. Select the location for the final file and choose the desired format. When all the settings are done, click Save.
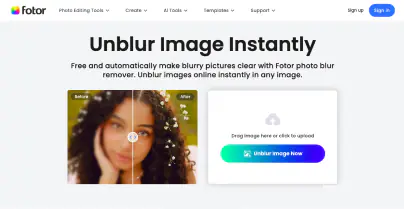
Have some pics that turned out a bit blurry and want to make them crystal clear? No worries! In this guide, I'll show you how to use Fotor online to turn those blurry pictures into sharp, stunning images with just a few clicks. Let's get started!
Fire up your web browser and head to the Fotor website. You can find it by typing "Fotor online" in your search engine or simply click the link below.
If you already have a Fotor account, log in. If not, don't sweat it – you can sign up for free in a jiffy using your email, Facebook, or Google account.
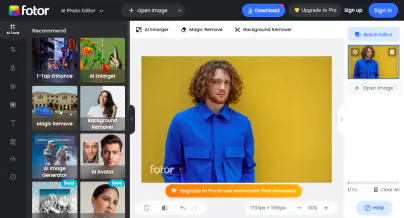
Once you're in, click the Unblur Image Now button, usually found on the homepage. Click on it, and then choose Open to upload your blurry pic from your computer. Fotor will work its magic and open your image in the editor.
You don’t really need to do anything, as the tool will clear a blurry picture automatically.
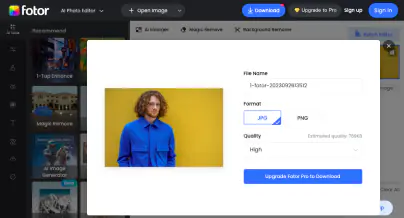
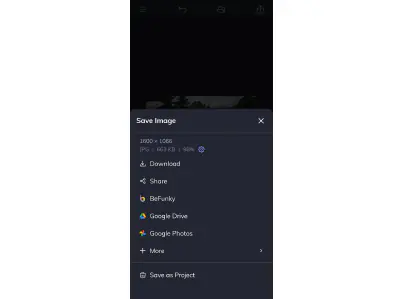
Click Download to save your picture. Voila! Now you know how to make a picture less blurry.
That's it! Now you can turn blurry pictures into clear, stunning images using Fotor online. Whether it's for social media, personal projects, or just reliving your favorite memories, your pics will never look blurry again.
Got some blurry photos that need a rescue mission? No worries! This step-by-step guide will show you how to use Adobe® Photoshop® to make a photo less blurry. Whether it's a cherished memory or an important shot, we'll help you bring it back into focus.
If you don't already have Adobe® Photoshop® installed, you'll need to get it. You can download a free trial from Adobe's official website or subscribe to Adobe Creative Cloud for access.
Launch Adobe® Photoshop® and click File in the top menu. Select Open and browse your computer to find the blurry photo you want to clarify. Click Open to load the image into Photoshop®.
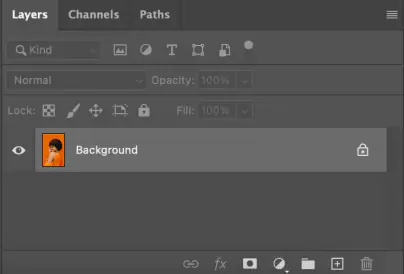
In the Layers panel (usually on the right side), right-click on the background layer and choose Duplicate Layer. This creates a copy of your photo, so you can work on it without altering the original.
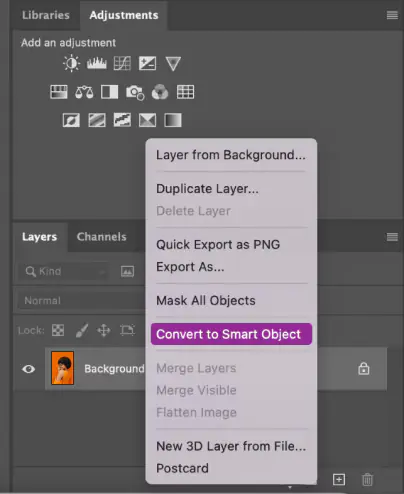
Right-click on your Background layer and select Convert to Smart Object.
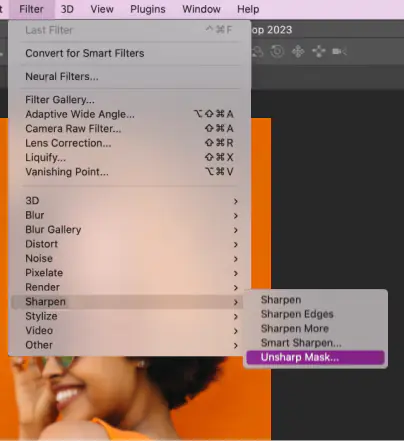
Go to Filter, then Sharpen, and select Unsharpen Mask.
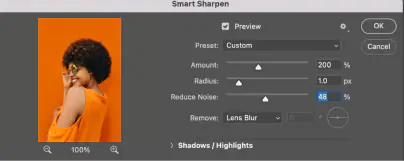
Before clicking OK, you can use the preview box to see how the changes affect your photo. Zoom in to check for any unwanted artifacts or excessive noise. Adjust the settings as needed until you're satisfied with the result.
Once you're happy with the clarity, you can either merge the duplicated layer with the original by selecting Layer > Flatten Image, or you can save the clarified image separately by going to File > Save As.
Choose your desired file format and location to save your newly clarified photo. Click Save, and you're done!
Congratulations! You've just learned how to make a photo clearer using Adobe® Photoshop®. With a little patience and the right settings, you can breathe new life into your blurry images and make them look crisp and sharp.
Is there a way to make a picture more clear right on your iOS or Android device? Sure, there is! This guide will walk you through the steps to transform a blurry image into a sharp masterpiece using the BeFunky app. Get ready to rescue your photos from blurriness!
If you haven't already, head to the App Store on your iOS device and download the BeFunky Photo Editor & Collage Maker app. For Android, go to Google Play. It's free to download and use, and it's a lifesaver if you want to make a blurry image clear on mobile.
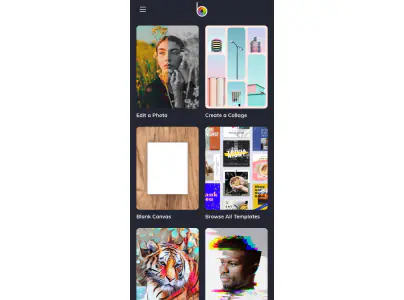
Tap on the BeFunky app icon to open it up. You'll be greeted with a welcoming screen that invites you to start editing.
Tap the Edit a Photo option to access your device's photo gallery. Choose the blurry image you want to make clear, and it will open in the BeFunky editor.
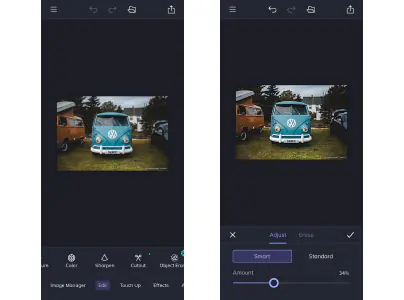
At the bottom of the screen, you'll see a menu with various editing options. Swipe through until you find the Sharpen tool, which looks like a magic wand. Tap on it.
A slider will appear, allowing you to control the strength of the sharpening effect. Slide it to the right to increase the sharpness until your image looks clear and sharp, but be careful not to overdo it.
To see the difference you've made, tap and hold your finger on the photo. This action will show you the original blurry image. Release your finger to see the clear, sharpened version. This feature helps you fine-tune the effect.
Once you're satisfied with the result, tap the checkmark or Apply button to confirm the changes. Then, tap the Save icon to save your clear image to your device's photo gallery.
You can now share your newly clear image on social media, send it to friends, or continue editing with other BeFunky tools if desired.
That's it! You've successfully made your blurry image clear on your iOS device using BeFunky. It's a quick and easy way to enhance your photos and bring out their full potential. Say goodbye to blurry pics and hello to sharp, stunning images!
Blur in photos can be a real bummer, but not all blurs are the same. Some types of blur can be fixed with editing tools and techniques, while others are just too stubborn to clear up. In this guide, we'll break down what types of blur on photos can and cannot be fixed, so you know when to reach for your editing magic and when to accept the blur as a part of the photo's character.
While many types of blur can be improved using various editing tools and techniques, some blurs are simply beyond repair due to the loss of crucial image information or extreme distortion. Understanding the nature of the blur in your photos is the first step in determining whether you can successfully make a photo more clear or if you need to embrace it as part of the image's character.
Ever snapped a photo and wondered why it came out all blurry? Blurriness can be a real photo-ruiner, but don't worry, it happens to the best of us. Let's dive into some common mistakes that cause blurriness in photos, so you can avoid them and capture crystal-clear shots.
By understanding these common causes of blurriness in photos, you can take steps to avoid them and increase your chances of capturing clear and sharp images. So go out there, snap away, and remember, practice makes perfect!
In conclusion, turning a blurry picture into a crystal-clear masterpiece is within your grasp! We've covered various methods, from using Movavi Photo Editor, Fotor, Adobe® Photoshop®, and BeFunky, to understanding which types of blur can be fixed and the common causes of blur in photos.
Remember, not all blurs are removable, but with the right tools and techniques, you can work wonders. If you're itching to get started on clarifying your pictures, why not give Movavi Photo Editor a shot? It's a fantastic option that can make your blurry images look sharp and stunning. So, don't hesitate – go ahead and bring your photos back into focus!
*The trial version of Movavi Photo Editor has the following restrictions: you can save up to 10 images with added watermark, screenshots are disabled.
To fix a blurry picture, try Movavi Photo Editor:
Yes, light blurriness on pictures can be fixed. However, if the image is severely damaged, it may be beyond repair. For starters, try Movavi Photo Editor. It’s very friendly to newcomers and can fix a blurry picture in no time.
Fotor offers an easy way to enhance your images, ensuring they're sharp and stunning for various purposes, from social media to personal projects. Follow these simple steps: visit the Fotor website, sign up or log in, upload your blurry picture, select the Sharpen tool, adjust the sharpening strength, apply and save your changes, then download your clear picture.
If you’re an iPhone user, try BeFunky to unblur your pics. Here’s how you use it:
Yes, light blurriness, for example if there’s slight motion blur or the image is a bit out of focus, can often be fixed. For beginners, consider using Movavi Photo Editor, which is user-friendly and effective at clearing up mild blurs.


1.5M+ users already subscribed to our newsletter