How To Create Animated Videos: Best Tips [2024 Guide]

Try Movavi Video Editor for editing your clips!

  • Trim, cut, crop, and rotate videos

  • Add titles, stickers, and transitions

  • Apply visual effects

By clicking the download button, you're downloading a free version of the program.*

Edited by Ben Jacklin
5,243

Animations are excellent ways to tell compelling stories. They offer unique creative possibilities, giving you the space to let your creativity run wild. And thanks to modern editing technology, learning how to make an animated video is far easier than you might think!

How to make an animated video

Ever since humans learned how to draw, we’ve been animating. For decades, some of the earliest cave paintings baffled researchers. Animals had extra pairs of limbs and were painted over each other, all for no discernible reason. Were our ancestors just poor artists? Quite the opposite. The eureka moment came when one researcher turned off the high-tech LED lights deep inside one cave and lit a candle. In the flickering, unsteady light of the naked flame, the strange paintings seemed to come alive. Animals ran and jumped on the stone walls. The seemingly incorrect paintings were a very early form of animation!

In the thousands of years since, animation has followed the same basic principle. Still images, when viewed in quick succession, can create the illusion of movement. Create these images and play them back at the appropriate speed, and you have yourself an animated video.

Fortunately, you no longer have to descend deep into caves to learn how to create animated videos. There are dozens of applications designed to help you make every type of animation, from cartoon videos to stop motion and beyond. 

You might feel tempted to install one of these programs and jump right in, but try to resist that urge. It might work for simple animations, and trial and error are necessary when learning how to create animation, but the success of an animated project starts with preparation.

Tip 1. Choose an animation style

First, consider what you want your animation to look like. Unlike shooting video, the options when animating are virtually limitless. You could shoot for a high-quality, ultra-realistic style, which is increasingly common in modern games. Perhaps you’d rather something more unique that will make your animated video stand out. Or maybe you want to avoid the third dimension altogether and would prefer to create something like Japanese anime or Western cartoons. If you’re going to focus on text, then you could animate typography. Stop motion might be the best option for projects blending the real world with the world of animation.

When selecting your style, consider your goals and limitations. If you’re creating an educational video, for example, you might not need to invest the time and effort required to create ultra-realistic 3D animations. However, make sure to pick a style that really interests you. After all, making animated videos might be more accessible than ever, but it’s still a learning curve that takes time and dedication to master. 

Tip 2. Select the software

After you’ve decided what style to use, you’ll want to select the right software. There are plenty of options, many of them free to use. You’ll be able to find one compatible with your PC, whether it’s Windows or Mac or something else entirely. You can watch videos and read reviews to understand which programs best suit your needs. Remember, you don’t have to commit to using only one program. Many animators combine multiple into their workflow. For example, you could create your animated clips in a free program like Blender, Moovly, Animaker, or Powtoon and then combine them in an editing program like Movavi Video Editor.

Tip 3. Write a script

With style and software in hand, it’s time to write your script. This doesn’t necessarily mean words. After all, plenty of amazing animations have no dialogue at all. Your script, therefore, could be more like a screenplay or storyboard, composed of nothing but images. The important thing when making a script is to figure out precisely what your animation will be. Why are you making it? Who are you making it for? How do you want them to react to it? Asking these questions will help you refine and plan your idea. This is the time to refine your story. Remember, animation can be very time-consuming. Making a single second of animation can take days, even when using powerful computer software. Having a watertight script means you won’t waste any time animating things you’ll have to cut later.

With that in mind, it’s time to consider some basics of animated storytelling.

  1. Try to keep things short. Keeping things snappy is important for any animation, but especially so when making things for the internet.
  2. Remember the old rule of visual storytelling: show, don’t tell. For example, let’s say you want to convey to the audience that your character is new to creating animations. (Original, right?) There’s a straightforward way you could do this. Just write a title card or record a voiceover introducing the character and explaining that they are new to animating. Easy, but not particularly compelling. You’ve told the audience something. Try showing them instead. For example, your character could be introduced while reading a book about making animations. Or perhaps they could be shown struggling to figure out their new animation software. This information – that they’re a new animator – can even be shown in the background. That is, the book about animation or the newly purchased software can be present during an otherwise unrelated introductory scene. Showing the audience something is far more compelling than simply telling them. With animation, you have practically unlimited options for showing things. Let your creativity run wild!
  3. Consider your characters. What are their motivations? Their beliefs? How are they going to change throughout the video? When creating your characters, keep your target audience in mind. For example, a simple animated video intended to tell a single joke doesn’t necessarily require extensive character development. But it certainly might require characters with interesting and funny designs. Remember, you’re not bound by reality, especially when making a cartoon video. The design of a character can tell the audience a lot about them.
  4. Break your video down into sections. The beginning is called the hook. This is arguably the most crucial part. It’s what will convince people to keep watching. The hook leads into the main section, sometimes called the patty, which is where the bulk of your story should unfold. Finally, you need a punchy ending. This is where the audience gets the payoff, their reward for watching your video. It’s where the joke will land, the revelations will be made, the tears shed. If you want your video to induce some kind of action in your audience, the end is where to put your specific call to action. This can be literal, as is often the case in an advertisement, for example. A call to action can also be more subtle, as is the case for videos that try to teach a lesson or invoke a particular emotion.
  5. Make sure to structure your story carefully, step by step. The hook, patty, and CTA are general guides to the different parts of your video, but the structure is more step-by-step. One classic structure is the hero’s adventure. Used in thousands of stories, this structure is very simple. A character leaves his home, encounters difficulties, and returns having changed. Consider some of your favorite animated films. Break down the journey taken by the protagonist, the hero. Why did they leave their home? Remember, their home doesn’t have to be literal. It can mean their comfort zone or their old mindset, for example. What difficulties did the hero encounter? These can be literal, in the form of a monster or antagonist, but are often metaphorical, in the form of mental struggles, difficult choices, and clashes of beliefs. How did the hero overcome these difficulties? And, most importantly, how did that change them? Usually, the hero’s refusal to change gets them into trouble. When they refuse to change, things can get dark. Fortunately, they usually change at the last minute, overcoming the odds and triumphing. When done right, this can be incredibly satisfying for the audience. Now, you don’t have to follow this structure strictly. However, the basic principles can help you refine your story, even if it’s a short and simple animated video. After all, even the most basic jokes have structures. There’s a hero, something happens to them, and they change.

Tip 4. Start the animation process

Right. You’ve written and refined your script. It’s time to actually animate. Here’s where things get really interesting. What you do here depends entirely on what style you’ve chosen. 

There are still some basic principles to follow. First, ensure the software you chose works for your style. You can always change to another app if it will help your animation process. Second, don’t let perfect be the enemy of good. Plenty of extraordinarily talented animators have spoken openly about never being fully satisfied with their work. However, that didn’t stop them from completing and sharing it with the world. Don’t let your internal editor stop you, either. Third, be creative. In this case, creative means adaptive. For example, perhaps your story involves a particular scene or shot that turns out to be very difficult to animate. Is there a way for you to achieve the same effect of your planned shot but in a different, more straightforward way? Sometimes, there’s no getting around it, but in many cases, a clever workaround can get you practically the same result using a fraction of the time and effort.

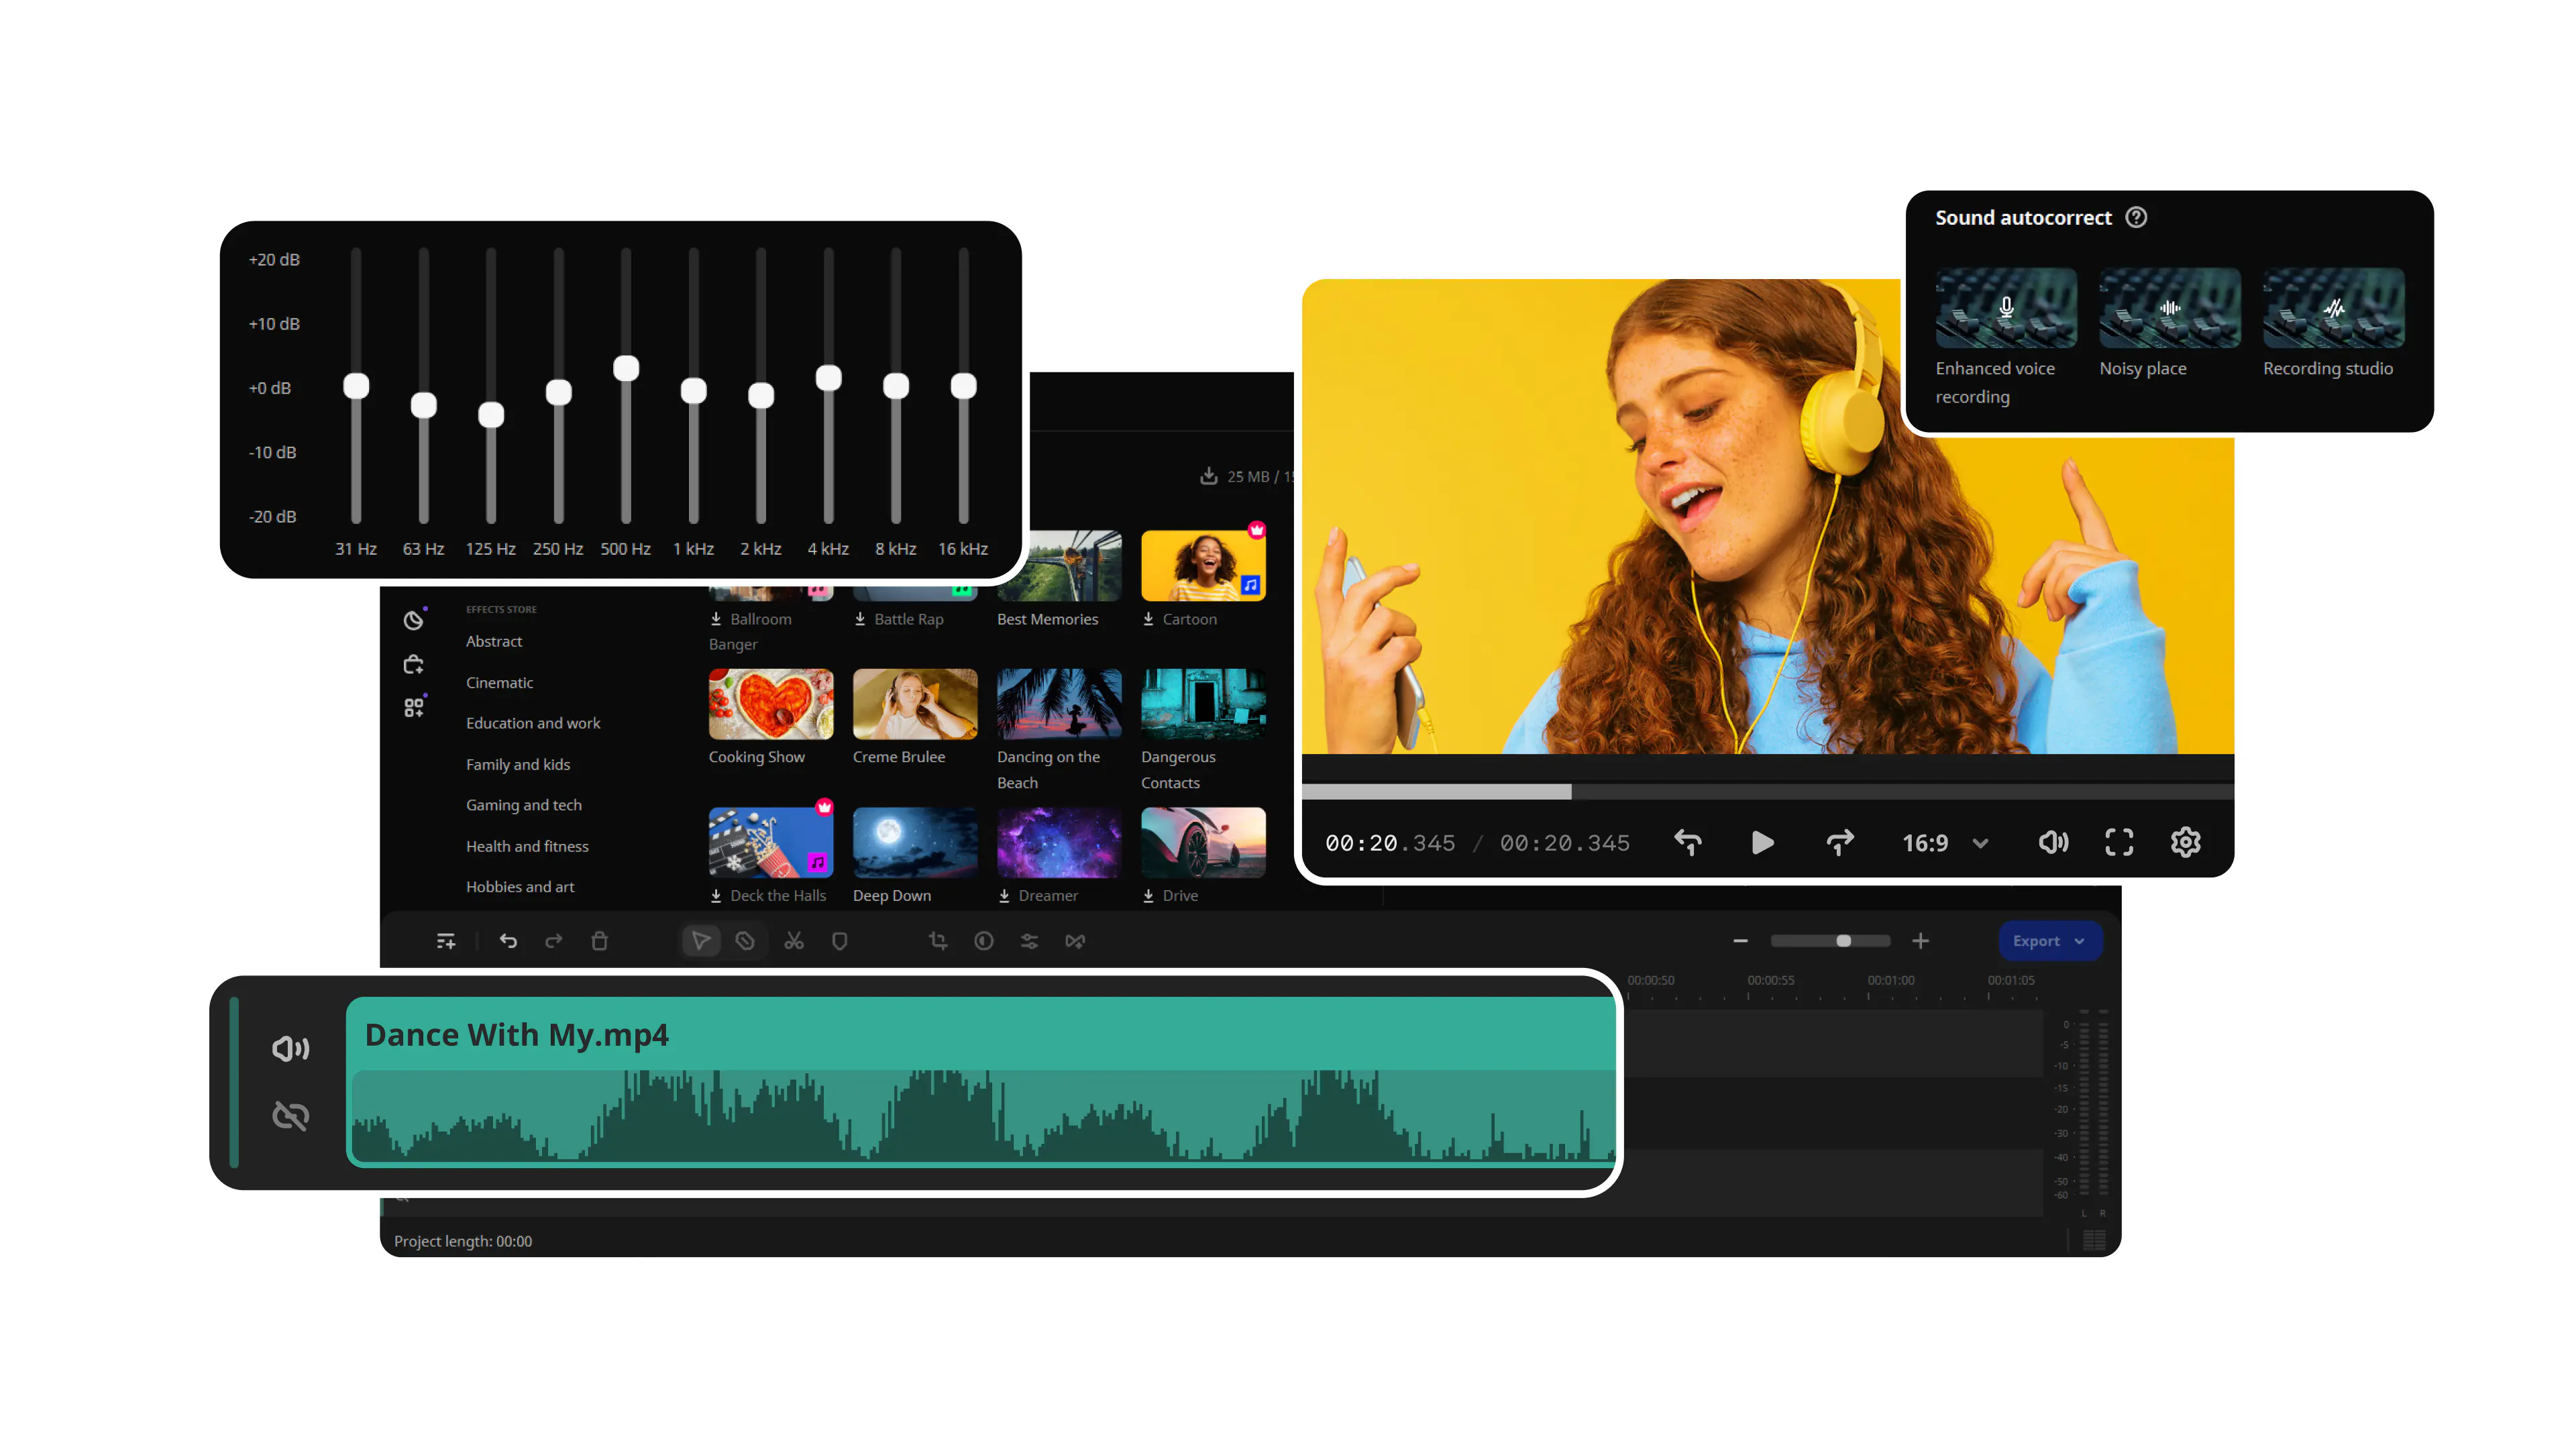
Fourth, remember that the visuals are only one part of animation. Sound, for example, is also incredibly important. That might be as simple as a song. It might be as complex as a full Foley soundtrack, with every action given carefully recorded sounds. Most likely, it will be somewhere in the middle. As the creative, you have complete control over this. Choose the sounds that will best suit your own animation.

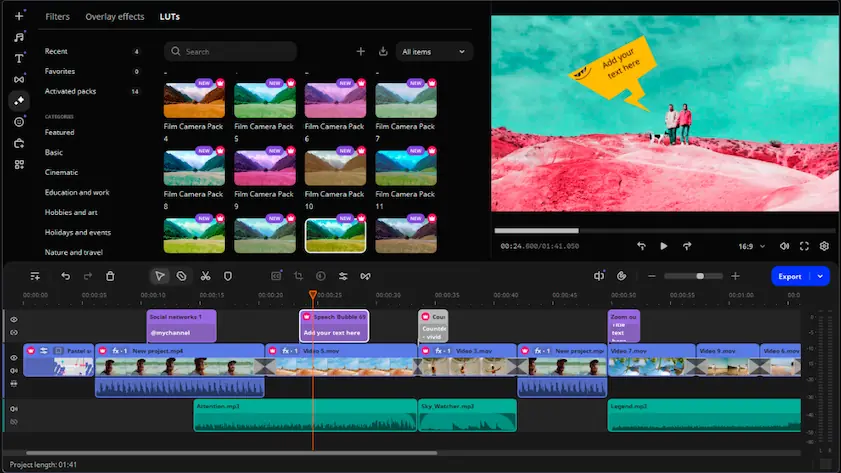
You might want to use a different application than the one you animated in to do this. For example, you could use an animation app to create the visuals and then put each shot together in a specialized video editing app. These editing apps are often the perfect place to add audio and other effects, like subtitles. An example is Movavi Video Editor, which we’ll discuss more below.

Finally, have fun! Animation can be challenging, but those challenges only make the process all the more satisfying. In fact, there are few things more satisfying than bringing your creative visions to life. Enjoy the process and be proud of yourself!

Tips on creating animated videos

  • Choose a style that suits your taste and story
  • Download the right software for your chosen animation style
  • Refine your script – or storyboard – as much as possible before you start animating
  • Take advantage of the thousands of tutorials available online
  • Use creative workarounds when confronted with complex animation challenges
  • Combine your animation software with a dedicated video editing program like Movavi Video Editor
  • Don’t forget the sound – or the subtitles

Edit your videos with Movavi Video Editor

One of the best choices for putting together your own animation is Movavi Video Editor, a powerful editing software. In fact, over 70 million people from 190+ countries have already made that choice, and for good reason – or, rather, reasons. 

One of those reasons is the streamlined timeline, designed to make it easy to combine all of your clips into a cohesive video. Import your animated clips into Movavi Video Editor and put them together using the frame-precise cut tool to ensure everything is perfect. Thousands of transitions, filters, stickers, titles, and other effects allow you to spice up your animations easily. Create an intro to set the stage for your animated story, or add subtitles to ensure everyone can understand what’s going on. Remember, surveys show that over 90% of people watch videos on mobile devices with sound turned off. Subtitles could be the difference between retaining and losing these viewers.

That being said, Movavi Video Editor has an extensive set of audio-editing tools to help you get the sound right. Select samples from Movavi’s vast library of free music and sound clips, or import your own. 

Finally, Movavi Video Editor can help you achieve all of this – literally. AI tools can take care of complex editing tasks for you, from motion tracking to background removal to noise removal.

Summary

Creating animated videos is challenging but incredibly satisfying. With the right approach and tools, you can minimize the challenge and maximize the satisfaction. Consider your needs and choose the style and software that best suits you!

Movavi Video Editor

Сreate awesome videos easily

*The free version of Movavi Video Editor may have the following restrictions depending on the build: watermark on exported clips, 60-second video or 1/2 audio length limit, and/or some advanced features unavailable when exporting videos.

Movavi Video Editor
Have questions?

Have questions?

If you can’t find the answer to your question, please feel free to contact our Support Team.

Join for how-to guides, speсial offers, and app tips!