How to Reduce JPG File Size on Mac: 3 Easy Ways Without Losing Quality

Compress images with the Movavi converter!

  • Lightning-fast conversion

  • Batch processing of files – any number, any size

  • No quality loss, even with 4K videos

  • Easy editing and compression

By clicking the download button, you're downloading a trial version of the program.*

Edited by Ben Jacklin
4,436

Large JPG files can quickly gobble up storage space on your Mac. Whether you're sharing photos online, emailing them to friends, or managing a large collection, reducing JPG file size can be a lifesaver.

The good news is there are several easy methods to achieve this on your Mac without sacrificing significant image quality. Read this guide to learn how to reduce the JPG file size on a Mac in three effective ways.

Method 1. Use Preview to reduce the photo size

While a convenient option to reduce file size might seem ideal through a right-click menu on your Mac, this functionality isn't always available for JPGs. However, fret not! Mac's built-in Preview app offers a powerful and straightforward method for shrinking JPEG file size.

Here's how to shrink the JPEG file size on a Mac:

  1. Locate your JPG file. Navigate to the folder containing the JPG image you want to resize.
  2. Open the image with Preview. Right-click on the JPG file and select Open With followed by Preview. Alternatively, you can double-click the image to open it directly in Preview (if set as the default image viewer).
  3. Access the resize options. Once the image is open in Preview, navigate to the top menu bar and click on Tools. A dropdown menu will appear. Select the option labeled Adjust Size.
  4. Resize for smaller file size. A new window titled Adjust Size will pop up. Here, you can choose between two methods to make your JPEG file smaller:

    a. Percentage: Enter a percentage value in the Width or Height field to proportionally reduce the image size. A lower percentage will result in a smaller file size.

    b. Dimensions: For more precise control, enter specific pixel values in the Width and Height fields. This allows you to define the exact dimensions you desire for the resized image.
  5. Maintain aspect ratio (optional). It's generally recommended to keep the checkbox for Scale Proportionally selected. This ensures the image's original aspect ratio is maintained while resizing, preventing distortions.
  6. Save the resized image. Once you've chosen your desired reduction method and values, click the OK button. Preview will create a new, resized version of the JPG file. To save this reduced-size image, navigate to File in the menu bar and select Save As.

By following these steps, you can effectively reduce the file size of your JPG images using Preview on your Mac.

Remember, the more you decrease the image size (percentage or dimensions), the smaller the file size will be, but there may also be a noticeable decline in image quality. It's a balancing act, so experiment to find the sweet spot between file size and acceptable quality for your needs.

Method 2. Compress pictures using Mac’s Photos app

While the Photos app on your Mac doesn't offer a built-in feature for directly compressing JPEG file size, there's a handy-hidden option you can leverage. This method utilizes the export function and allows you to control the image quality during the export process, ultimately leading to a smaller file size.

Here's how to compress a photo:

  1. Locate your JPGs in Photos. Open the Photos app on your macOS computer and navigate to the album or folder containing the JPEG pictures you want to compress.
  2. Select the images. Click on the desired JPG files to select them. You can hold down the Command key for multiple selections.
  3. Access the export menu. With the images selected, navigate to the File menu in the top menu bar. From the dropdown menu, choose the option labeled Export followed by Export Photos.
  4. Fine-tune image quality for compression. A new window titled Export Photos will appear. Here's the key: under the Quality dropdown menu, you'll find options ranging from Maximum to Low. Selecting a lower-quality setting will result in a smaller file size.
  5. Maintain aspect ratio (optional). Similar to the Preview method, you can ensure the original aspect ratio is preserved during export by checking the box next to Resize to. This prevents any unwanted image stretching.
  6. Choose a destination and export. Select the desired folder location where you want to save the compressed JPGs. Finally, click the Export button. Photos will create new, compressed versions of your selected images in the chosen location.

By adjusting the quality setting during export, you can effectively compress your JPG files using the Photos app on your Mac.

Remember, a lower-quality setting translates to a smaller file size but might also lead to a slight reduction in image clarity. Experiment to find the optimal balance between file size and acceptable quality for your specific use case.

Method 3. Compress images with Movavi Video Converter

Another option is to compress your photos using third-party software – Movavi Video Converter. The app boasts a user-friendly interface, making it easy to navigate even for beginners. The process of compressing images is straightforward and requires minimal technical knowledge.

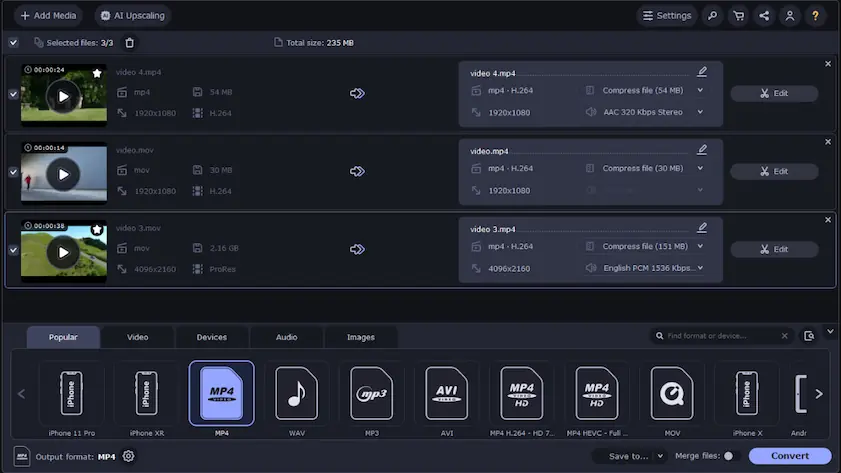
Need to compress multiple JPGs? No problem! Movavi Video Converter lets you process a batch of images simultaneously, saving you significant time and effort.

1. Download and install the program

Download the Mac version of Movavi Video Converter. Follow the on-screen instructions to complete the installation process.

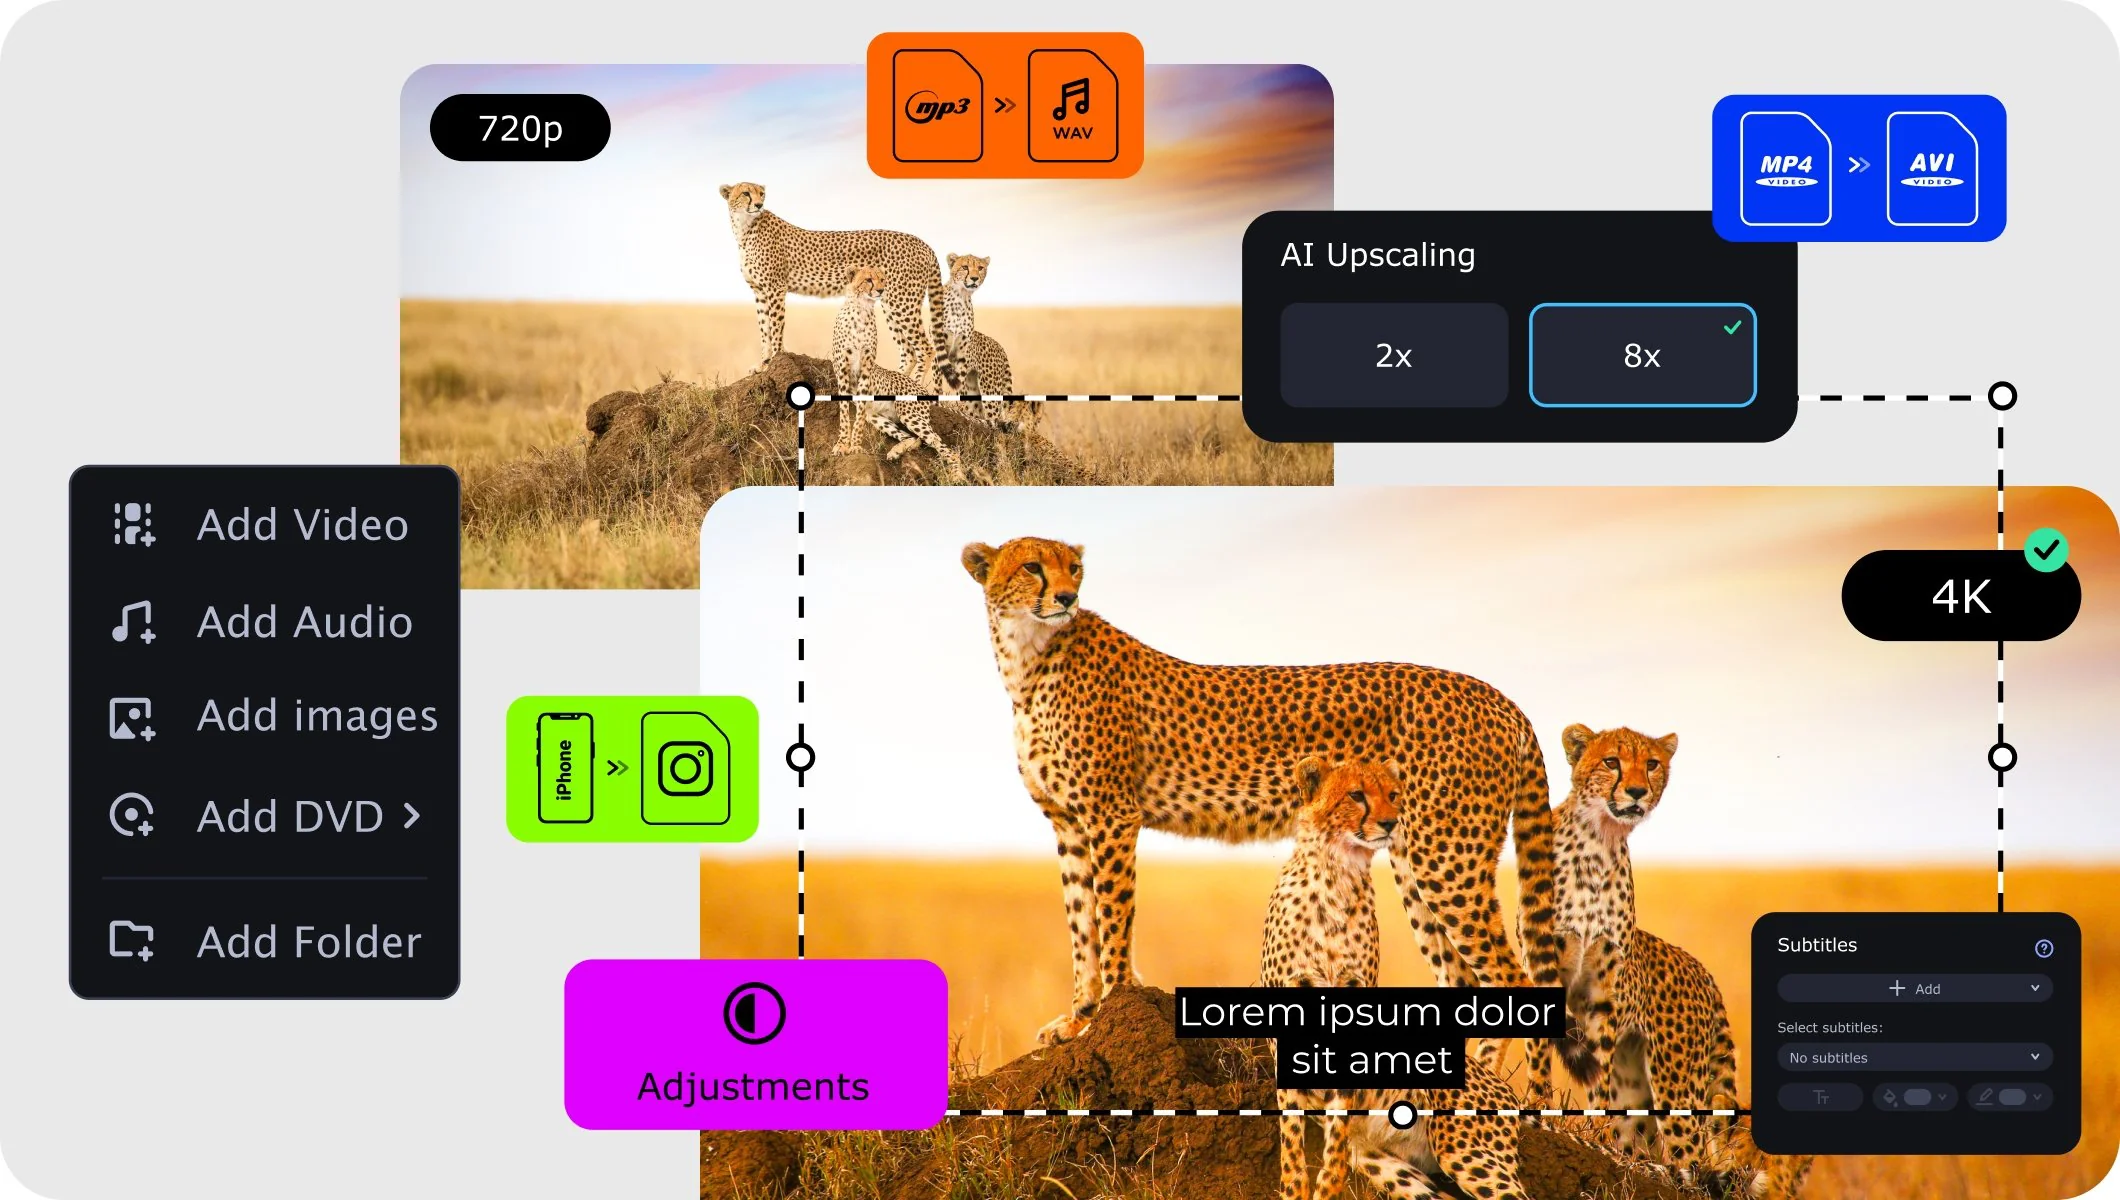
2. Add your JPG images

Launch Movavi Video Converter. Click the Add Media button in the top-left corner and select Add images from the dropdown menu. Navigate to the folder containing your JPG files and select them.

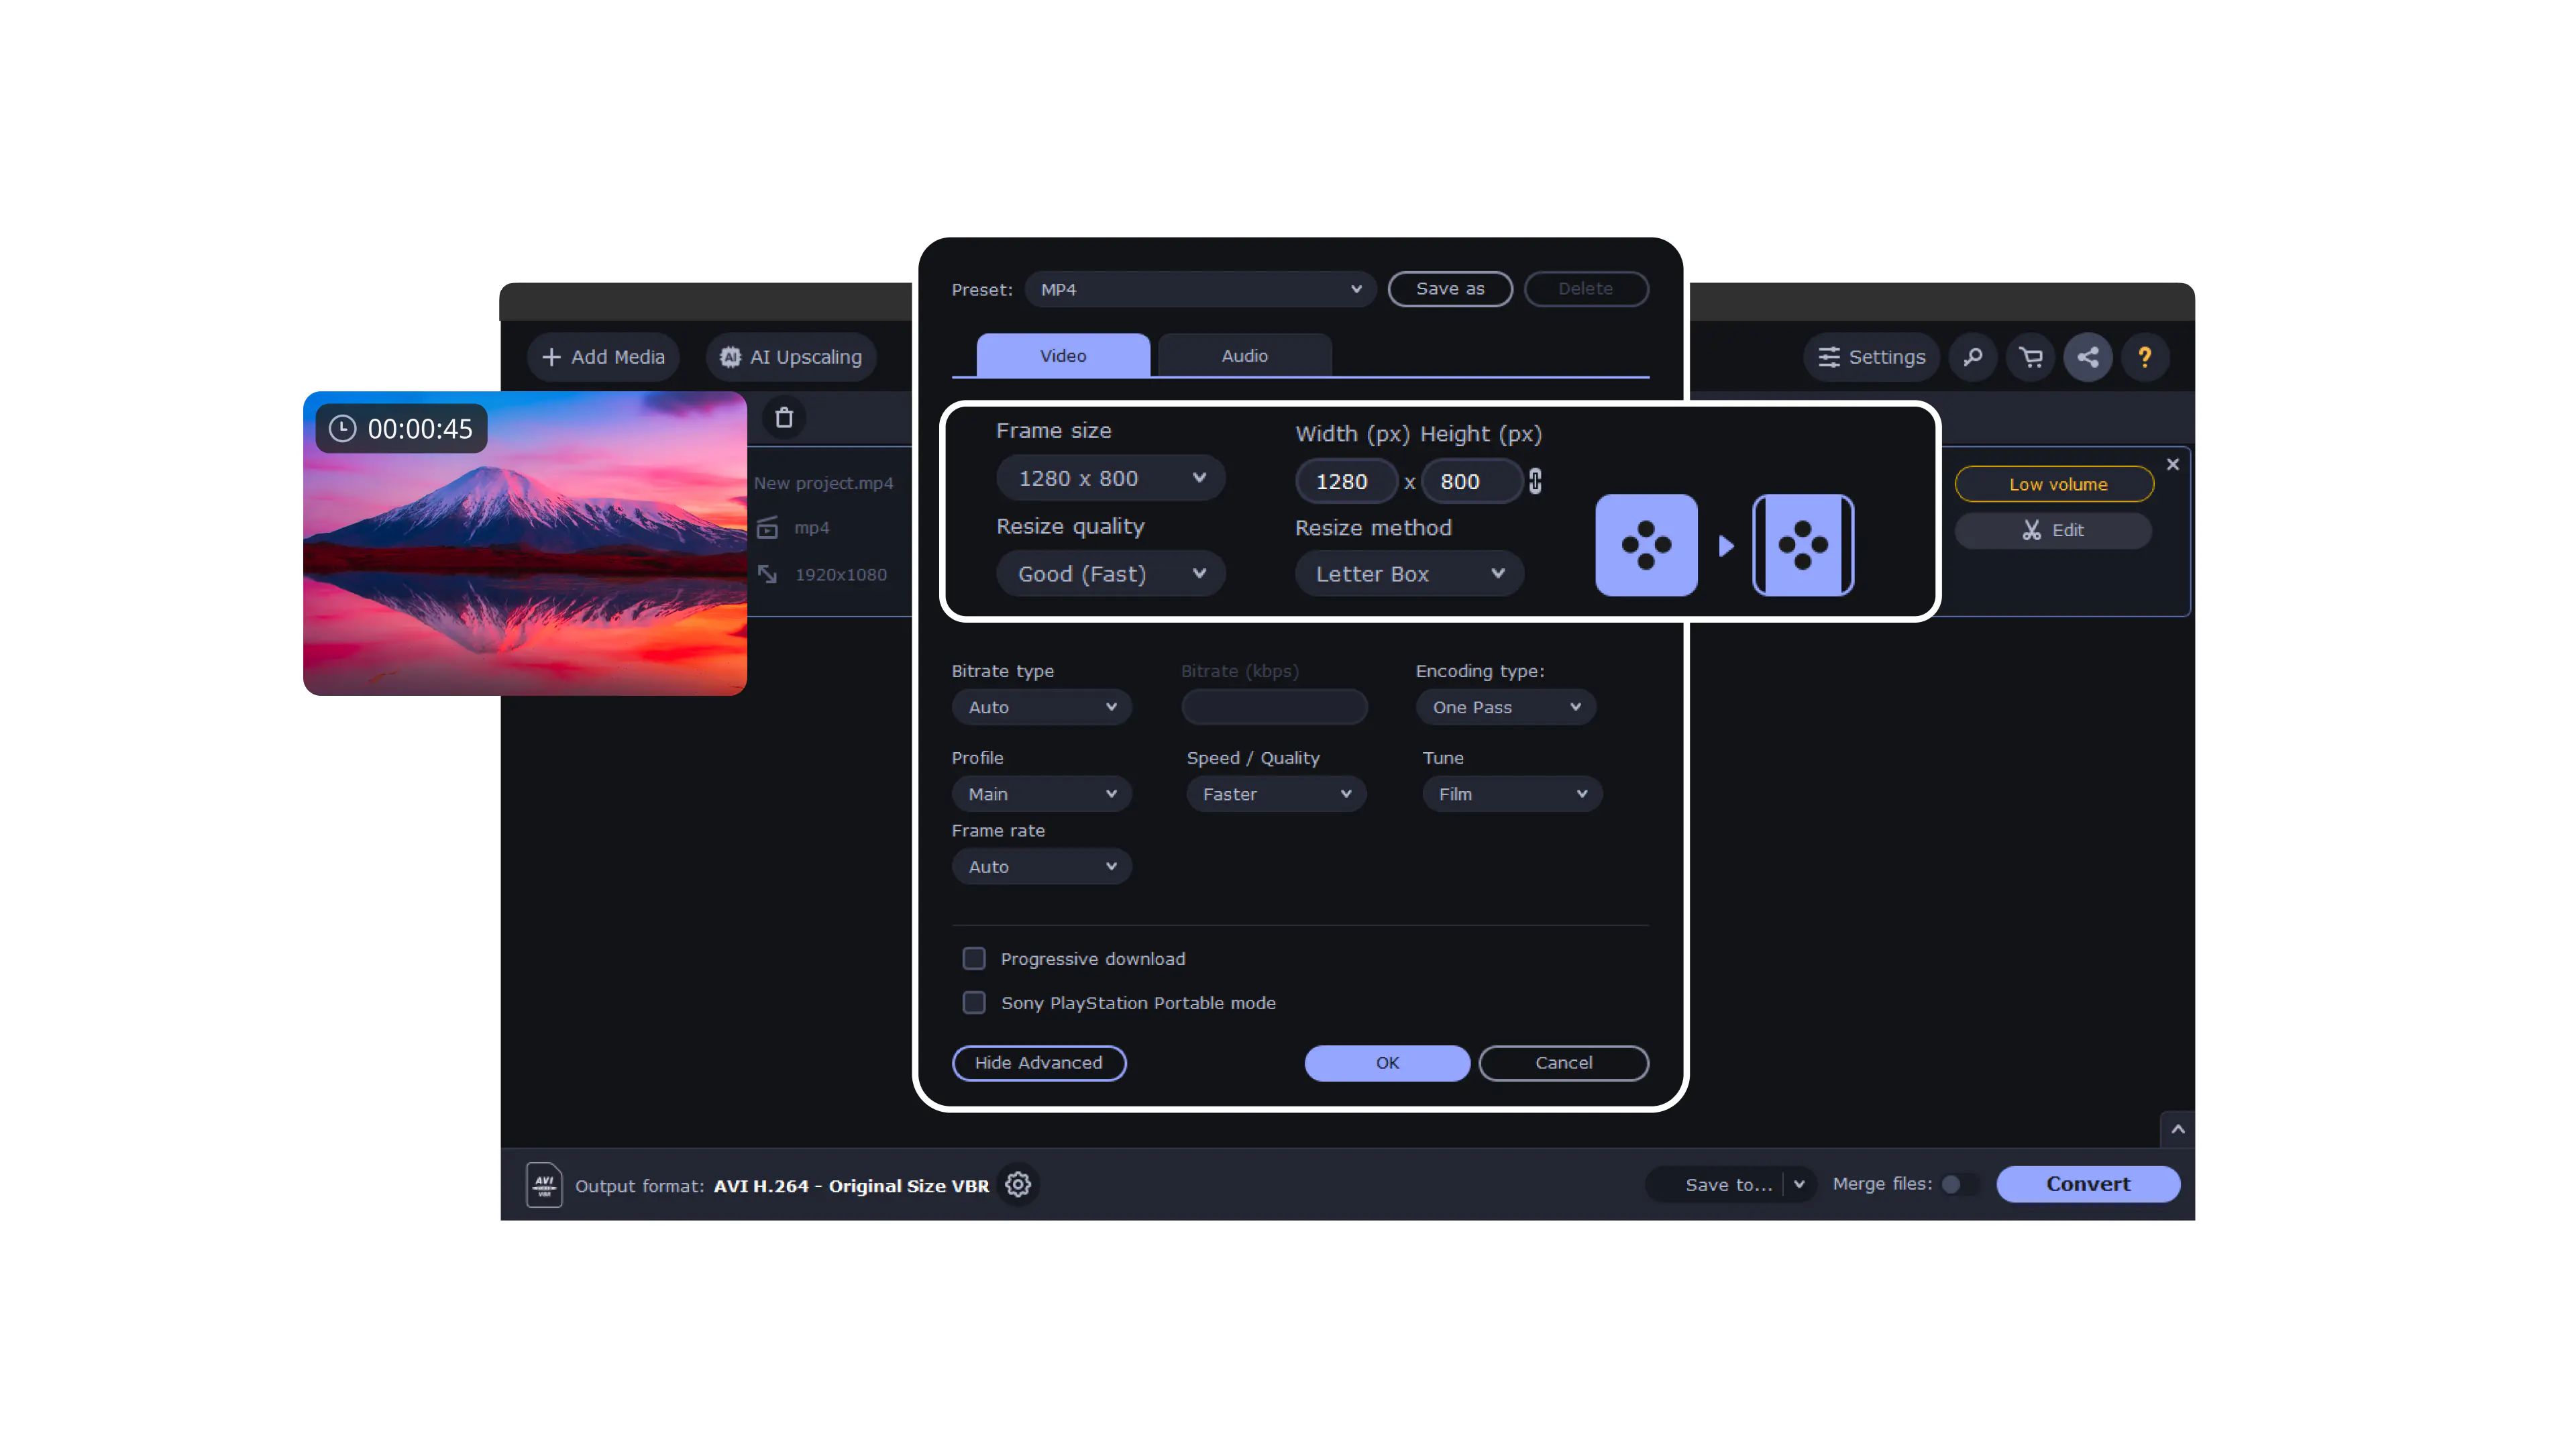
3. Choose the output format

Movavi Video Converter supports various image formats like JPG, PNG, and BMP. Open the Images tab and select the JPG preset. If you want to convert your files to a different format, you can use the Images tab and select your preferred output format.

4. Specify the compression settings

Click Compress file next to your image in the file list. This will open a window dedicated to compression settings. Adjust the slider to set the preferred quality and click Apply.

5. Compress the images

Once you're happy with the compression settings, choose the destination folder where you want to save the compressed JPG by clicking the Save to button at the bottom. Finally, click Convert to initiate the compression process.

Summary

Large JPG files can quickly devour storage space on your Mac. This guide explored effective methods for reducing the file size without compromising significant quality. With these techniques, you can effectively manage your JPG file size and free up valuable storage space on your Mac.

Movavi Video Converter

The ideal way to get your media in the format you need!

* The trial version of Movavi Video Converter has the following restrictions: a 7-day trial period; a watermark on output videos; when converting audio files, an ability to convert only half the file length; and, when working in the SuperSpeed mode, an ability to convert only half the video file length.

Movavi Video Converter
Have questions?

Have questions?

If you can’t find the answer to your question, please feel free to contact our Support Team.

Join for how-to guides, speсial offers, and app tips!