Step 1. Download Movavi Video Editor
Download and install the program on your PC or Mac. After the installation is complete, launch Movavi Video Editor.

How to Do Green Screen on CapCut: Step-by-Step Guide [2025]
Use Movavi Video Editor to edit green screen videos!
By clicking the download button, you're downloading a trial version of the program.*

The green screen is one of the most legendary effects in video editing. Learning how to do green screen on CapCut, a free video-editing app, is simple. What video editors of the past had to spend weeks achieving, you can do in minutes!
CapCut offers a free app for Mac and Windows computers. It’s a versatile, easy-to-use video editor with plenty of features. That includes chroma keying, which is the technical term for green screen.
Actually, CapCut for desktop offers multiple methods for achieving a green screen effect, some of which don’t involve chroma keying. We’ll get to those later.
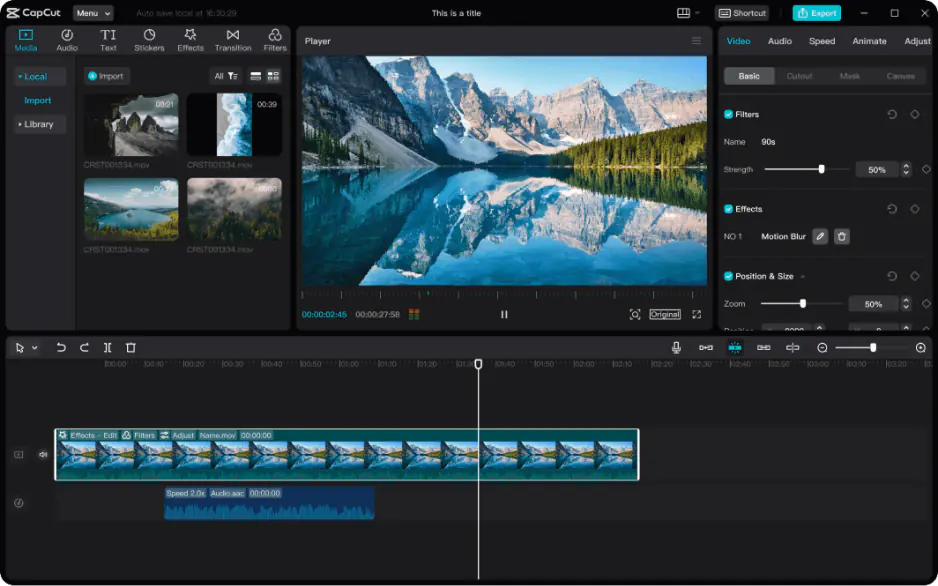
To chroma key in CapCut for desktop, do the following:
That’s it! You can use the chroma key effect with colors other than green. Blue is a popular choice. The only things that matter are that the background color is uniform, well and evenly lit, and not present anywhere else in the video. If your character is wearing a green shirt and you remove the green background, the shirt will also be removed.
Of course, that’s not ideal. What if you don’t want to use a colored background? Or want to achieve a green screen effect, but don’t have a green screen, or forgot to use it while filming?
These and other reasons are why CapCut also offers a cutout tool. Using this tool, you can literally “cut out” subjects from a video. That removes the background, allowing you to replace it with whatever you want.
First, follow all the same steps as above. Instead of clicking Chroma key, check the box next to Auto cutout. CapCut will then automatically remove the background of your video.
Sometimes, CapCut might not be able to remove the background. What then? Fortunately, the software also offers a custom cutout tool. In the Cutout tab, check the box next to Custom removal. The custom cutout tool has three options. There’s a smart brush, smart eraser, and basic eraser. If you’re using CapCut’s free version, the basic eraser is all you’ll have access to. All of these tools have the same basic premise. With the brush, you highlight what you want to keep. The erasers are for deleting anything you want to remove.
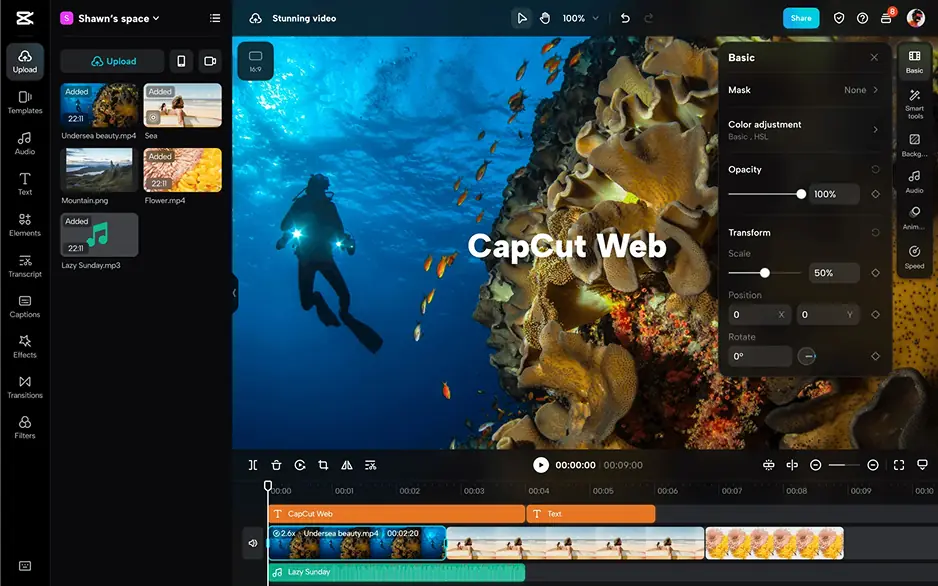
If you want to learn how to do a green screen effect on CapCut without downloading any software, try the free online editor. You can find it on CapCut’s website.
Follow these steps:
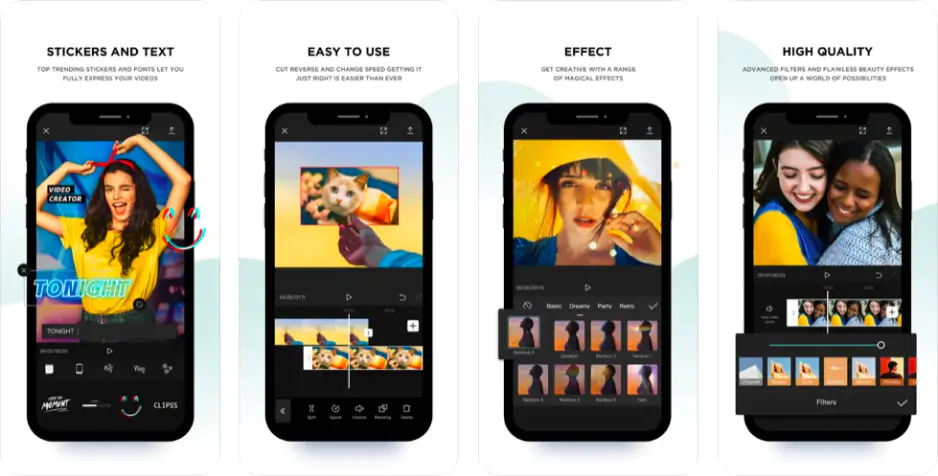
CapCut’s mobile app is a fantastic tool for busy people who want to edit videos on the move. It’s also great for anyone creating content for social media. You can record videos, edit them, and upload them to social media, all without leaving your phone. It doesn’t get much more convenient than that!
Then, follow these steps to learn how to use a green screen on CapCut:
How to use green screen in Movavi Video Editor – a CapCut alternative
CapCut is fantastic, but what if you want to explore another option? There are plenty of great free video editors out there. One excellent choice is Movavi Video Editor.
Movavi Video Editor is packed with advanced editing tools. You can do all the basics, like cutting and trimming, and much more. AI-powered tools, for example, can automatically perform complex edits for you in seconds.
Plus, you’ll have access to hundreds of filters, titles, overlays, and transitions to jazz up your videos. And, of course, the ability to do a green screen effect.
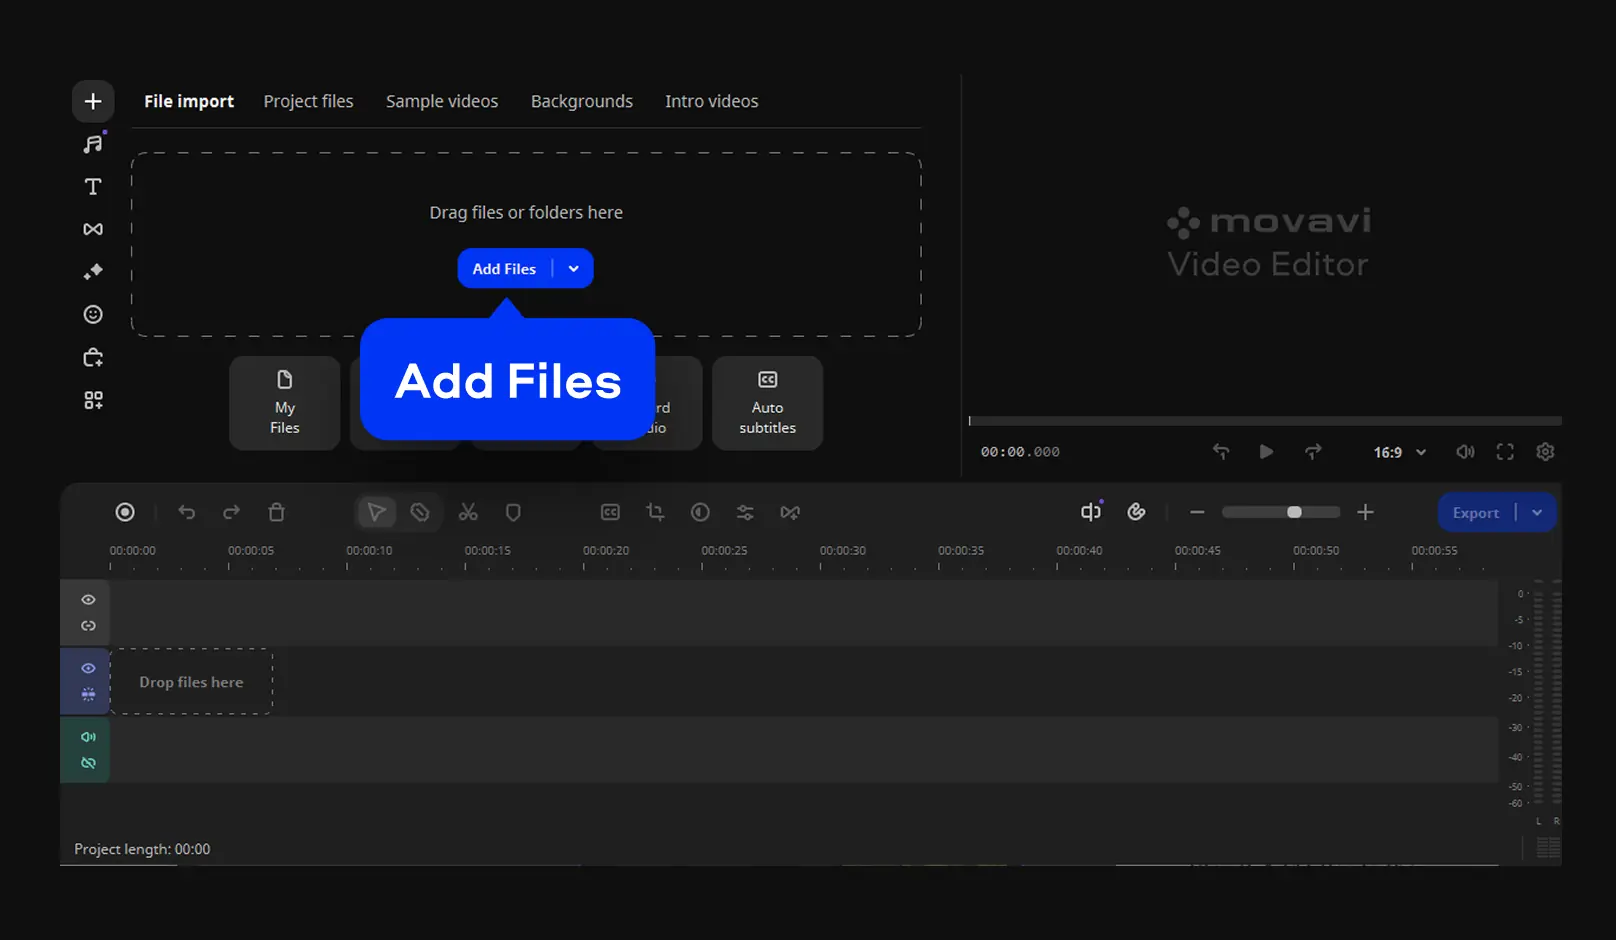
Step 1. Download Movavi Video Editor
Download and install the program on your PC or Mac. After the installation is complete, launch Movavi Video Editor.
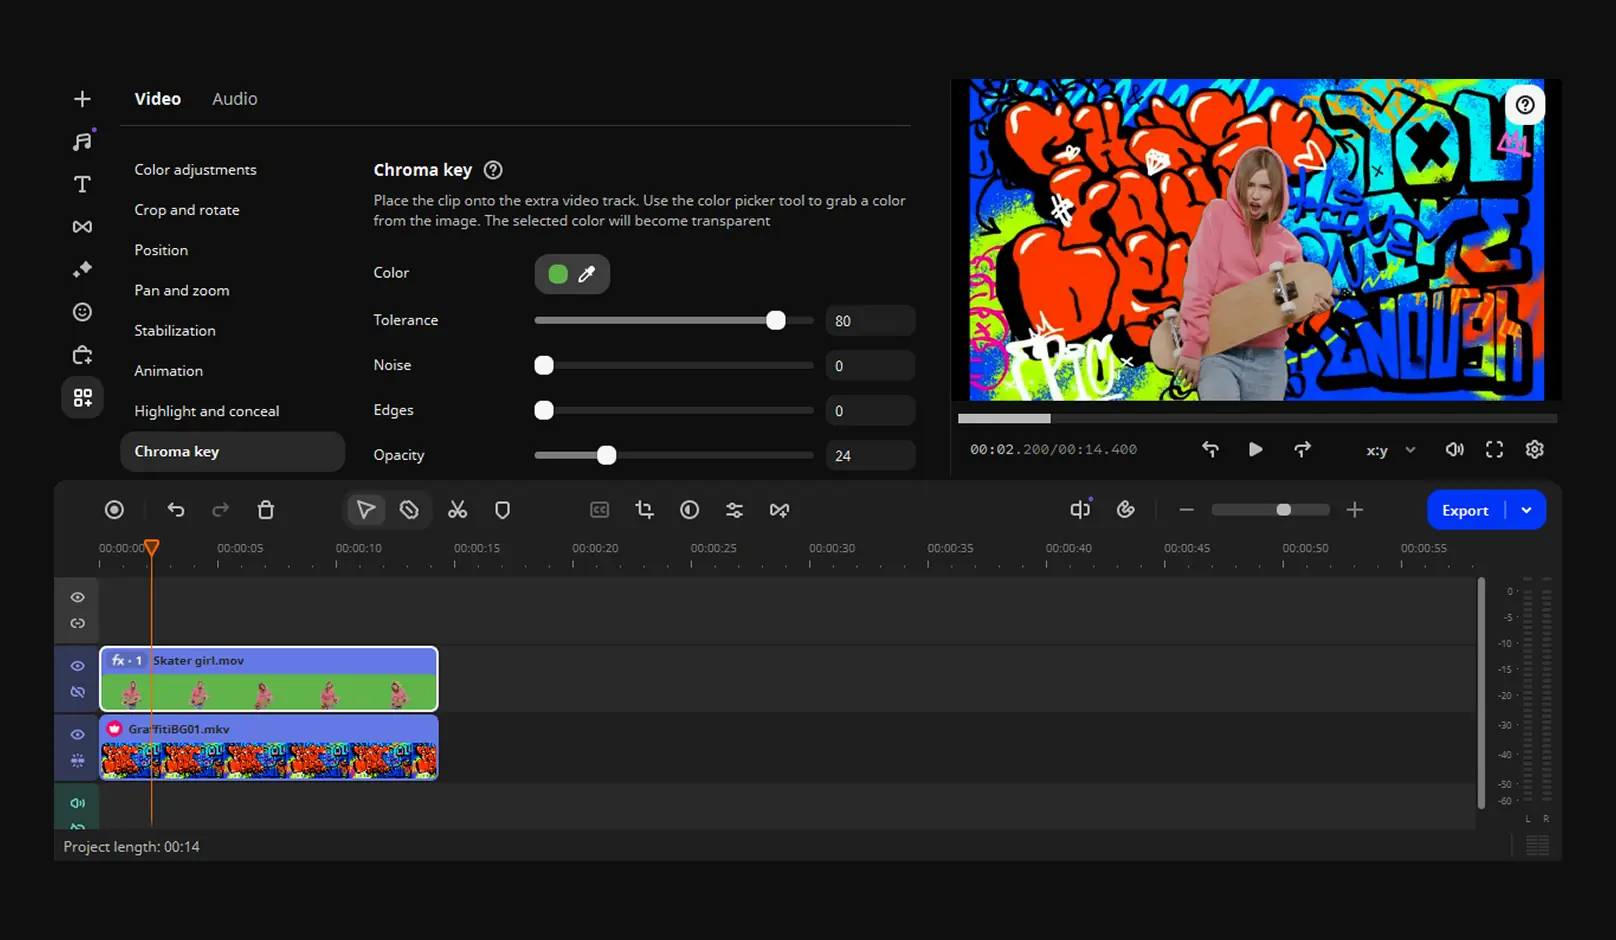
Click on Add Files to import your videos. Drag your imported videos onto the timeline. Make sure the green screen clip is on the upper track, while the background clip is on the lower track. The upper track will become an overlay track.
Click on the More tools menu, located on the vertical toolbar along the left side of your program window. Then click Chroma key. Click on the colored background to activate the tool. Movavi Video Editor will display a preview of the effect.
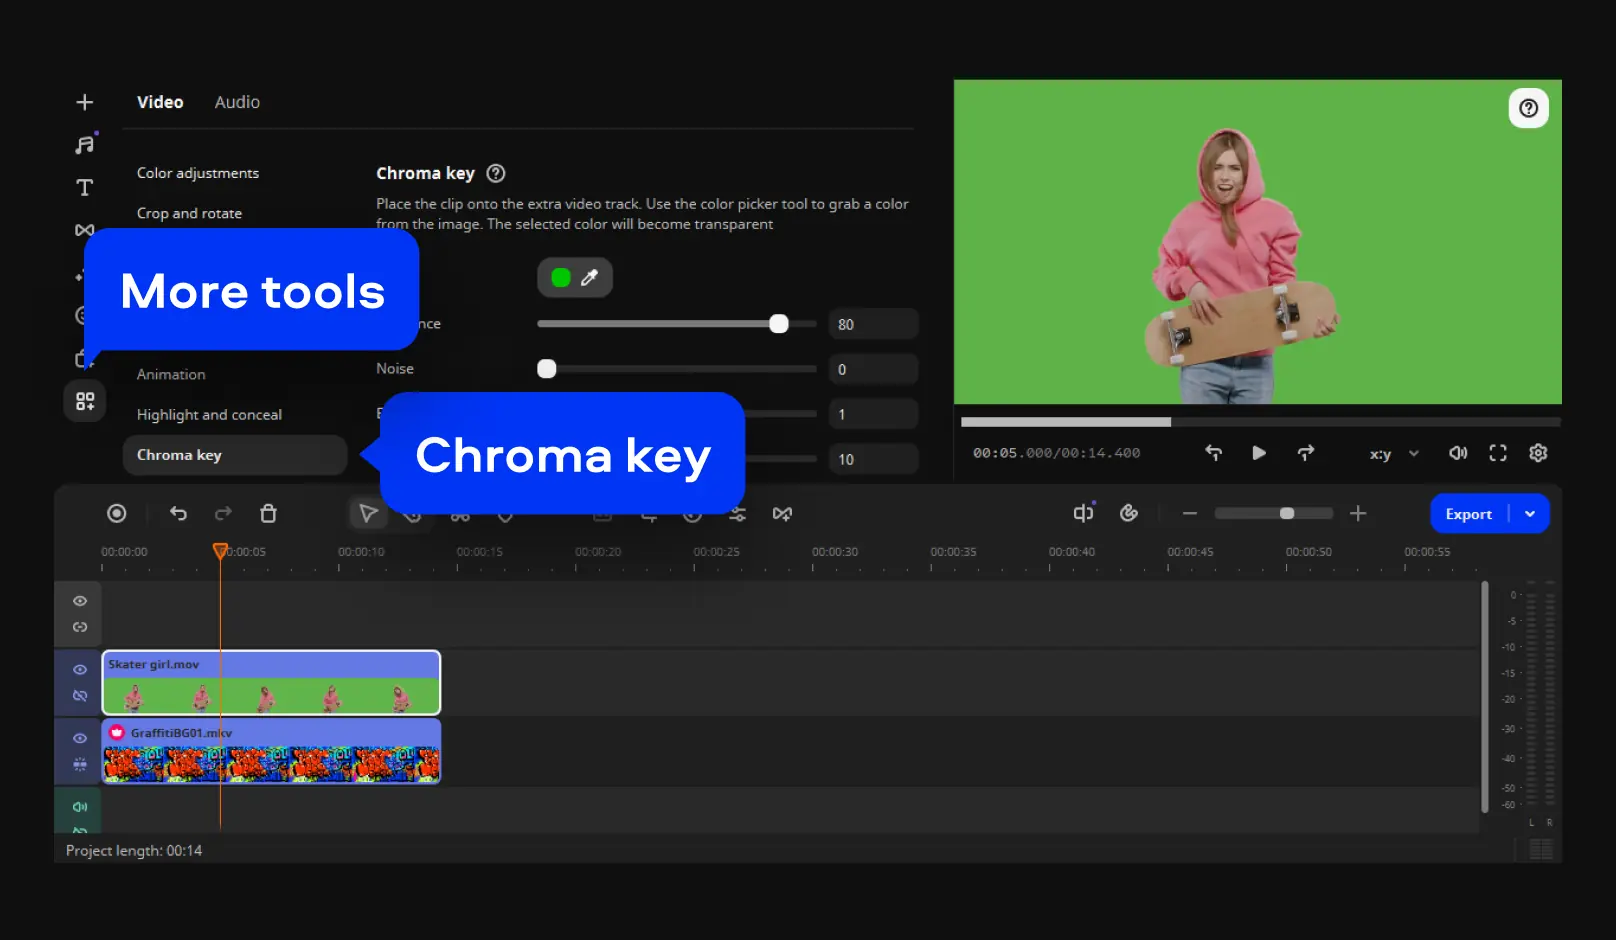
Play with the settings to fine-tune the green screen effect. Movavi Video Editor provides four different tools for adjusting the parameters of your chroma key: Tolerance, Noise, Edges, and Opacity.
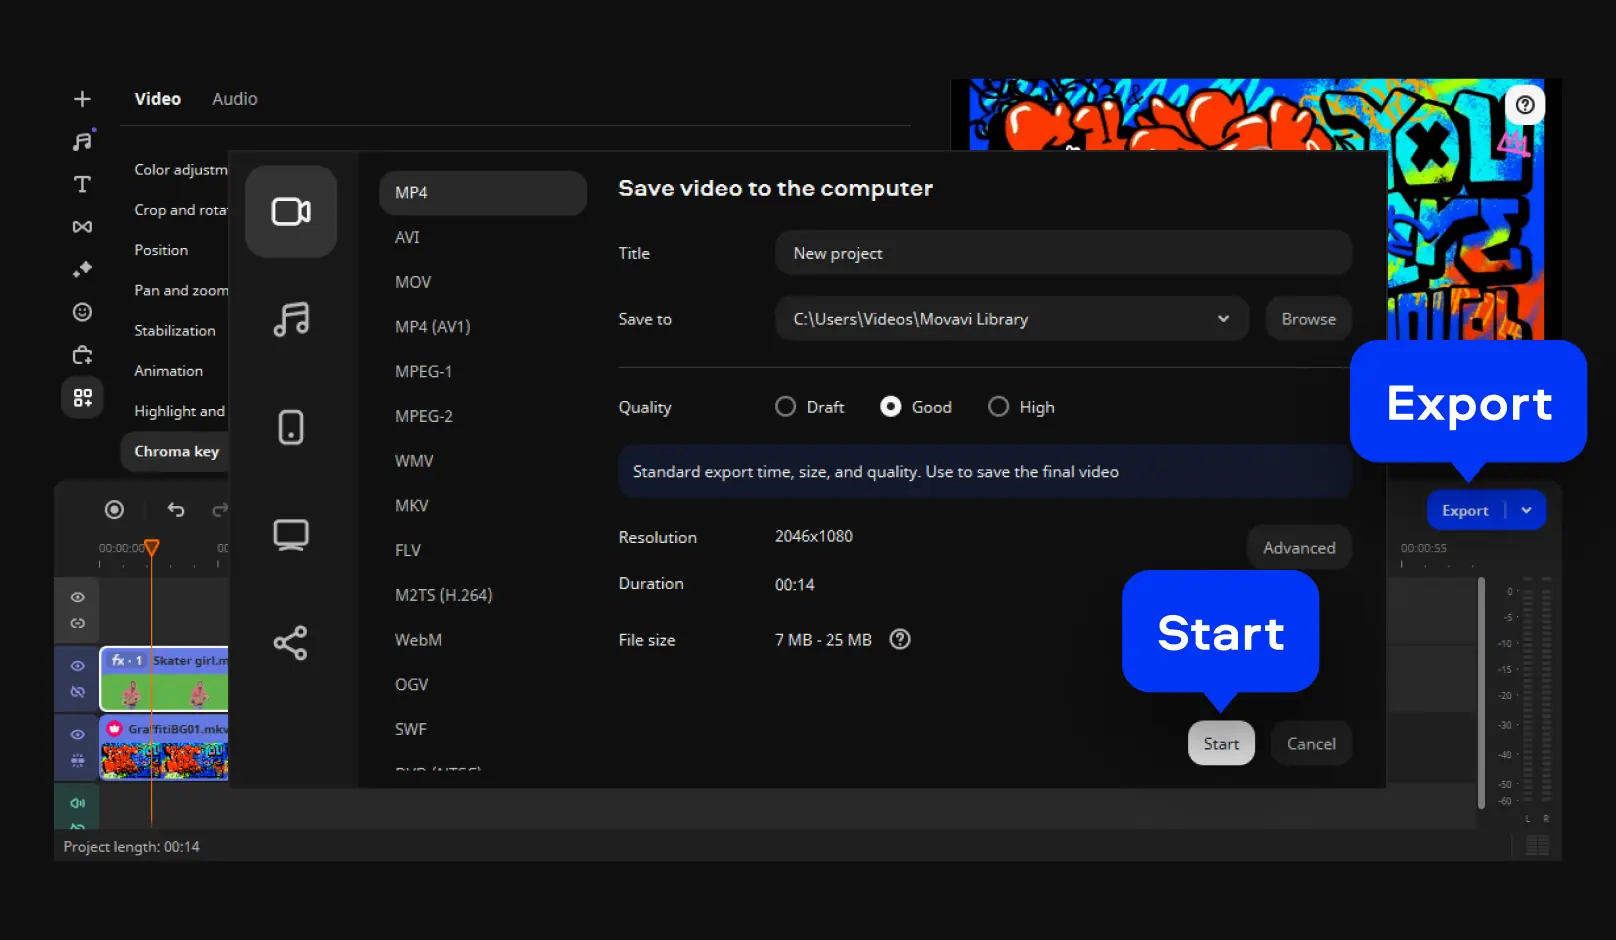
Hit the Export button and specify the settings. Finally, click the Start button to export your finished video.
CapCut offers you the ability to achieve an iconic video-editing effect. With a green screen effect, you can create videos for TikTok and YouTube with your own backdrop, even adding a personal logo. What once took filmmakers hours can be done in seconds, and on a phone, too! That said, there are other options out there, like Movavi Video Editor, should you want to try another option.
Movavi Video Editor
*The free version of Movavi Video Editor may have the following restrictions depending on the build: watermark on exported clips, 60-second video or 1/2 audio length limit, and/or some advanced features unavailable when exporting videos.


Have questions?
Join us for discounts, editing tips, and content ideas


1.5M+ users already subscribed to our newsletter