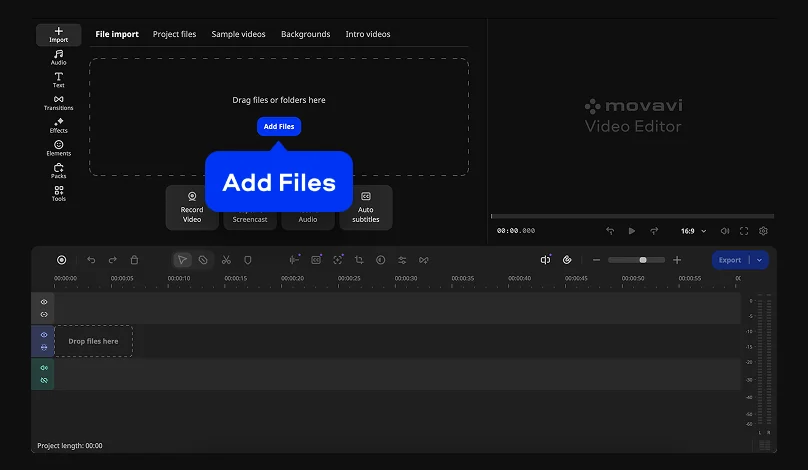
Step 1. Import your video and your photo.
Click Add Files to import your video and picture. Drag the video onto the main Timeline track, then drag your image onto a track above it to create an overlay layer.

Adding an image to a video means placing a photo, illustration, or proof over your footage, then adjusting its size and position – a quick way for bloggers and YouTubers to add context, callouts, or visual punchlines.
In Movavi Video Editor, creating content is effortless thanks to one-click AI tools, and drag-and-drop effects. Its clean interface makes every tool easy to master right away, automating tedious editing tasks so you spend time creating instead of figuring out how the software works. Built for beginners and everyday creators, its simple drag-and-drop design lets you deliver high-quality results from your very first try without wasting time figuring out complex tools. Just drag your video and photo onto the timeline, adjust the image over your clip, and hit Export.

Gather your video clip and the photo, logo, or graphic you plan to overlay. Movavi Video Editor handles all standard formats (MP4, MOV, JPEG, PNG) right out of the box, letting you easily build everything from channel watermarks and product callouts to visual reactions. You will just need the free version of Movavi Video Editor installed on your computer – once downloaded, the entire process runs completely offline in under three minutes with no prior editing experience needed.
As a quick prep tip, if you are adding a logo or icon, opt for a PNG file with a transparent background so it sits seamlessly over your footage rather than placing a solid white JPEG box across your scene.
How to put a photo on a video
Click Add Files to import your video and picture. Drag the video onto the main Timeline track, then drag your image onto a track above it to create an overlay layer.
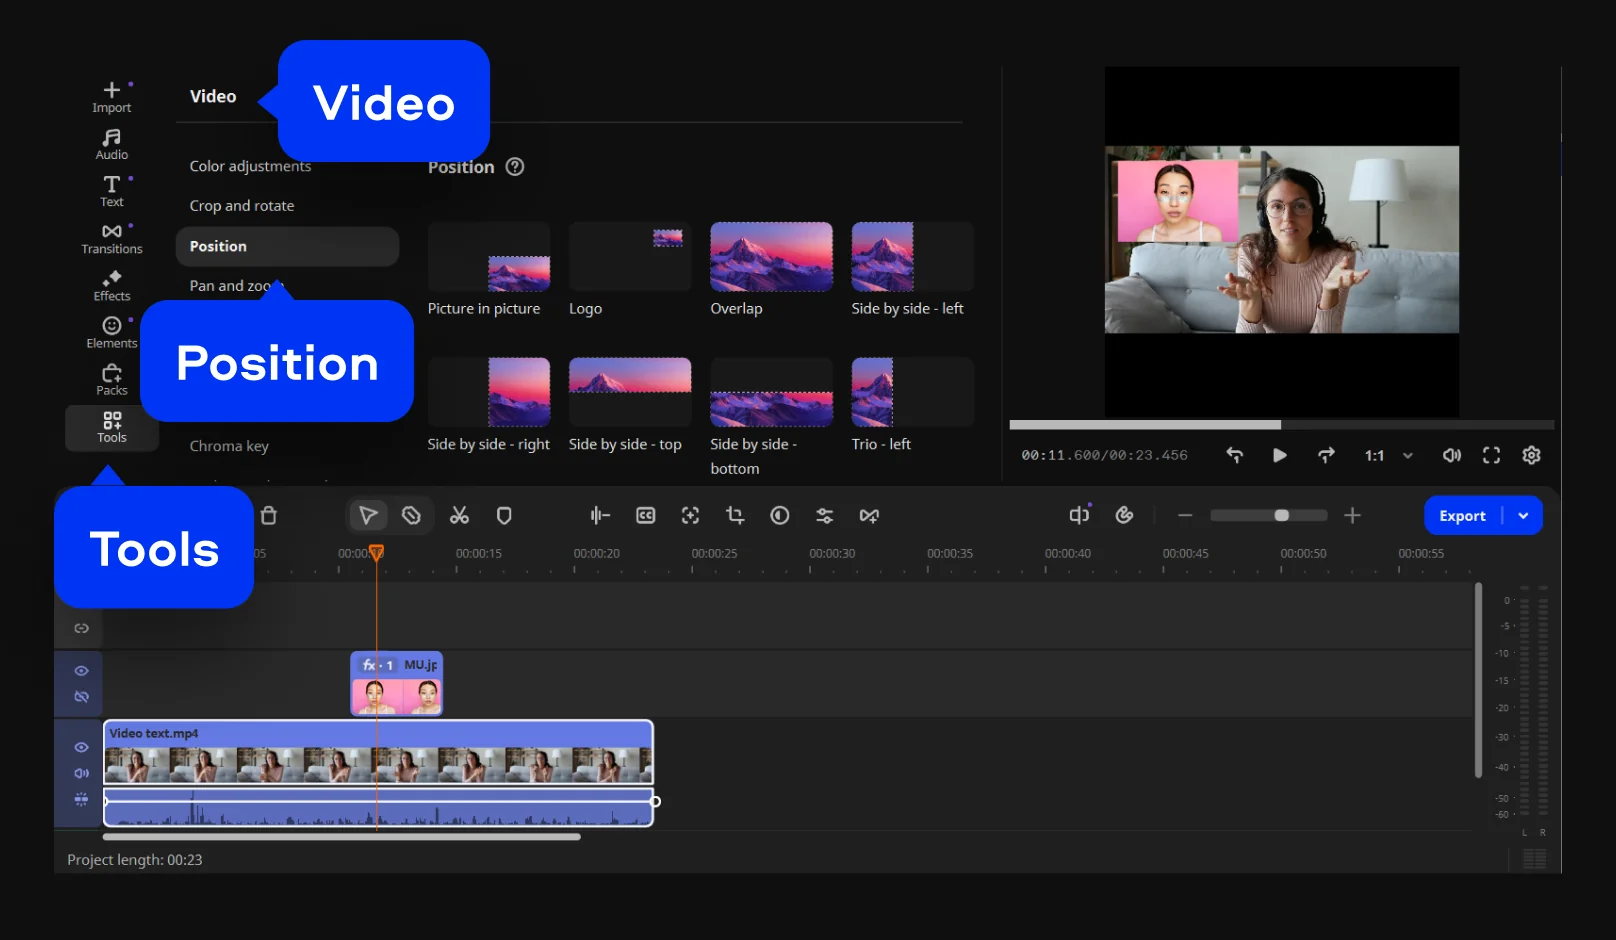
Head to the Tools tab and select Position. Choose an overlay mode – Picture-in-Picture for corner callouts, Logo for subtle channel branding, Side-by-side for visual comparisons, or Overlap for full-frame impact. Resize, rotate, and drag the image anywhere in the preview window to pin your point.
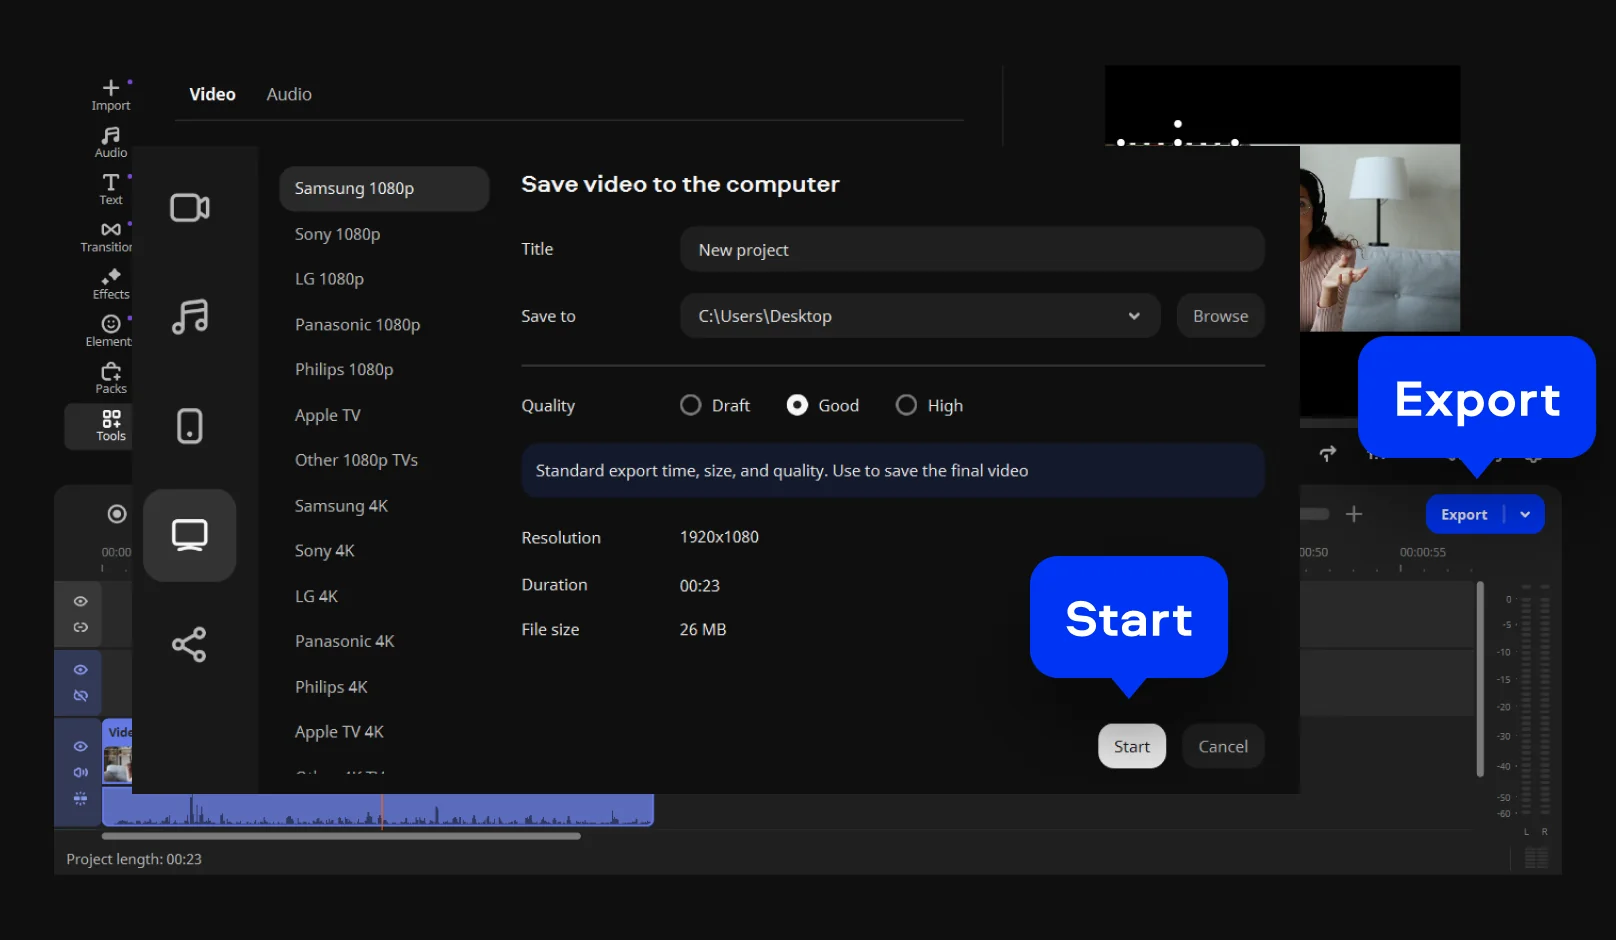
Click Export, choose your ideal format and resolution settings, and hit Start to save your video – ready for instant upload to your social media channels.
Which mode makes sense depends on the job the photo is doing: branding a clip, layering in a reaction shot, or replacing the background outright.
The overlay modes aren't the only layer available, either. Drag-and-drop effects and elements – stickers, frames, callouts – add options on top, whatever style you're going for.
Once it's on the timeline, the photo behaves like any other visual element: you can resize it, move it, and set exactly when it appears and disappears. If you're moving around the frame instead of sitting still at a desk, AI Motion Tracking locks the image to your position in one click so it follows you rather than drifting to one side. It's a fairly small feature, but it's the kind of AI that actually buys back time: the tracking runs once, automatically, instead of you nudging the image frame by frame for the rest of the clip.
Opacity can be adjusted too. That matters when you want a photo sitting behind your face instead of blocking it – lower the opacity and it reads as a soft background layer rather than a hard cutout on top of your shot.
A photo that looks fine on a phone screen can look rough once it's stretched across a 1080p or 4K frame. Planning to size the image up – filling the full frame in Overlap mode, say – start with the highest-resolution version you've got. Movavi Video Editor keeps your original video quality intact through editing; sharpness at that point comes down to the source image's resolution, not the software.
Both JPEG and PNG hold up fine for this kind of overlay work. Reach for PNG specifically when the image needs transparency, like a logo you want sitting on your footage without a background box trailing behind it.
None of this costs anything to try. Movavi Video Editor is available as a free download, and what changes between tiers is what you can do with the finished file.
The overlay workflow itself stays the same no matter which version you pick. Picture-in-Picture works identically whether the export carries a watermark or not; the tiers change the output, not the tool. It's also the workflow more than 70 million people across 190+ countries already use, so if a step feels unfamiliar the first time, plenty of people have been right where you are.
Adding a PIP element is rarely the last thing you touch in an edit. If you're weighing what to add next – a subtitle style, a transition, a particular look for the rest of the clip – Movavi Ideas puts out a new step-by-step tutorial every week, free, built for exactly that next step.

Yes. Each image gets its own overlay track, so you can insert several photos at different points along the timeline, or stack more than one on screen at once with Trio mode.
Not by itself. The video keeps its original quality – a photo only looks soft if the source file was already low-resolution before you sized it up.
No. Movavi Video Editor runs as an offline desktop program. Once installed, everything from inserting the image to exporting the finished file works without a connection.
Logo mode is for a small mark that stays fixed and stays quiet – something you'd leave on screen for an entire video. Picture-in-Picture is built to be noticed: a corner image your audience is actually meant to look at.
Yes, on Windows 10 and 11, and on macOS 12.0 and later, including native support for Apple M1 chips.
Yes. The free download lets you test the overlay tools before deciding whether to move up to Lite or the full version.



1.5M+ users already subscribed to our newsletter