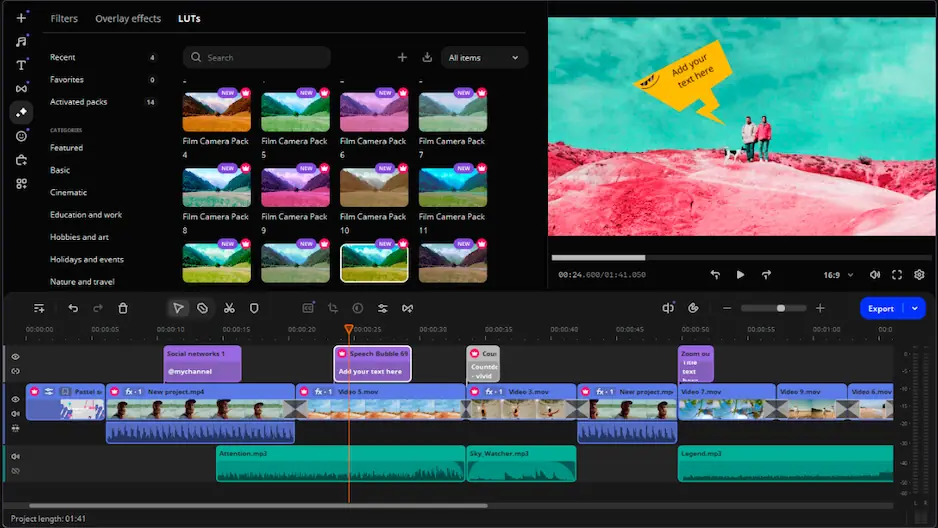
How to Clean Up the Background (Blur or Replace) in Video: Full Guide for 2026

If you searched for how to clean up the background of a video, you're choosing between two different jobs: blurring what's back there, or getting rid of it and dropping in something else. Both are doable without a studio, a green screen, or hours of practice. Movavi Video Editor is simple and fast by design, and this guide walks through both paths – plus the free version's limits, so you know what you're working with before you start.

By clicking the download button, you're downloading a trial version of the program.*

Edited by
Ben Jacklin
4,657

Why your video background actually matters

A distracting window or a wall covered in mismatched posters pulls attention away from whatever you're actually saying. For a lifestyle vlog, that might mean viewers notice the laundry pile instead of the outfit you're reviewing. For a product demo, a busy desk competes with the product itself.

Cleaning it up isn't about hiding anything. It's a normal part of finishing a video, the same way trimming dead air or adding a title card is. A blurred or swapped background just means the room stops being part of the story.

What's the difference between blurring and replacing a video background

Blurring keeps your real background but softens it, so a messy bookshelf or a busy street stops competing with you for attention. It's the video equivalent of portrait mode on a phone camera – same location, softer edges.

Replacing the background swaps it out completely. You record in your actual room and the footage ends up looking like a studio, a beach, or a plain color card. This is the job that used to require a green screen and is now mostly handled by AI.

Neither one requires reshooting anything. Both start with footage you already have.

A quick way to decide is if your room looks fine but a little busy, blur it. If your room doesn't match the video at all – say, you're filming a travel story from your bedroom, or a business update from your kitchen – go with a full replacement instead.

How to blur a video background

A blurred background works well for talking-head content, product reviews, and any clip where the point is your face or your hands, not the room behind you. Here's the general workflow:

  1. Import your footage. Drag the clip onto the timeline.
  2. Isolate the subject. Use the AI background removal tool to separate you (or the product) from everything behind it – this is the same tool used for full replacement, just applied differently here.
  3. Duplicate the background layer. Place a copy of the original footage underneath the isolated subject, so the room is still visible behind you, just as a separate layer you can edit on its own.
  4. Apply a blur. Movavi Video Editor includes a Blur filter as part of its 180+ built-in filters, alongside effects like Glitch and VHS. Drag it onto the background layer and adjust the intensity until the room reads as soft shapes rather than a distracting wall of detail.
  5. Export. Save at the resolution and format you need for YouTube, TikTok, or wherever the clip is headed.

The result is your background softens into an out-of-focus blur while you stay sharp, without needing any special lighting setup. This works particularly well for talking-head reviews, tutorials filmed at a desk, or any clip where a slightly-too-real bedroom shouldn't be the main visual.

Once your background is sorted, the next step is usually sound – an echoey room or background hum gets more noticeable once the visual noise is gone. Movavi Ideas publishes a new step-by-step editing trick every week, free, if you want more to try after this one.

How to remove video background and replace it

This is the classic move – swap your real background for something else, whether that's a solid color, a branded backdrop, or full footage of somewhere you've never actually been.

With a green screen (chroma key):

  1. Set up a plain green (or blue) backdrop, ideally fabric or paper without wrinkles – creases catch shadows and confuse the keying.
  2. Light it evenly. Two lights angled at the screen from either side, separate from the light on you, keeps the color flat instead of patchy.
  3. Stand a few feet away from the backdrop so you don't cast a shadow directly onto it.
  4. Import the clip and apply the chroma key tool.
  5. The tool keys out the green and makes it transparent, leaving your outline intact.
  6. Drop in your new background – an image, a video, or a solid color.
  7. Fine-tune the edge settings if any green fringe remains around your hair or shoulders, then export.

Chroma key is precise and forgiving of tricky details like flyaway hair once it's lit correctly, but it does depend on having the screen and the setup – not something you can do with footage you already shot in a regular room.

Without a green screen (AI background removal):

AI that actually saves time is the whole point here – the algorithm identifies you as the subject and treats everything else as background, no colored fabric required.

  1. Import the clip you already have.
  2. Apply AI background removal. The tool detects your outline automatically, frame by frame, and separates it from the room around you.
  3. Add whatever background you want behind it – a still image, footage, or a flat color.
  4. Preview the edges around fast movement – a quick hand wave or a head turn is the hardest moment for any detection algorithm – then export.

This is the version most casual creators reach for, since it skips the equipment entirely and works with footage shot in an ordinary bedroom, office, or kitchen. If you're editing on the go, Movavi App brings the same idea to mobile: it can switch backdrops directly on your phone, no green screen needed, which is handy for a quick reel between filming and posting.


Tips for clean edges and natural-looking results

A few small habits make a bigger difference than any single setting:

  • Light yourself evenly. Shadows across your face or one side of your body confuse both chroma key and AI detection.
  • Wear solid colors that contrast with your background. Green shirts and green screens don't mix; the same logic applies loosely to AI removal.
  • Keep the camera steady. A tripod or stable surface reduces the shakiness that makes edge detection harder.
  • Watch for loose hair and thin objects. These are the hardest elements for any removal tool, AI or chroma key alike.
  • Preview before committing. Play back the clip at full size instead of judging it from the small thumbnail, before you export.

Which background suits which kind of video

The right choice depends less on the tool and more on what you're actually making.

  • Lifestyle vlogs and daily routines: a light blur keeps things personal and real, without turning your home into the main subject.
  • Beauty, fashion, and product reviews: a flat, replaced background puts the product front and center – useful when the room's lighting or color would otherwise clash with what you're showing.
  • Business updates and presentations: a branded or plain backdrop reads as more polished than a home office, without needing an actual studio.
  • Cooking and recipe videos: the blur video effect usually works better than a full swap here, since the kitchen itself is often part of the story.
  • Gaming and tech reviews: a replaced background can hide a messy desk setup while keeping the focus on the device or the gameplay footage on screen.

If a full replacement looks more natural for your travel story or your tarot reading setup than a blur would, go with what actually looks right on your screen.

Which Movavi Video Editor version do you need

Movavi offers tailored options for every budget, so the right starting point depends on how often you'll be doing this. If you're just testing whether a blur or a swap looks right for your channel, the free download is enough to get a feel for the workflow. Once you're editing background changes on a regular basis, the full version is where the export limits disappear and the AI tools open up completely.

The full version also opens up an optional Movavi Effects subscription – 10,000+ extra effects and 1,500+ music tracks across themes like blogs, business, and family content, in case your background swaps are part of a bigger project that also needs titles, transitions, or a soundtrack.

Movavi is trusted at scale – the software is used by more than 70 million people across 190+ countries, with 15+ updates released every year, so the AI tools behind background removal keep getting refined rather than staying static after launch.

Common background-editing mistakes to avoid

Most background-editing problems come down to a handful of repeatable slip-ups, and catching them before export saves a re-do later.

  • Skipping the edge check. A background swap can look perfect at a glance and fall apart around the hairline on closer inspection.
  • Using a background that doesn't match the lighting. If your new backdrop is lit differently than you are, the swap reads as fake even when the edges are clean.
  • Over-blurring. A heavy blur on a busy background sometimes looks less natural than a lighter touch – start subtle and increase only if needed.
  • Forgetting audio. Cleaning up the visual background doesn't fix background noise; that's a separate AI noise removal step if your room is echoey or loud.
  • Choosing a background with the wrong aspect ratio. A replacement image that's the wrong shape gets stretched or cropped oddly – check that your new background matches your export format before you commit to it.
Movavi Video Editor
Create awesome videos easily

*The free version of Movavi Video Editor may have the following restrictions depending on the build: watermark on exported clips, 60-second video or 1/2 audio length limit, and/or some advanced features unavailable when exporting videos.

Frequently asked questions

Do I need a green screen to remove a video background? 

No. Chroma key is one option, but AI background removal detects your outline automatically and works with ordinary footage – no colored fabric required.

Can I blur a video background without a green screen? 

Yes. Blurring uses the same AI-detected outline as full replacement; you're just placing a softened copy of the original background behind you instead of a new image.

Does AI background removal work on phone footage? 

It works best with steady, well-lit footage, whether that's from a phone or a dedicated camera. Shaky or dim clips make edge detection harder regardless of the source.

Will removing or replacing the background lower my video quality? 

Not inherently – quality loss usually comes from export settings, not the removal tool itself. Export at the resolution your platform recommends and the swap won't cost you sharpness.

Do I need a green screen and AI background removal, or just one of them? 

Just one, depending on your setup. Chroma key is the better choice if you already have a green screen and controlled lighting. AI background removal is the better choice if you're working with footage from an ordinary room and don't want to set anything up.

Can I switch between a blurred and a replaced background in the same video? 

Yes. Both use the same subject-detection step, so you can blur the background for one section of a clip and swap it entirely for another, as long as you apply each effect to the right part of the timeline.

What file formats work best for a background image or video? 

Common formats like JPEG, PNG, and MP4 all work fine to change video backgrounds. If you're using a video as the new backdrop rather than a still image, matching its resolution to your main footage keeps the composite from looking mismatched.

Have questions?
If you can’t find the answer to your question, please feel free to contact our Support Team.
Join us for discounts, editing tips, and content ideas

1.5M+ users already subscribed to our newsletter

By signing up, I agree to receive marketing emails from Movavi and agree to Movavi's Privacy Policy.