If you want to learn how to make a time-lapse video from photos, here’s a simple guide for you.

How to Make a Time-Lapse Video
Try Movavi Video Editor!
- Trim, cut, crop, and rotate videos
- Add titles, stickers, and transitions
- Apply visual effects
By clicking the download button, you're downloading a free version of the program.*

Edited by
10,456
A time-lapse takes something slow, like a sunset or a plant unfurling, and crunches it into a few fast seconds of video. A crowd crossing a square works just as well. Basically, anything that's duller to watch in real time than sped up. For YouTubers and bloggers, it's also a fast way to get through the parts of a video nobody wants to watch in real time – packing for a trip, prepping ingredients before a recipe, or painting a room before a reveal.
Wondering how to make a time-lapse video? There are two ways to do it – speed up a clip you already filmed or line up a series of still photos and play them back quickly. Try Movavi Video Editor to create a time-lapse video in just a few simple steps. The program is designed for beginners and everyday creators, bringing high-quality results from the first try. The drag-and-drop workflow, hover previews, and clean interface speed up the editing process, so you can spend time creating – not figuring out how the software works. The free download option lets you try the app on Windows and Mac right away.
How to make a time-lapse video from photos
Step 1. Import your photos
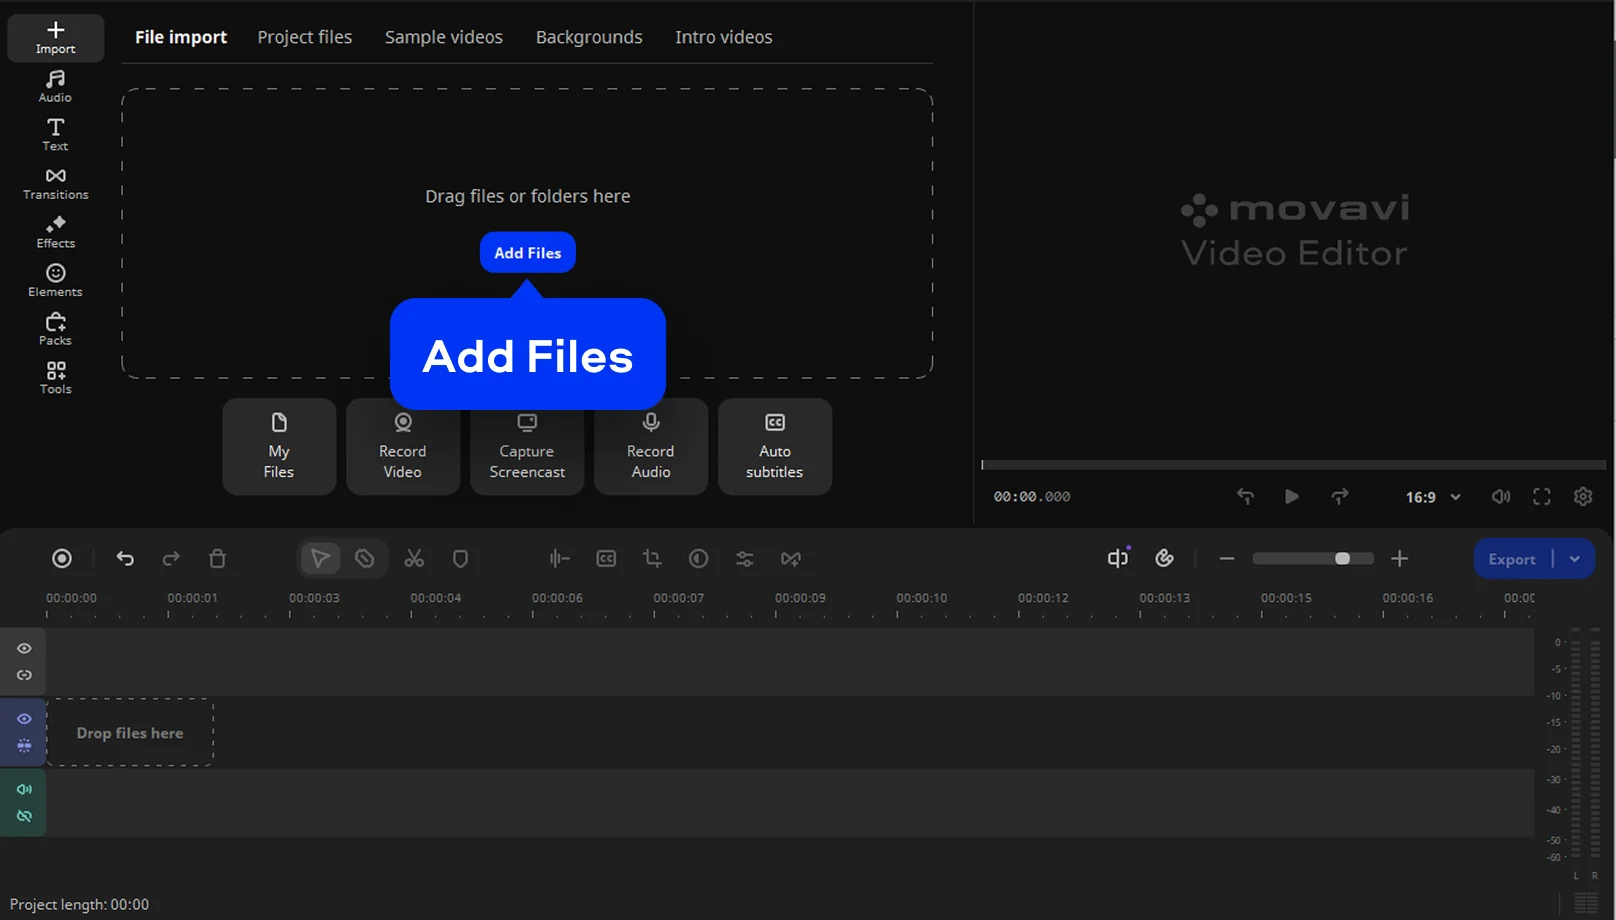
Click Add Files and select the images for your time-lapse video. Drag your photos onto the timeline and arrange them in the desired order. Start with your best, sharpest shots – at high speed, a blurry frame only stays on screen for a fraction of a second, but you'll still notice it.
Step 2. Shorten each photo's length
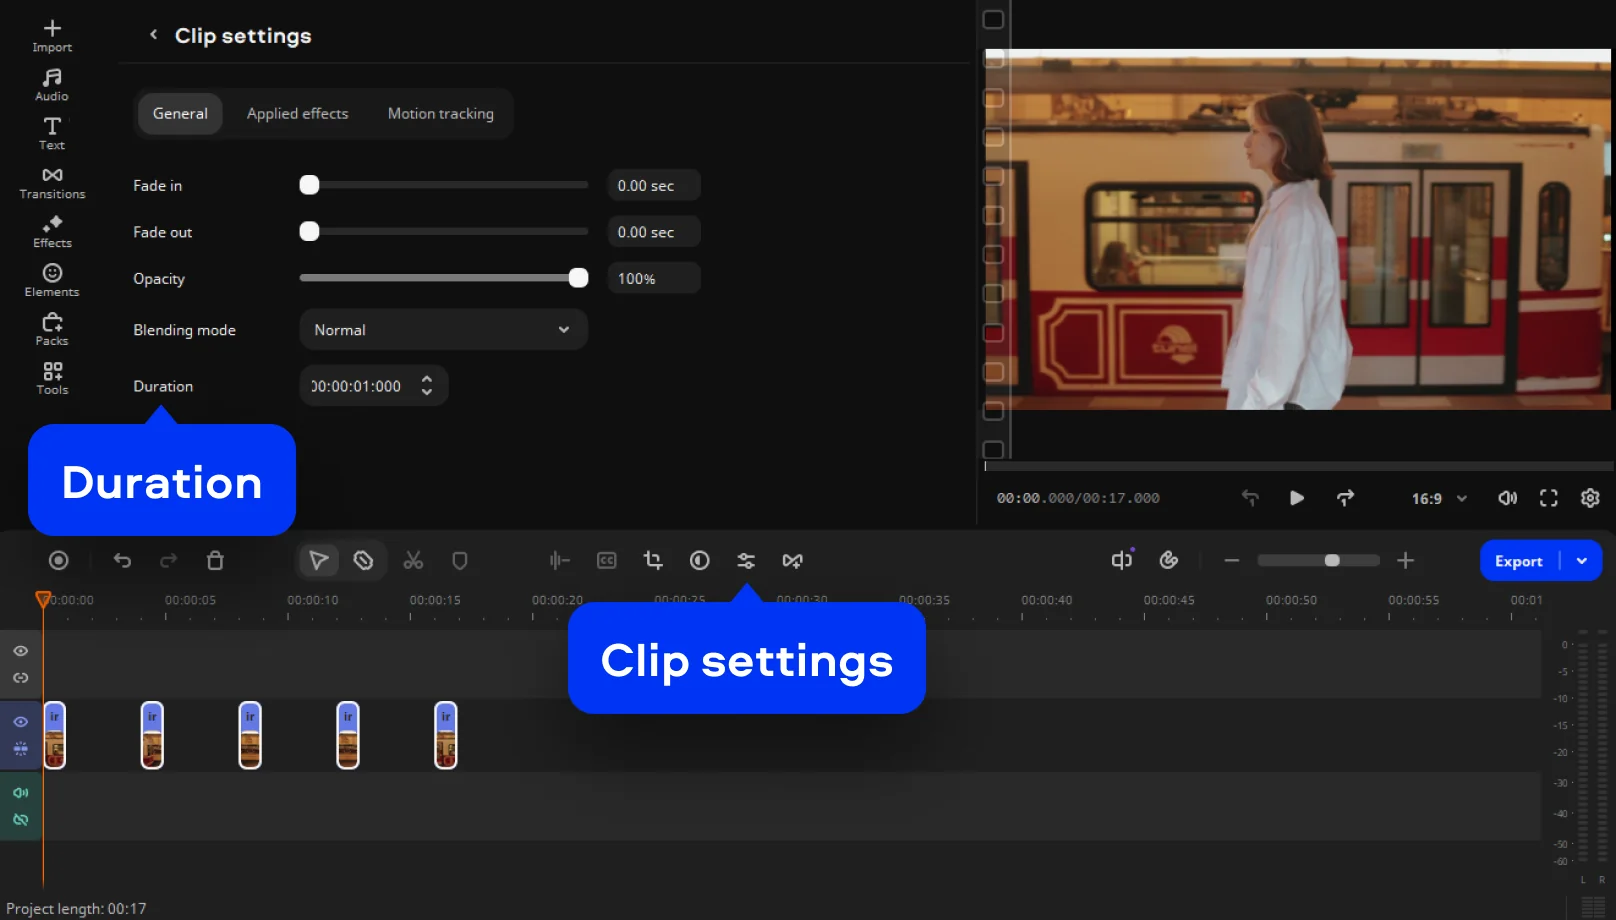
By default, a photo sits on the timeline far longer than a time-lapse needs. To trim down the length, select the images on the timeline, click the Clip settings icon, and find the Duration field. Set the duration to one second or even less.
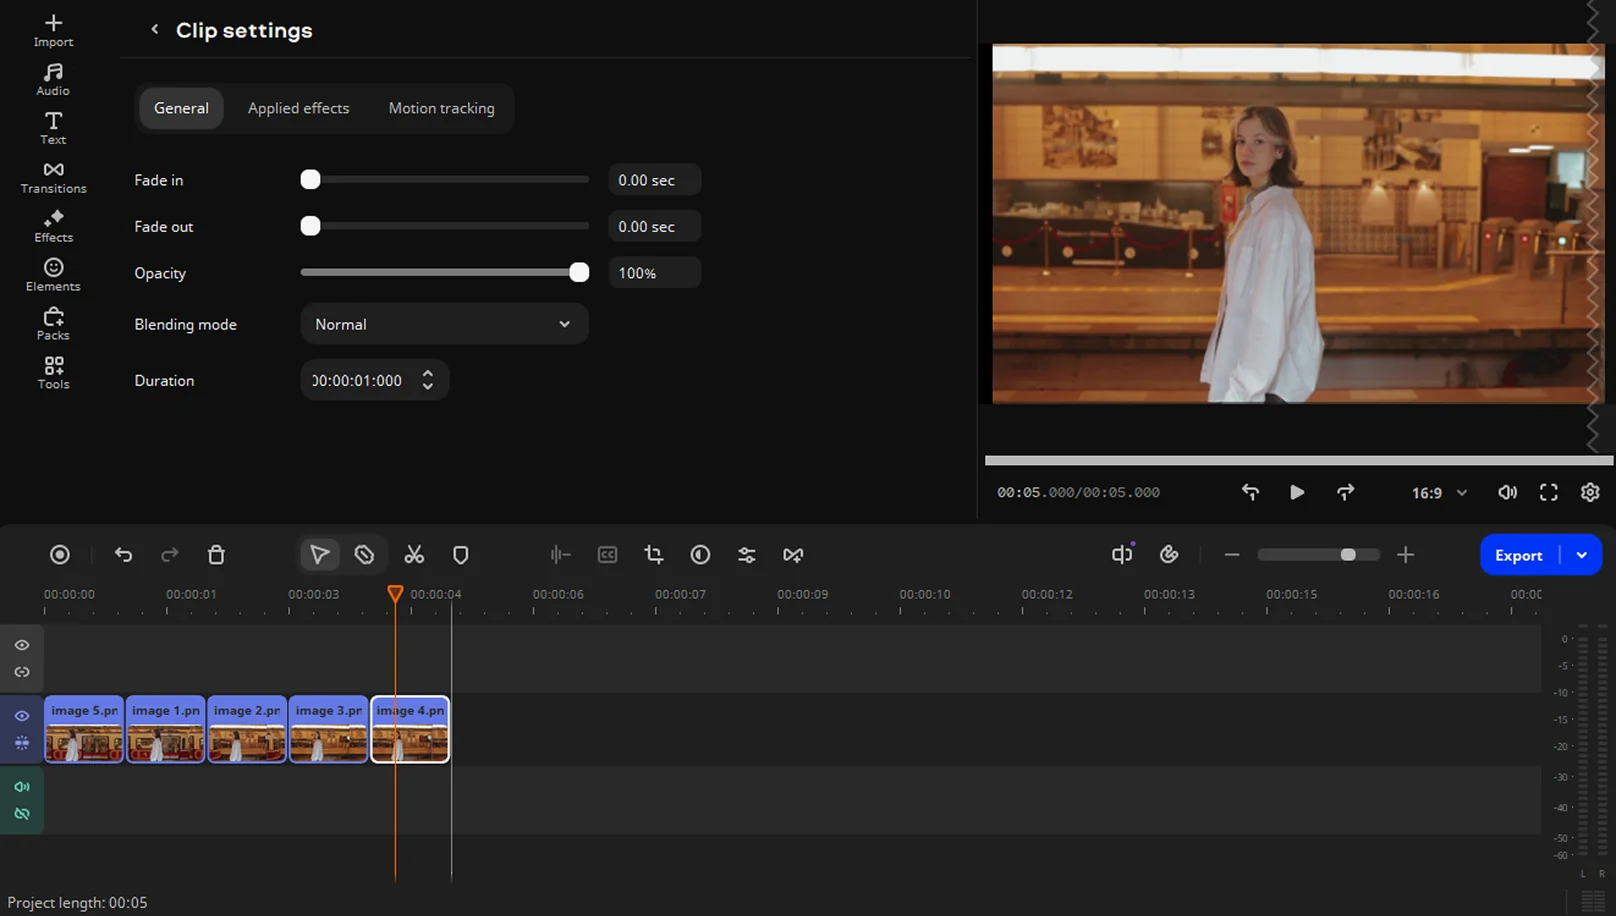
When you change the image length, gaps will appear between the photos on the timeline – move the files close to each other to avoid gaps. You can preview the result and then change the image length as you wish.
Step 3. Enhance the color
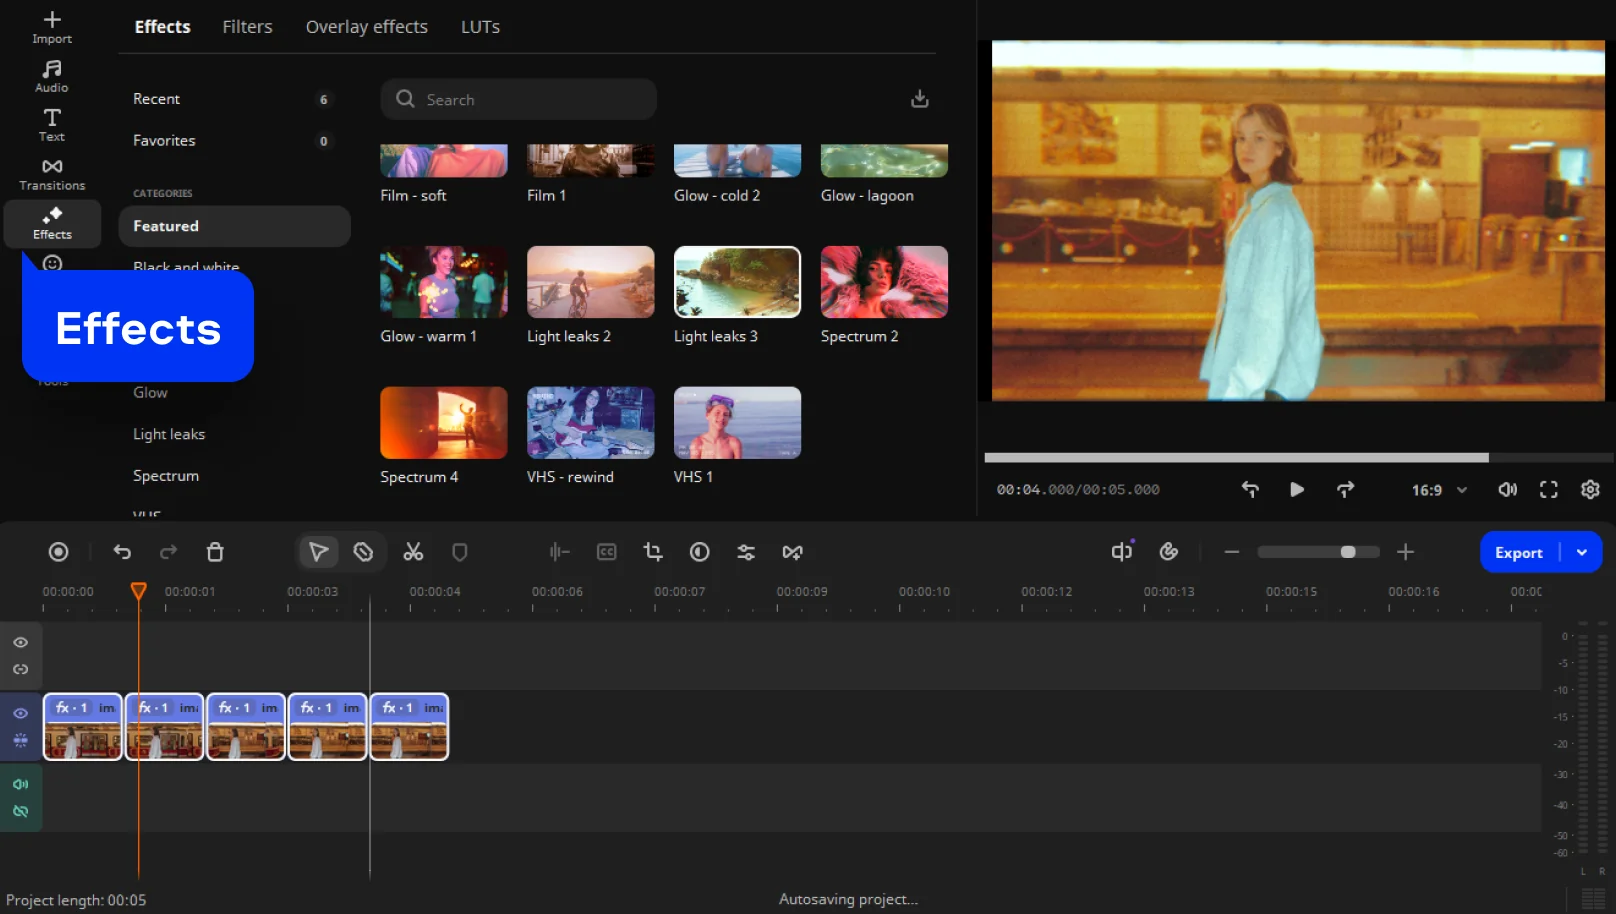
Your photos may not match in color, especially if they were shot across different lighting. A color preset will help you out. Open Effects on the side panel and choose from a built-in collection of color effects, filters, LUTs, and overlays. Use instant hover previews to display an immediate glimpse of effects before actually applying them to your video. When you find the effect you like best, simply drag and drop it onto the timeline.
Step 4. Add background music
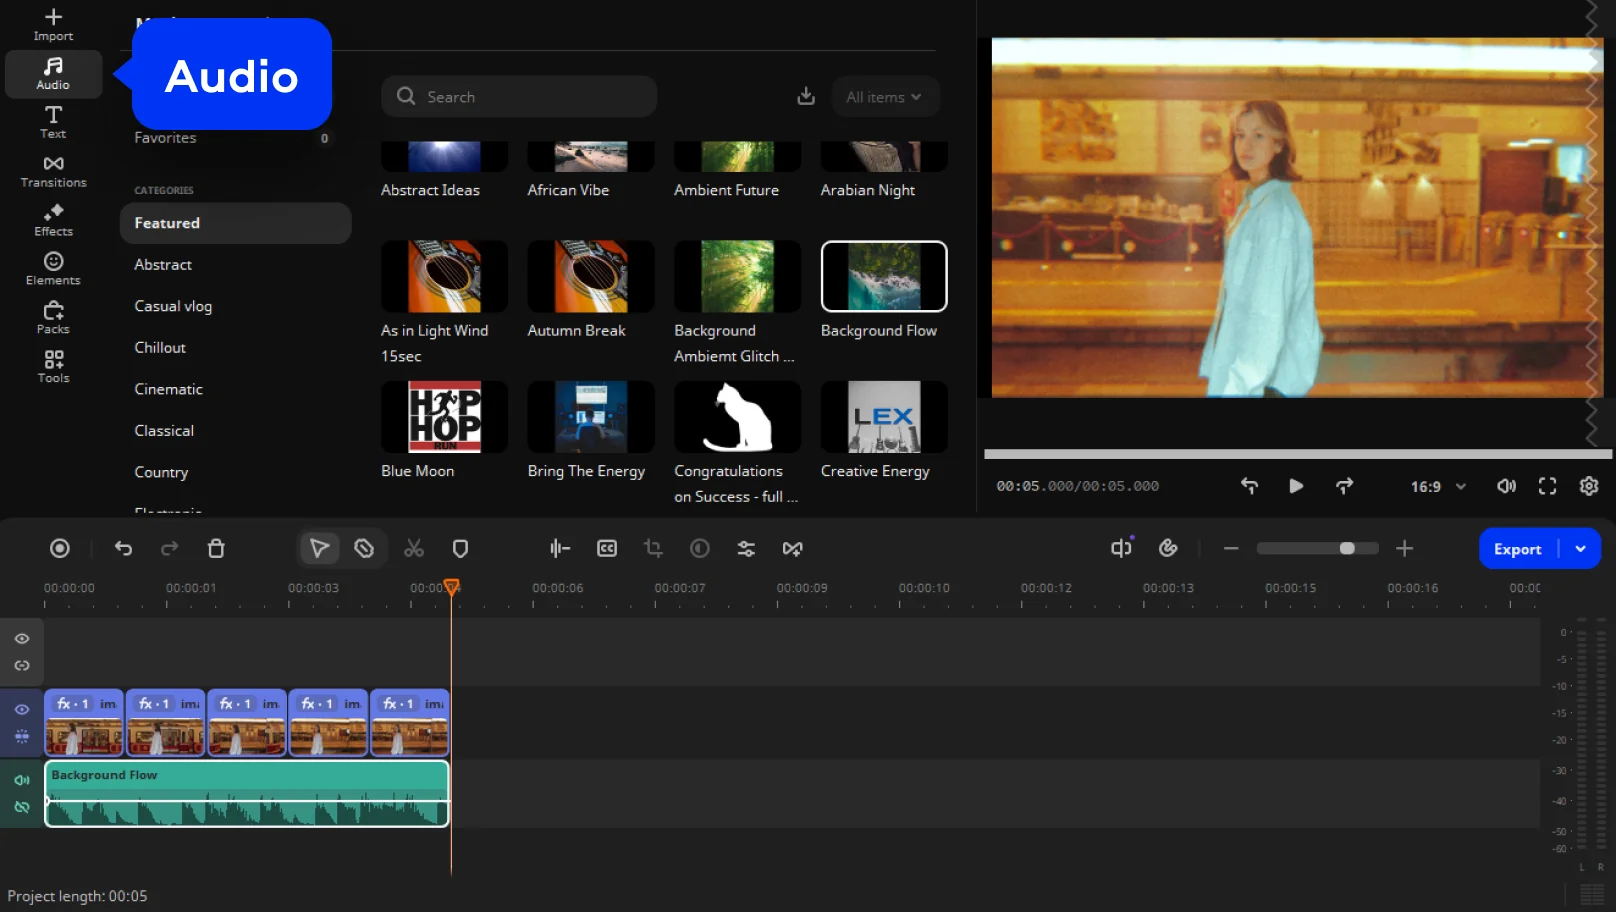
Add some music to liven up your time-lapse. Go to Audio and browse through Movavi’s collection of copyright-free music tracks. For those who want to expand their collection, there's Movavi Effects – an additional subscription with 10,000+ effects across themes like blogs, business, family, and holidays, and 1,500+ music tracks for every mood.
Select the audio that fits your video and place it on the timeline. Trim the track to match the timelapse length and apply Fade in / Fade out effects.
Step 5. Export your video
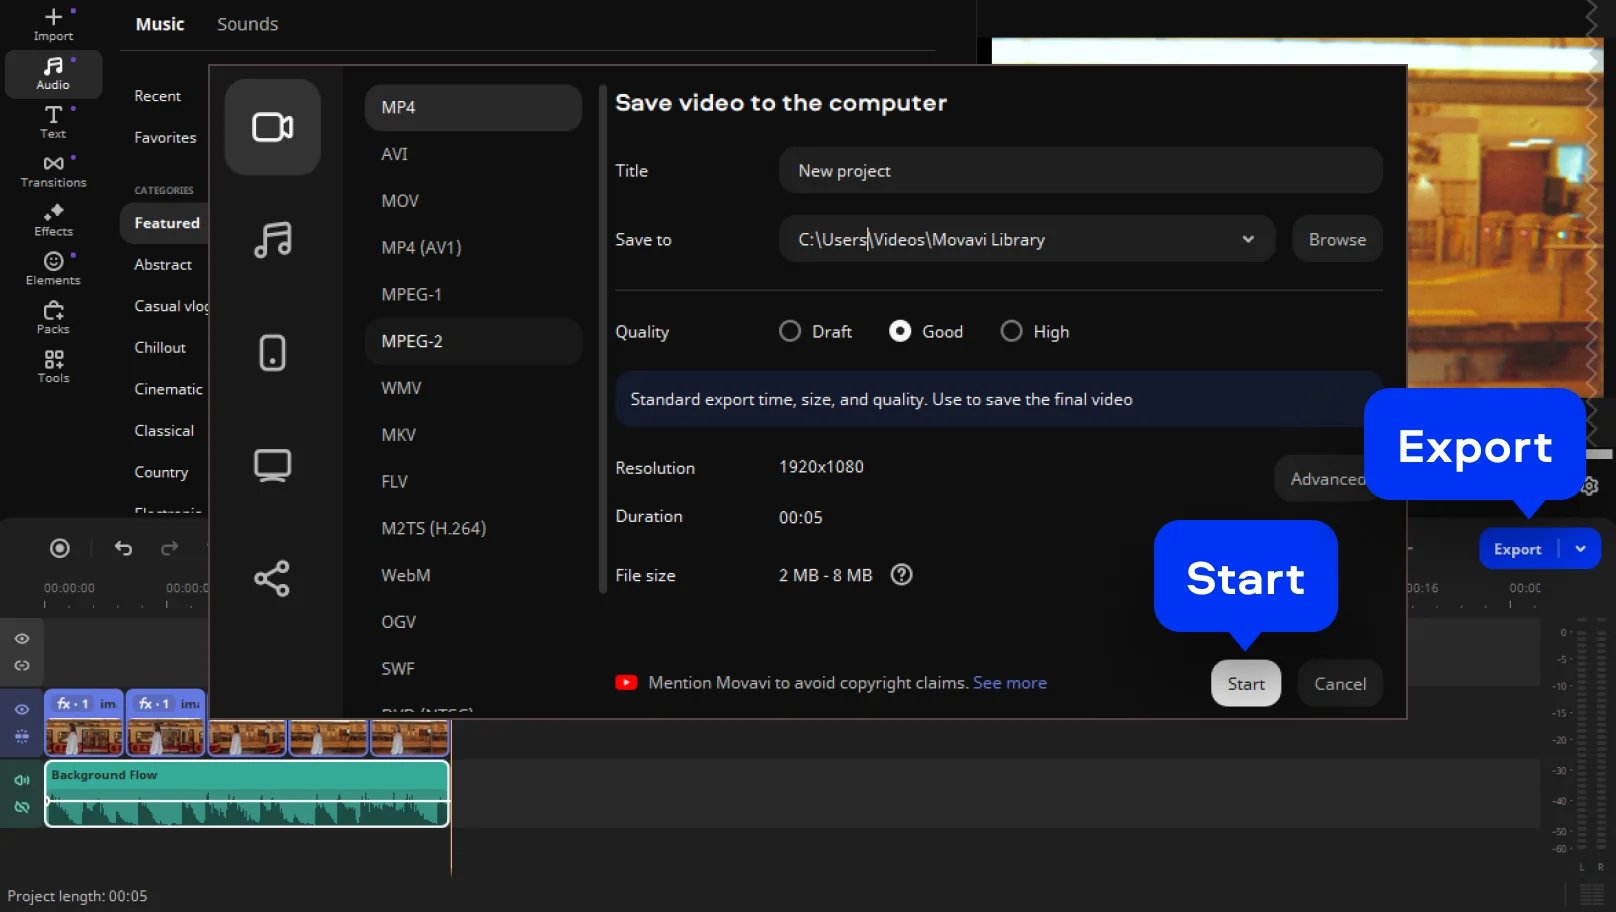
Preview your video, and if everything suits you – export the result. Simply hit Export, set the output parameters, and click Start.
How to turn a recorded clip into a time-lapse
Have video footage? Speeding it up is the faster route, since there's no importing or arranging a batch of photos first.
Step 1. Import your clip
Hit Add Files and import your video file, then drag it onto the timeline.
Step 2. Adjust the speed
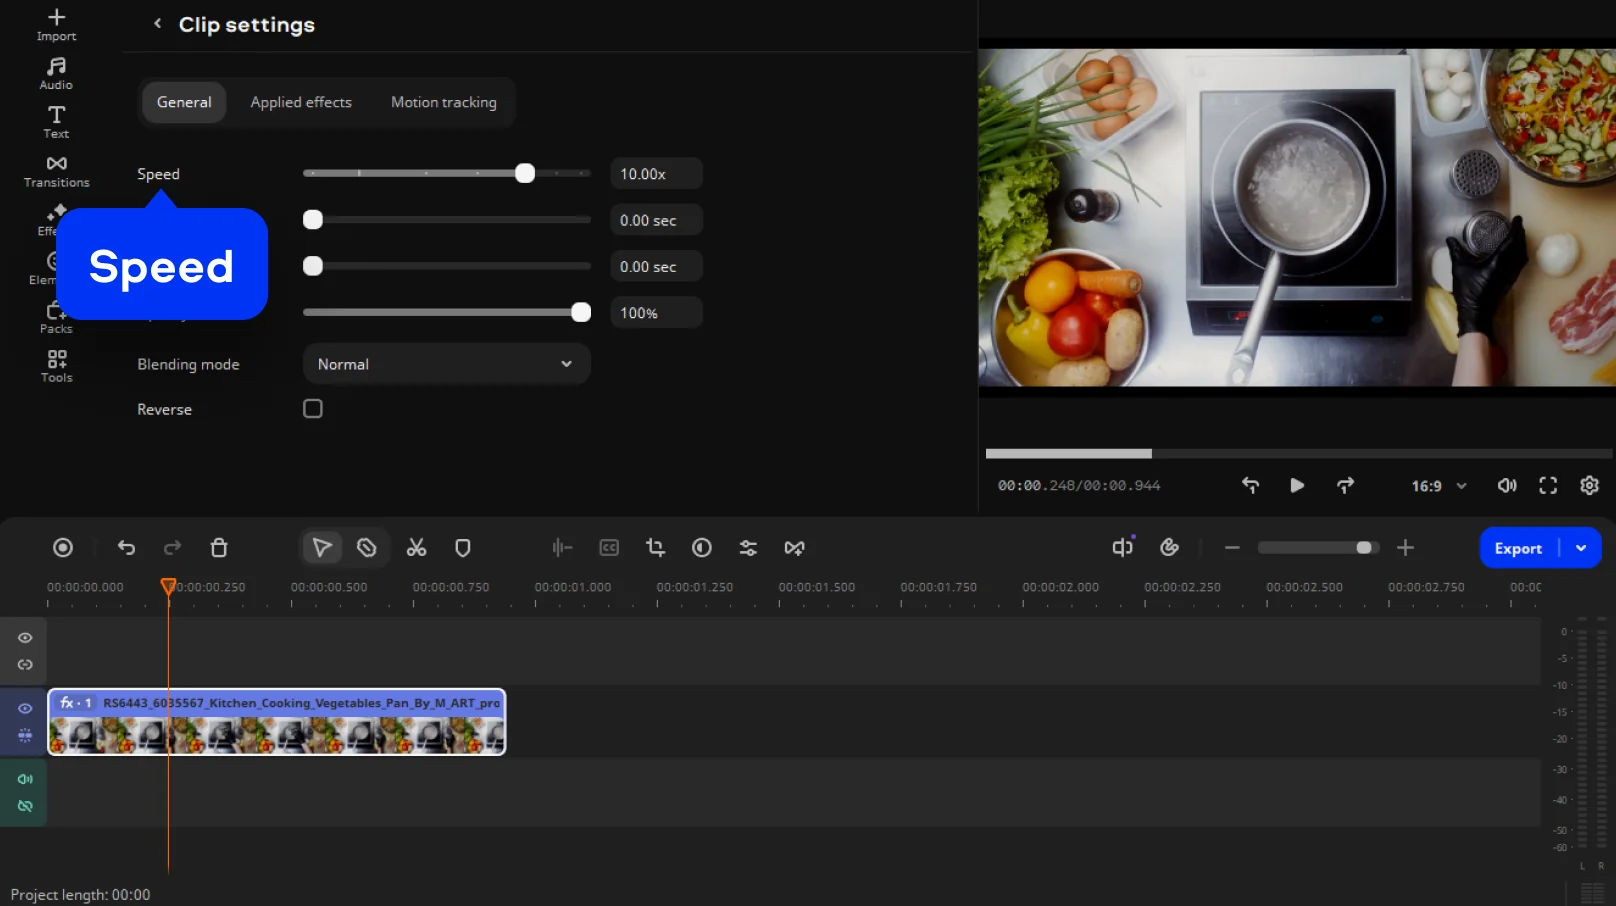
Select the clip on the timeline and double-click it to open its speed settings. Find the Speed slider and drag it up – you can start with 10x and see if it’s enough. The tool can accelerate footage up to 100x video’s original speed.
Step 3. Preview and export
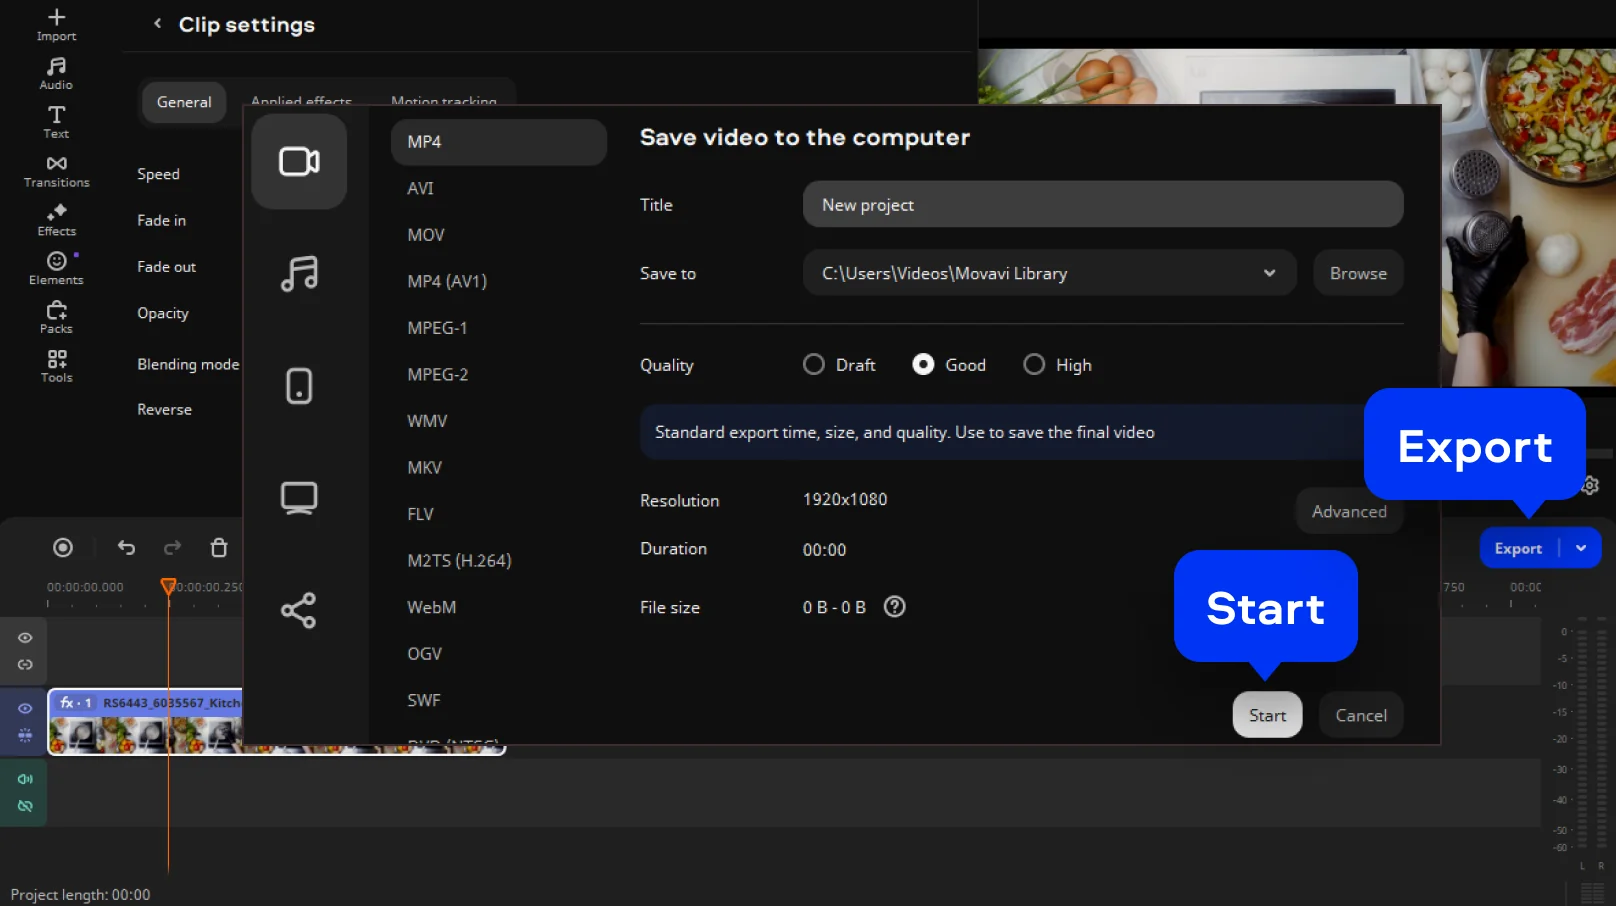
Check the whole clip at the new speed before you move on. Once it plays back the way you want, hit Export and save the result.
Footage or photos – which one fits your project
Movavi Video Editor
Create awesome videos easily
*The free version of Movavi Video Editor may have the following restrictions depending on the build: watermark on exported clips, 60-second video or 1/2 audio length limit, and/or some advanced features unavailable when exporting videos.

Frequently asked questions
How long should each photo stay on screen in a photo time-lapse?
How long should each photo stay on screen in a photo time-lapse?
Set each photo’s duration from half a second to one second. You can make the length shorter to create a faster, punchier feel. Hold images for a bit longer if there's fine detail worth noticing.
What speed should I use to turn a video into a time-lapse?
What speed should I use to turn a video into a time-lapse?
To turn a video into a time-lapse, you’ll need to increase the video speed up to 10x or 20x its original speed. If the original video is long and shows gradual change, you can apply 100x speed adjustment.
Can I make a time-lapse video on an iPhone?
Can I make a time-lapse video on an iPhone?
Yes – the Camera app has had a built-in Time-Lapse mode since iOS 8, so you can shoot one without installing anything extra.
Can I make a time-lapse offline?
Can I make a time-lapse offline?
Sure, you can use desktop software, like Movavi Video Editor. Its intuitive interface makes it easy to get started and edit a complete video from the first try. By automating tedious editing tasks, Movavi lets video makers focus on creating and being themselves on screen.
Is there a free option in Movavi Video Editor?
Is there a free option in Movavi Video Editor?
Yes, and it includes essential editing features alongside automated tools like auto subtitles, auto crop, and silence removal. Free exports are capped at 60 seconds, watermarked, and lower in quality than a paid export. The free version is ideal for testing the software's capabilities, and users can upgrade to the full version at any time to remove all export restrictions and the watermark.

Have questions?
If you can’t find the answer to your question, please feel free to contact our Support Team.
Join us for discounts, editing tips, and content ideas


1.5M+ users already subscribed to our newsletter