Best 4K Video Editor for PC | 4K Video Maker by Movavi

Movavi Video Editor is an accessible 4K video editor for PC and Mac that lets you import, cut, colour-correct, and export ultra-high-definition footage without quality loss – no complex setup required.


Whether you are creating travel films, product videos, tutorials, or short films, Movavi gives you the tools to work confidently with 4K footage and deliver a polished result on any platform.

Trusted by 70 million creators worldwide

70M+

users

190+

countries

15+

updates per year

10,000+

effects to choose from

Key features of the 4K video editor

Everything you need to edit 4K footage cleanly – from import to final export – in one straightforward tool.

Edit 4K footage without quality loss

Movavi Video Editor handles 3840 × 2160 (UHD 4K) and 4096 × 2160 (Cinema 4K) footage natively, keeping every detail sharp throughout the editing process. GPU-accelerated playback means the timeline stays responsive even on mid-range hardware, so you can scrub, trim, and rearrange 4K clips without waiting for buffering or dropped frames.

Colour correction, filters, and transitions

The built-in colour adjustment tools let you balance exposure, contrast, and saturation on 4K clips with the same precision available in professional editing suites. Over 100 filters and 100+ transitions are included in the library, and each can be applied to individual clips or the entire timeline with a single drag, making 4K video editing faster without sacrificing visual quality.

Trim, split, and multi-track editing

The multi-track timeline supports multiple video and audio layers, so you can overlay clips, add a music track, and place title graphics – all at 4K resolution – without leaving the editor. The magnetic timeline snaps clips into place to keep edits tight, and the split tool lets you make frame-accurate cuts even in long 4K sequences.

Export in 4K for any platform or device

Movavi exports finished 4K projects in MP4 (H.264 and H.265), MOV, AVI, and other widely supported formats. H.265 encoding gives you the highest quality at the smallest file size – critical for 4K, where H.264 files can be two to three times larger. Dedicated presets for YouTube, Vimeo, and smart TVs mean you choose a destination and the right settings are applied automatically.

Why use Movavi for 4K video editing

Three reasons Movavi stands out as an accessible 4K video maker.

Smooth performance on mid-range hardware

Movavi uses GPU hardware acceleration to decode and render 4K footage efficiently, so you do not need a high-end workstation to edit 4K video. Most modern laptops with a dedicated graphics card – even mid-range ones – can handle a 4K timeline in Movavi without significant lag. Proxy file support further reduces the load during editing by substituting lower-resolution stand-ins that are swapped for the original 4K files at export.

All editing tools in one place

Movavi combines trimming, colour grading, audio editing, title design, effects, stabilisation, and 4K export in a single application. There is no need to move footage between separate tools for different tasks – the entire 4K video editing workflow from raw clip to finished file stays inside one program, which saves time and prevents the quality degradation that comes from multiple re-encodes.

Windows and Mac – free trial included

Movavi Video Editor installs natively on both Windows and macOS and supports Apple Silicon chips for maximum performance on the latest Mac hardware. A 7-day free trial gives full access to all 4K features – including export – before any purchase is needed, so you can confirm the editor fits your workflow and hardware before committing.

How to edit 4K videos with Movavi – 3 steps

From raw 4K footage to a finished, export-ready video in three straightforward steps.

Step 1. Import your 4K footage

Open Movavi Video Editor and click Add Files to start editing a 4K video. Drag it onto the Timeline. Make sure the project resolution matches your footage so you keep the original quality intact. If you are working with multiple clips, organize them early to avoid chaos later.

Step 2. Adjust the video

Select your clip on the Timeline and start trimming unnecessary parts. Rearrange scenes, split clips, and fine-tune the pacing. Use color adjustment tools to balance exposure and improve the look of your footage. You can also add filters, transitions, titles, or stabilize shaky shots if needed.

Step 3. Export the video in 4K quality

Once everything looks right, click Export and choose a format like MP4 or MOV. Set the resolution to 4K to preserve detail, then adjust quality settings if needed. Start the export and let the software process the final video. When it is done, your project is ready to upload, share, or archive without losing that high-resolution edge.

Who uses a 4K video editor

4K video editing is no longer limited to professionals – these are the three most common user types.

Travel and lifestyle creators · CONTENT CREATION

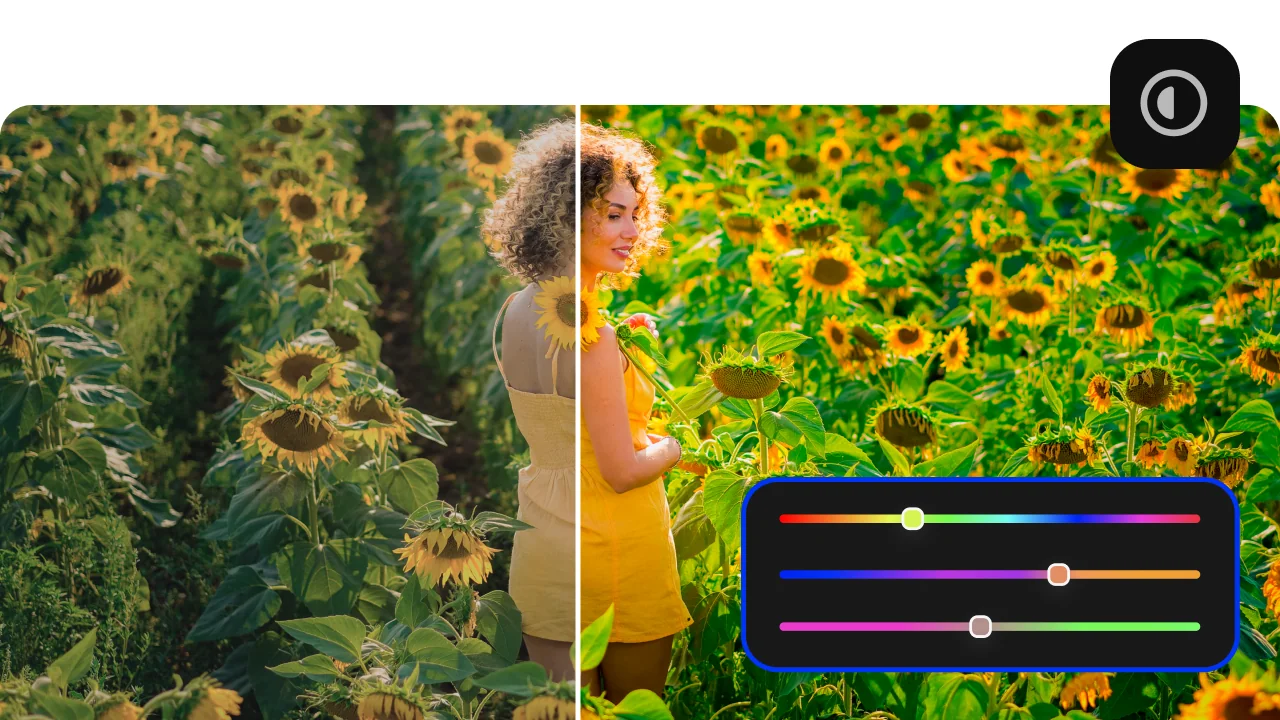
Creators who shoot with mirrorless cameras, GoPros, or modern smartphones produce 4K footage as a matter of course. A 4K video editor that is fast to learn and does not require expensive hardware lets them turn raw travel footage into polished YouTube videos, Instagram Reels, or client deliverables without a lengthy post-production pipeline.

Marketing and brand video teams · BUSINESS

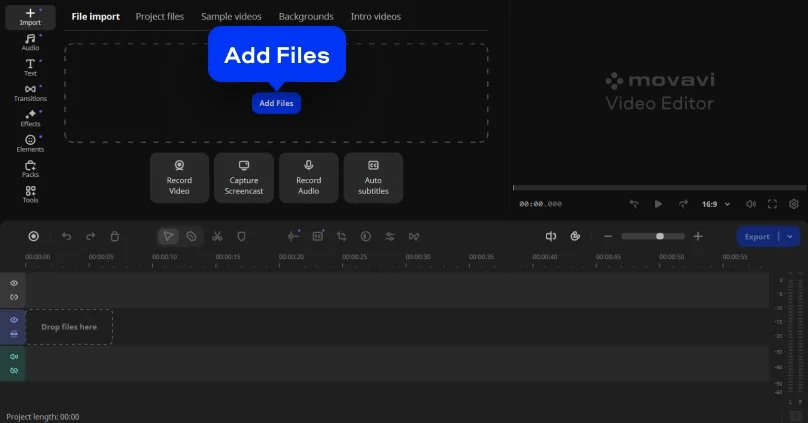
Marketing departments producing product demos, company culture videos, and event highlights increasingly deliver in 4K because large-screen display at trade shows and on modern TVs demands it. Movavi gives small internal teams a 4K video maker that handles the full workflow – from editing to export presets optimised for specific platforms – without the licensing cost of broadcast software.

Film students and indie filmmakers · FILMMAKING

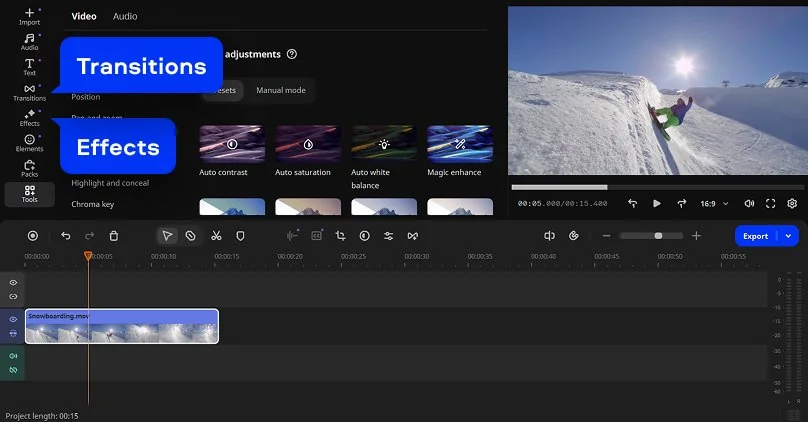
Film students and independent directors working with 4K cameras need an editor that supports their resolution without requiring a high-end computer lab. Movavi's proxy workflow and hardware-accelerated playback make 4K video editing practical on a student laptop, and the familiar non-linear timeline means skills transfer directly to professional tools when the time comes.

Frequently asked questions

Common questions about 4K video editing and what you need to get started.

What is the best 4K video editor?

The best 4K video editor depends on your skill level, budget, and workflow. For beginners and intermediate creators, Movavi Video Editor offers the most accessible entry point: it handles native 4K editing on both Windows and Mac, includes GPU-accelerated playback, and covers the full 4K video editing workflow – trimming, colour grading, effects, audio, and export – without a subscription. DaVinci Resolve (free) is the professional standard for colour science and handles 4K and 8K with exceptional depth, though its learning curve is significantly steeper. Adobe® Premiere® Pro is the most widely used tool in broadcast production but requires a monthly subscription. Final Cut Pro is the preferred choice for Mac-based professionals. For most independent creators who need capable 4K video editing software without a long ramp-up time or recurring cost, Movavi delivers the best balance of features and accessibility.

How to edit video in 4K quality?

To edit a video in 4K quality, open a 4K video editor and create a project set to 3840 × 2160 (UHD 4K) or 4096 × 2160 (Cinema 4K) so the timeline resolution matches your source footage. In Movavi, click Add Files, drag your 4K clip onto the Timeline, and confirm the project resolution in the settings. During 4K video editing, apply cuts and rearranges on the timeline without re-encoding – save rendering for the final export. Use the colour tools to grade the footage and the stabilisation filter to smooth handheld shots. When exporting, choose H.265 (HEVC) at the original frame rate to get the best quality-to-file-size ratio. In Movavi, open Export, select MP4, click Advanced, open the Resolution drop-down, and choose 3840 × 2160 to output in full 4K. The process is the same on Windows and Mac.

What do I need to edit a 4K video?

To run a 4K video editor smoothly you need a modern multi-core CPU (Intel Core i7 / AMD Ryzen 7 or equivalent), at least 16 GB of RAM (32 GB recommended for complex multi-track timelines), a dedicated GPU with at least 4 GB VRAM for hardware-accelerated decoding, and an NVMe SSD for fast read speeds when scrubbing 4K footage on the timeline. On the storage side, raw 4K footage from a mirrorless camera typically runs 2–4 GB per minute, so a 2 TB drive fills quickly. You do not need a 4K monitor to do 4K video editing – a 1080p colour-accurate display is sufficient for most grading work. Movavi supports hardware acceleration on both Windows (NVIDIA CUDA / AMD AMF) and Mac (Apple Silicon and Intel with AMD GPU), which significantly reduces the processing demand compared to CPU-only rendering.

Can CapCut do 4K videos?

Yes – CapCut supports 4K video editing on both mobile and desktop. The desktop app accepts 4K source files and exports at up to 4K 60fps, making it a functional free 4K video maker for social media content. On mobile, 4K export is available on supported devices, though some Android builds limit it on the free plan. CapCut's strengths are its AI tools, template library, and speed for short-form content optimised for TikTok, YouTube Shorts, and Instagram Reels. Its limitations as a 4K video editor for longer-form projects include fewer audio mixing options, limited codec control on export, and a timeline that is optimised for short sequences rather than multi-scene productions. For short social clips at 4K, CapCut works well; for longer videos, films, or brand content where bitrate, colour space, and export precision matter, Movavi Video Editor or DaVinci Resolve gives more reliable and professional 4K output.

Join us for discounts, editing tips, and content ideas

1.5M+ users already subscribed to our newsletter

By signing up, I agree to receive marketing emails from Movavi and agree to Movavi's Privacy Policy.