Step 1. Install Movavi’s video overlay software
Open the file you’ve downloaded and follow the on-screen instructions to install the software on your computer.

Overlay Video Editor by Movavi
Hundreds of overlays, filters, transitions, titles
One-click AI tools: auto subtitles, noise removal, and more
Fast and easy overlay editing: cut, crop, adjust colors and speed
Why the overlay video editor by Movavi stands out
Beginner-friendly with pro-level features
Movavi balances professional-grade features with an interface that even complete beginners can quickly master.
Tons of built-in effects and music
Movavi comes loaded with 10,000+ creative effects, built-in transitions, titles, overlays, music tracks, sounds, frames, backgrounds, stickers, and more.
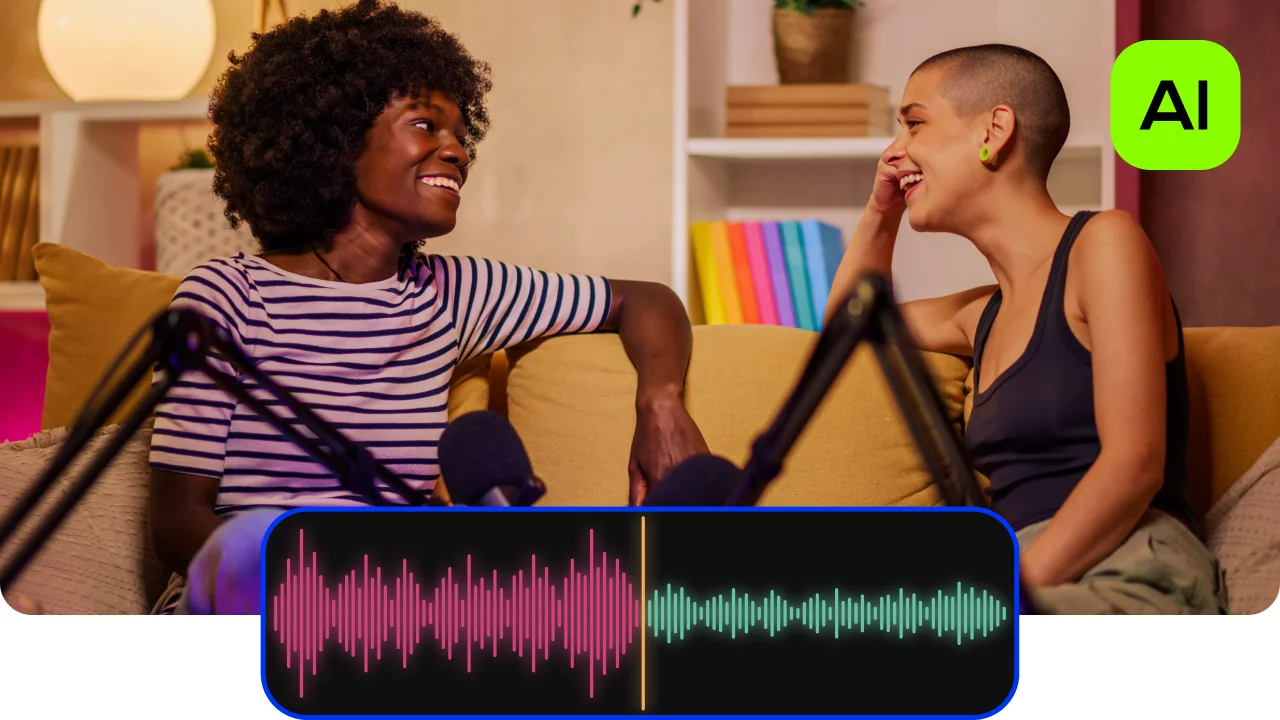
One-click AI
Movavi makes it super-easy to create subtitles, remove pauses, clean up noisy audio, track motion, change out backgrounds, and more – all automatically, no technical skills needed.
Smooth performance
Movavi is lightweight, easy to set up, and runs smoothly – even if your laptop isn’t top-of-the-line.
Features for AI video editing
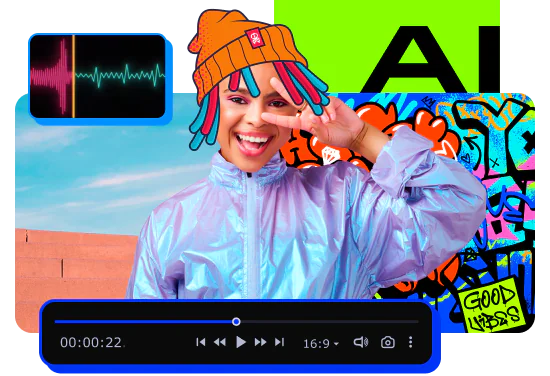
AI noise removal
Automatically remove car, wind, and other uncool sounds from your clips with our AI-driven audio denoiser. Create videos with crisp sound that viewers are sure to appreciate.
AI motion tracking
Enhance reality in your videos with additional moving graphics. Just click, and AI will quickly attach any photos, videos, emojis, or memes to objects in your footage.
AI background removal
Use the power of the AI to instantly swap backgrounds in your videos with no green screens. Drop in a new vibrant scene and get ready for an avalanche of likes on socials!

Silence removal
Cut out unwanted pauses automatically or fine-tune the pause length and volume threshold yourself. Skip the tedious cleanup and make your videos more dynamic in a flash.

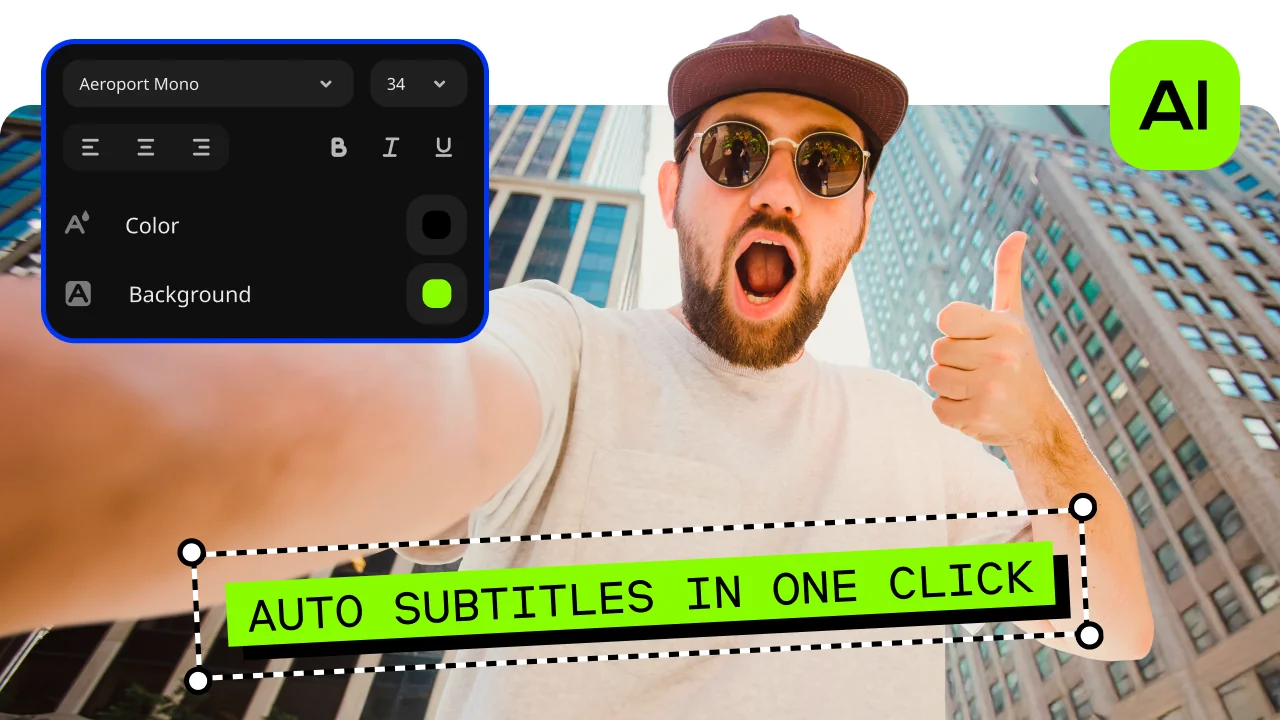
Automatic subtitles
Let AI quickly turn your speech into text and automatically create captions for your videos in almost any language. Just choose the font, text color, position – and you’re all set!
How to overlay videos with Movavi Video Editor
The steps below explain how to put a video on top of another video using Movavi Video Editor, from importing files to exporting the finished result.
Step 1. Install Movavi’s video overlay software
Open the file you’ve downloaded and follow the on-screen instructions to install the software on your computer.
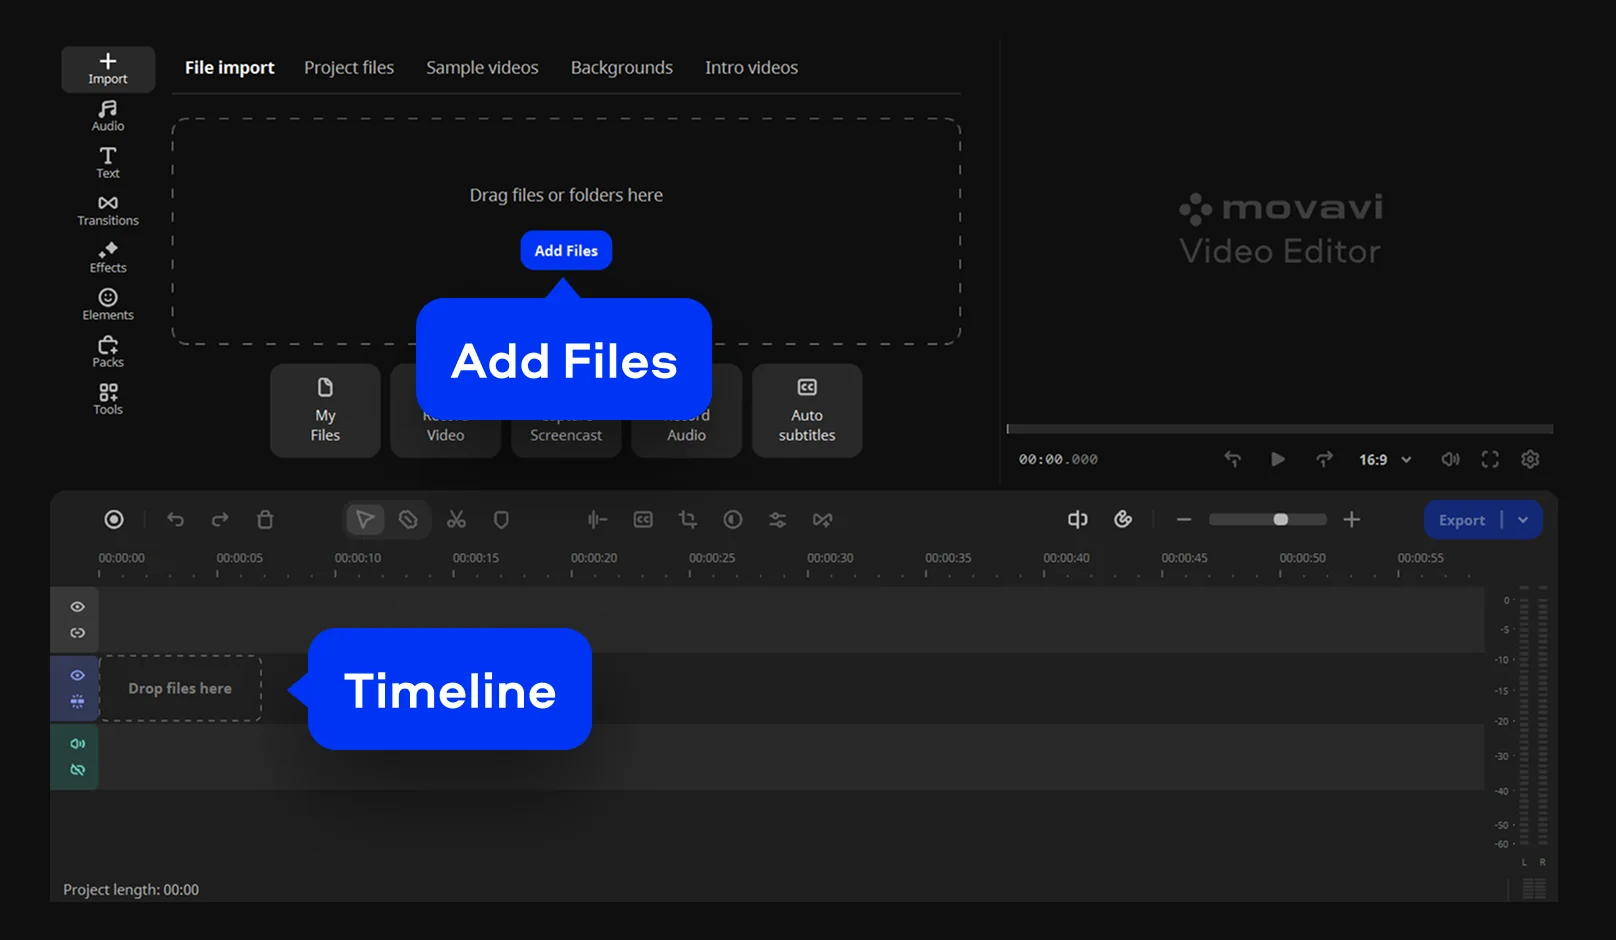
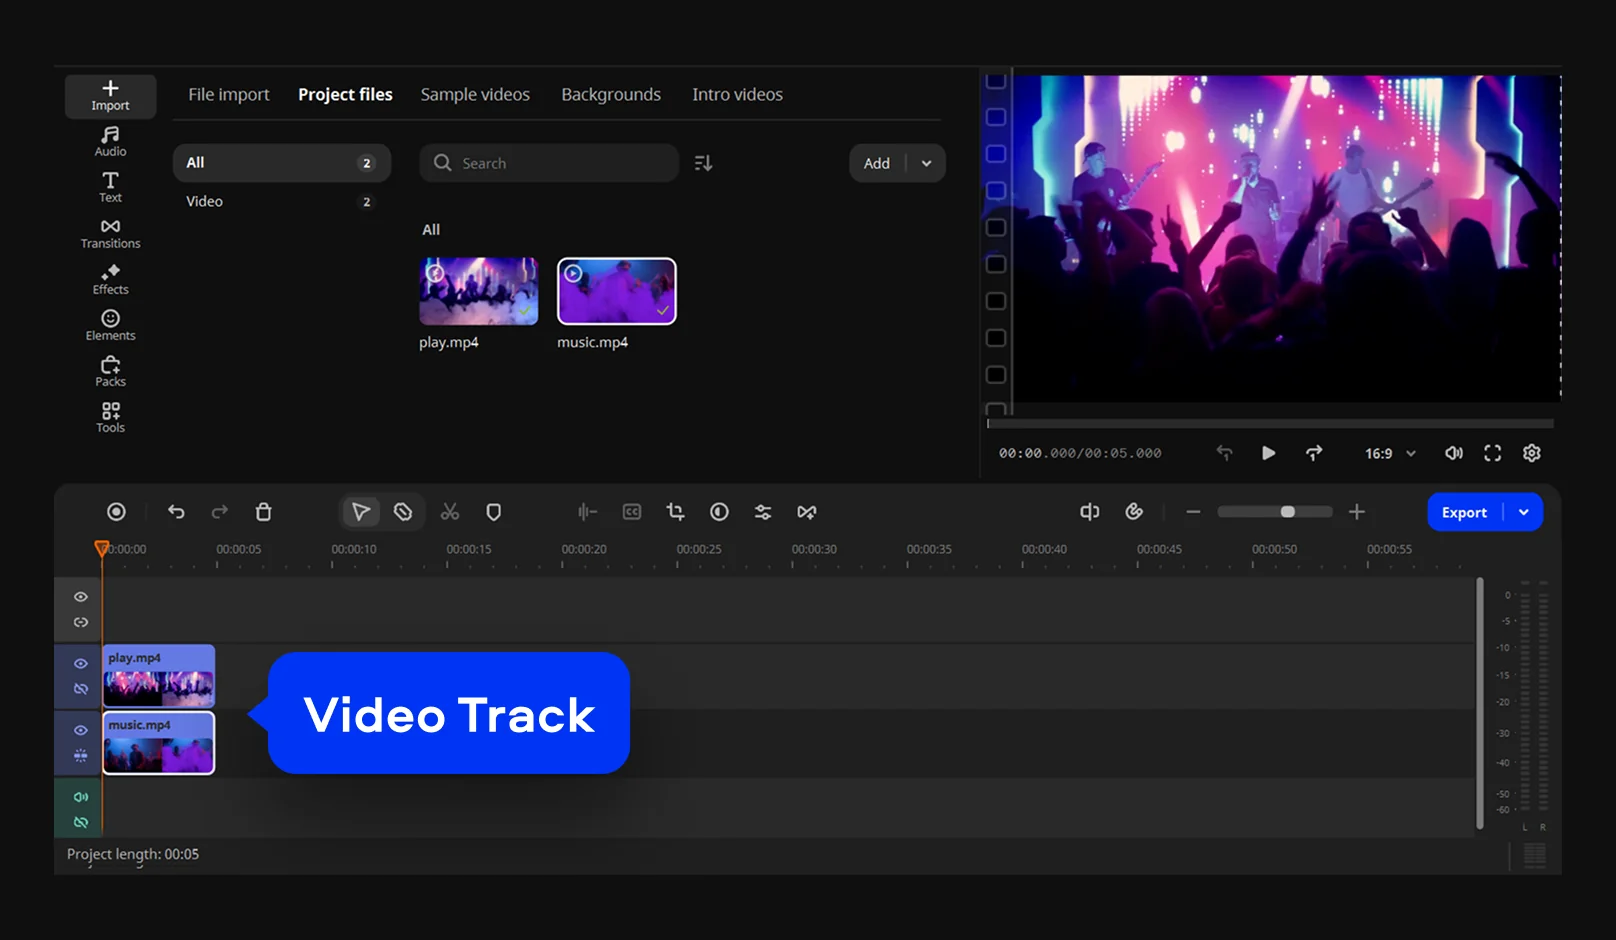
Step 2. Upload your media files
Open Movavi Video Editor and click Add Files to import your clips. They will appear in the Project files. Drag the files to the Timeline at the bottom to start editing your project.
Step 3. Add a clip above the main track
Place the background clip on the Video Track. Then drag the second clip above it to create an overlay.
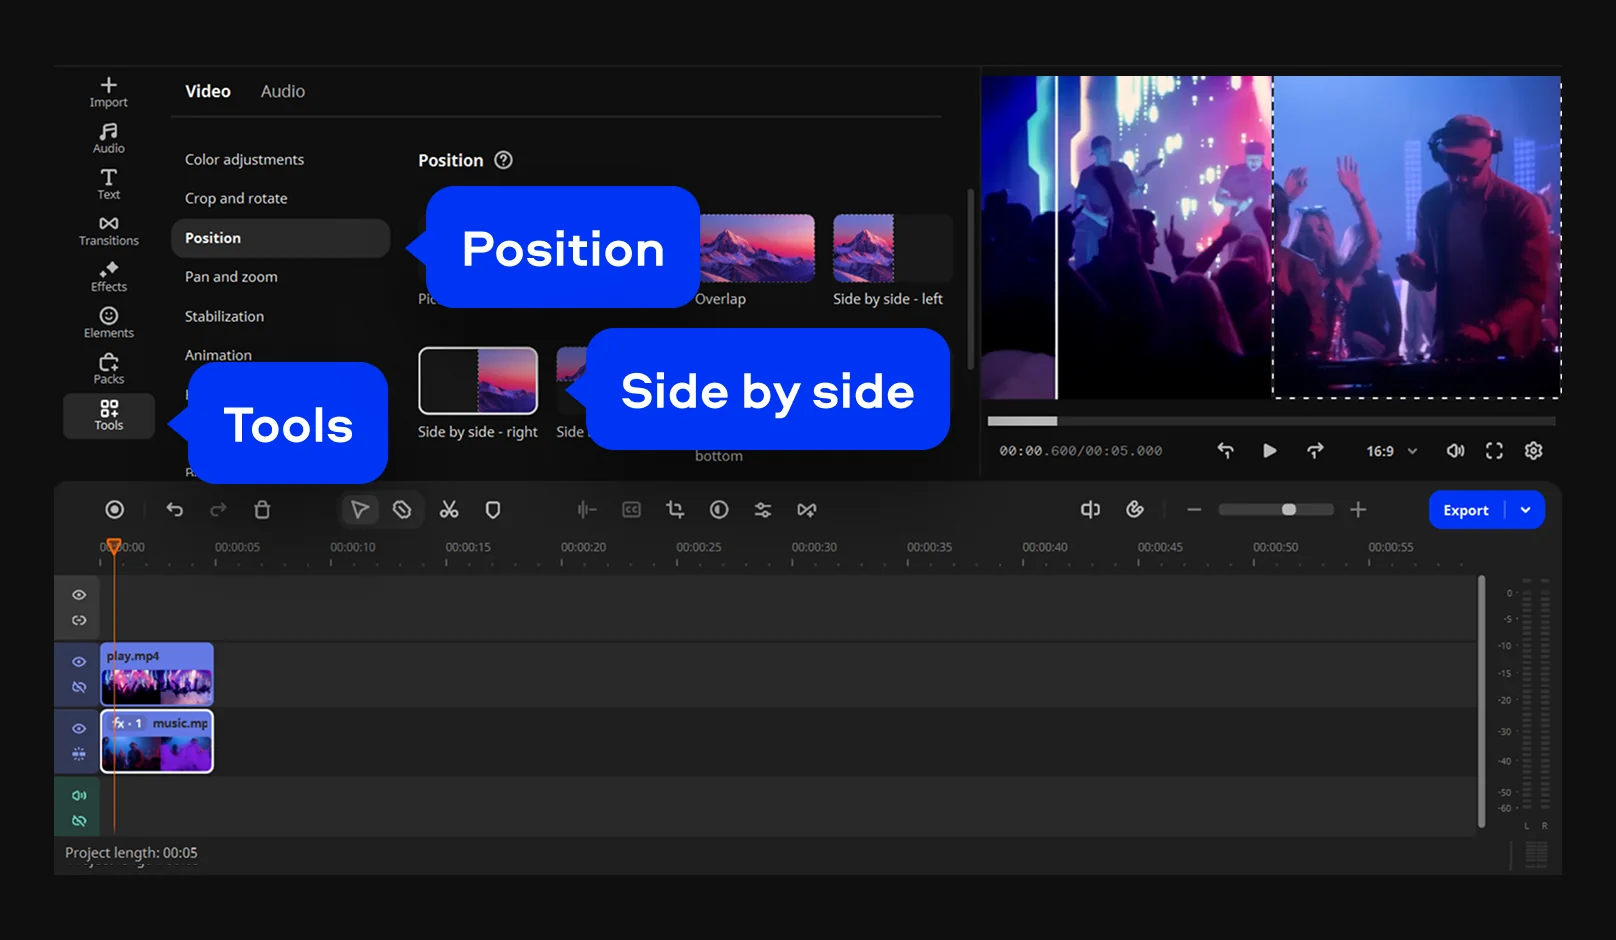
Step 4. Adjust size and placement
Open Tools > Position and select one of the available position presets. You can choose from options like Picture in picture, Side by side, Overlap, and other layout variations.
Fine-tune the result in the preview window to match your idea. You can freely move the clip across the screen, resize it by dragging the edges, or rotate it to fit the scene and balance the composition.
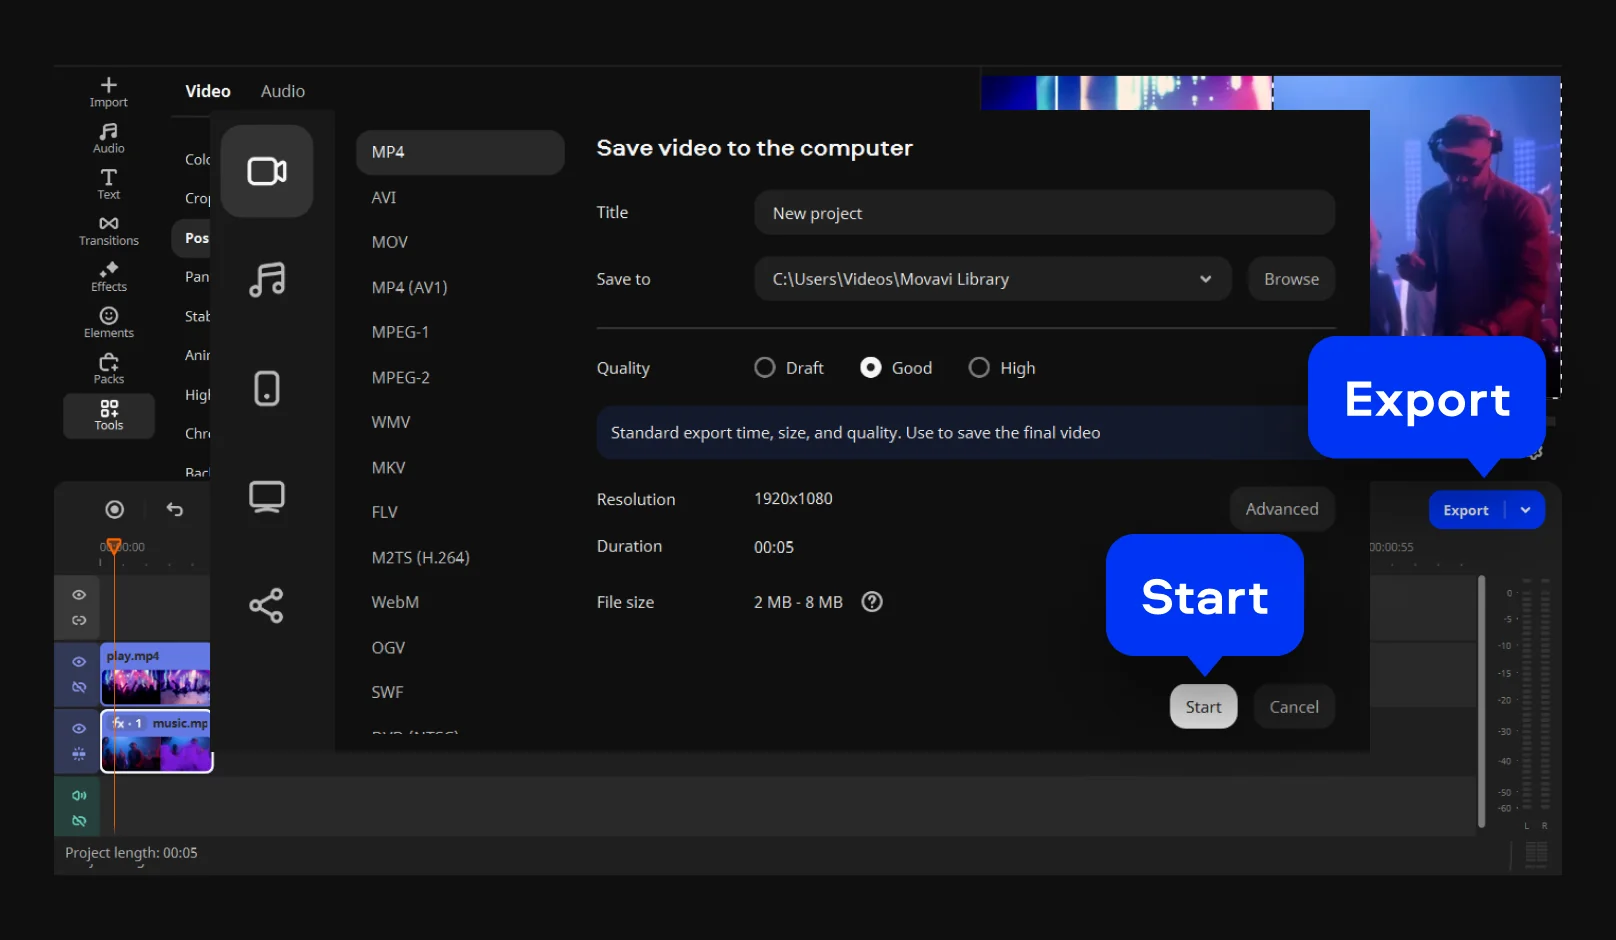
Step 5. Save your final video
Click Export, choose the folder where the file will be saved, and select the preferred format and quality settings. Press Start to render the project and store the finished video on your computer.
More tools for easy video editing
How to choose the best video overlay software
You usually know within minutes whether an editor feels right. Some tools like AI video overlay software invite you to experiment. Others make simple actions feel heavier than they should. When working with layered clips, the software should respond naturally to what you are trying to do, not push you toward fixed patterns. The clearer the workflow feels, the easier the choice becomes.
Practical tips for choosing the right tool
Before looking at feature lists, think about how you actually edit. Do you prefer quick adjustments or careful fine-tuning? The right tool supports both without getting in the way.
What you can actually create with Movavi Video Editor
The following examples show how flexible tools translate into real creative outcomes across different types of projects.
Selecting video overlay software comes down to how smoothly it fits into your workflow. Movavi Video Editor keeps the process straightforward, so you can concentrate on shaping your content and bringing ideas to completion without unnecessary distractions.
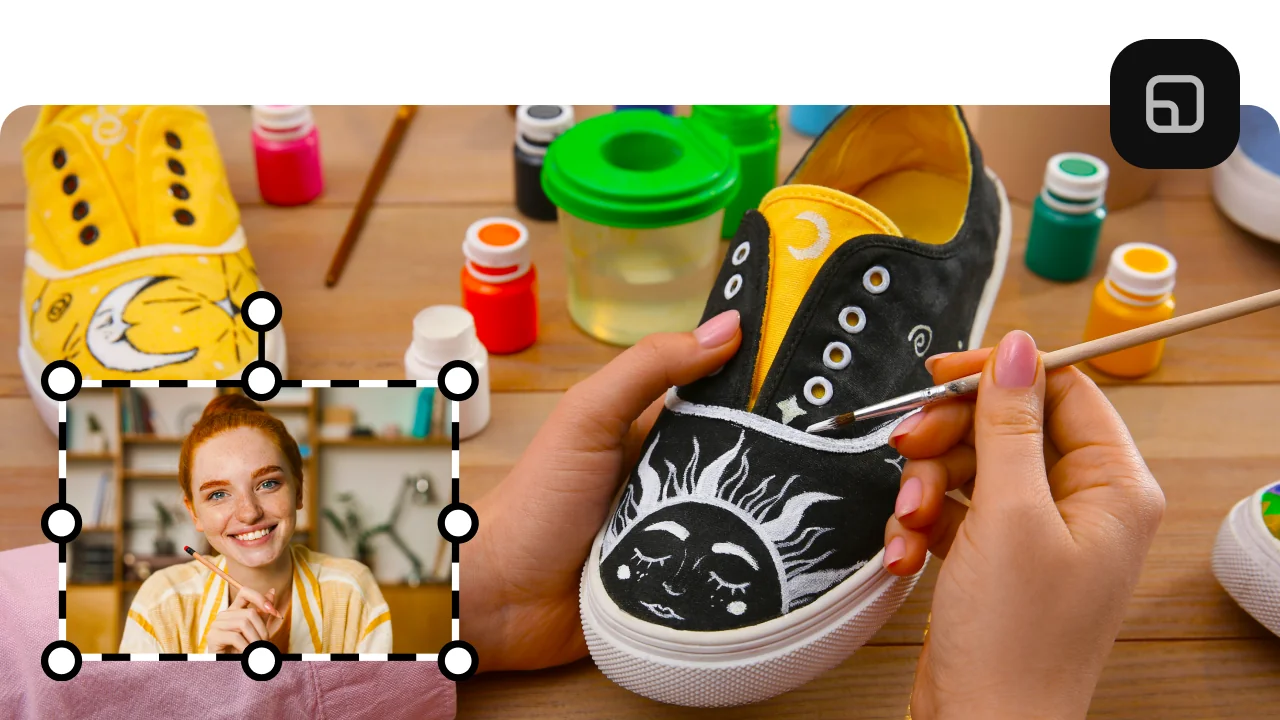
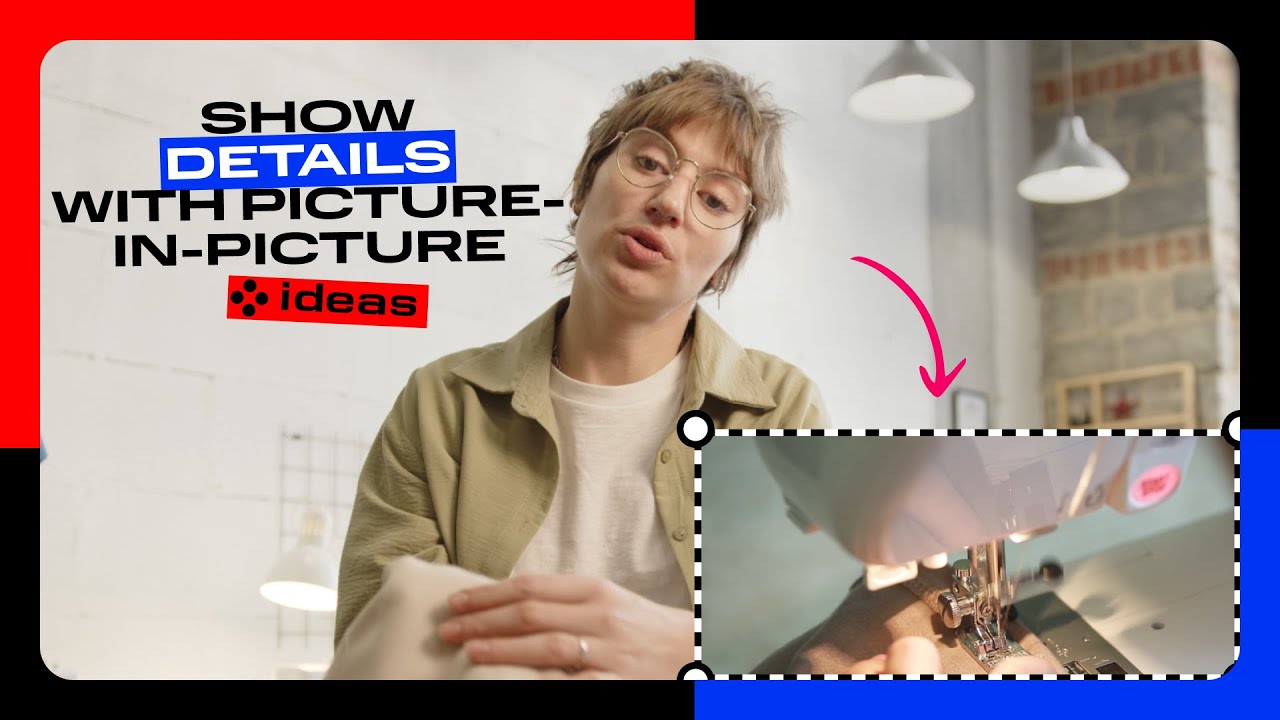
Show a detailed view with picture-in-picture
Use the picture-in-picture position to add a second angle or close-up right on top of your video – highlight the details your viewers need to see.
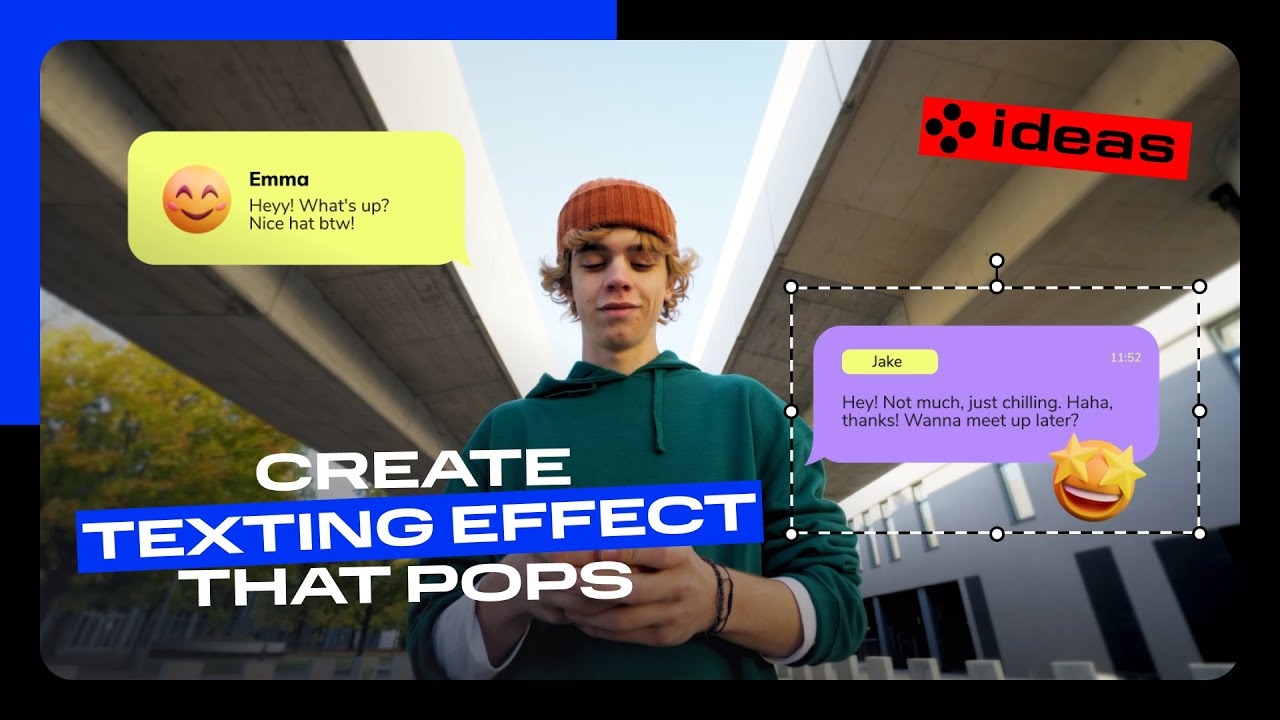
Create texting effect that pops
Use the animation tool to make titles pop up like chat bubbles, giving them a back-and-forth feel that’ll keep your viewers engaged.
Frequently asked questions
You can overlay a picture on a video using the “picture-in-picture” effect. Earlier in this guide, we explained how to overlay one video on another with Movavi Video Editor. The process of overlaying an image on a video is almost the same, except that instead of adding another video, you add a picture to a new overlay track. For more information, follow the instructions below.
First, download and install Movavi Video Editor.
Download Movavi Video Editor for Windows
Download Movavi Video Editor for Mac
Launch the program and click Add Files. Upload the video you want to use in your clip. Right-click on the Timeline and select Add Extra Track, then Add Video Track. Drag and drop the image you want to use on the new overlay track. Click the Cogwheel icon and, in the preview window, adjust the size and position of the image on the video. Click Export, choose the format and destination folder, and enter a file name. Then click Start.
You can overlay text on a video with Movavi Video Editor.
Download Movavi Video Editor for Windows
Download Movavi Video Editor for Mac
Install and launch the program. Click Add Files and upload the video you want to add text to. Go to the Titles tab, choose a text style, and drag and drop the selected item onto the Titles Track. Double-click on the title and enter your text, then adjust the font, size, and other parameters. Click Apply. To save the clip, click Export, enter the file name, choose a format and destination folder. Finally, click Start.
You start by placing your main clip on the timeline, then add the second clip above it using an overlay video editor. From there, it is mostly about small adjustments. You resize the top clip, move it where it looks right, and check the preview as you go. In Movavi Video Editor, this all happens directly on the timeline, so nothing feels hidden.
On an iPhone, the steps are familiar, just done with touch controls. Import both clips, place one above the other, and adjust the layout with simple gestures. If you already know how to overlay a video on a video on a computer, this will feel intuitive.
Free tools usually come with trade-offs, but they are useful for testing ideas. Many editors let you add overlay to video projects through trial versions or online platforms. You might see export limits or watermarks, but the core tools are there. Movavi’s free trial gives access to the full interface, which helps you understand the workflow before committing.
CapCut keeps things simple. You import your main clip, then add another clip as an overlay layer. After that, it is just a matter of resizing, moving it around, and adjusting timing. This setup works well for short videos where speed matters more than fine detail.
70M+


*The free version of Movavi Video Editor may have the following restrictions depending on the build: watermark on exported clips, 60-second video or 1/2 audio length limit, and/or some advanced features unavailable when exporting videos.


1.5M+ users already subscribed to our newsletter