If I need to make a quick adjustment to a clip – for social media or a client preview – I use Movavi’s online video filter app. It doesn’t require installation, and the workflow is straightforward: upload the file, choose a look, preview the result, then export. It’s designed for basic video editing when you want a clean finish without setting up a full desktop project.
Movavi Video Editor
Transform your footage with hundreds of professional filters, LUTs, and cinematic effects available in the intuitive Movavi Video Editor.
By clicking the download button, you're downloading a trial version of the program.*
Add Filters to a Video Online for Free
How to add filters to a video online
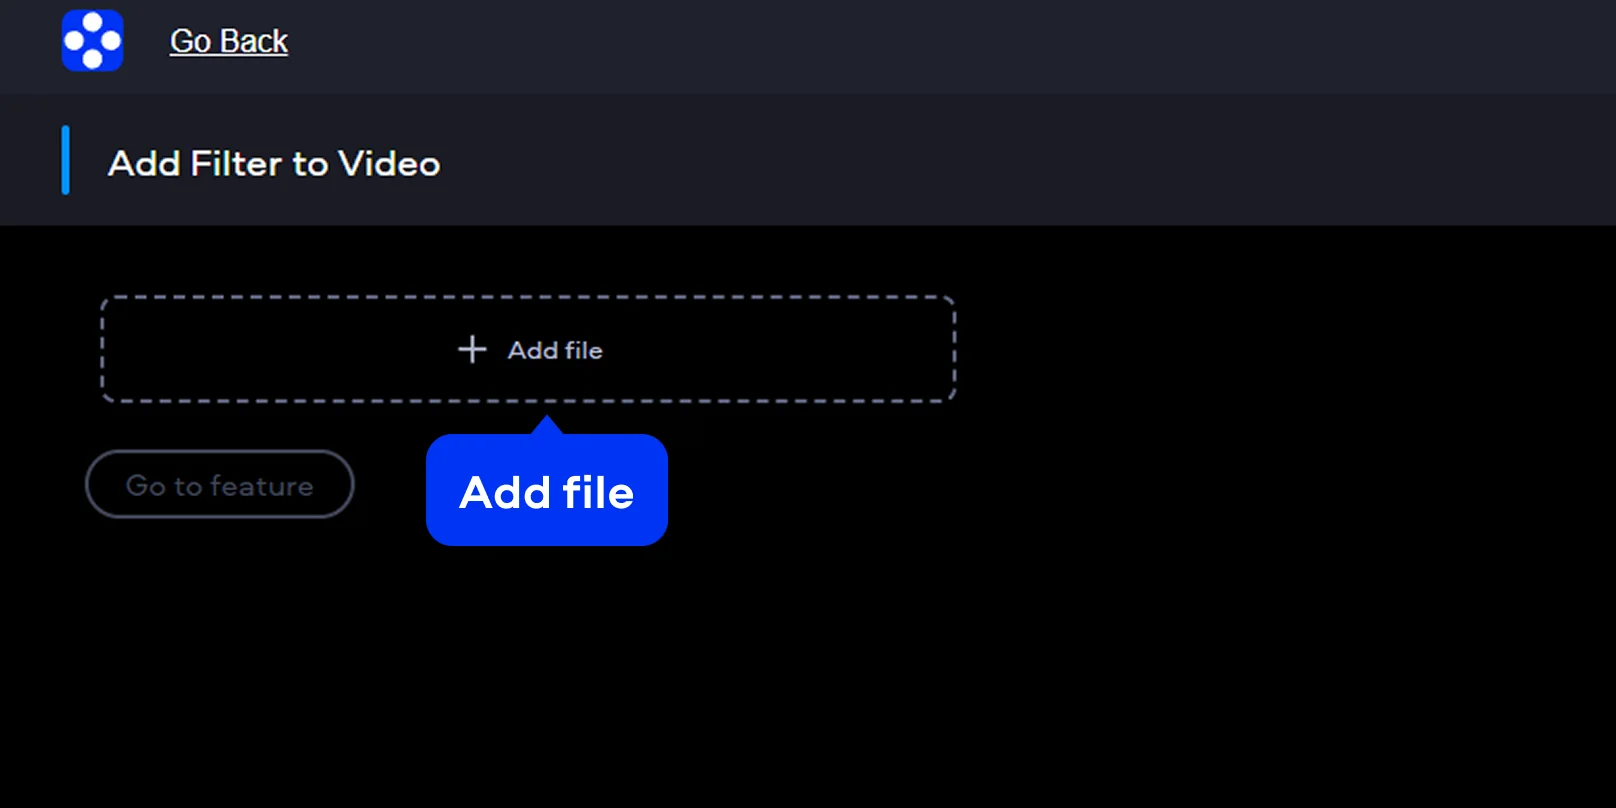
Step 1. Upload your file
Hit Add file – that’s the main upload button. This is the fastest way to add a filter to your video without installing anything.
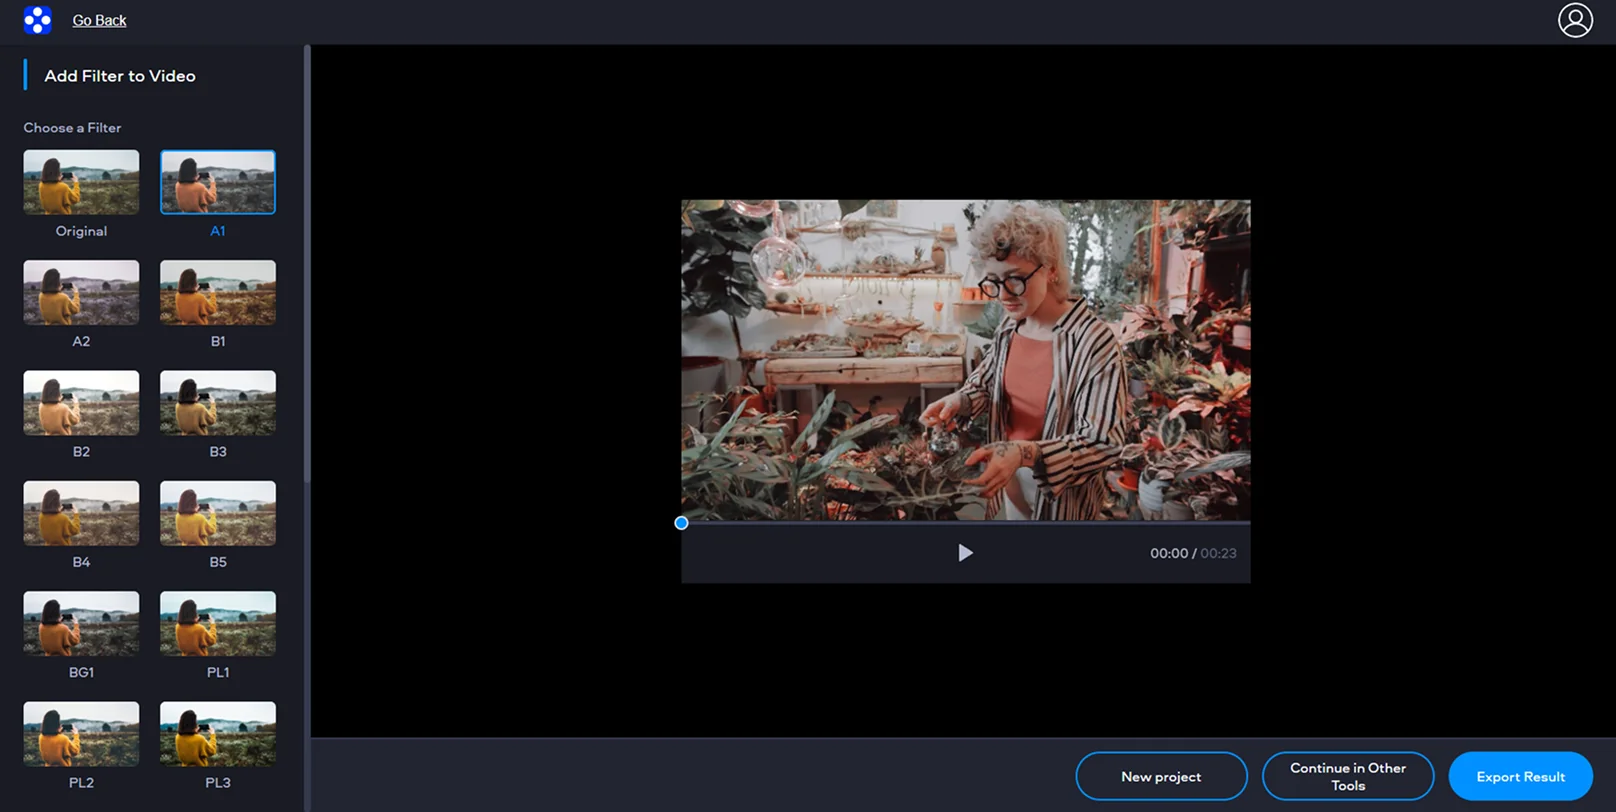
Step 2. Pick a video filter
When your video appears in the editor, click Go to feature, and you’ll see a filters list. Click through options and watch the preview update. This is the moment where you choose what kind of look you want – subtle cleanup, a moodier pass, or something that leans closer to special effects.
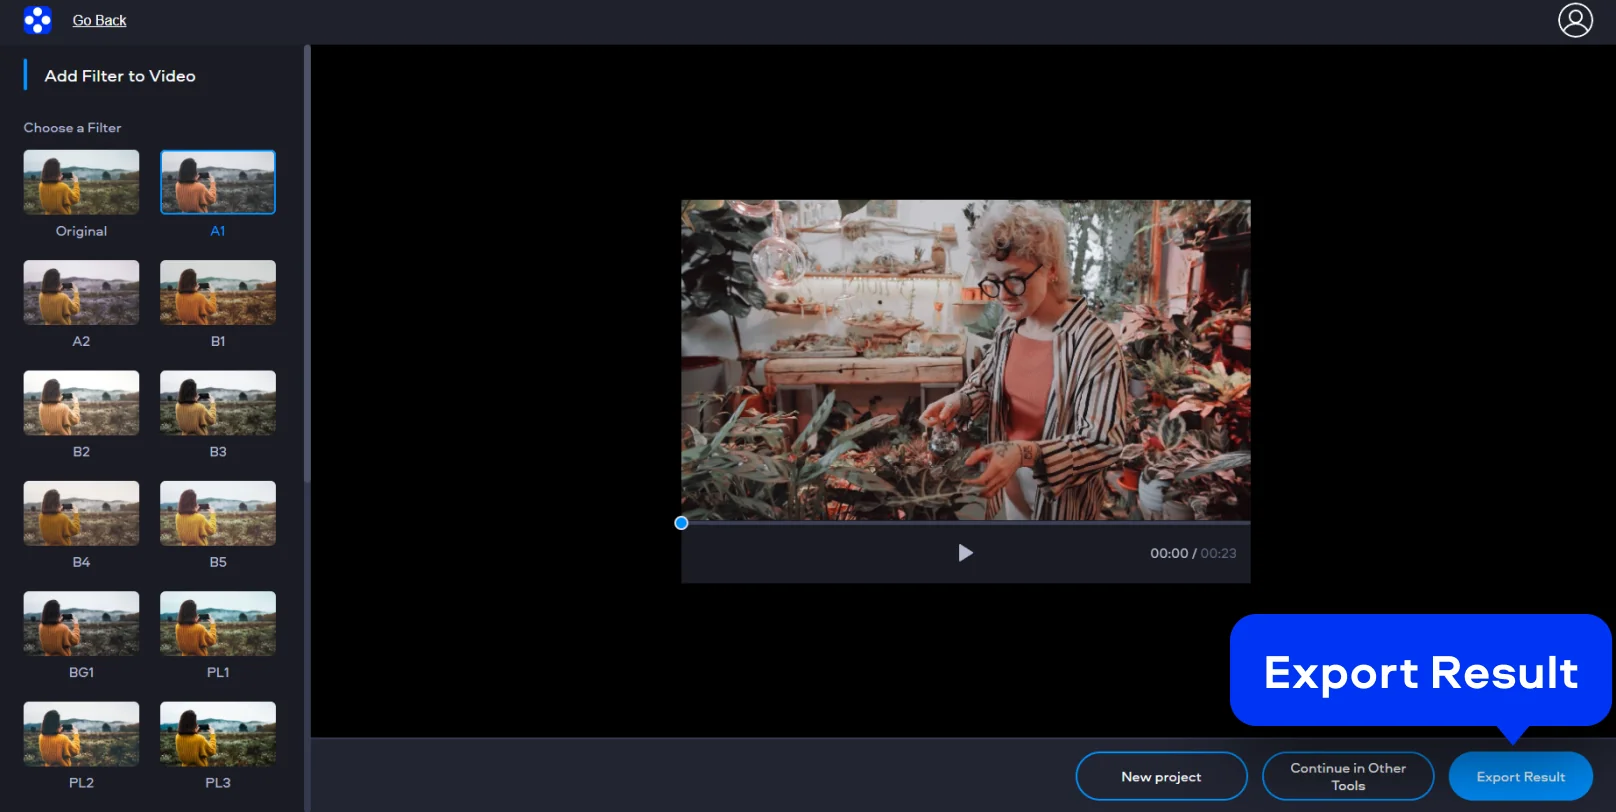
Step 3. Export the video
When the preview looks right, click Export Result. Hit the Download button to save the edited video on your computer.
How to add filters on desktop
When the project is longer, the files are big, or I need consistency across multiple clips, desktop editing wins. Movavi Video Editor gives you the timeline control that online tools don’t try to compete with: apply one look across the whole sequence, fine-tune specific moments, and keep things consistent from start to export. It’s still the same goal – add filter to video – but with more control over how that look behaves across multiple clips.
Step 1. Import your clips
Click Add Files to import your video, then drag it onto the timeline.
This is the moment to do basic cleanup – trim, split, or reorder clips – because it’s easier to judge a filter once the sequence is roughly in place. If you have multiple clips, import them together so you’re not matching color one file at a time.

Step 2. Apply filters
Open the Effects section and find the Filters tab. You’ll see a library where you can preview looks.
If your footage is already decent, choose something subtle. If it’s flat, a stronger filter can help, but watch the details – highlights, skin, and anything white in the frame.
Apply the filter to the clip by dragging it onto the clip on the timeline.

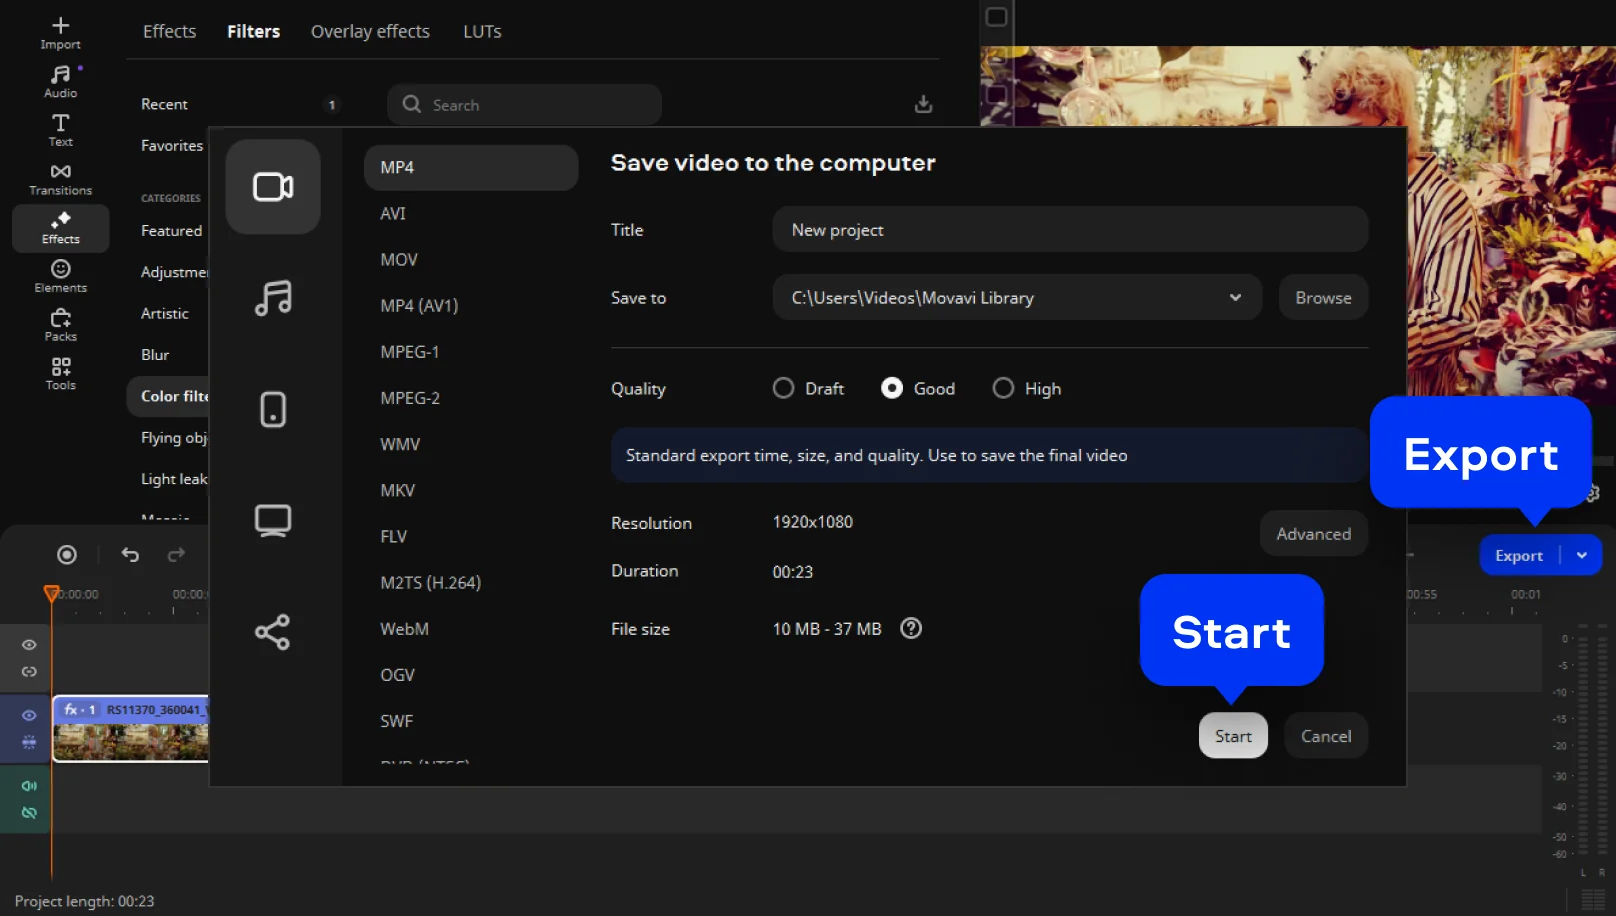
Step 3. Export the video
Review specific points: the brightest area, the darkest area, and any shot change. Indoor-to-outdoor edits are where filters can fall apart fast, so adjust intensity per segment if needed.
Click Export and choose the export format, like MP4, AVI, or MKV. Finally, hit the Start button.

Why choose Movavi
We’re the #1 choice for millions of people from all around the world. Join our thriving community and create stunning content with incredible ease.
70M+


users
countries
updates per year
effects to choose from
Frequently asked questions
How do I put a filter on a video?
How do I put a filter on a video?
Upload or import your video, open the Filters list, click a look to preview it, then export. For a clean result, preview at a bright moment, a dark moment, and a shot with skin tones – filters can behave differently across lighting. If you’re searching for the exact phrasing, this is basically how to put a filter on a video in three moves: upload, preview, export.
Can I put a filter on a video for free?
Can I put a filter on a video for free?
Often, yes. Many online tools and desktop trials let you apply filters without paying upfront, so you can test a video filter workflow free before committing. The usual trade-off shows up at export: a watermark, fewer resolution options, or limited formats. If you want the easiest file to share afterward, export to MP4 when it’s available.
Can I put a filter on an iPhone video?
Can I put a filter on an iPhone video?
Yes. iPhone videos are commonly MOV, and you can add a filter online or on desktop. If the edited clip needs to play nicely everywhere (social platforms, messengers, Windows laptops), exporting to MP4 is usually the smoothest move, even if the original file was MOV.
Can I use Movavi Online Video Editor on iPhone and Android smartphones?
Can I use Movavi Online Video Editor on iPhone and Android smartphones?
Yes, Movavi Online Video Editor can be used on iPhone and Android smartphones, completely free of charge.
Is Movavi Online Video Editor completely free?
Is Movavi Online Video Editor completely free?
Yes, Movavi Online Video Editor is a completely free video editing tool.
Does Movavi Online Video Editor add a watermark on videos?
Does Movavi Online Video Editor add a watermark on videos?
No, you can export your files without a watermark completely free of charge.
Movavi Video Editor
Create awesome videos easily
*The free version of Movavi Video Editor may have the following restrictions depending on the build: watermark on exported clips, 60-second video or 1/2 audio length limit, and/or some advanced features unavailable when exporting videos.
Join us for discounts, editing tips, and content ideas


1.5M+ users already subscribed to our newsletter