Step 1. Upload your video
Click the Add file button and select the video from your computer. The file will automatically upload to the online tool. Then click on Go to feature, and the tool will start preparing your video.
Protect your content or promote your brand by adding custom watermarks, logos, and text overlays easily within Movavi Video Editor.
By clicking the download button, you're downloading a trial version of the program.*
Add Watermark to Video Online
How to add a watermark to a video online
When I don’t feel like installing heavy software or opening a full editing suite just to place a logo in the corner, I use Movavi’s online tool. It works right in the browser, which means no downloads and no “system requirements” drama. I upload the clip, drop in my logos, tweak the size, and I’m done. It’s simple, but not simplistic – you still get control over how your video watermark looks and where it sits. For quick branding and basic protection, it does exactly what I need.
Below, you’ll find a brief guide on how to add a watermark in a video online.
Step 1. Upload your video
Click the Add file button and select the video from your computer. The file will automatically upload to the online tool. Then click on Go to feature, and the tool will start preparing your video.
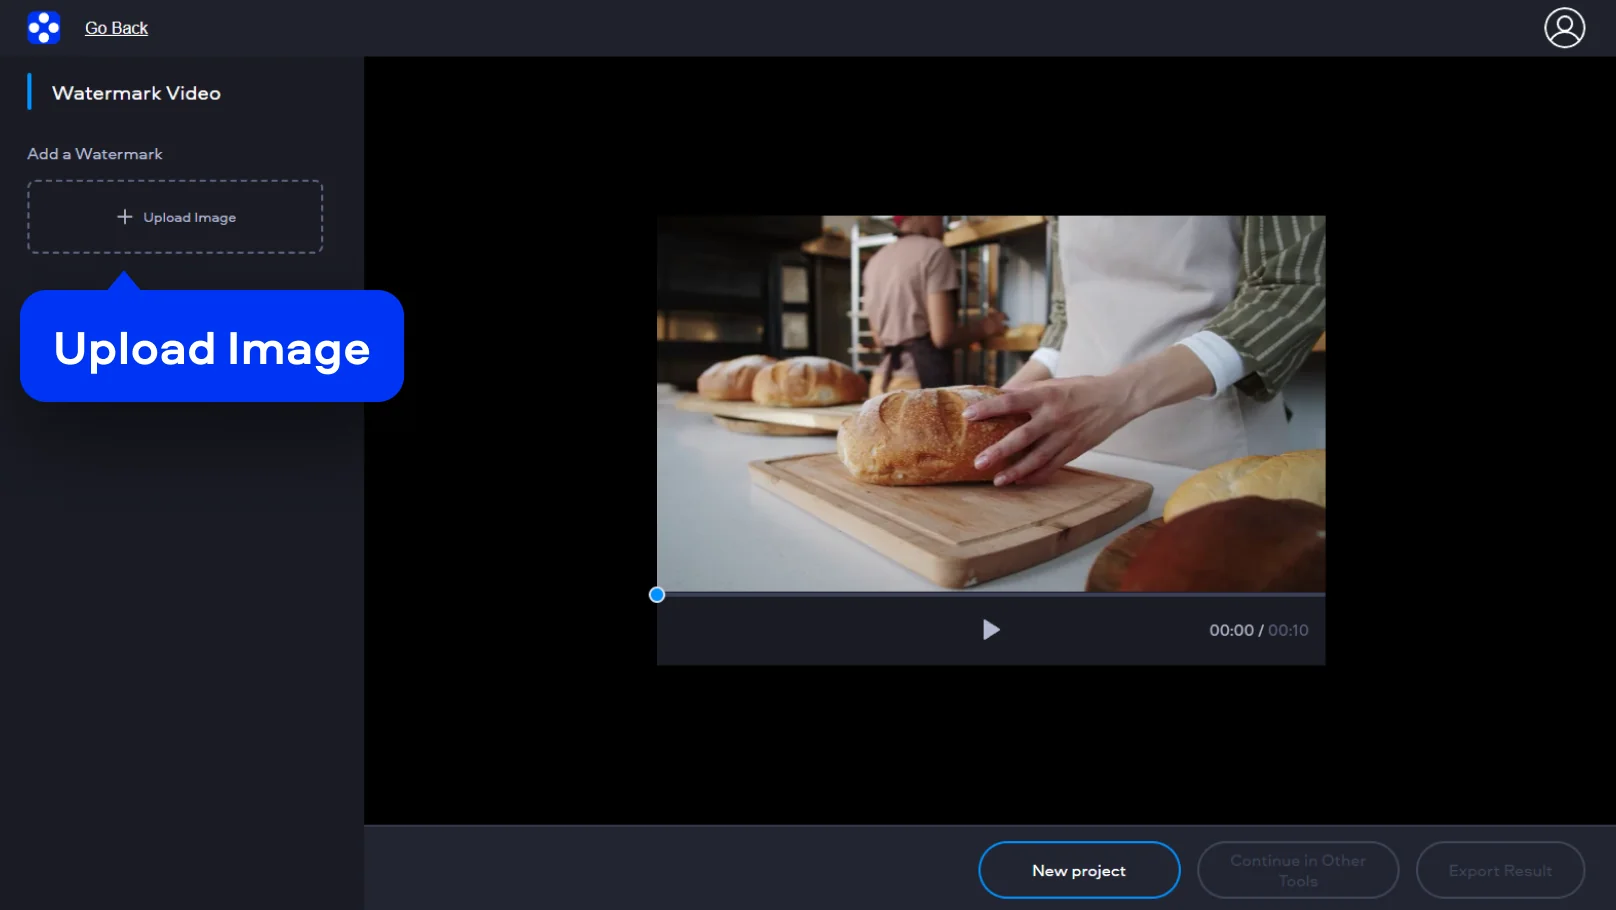
Step 2. Add and customize the watermark
To add a watermark to the video, click the Upload Image button on the left and choose the image you want to use as your watermark. Adjust its size and position on your video so it fits naturally into the frame without overpowering the content.
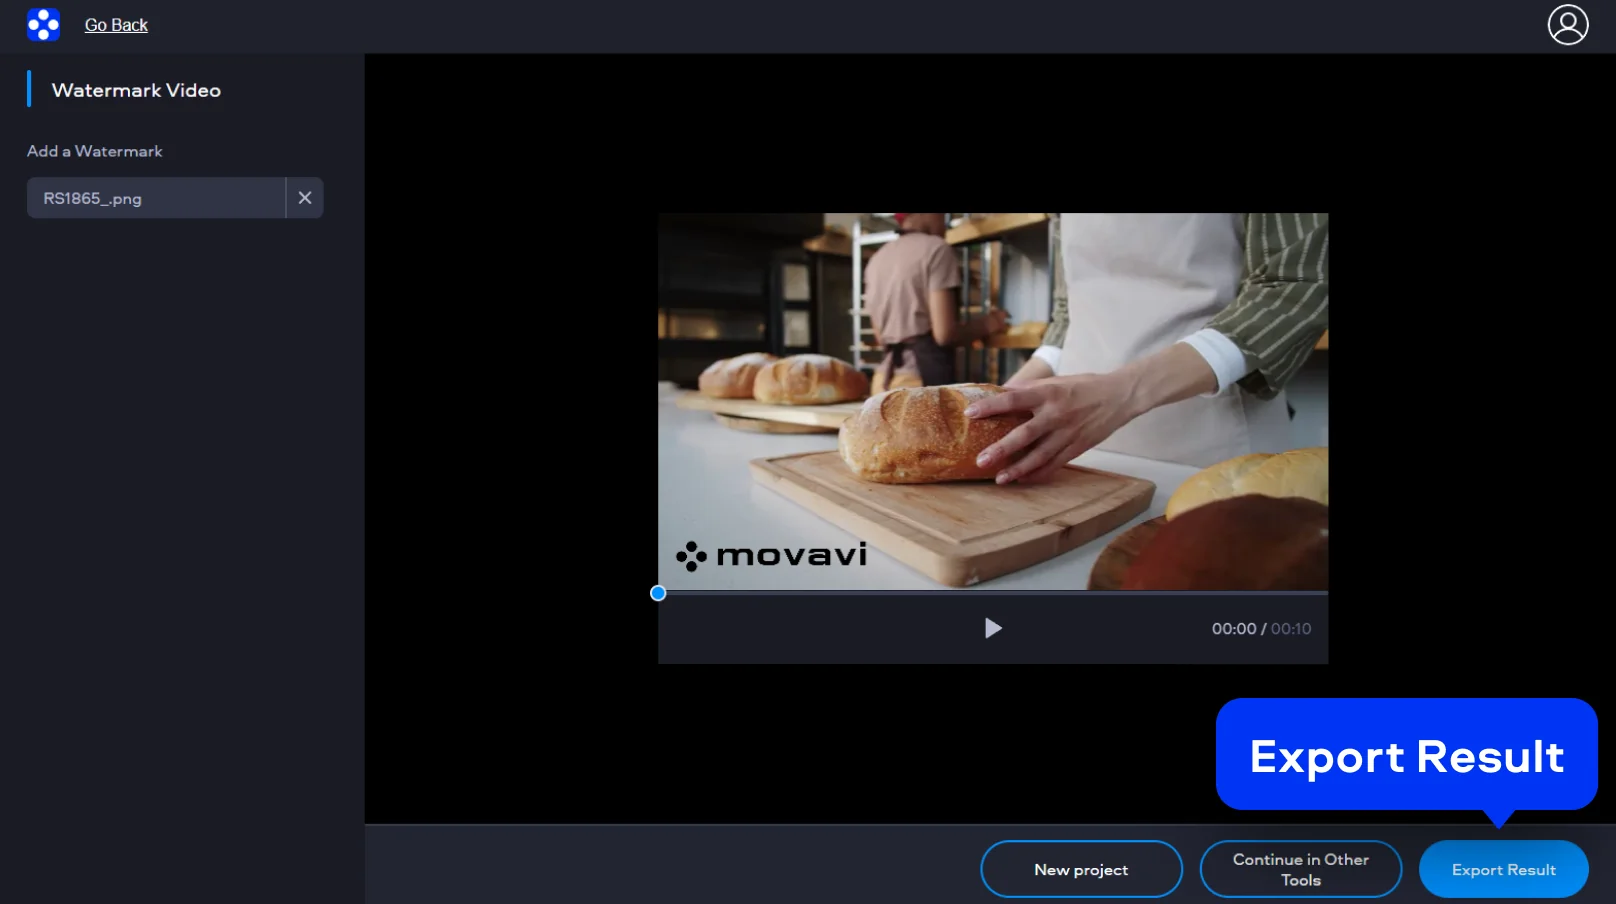
Step 3. Export the final video
Click on Export Result, wait for the processing to finish, and download your watermarked video. Now your content is branded and ready to be shared with confidence.
How to add a video watermark on desktop
When I make content for my YouTube channel or edit my Reels, I want full control over how my watermark looks and behaves. That’s when I open Movavi Video Editor on my desktop for video watermarking. I’m not just placing a random logo in the corner, I can fine-tune the size, position, transparency, and even decide how long the watermark appears on screen. Whether I want a subtle, semi-transparent mark that quietly protects my content or something more visible for branding, I can shape it exactly the way I want. It feels less like a quick fix and more like finishing a project properly before sending it out into the world. What I also like is that the software works with all the popular video formats (MP4, MOV, MKV, AVI and many more), so I don’t need to switch to some video converters to do my work.
So, here’s how to add a logo to a video on your PC or Mac.
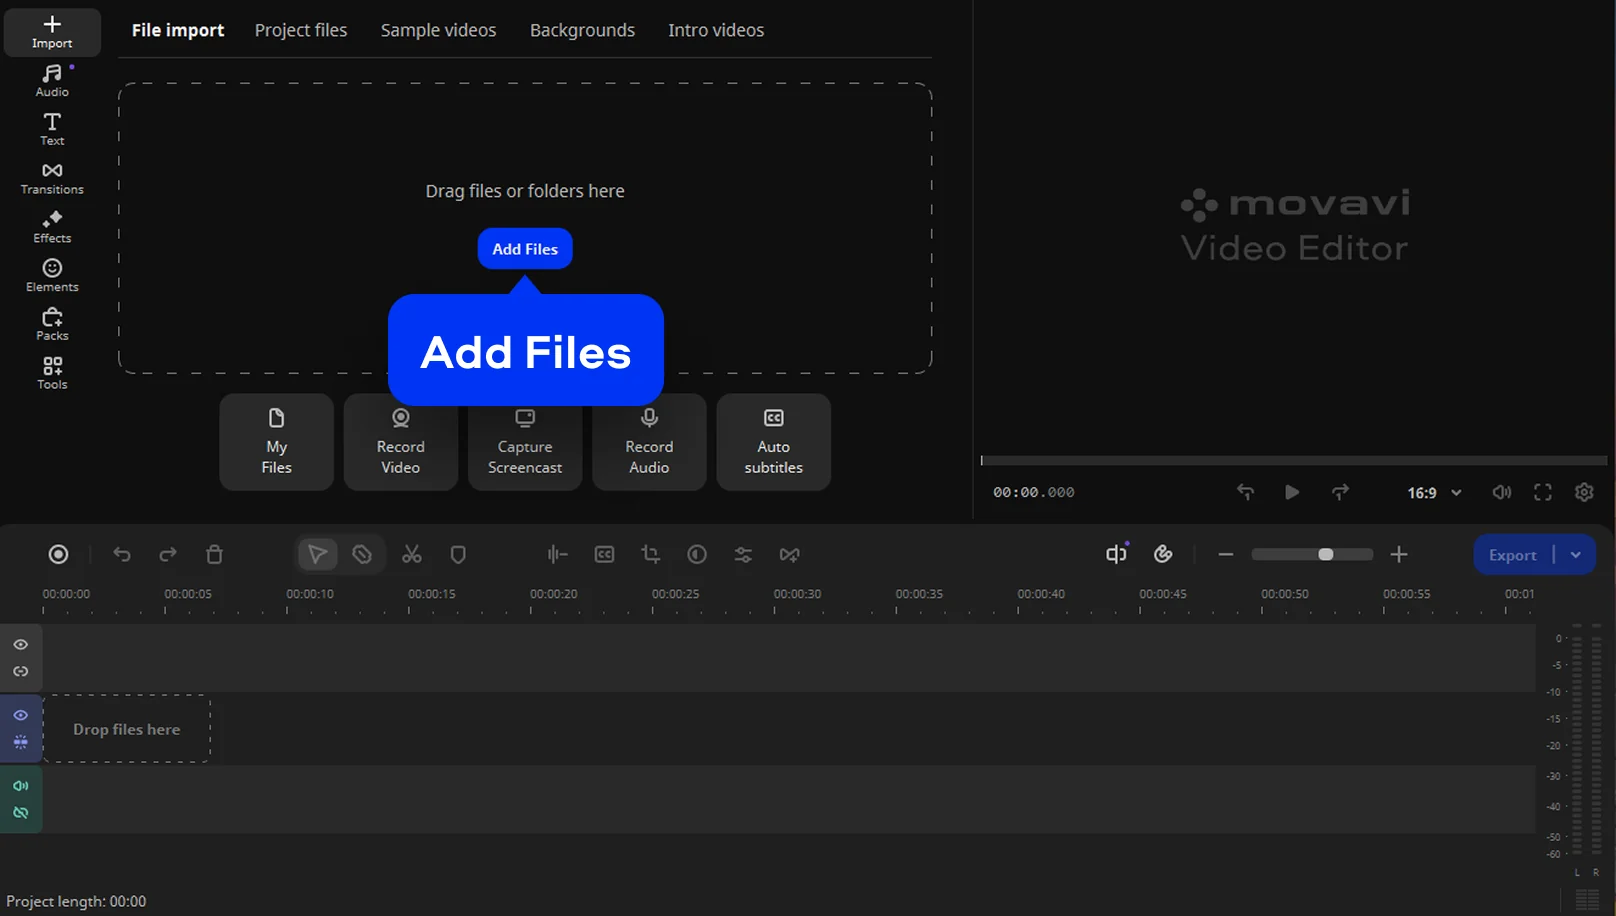
Step 1. Add your video
Open Movavi Video Editor and click Add Files to import your video. Drag it onto the Timeline so you can start editing.
Step 2. Insert your watermark
Use the Add Files button to import your logo image. Drag the text or image onto a track above your video on the timeline, until there is an Extra Video Track. Click on the image and go to Tools. On the Video tab, click Position and select Picture in picture. Now, you can resize the watermark on the video in the preview window and move it to the desired position.
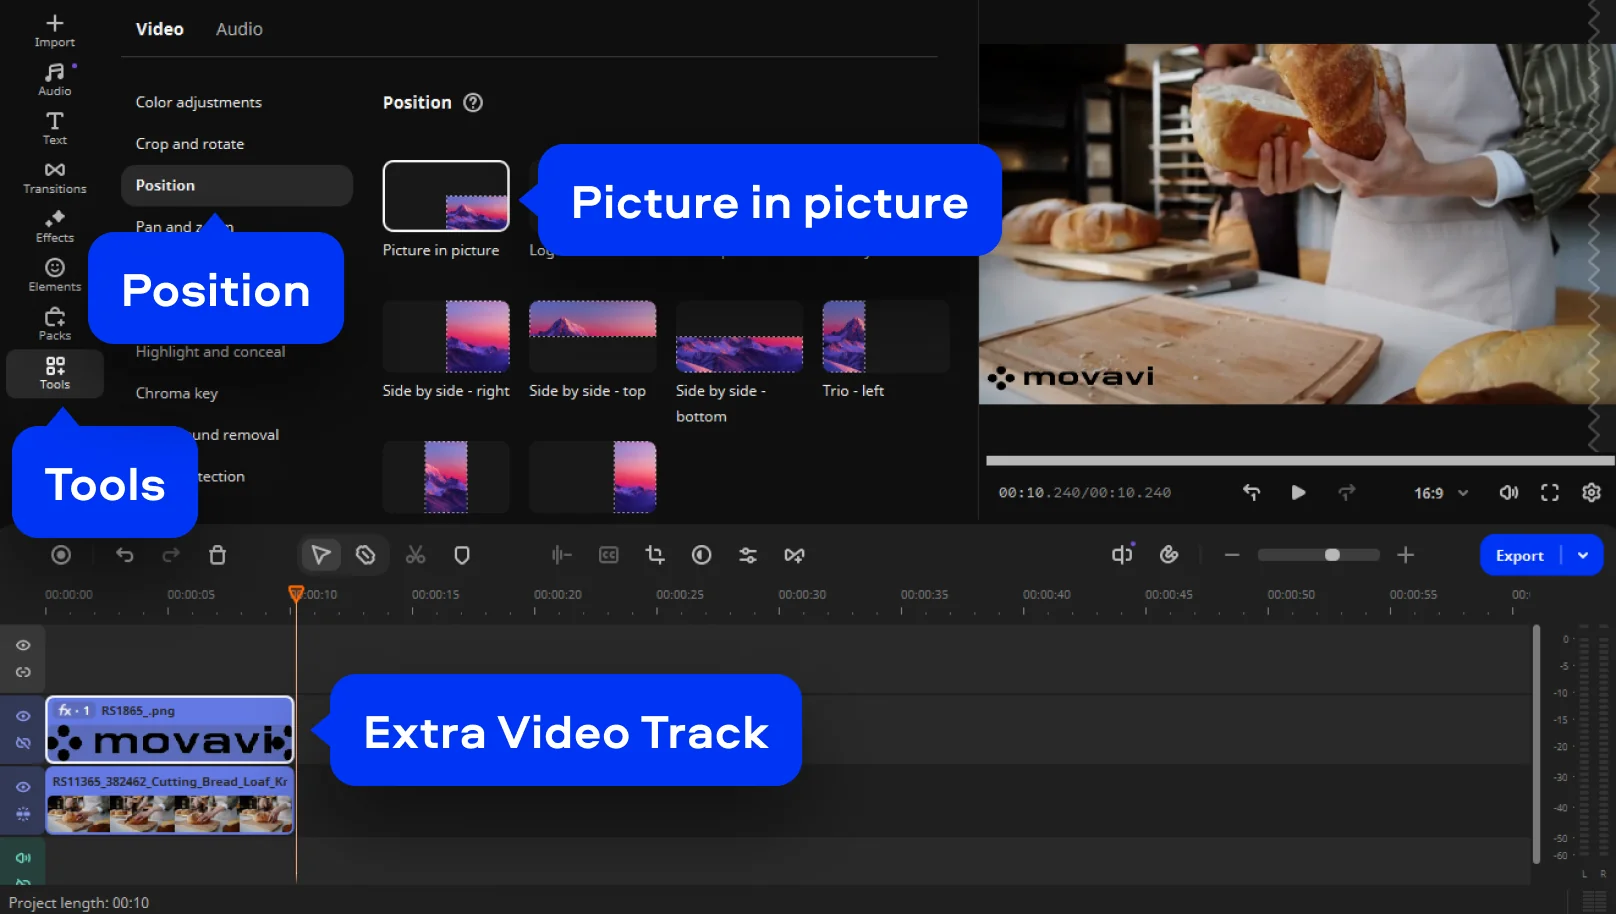
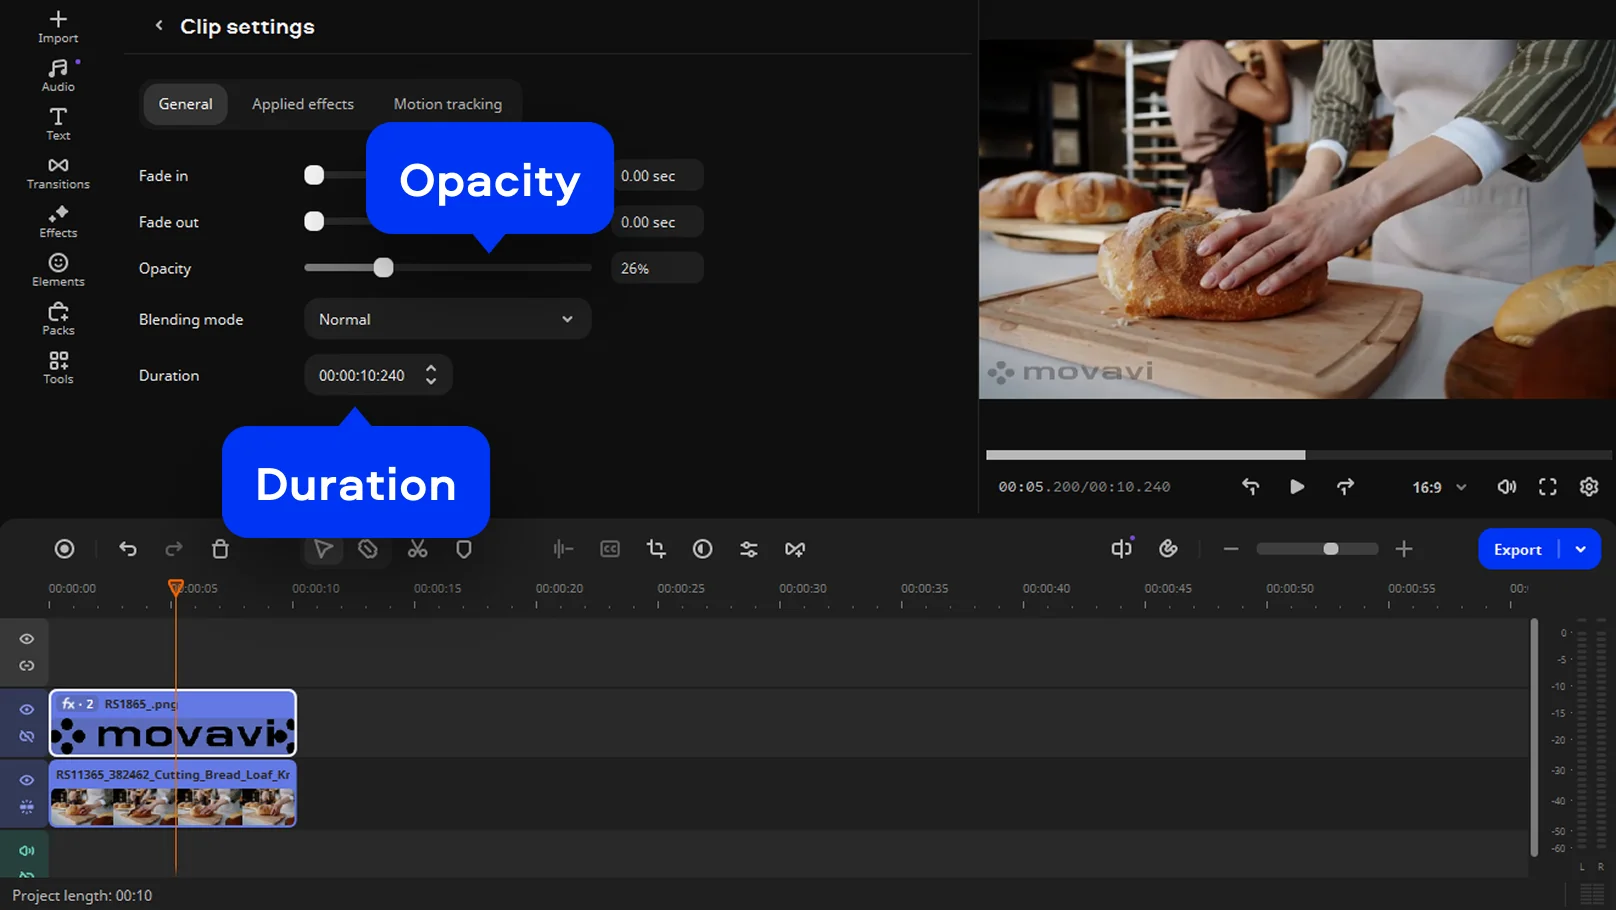
To adjust opacity or duration, double-click the image on the timeline and set the desired parameters in Clip settings.
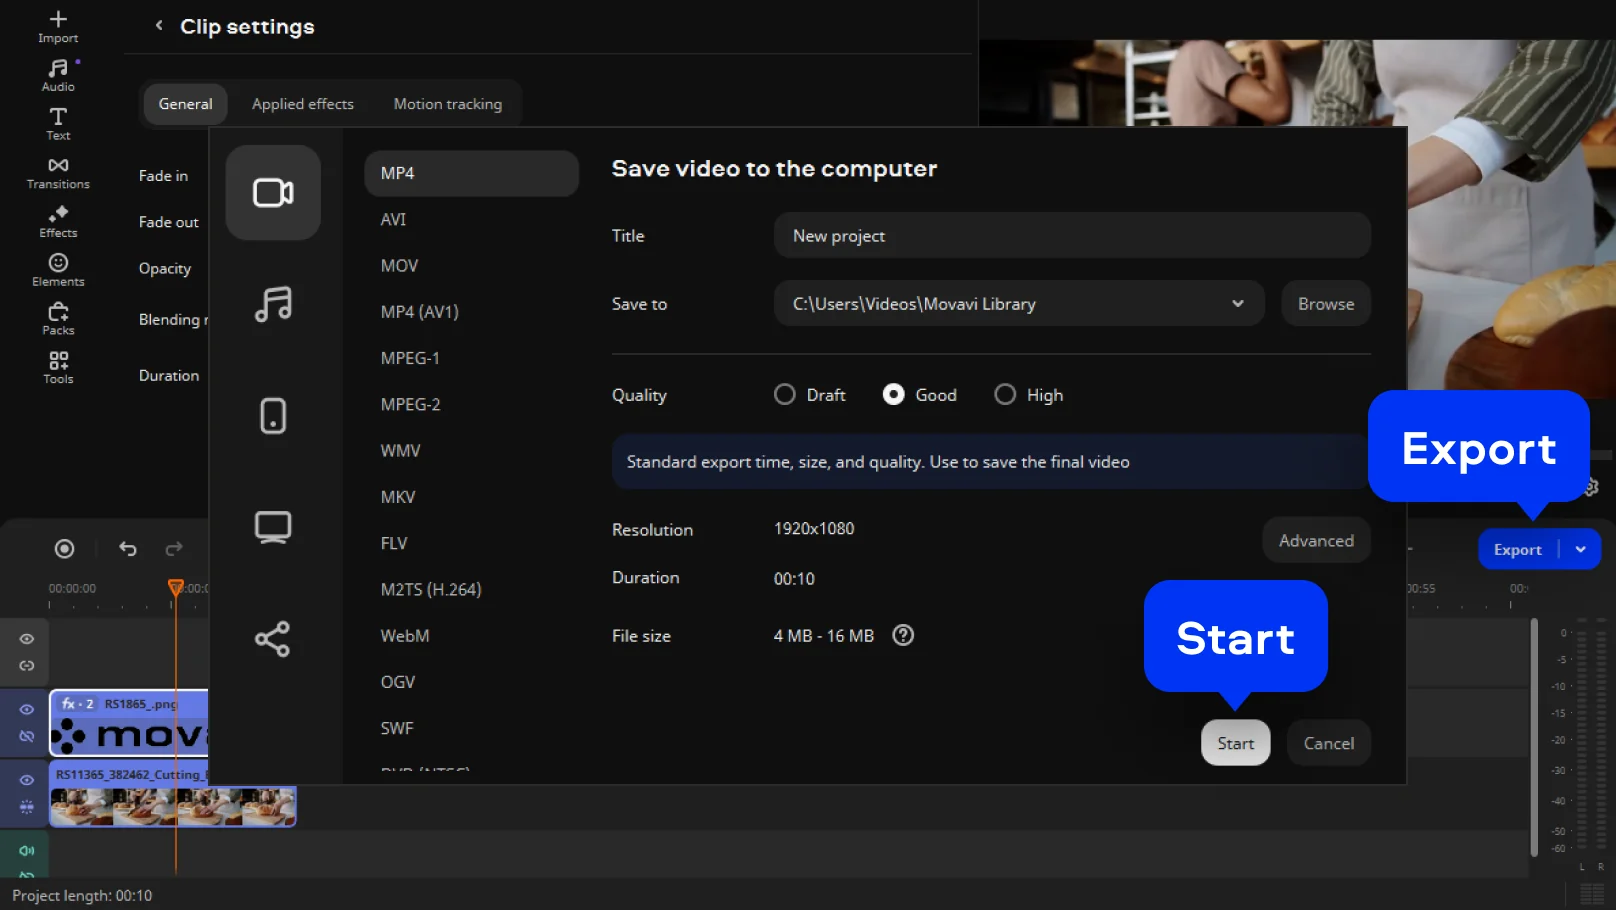
Step 3. Export the watermarked video
Click Export, choose your preferred format and settings, then start the export process. Once it’s finished, you’ll have a branded video ready to publish, share, or archive, with your mark clearly in place.

We’re the #1 choice for millions of people from all around the world. Join our thriving community and create stunning content with incredible ease.
70M+


Frequently asked questions
No, the Movavi online video editor doesn’t put a watermark with their brand when you use a free version.
Yes, the online video editor by Movavi is available completely for free.
Now this is where speed matters. When I’m on my iPhone, I don’t want a complicated process, I want something that takes minutes, not a full editing session.
Here’s the fast route:
Yes, Movavi Online Video Editor can be used on iPhone and Android smartphones, completely free of charge.
Yes, Movavi Online Video Editor is a completely free video editing tool.
No, you can export your files without a watermark completely free of charge.
*The free version of Movavi Video Editor may have the following restrictions depending on the build: watermark on exported clips, 60-second video or 1/2 audio length limit, and/or some advanced features unavailable when exporting videos.


1.5M+ users already subscribed to our newsletter