
Movavi Screen Recorder
The perfect way to record anything from your screen

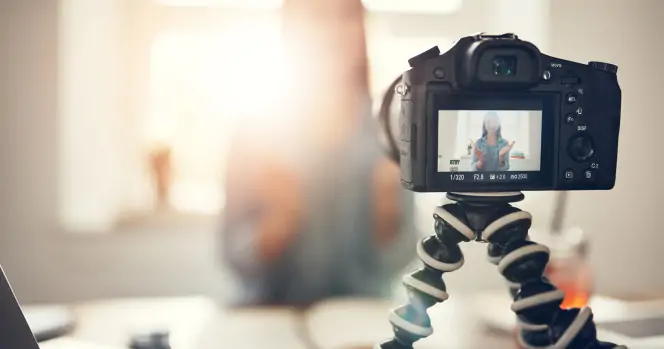
How to Record Lectures
To record an online lecture, use Movavi Screen Recorder:
Record in HD and 4K quality
Enable mouse cursor and keystrokes
Add real-time annotations and draw on videos
Being able to record class lectures can be important for many different reasons. It's not always possible for students to attend lectures in-person, for example, and recording class lectures can help students look back on lectures, review content, and strengthen their understanding of certain subjects in their own private study time.
There are also more and more classes and courses happening remotely, making it even more important for professors to know how to use screen recorders and share their recordings with students remotely. This is vital for online courses and studies in general, and it can offer lots of benefits for both students and teachers alike.
This guide will cover the best way to record lectures on laptops and MacBook Air, as well as on a PC, Mac, and other devices. We'll cover the benefits of using a lecture video recorder, top teacher tips to get the best lecture video recording, and some information for students regarding lecture recording in college or online classroom spaces too.

Before we look at how to record lectures on a Mac and PC, let's first focus on some reasons why you might want to record lectures to begin with. There are many benefits, not just for students, but for teachers too.
Remote classes. The first benefit of recording lectures is that it's simply vital when it comes to remote classes or online courses. If you want to offer any kind of remote learning with students from different time zones and locations, lecture recordings help to ensure that everyone gets equal access to the content they need.
Increasing accessibility. One of the best benefits of recording classes and lectures to share with students is to increase the availability and accessibility of important educational content, helping to make it easier for your students to get the education they need and develop their own skills and understandings.
Course appeal. Providing easy access to recorded lectures can massively help to enhance the appeal of any course, either online or in-person, and it can be very beneficial for students to be able to load up past lectures during their private study sessions to review content and expand their knowledge.
Working in the field. There are also situations in which professors or guest lecturers might be working in the field and aren't even able to come into a college to provide a traditional lecture, but could easily set up a laptop or other device and record one that can be shared again and again with students around the globe.
Budget cuts and retirements. Some classes might get cut due to budgetary reasons at a college or university, or a professor with a certain style or personality may eventually retire. Recordings help to preserve the value of those classes and the work of those professors.
Remedial classes. Recorded lectures can also be used in remedial or prerequisite classes to help students who are just starting out or making the switch to a new subject.
Flexibility. Another brilliant benefit of recording lectures is that it can be done almost anywhere. It doesn't matter if you're in a lecture hall, your office, or even at home, as long as you can set up some simple recording hardware or software, you can record a lecture.
Options. Lecture recordings also give students many more options about how to take in and review educational material, with studies showing that close to 8 in 10 students want to be able to watch lectures again in order to better understand and retain information. This can lead to higher test scores and better results all-round.
Reducing failure and drop-out rates. Many students struggle during exam season or have issues keeping up with classes due to personal reasons of all kinds. Having recorded lectures they can turn to in emergency situations will help them keep up with the class, reducing the risk of failures and drop-outs from your classes.
Diversity. You can also attract a more diverse range of students by making use of lecture recordings too, as there are some students who are simply unable to keep up with regular class schedules due to family or professional commitments or personal circumstances like health issues, disabilities, or being in the armed forces.
When it comes to recording lectures, you can choose between hardware-based capture and software-based capture.
Hardware-based lecture recording
Hardware for lecture capture involves the usage of physical capture box systems connected to cameras, microphones, and other devices that have to be physically set up in the classroom, lecture hall, or recording space to record or stream the lecture.
Pros:
Can record in full HD video and audio for top quality recordings
Able to capture from multiple sources simultaneously, including different cameras and microphones
Well-suited to scheduled lecture recordings
Can be set up by professionals, letting the lecturer focus on their own tasks
Cons:
Hardware for recording can be expensive
It can also be costly to maintain and store the various recording items like boxes and microphones
Can be confusing to set up without professional assistance
Only really works with strict recording times and in certain locations
Software-based lecture recording
Software allows you to record lectures, presentations, and so on directly via an app or piece of software on your computer, laptop, tablet, or another device. Many programs also allow for streaming and instant sharing with users from around the world, and you don't need any capture boxes or extra equipment aside from basic recording items like a webcam and microphone.
Pros:
A more flexible and affordable option when compared to hardware recording
Can be scaled to suit any environment
Built-in features like streaming, sharing, and editing
More portable and can work using phone, tablet, and portable devices
Usually quite simple to set up
Cons:
Some programs may have expensive fees and licenses
Some programs can be confusing to set up
The quality of the recordings may not be as high when compared to hardware capture
Difficult to align with automatic scheduling

The following steps will show you the best way to record your lectures to share with students:
Prepare the lecture in advance
It's best to ensure that your lecture is fully prepared before you start sorting out any kind of recording. This is standard practice in the educational field, and it's important to structure the lecture or presentation accordingly to maximize engagement and get your ideas and messages across to students as efficiently as possible. Try to cut out unnecessary content from your slides to streamline your presentation and use bullet points, diagrams, and visual aids to help students retain more details.
Download a lecture recording program
In order to record your lecture, you'll need to have a reliable recording app to make use of. Movavi Screen Recorder is a great choice for this. It allows you to capture webinars, online calls, lectures, and presentations in just a single click, with a simple user interface and easy editing tools built-in too. You may also consider the Movavi Screen Recorder + Movavi Video Editor bundle, which gives you additional features and functionality to edit your recorded videos, cutting out unnecessary content or adding subtitles for students with disabilities.
Set the scene
The recording environment in which you present your lectures and make your recordings can have a big impact on the quality of the videos you produce, so it's important to prepare the area as well as you can. Try to find a quiet, well-lit space and position the webcam and device correctly to get your full head and shoulders in view. Try to avoid common mistakes like sitting directly in front of a window, as this can cause a lot of shadow and interference in the video, or recording in a room with loud fans or background noise which may interfere with the audio.
Make a test video
Before recording your lecture, it's wise to record a test video first of all so that you can get familiar with the software you're using and ensure that everything has been set up correctly. This gives you an opportunity to practice your presentation too, and you can record for just a few minutes and then play the video to check the quality of the audio and video to see if anything needs changing.
Record your lecture
When everything has been set up to your satisfaction and you're happy with the results of your test video, you can then proceed to record your lecture. Follow the instructions in the software you've chosen to incorporate your slides or webcam and configure the settings accordingly. Try to record all the way through without stopping the recording so that you have one long file. If you make any mistakes along the way, you can simply trim them out later with simple editing tools. Once you're finished, stop, save, edit, and share your lecture.
Tips on recording lectures
Be flexible. As explained earlier on, you can record lectures anywhere you want, including offices, lecture halls, or even out and about at research labs, hospitals, other educational facilities, and in the field. Be flexible and make your recordings diverse.
Add some interactive elements. A good way to make your lectures more engaging is to incorporate some sort of interactive elements like a poll or quiz. This can be done at any stage of the lecture and helps to keep students' focus levels up.
Use existing resources. There's no need to feel like you need to make every single part of your lecture or presentation yourself. You can make use of existing resources you've made in the past or publicly available resources like videos from YouTube or images online.
Accessibility is important. You may have students with visual or hearing problems, so including some captions and trying to make your videos as accessible as possible will help to ensure that all students enjoy equal benefits from your content.
Show and tell. Lectures shouldn't simply be reduced to you talking for several hours over bland slides and bullet point text. They need to be varied and engaging to be effective, so try to shake things up by incorporating video clips, screen capture tutorials, audio files from other speakers, and so on.
Always make a test video. As explained in the step-by-step guide above, it's vital to make a practice or test recording before you start to check that everything is working. Otherwise, you might waste a lot of time recording a lecture that is completely unusable.
Consider investing in some extra equipment and accessories like a clip-on mic for better audio, some extra lamps and lighting to improve the visuals, or a tripod or stand if you're recording from a portable device like a phone or tablet.
Keep it clean. Try to host your lectures in a clean and clear environment without any excess clutter behind or around you, as this could take the viewers' attention away from the content of your lecture.
Be careful with lighting and noise. As mentioned earlier, you need to make sure that the space in which you record your lectures is well-suited for this purpose. So make sure that the lighting is right and there aren't any unnecessary hums, vibrations, or other noises in the background which could distract viewers.
Lecture recording for students

If you're a student, you also might want to record lectures from your professors so that you can re-watch them and review the content later on or schedule recordings for lectures that you won't be able to actually attend or watch live. This can be a great way to strengthen your studies, but it's important to have the right tools for the job and check with the relevant authorities to ensure that you are allowed to record in the first place.
Benefits of lecture recording for students:
Focus. It can be hard to stay focused in class during a lecture, whether it's an in-person lecture or an online presentation. But if you have recordings, you'll be able to go back and focus on the content you need to hear, making sure you don't miss a thing.
Pace. Having recordings of lectures lets you work and learn at your own pace, as you can pause, rewind, listen again, fast forward, stop, make notes, and so on to suit your own learning style and rhythm.
Accessible. You can load up your lecture recordings on any device, playing them on your PC, your Mac, your laptop, phone, tablet, or even your TV if you like, giving you full access to all the content you need, whenever and wherever you need it.
Learn. Everyone has their own unique way of learning. Some people are visual learners, others are auditory learners. Some learn best with friends, others prefer to be alone in a quiet room to help them concentrate. Having recordings of lectures gives you the freedom to learn however you like.
Optimize. Recorded lectures can also be edited and annotated however you like, so you can add your own notes, cut out clips that don't apply to you, highlight areas you need to go over, and so on, and all of this can really help to optimize your own learning experiences in your private study time.
Top tips for recording lectures
Make use of a good-quality recording app like Movavi Screen Recorder. This app is free to try and simple to use on both Windows and Mac devices, letting you record all or part of your screen with ease, perfect for recording lectures. You can also draw on your video and add shapes to highlight something on your recording.
Test the software first to make sure that you know how to use it, as it can be a little confusing for some people when they first start to use a new app and need to get used to the various settings and features.
Make use of a scheduler feature, if your screen recorder has one, to program the app to record automatically at a certain time. This can be very useful when you aren't able to physically be at your device and watch the lecture happen in real-time.
Edit your lecture recordings using built-in editing features or other editing tools to cut out sections you don't really need or parts that don't apply to you. You can also add your own captions and notes to highlight key areas for your personal study.
If you want to record lectures offline, check out our guide of the best lecture recorders available right now for inspiration and recommendations.

Frequently asked questions
There are many benefits associated with making use of lecture capture tools and software to record your lectures, with both professors and students feeling the benefits of these recordings. Some of the top advantages for professors include:
One of the best ways to record a lecture on your PC is with the help of Movavi Screen Recorder. Simply follow these steps:
Download and install Movavi Screen Recorder.
Set up the recording parameters as desired – you can use the scheduler to start the recording at a set time and make use of the settings to activate mic and webcam capture.
Press the REC button to start the recording process and give your lecture as normal.
Click the Stop button to end the recording when you're done and then edit or save it.
There's no simple answer to this question. It depends on the lecture in question and the professor providing the lecture. You will be allowed to record lectures if the professor in question or the university authority has provided permission. However, a lot of professors are opposed to this practice, so it's important to check with them first and never record without permission.
Best recorders for lectures
How to record on Google Slides
Meaning of virtual onboarding
How to make training videos for employees
How to Record Video on Mac in 2026 [An Epic Guide]
Bandicam vs. OBS: Which Is Better? [Full Comparison]
7 Best Podcast Recording Software [2026] - Movavi
16 Best Free Screen Recorders for Windows 11 [2026]


1.5M+ users already subscribed to our newsletter