
1. Open VLC on your desktop.
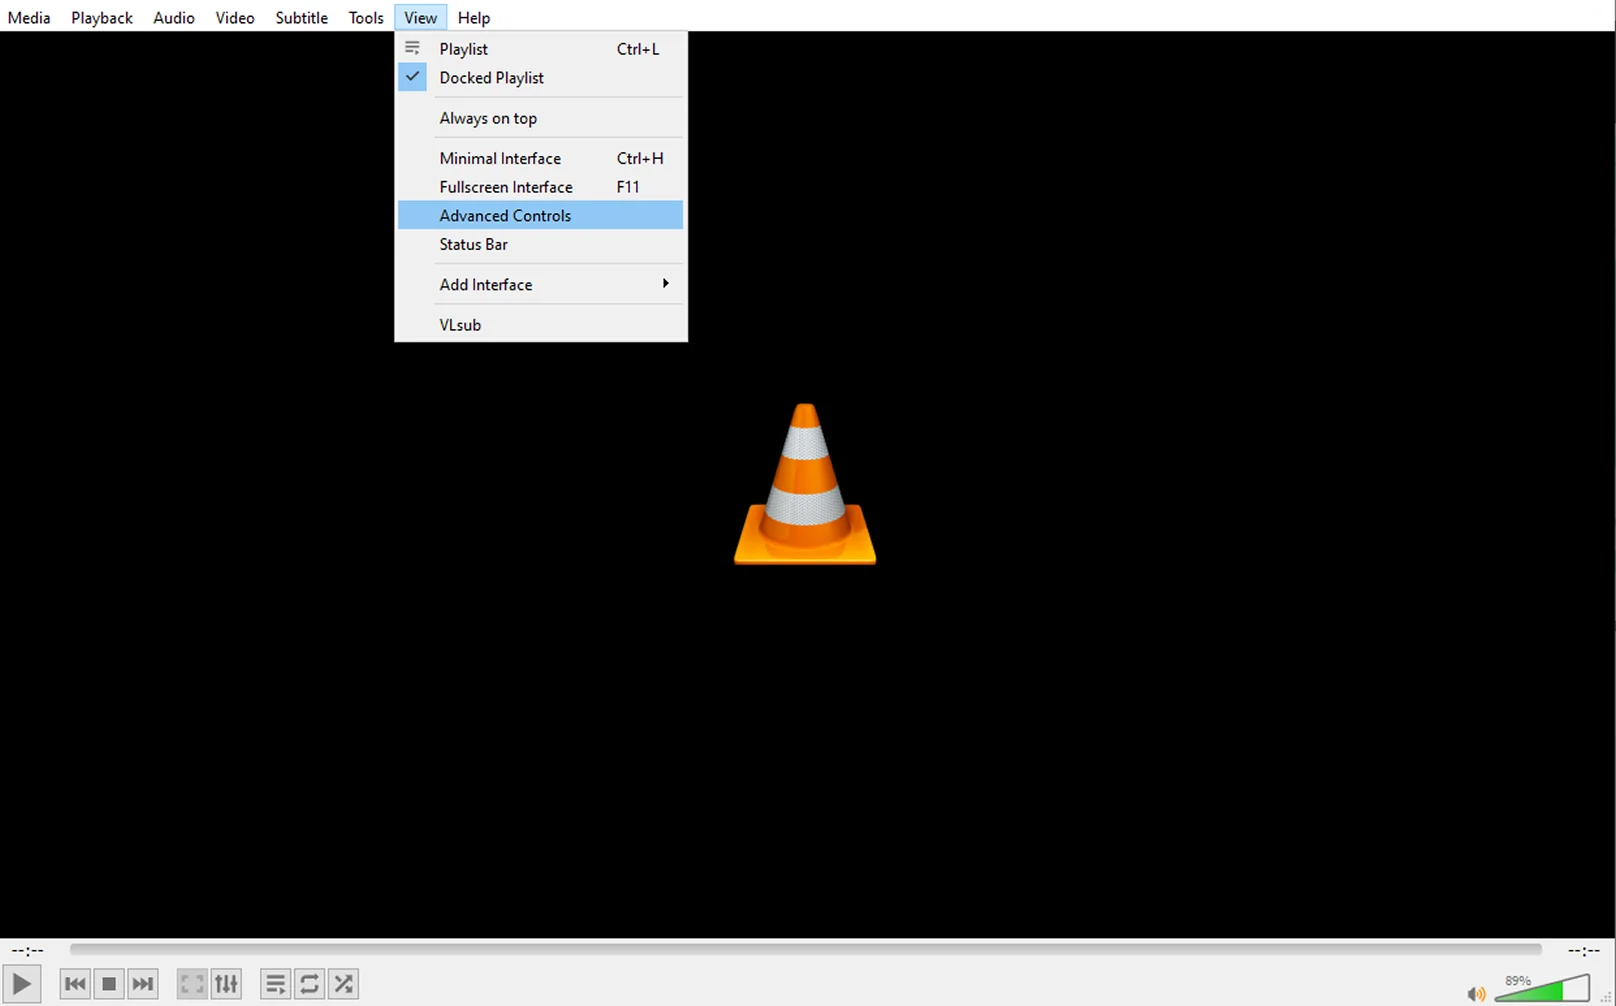
2. Click on the View menu in VLC.
3. Select Advanced Controls.
4. The VLC record button should appear next to the Play button.

How to Use VLC to Record a Screen [Updated]
Click on View and go to Advanced Controls.
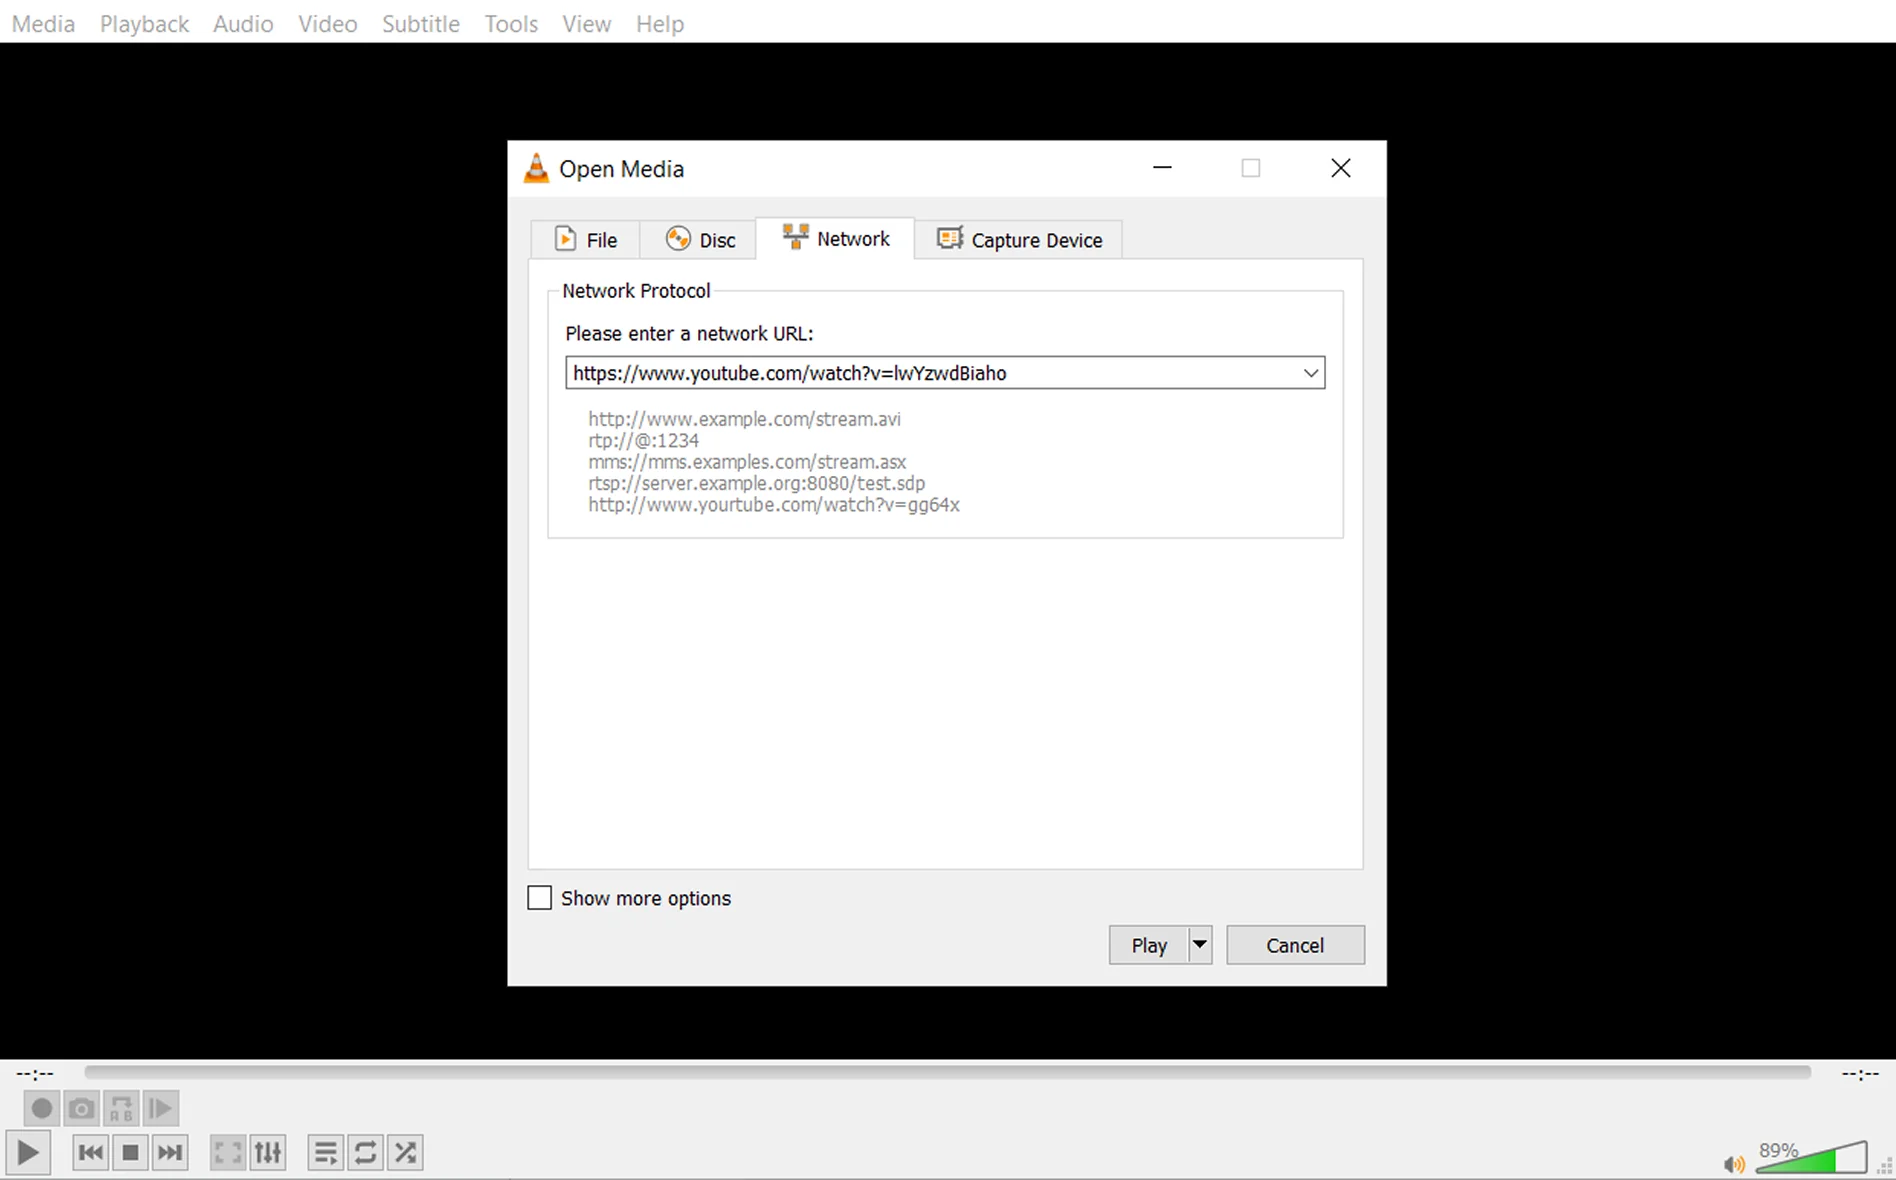
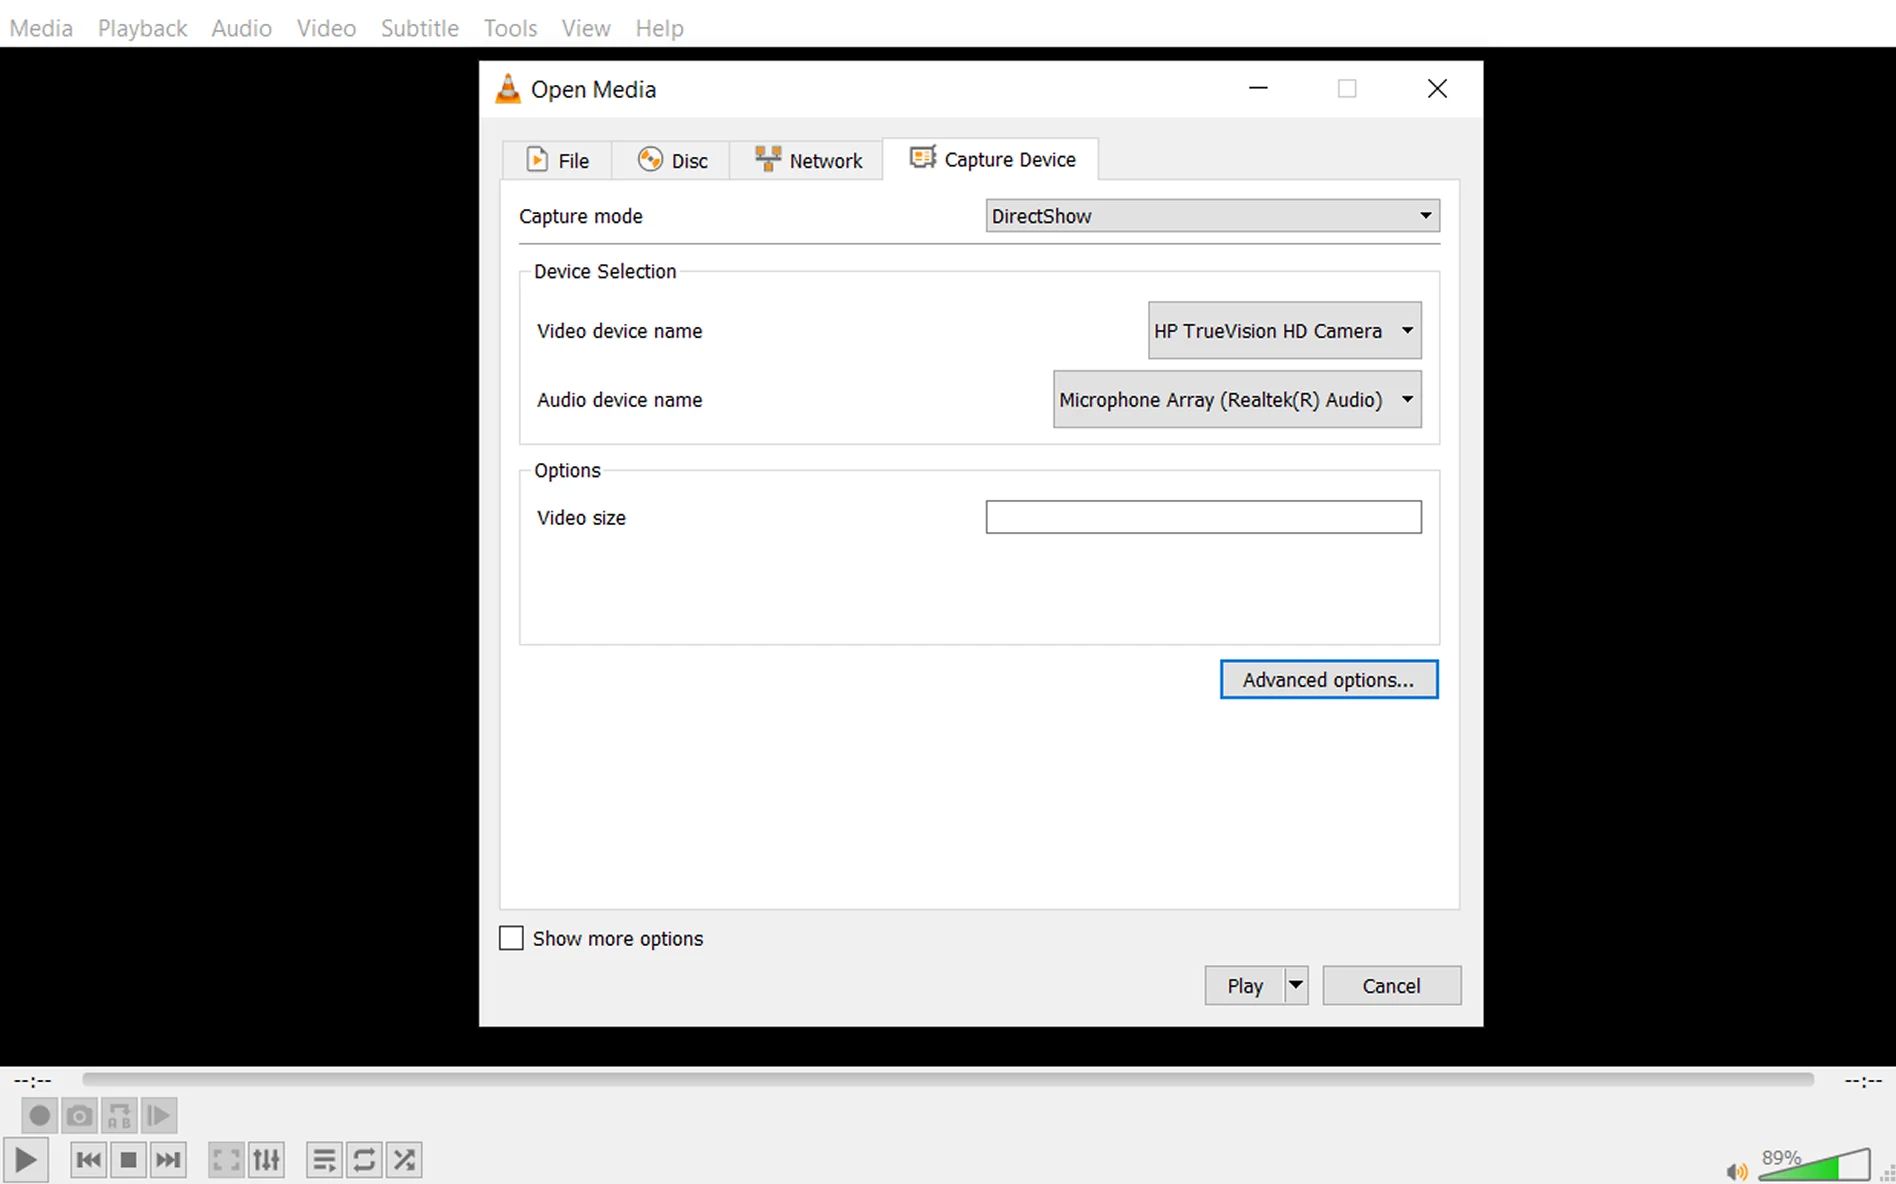
Go to Media (or Ctrl + C), then Open Capture Device.
Set Capture Device to Desktop.
Click Play and start the recording.
Seems complicated? Try Movavi Screen Recorder instead.
There are multiple options for screen recording software out there. I’ve used a screen recording feature for taking online courses, streaming gameplay and more. I also tend to have the latest version of VLC installed and find it a pretty simple way to make some quick conversions and screen recordings. In this tutorial, we’ll take you through all the steps to use VLC to record a screen with audio and video that you can keep.
How to use VLC to record a video
I like to use one of the simplest options for these kinds of tasks, especially if I just want a quick result. VLC screen recording with audio is fairly straightforward. To do it, though, you’ll need to ensure that the VLC screen capture is ready to go.
Let’s walk through how to record with VLC. We’ll start with a step-by-step guide on how to record in VLC.
1. Open VLC on your desktop.
2. Click on the View menu in VLC.
3. Select Advanced Controls.
4. The VLC record button should appear next to the Play button.
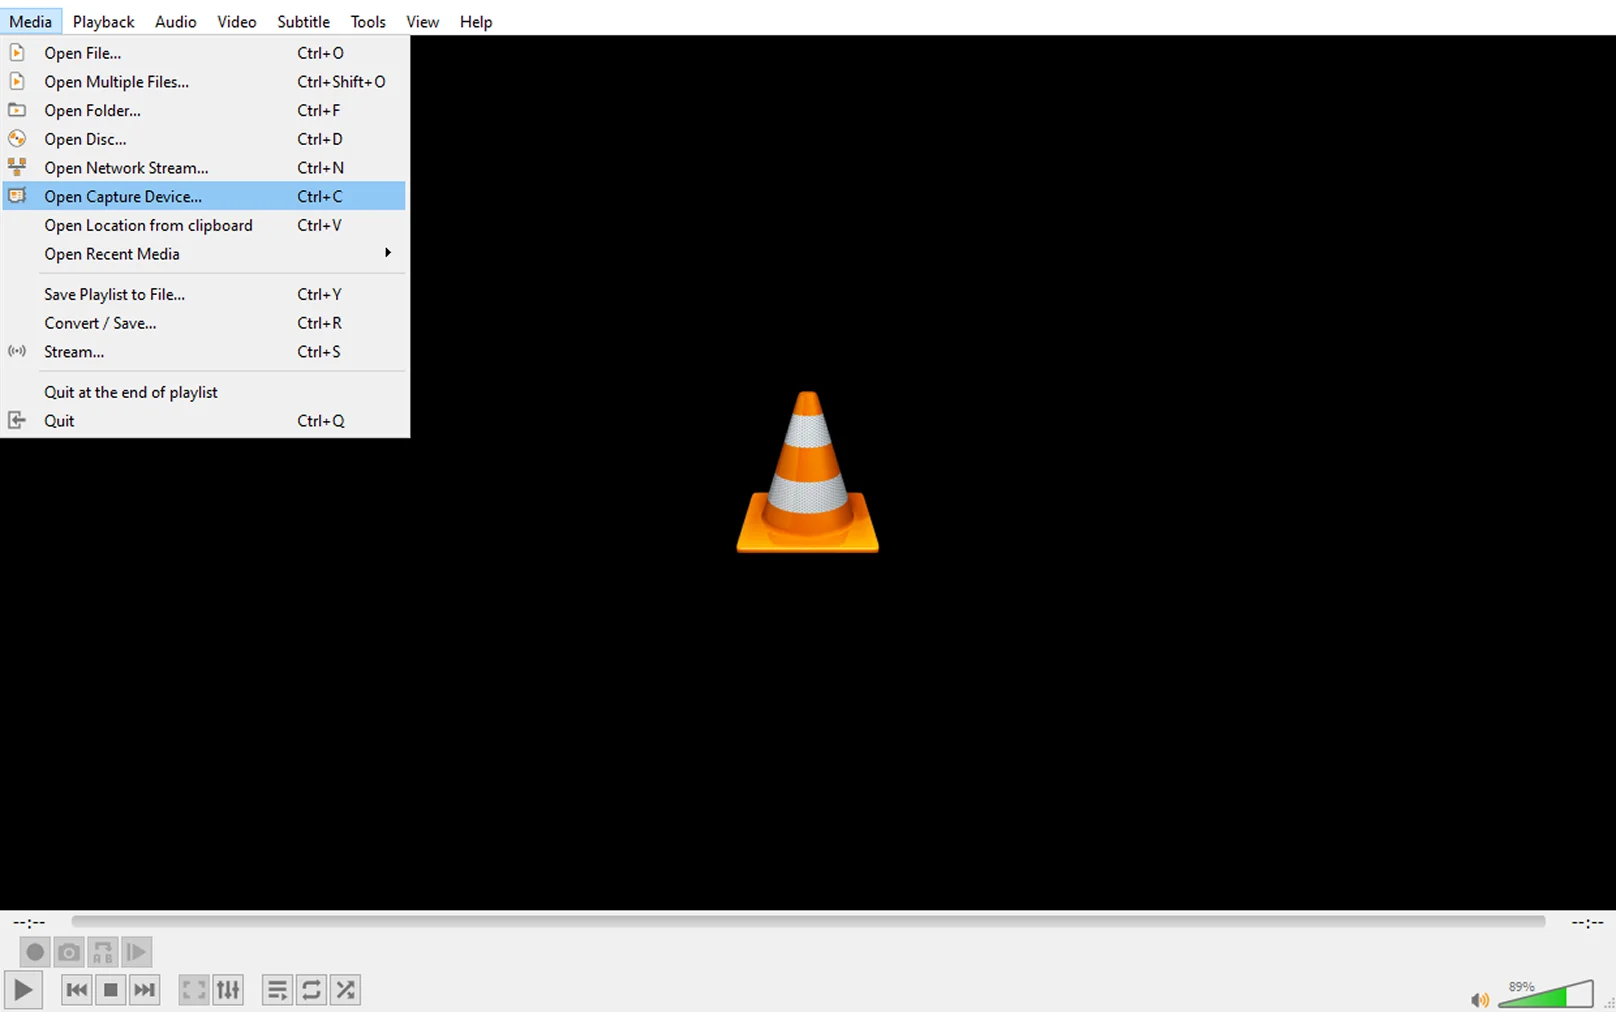
5. Click on Media in the top menu.
6. Select the Open Capture Device option.
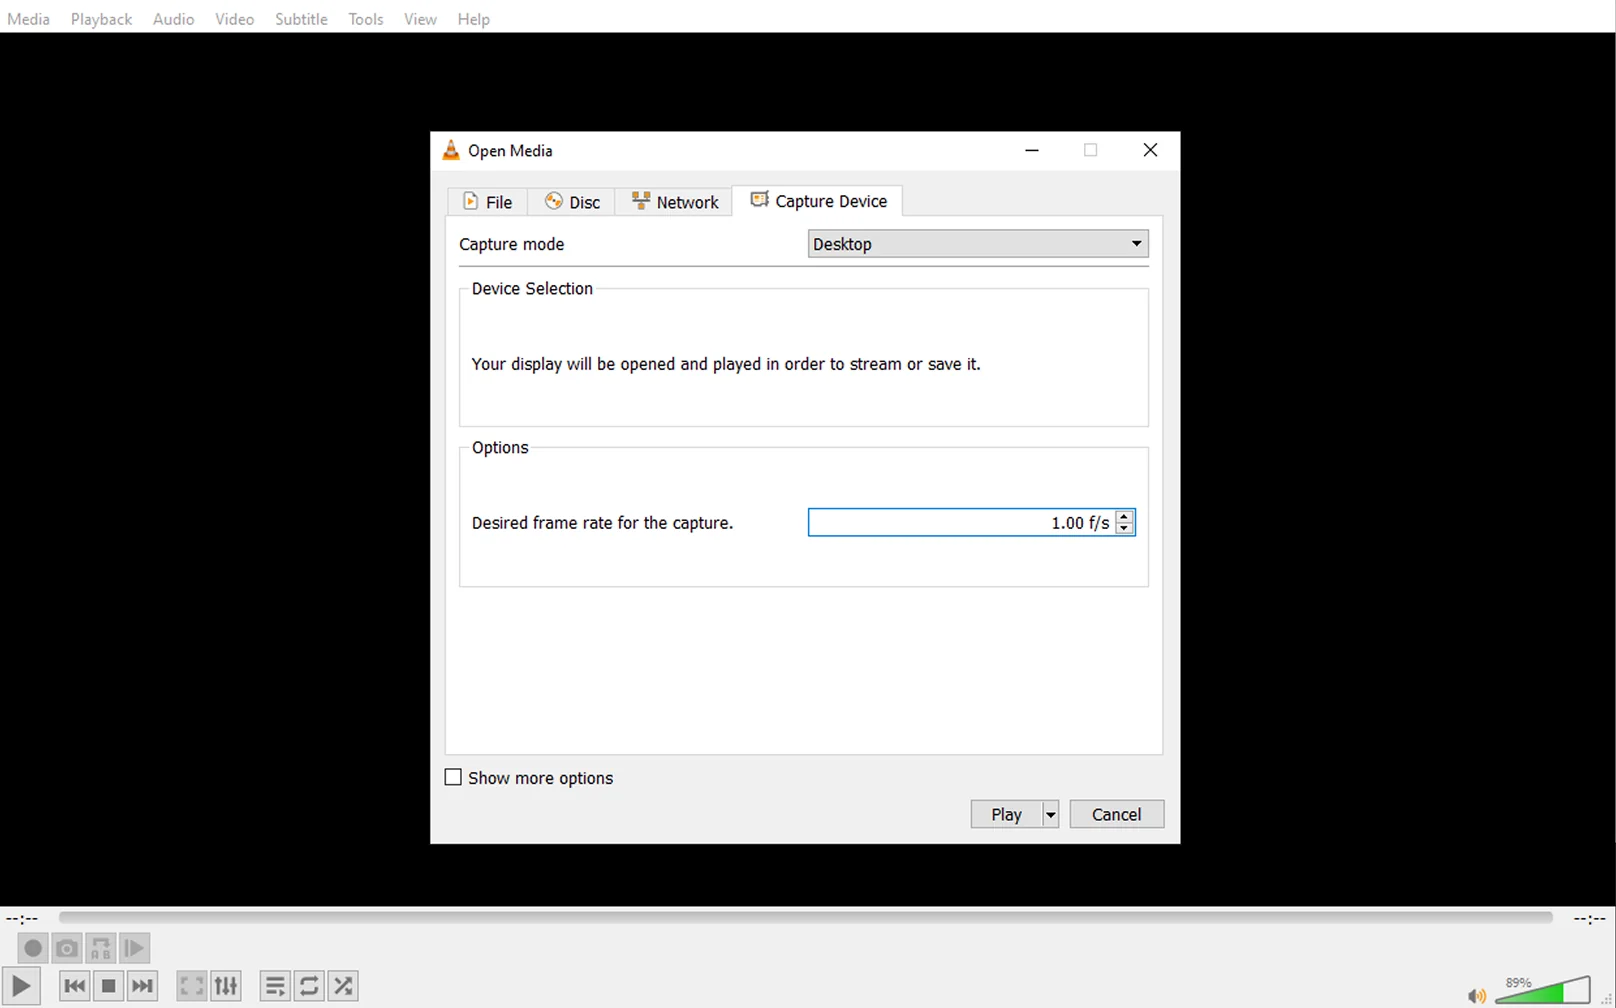
7. On the Capture Device tab, at the top right, click the Capture mode dropdown and select Desktop.
8. Set your preferred frame rate in the Desired frame rate field.
9. Click Play at the bottom right corner of the window.
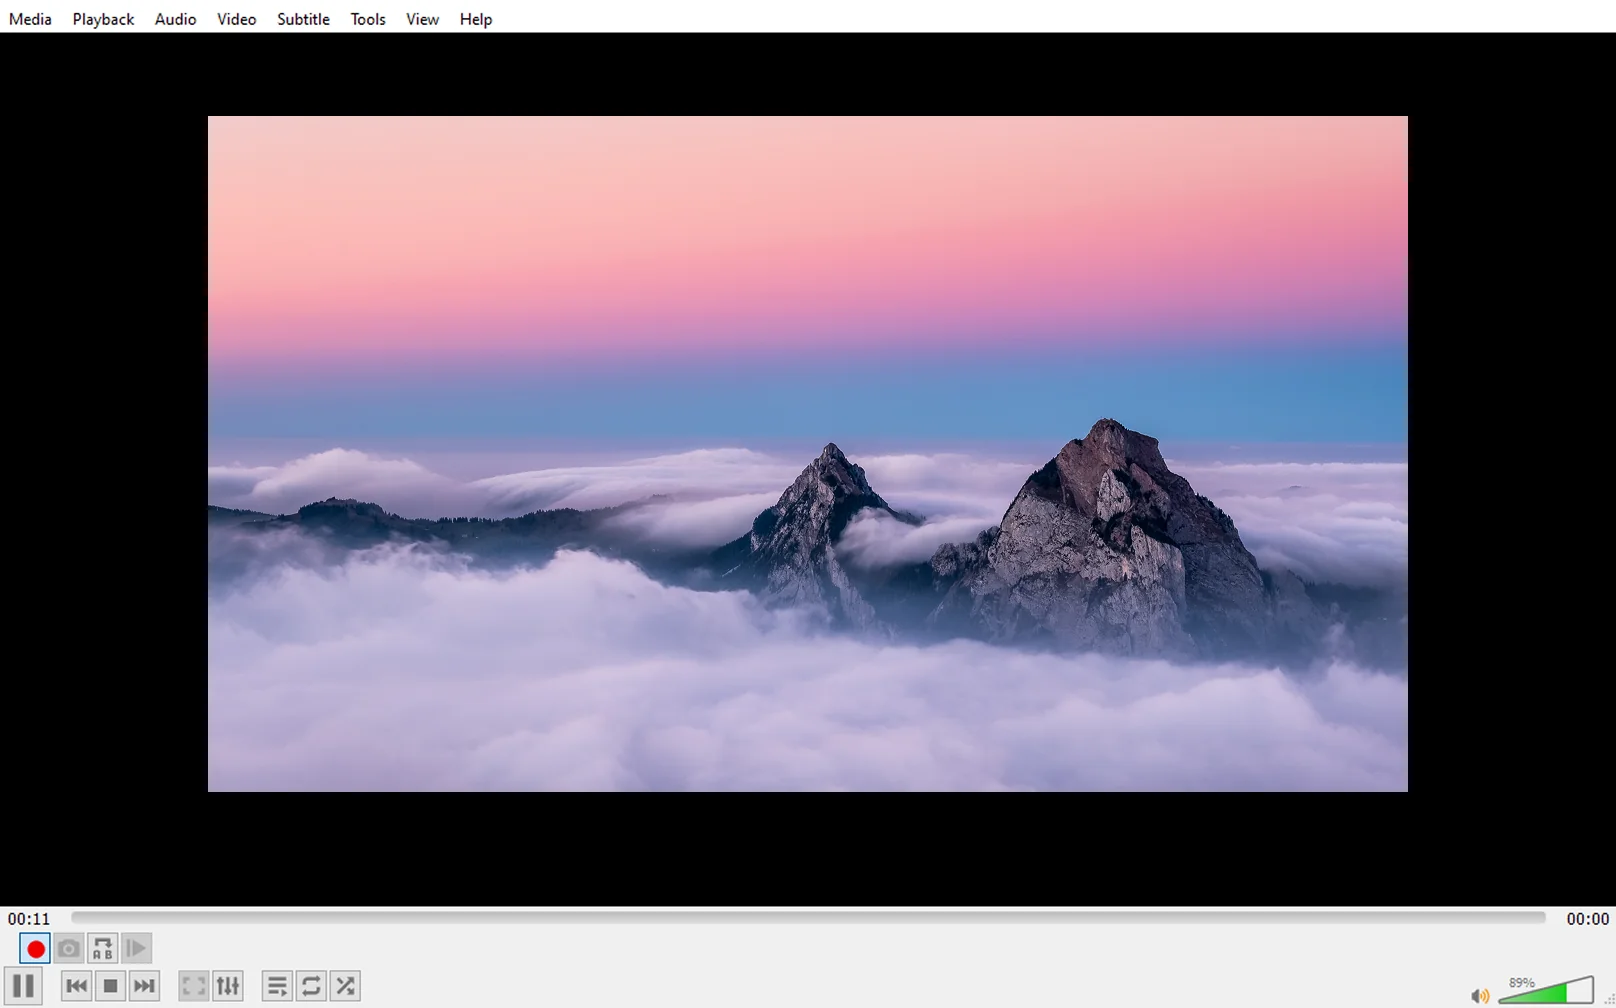
10. Click Record to start recording your computer screen.
11. Stop the video when you are ready to save the recording.
How to use VLC for video capture from a disc
I still have lots of DVD and Blu-ray discs. Not everything is on the streaming platforms these days and you may find yourself wondering how you can quickly grab a recording of part or all of your video. Ripping a video clip from a disc can be a time-consuming process that involves finding the right software and messing with a lot of video and audio settings. I’ve sometimes recorded the video directly in the media player. Especially useful if I just want a clip.
VLC’s video capture capabilities don’t stop with its ability to record a desktop, though. You can also capture videos from discs using VLC. The VLC record video function is relatively simple when using a disc.
Following esports means that I sometimes need to record screens, so the ability to use VLC to record screen functionality for streams is super useful. Not only to record your livestream, but you might also choose to make edits and/or upload it to other platforms like YouTube.
I also found some other uses for this as home security cameras and other recording devices that upload to the cloud could also allow you to record the feed. To learn how to use VLC to record a stream with sound, follow these steps:
How to record a part of a video with VLC
I make compilation videos and uploads that just need a section of a video to add a clip to a longer video project and VLC allows that too. You might also want to enrich a livestream or add to an online presentation. To record a part of a video with VLC’s record function, follow the steps above to enable the record button. Once you have your advanced controls selected, here’s how to record on VLC:
How to record a webcam with VLC
In addition to recording videos in VLC and capturing screen recorders, VLC’s video recorder can also record video from your webcam. This is a great feature for adding your reactions to a gaming stream or recording yourself for an online presentation or webinar. Here are the steps to record from your webcam:
How to convert recorded videos with VLC
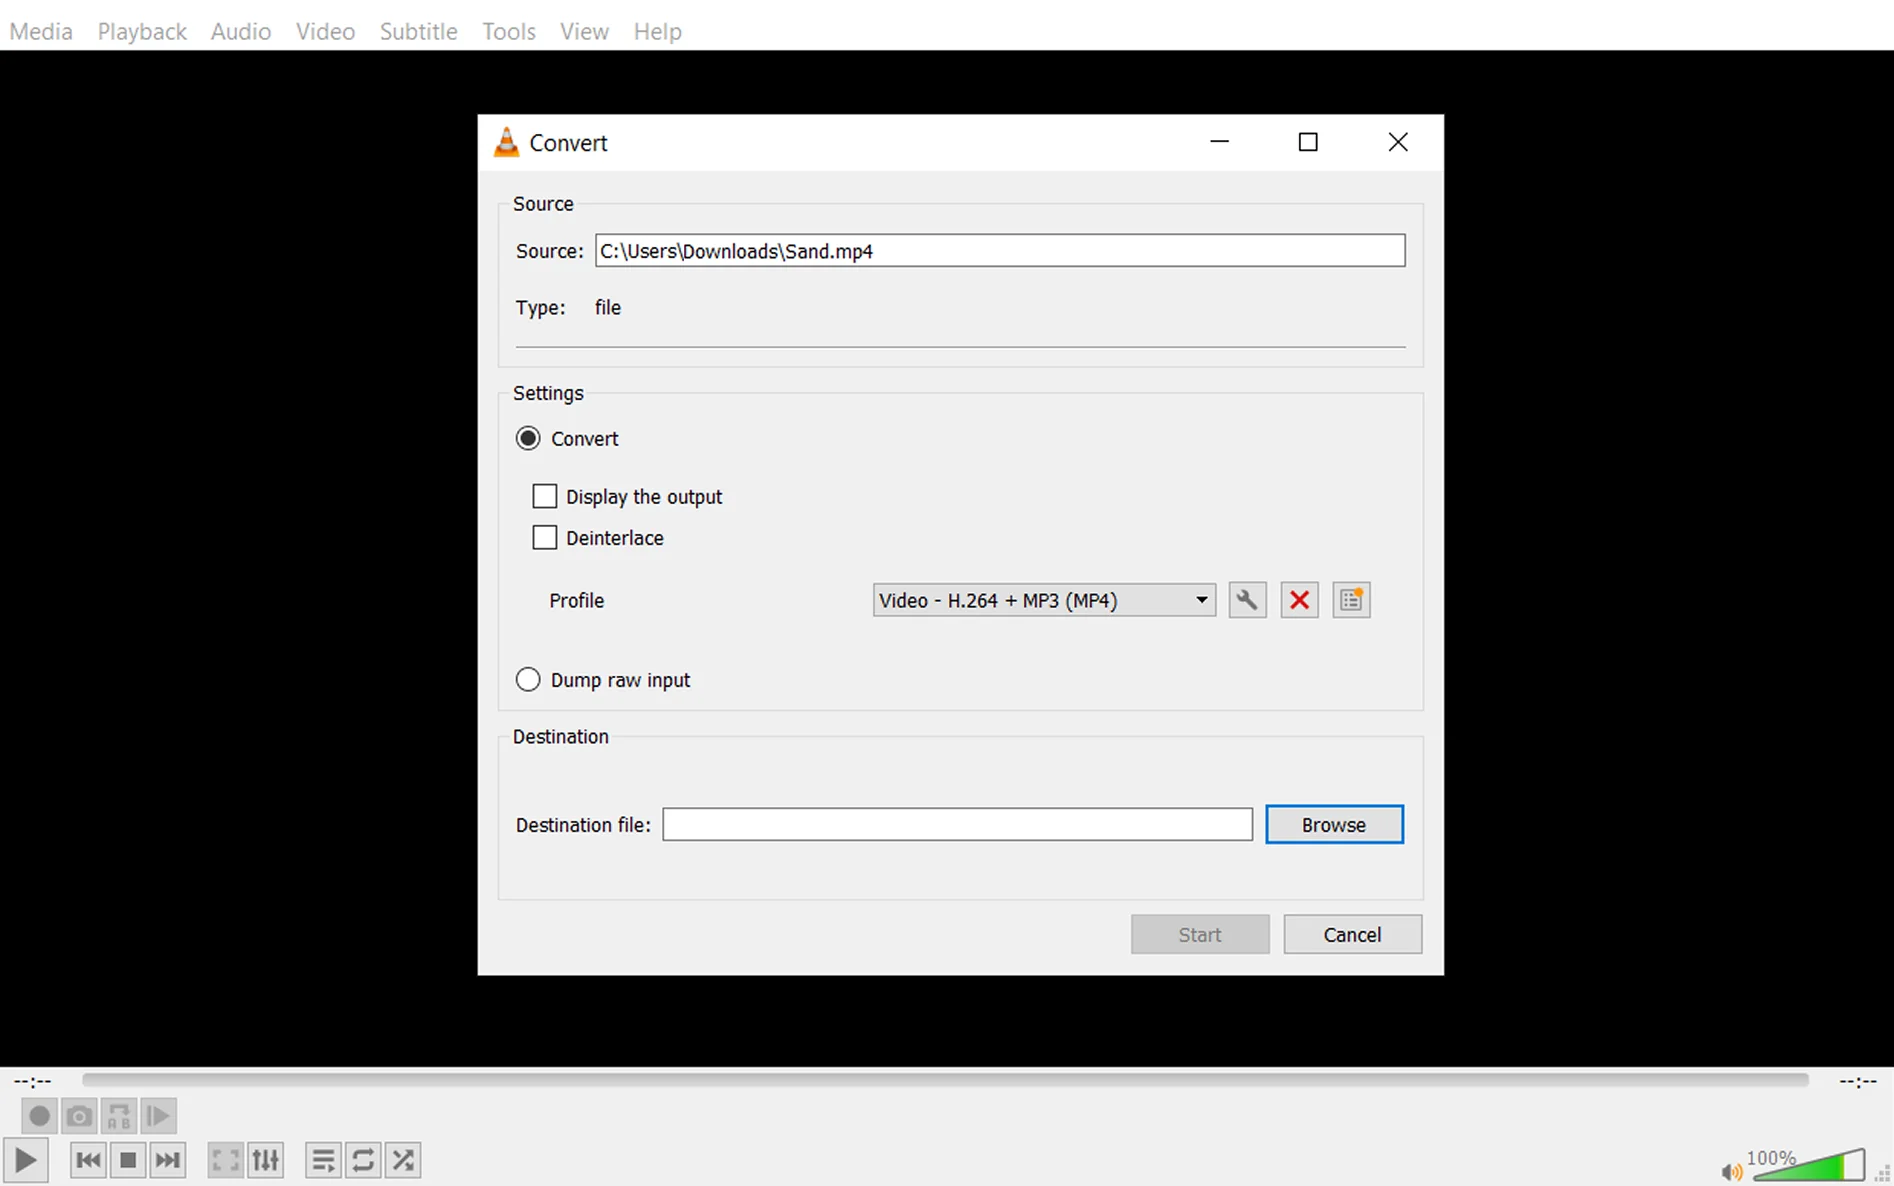
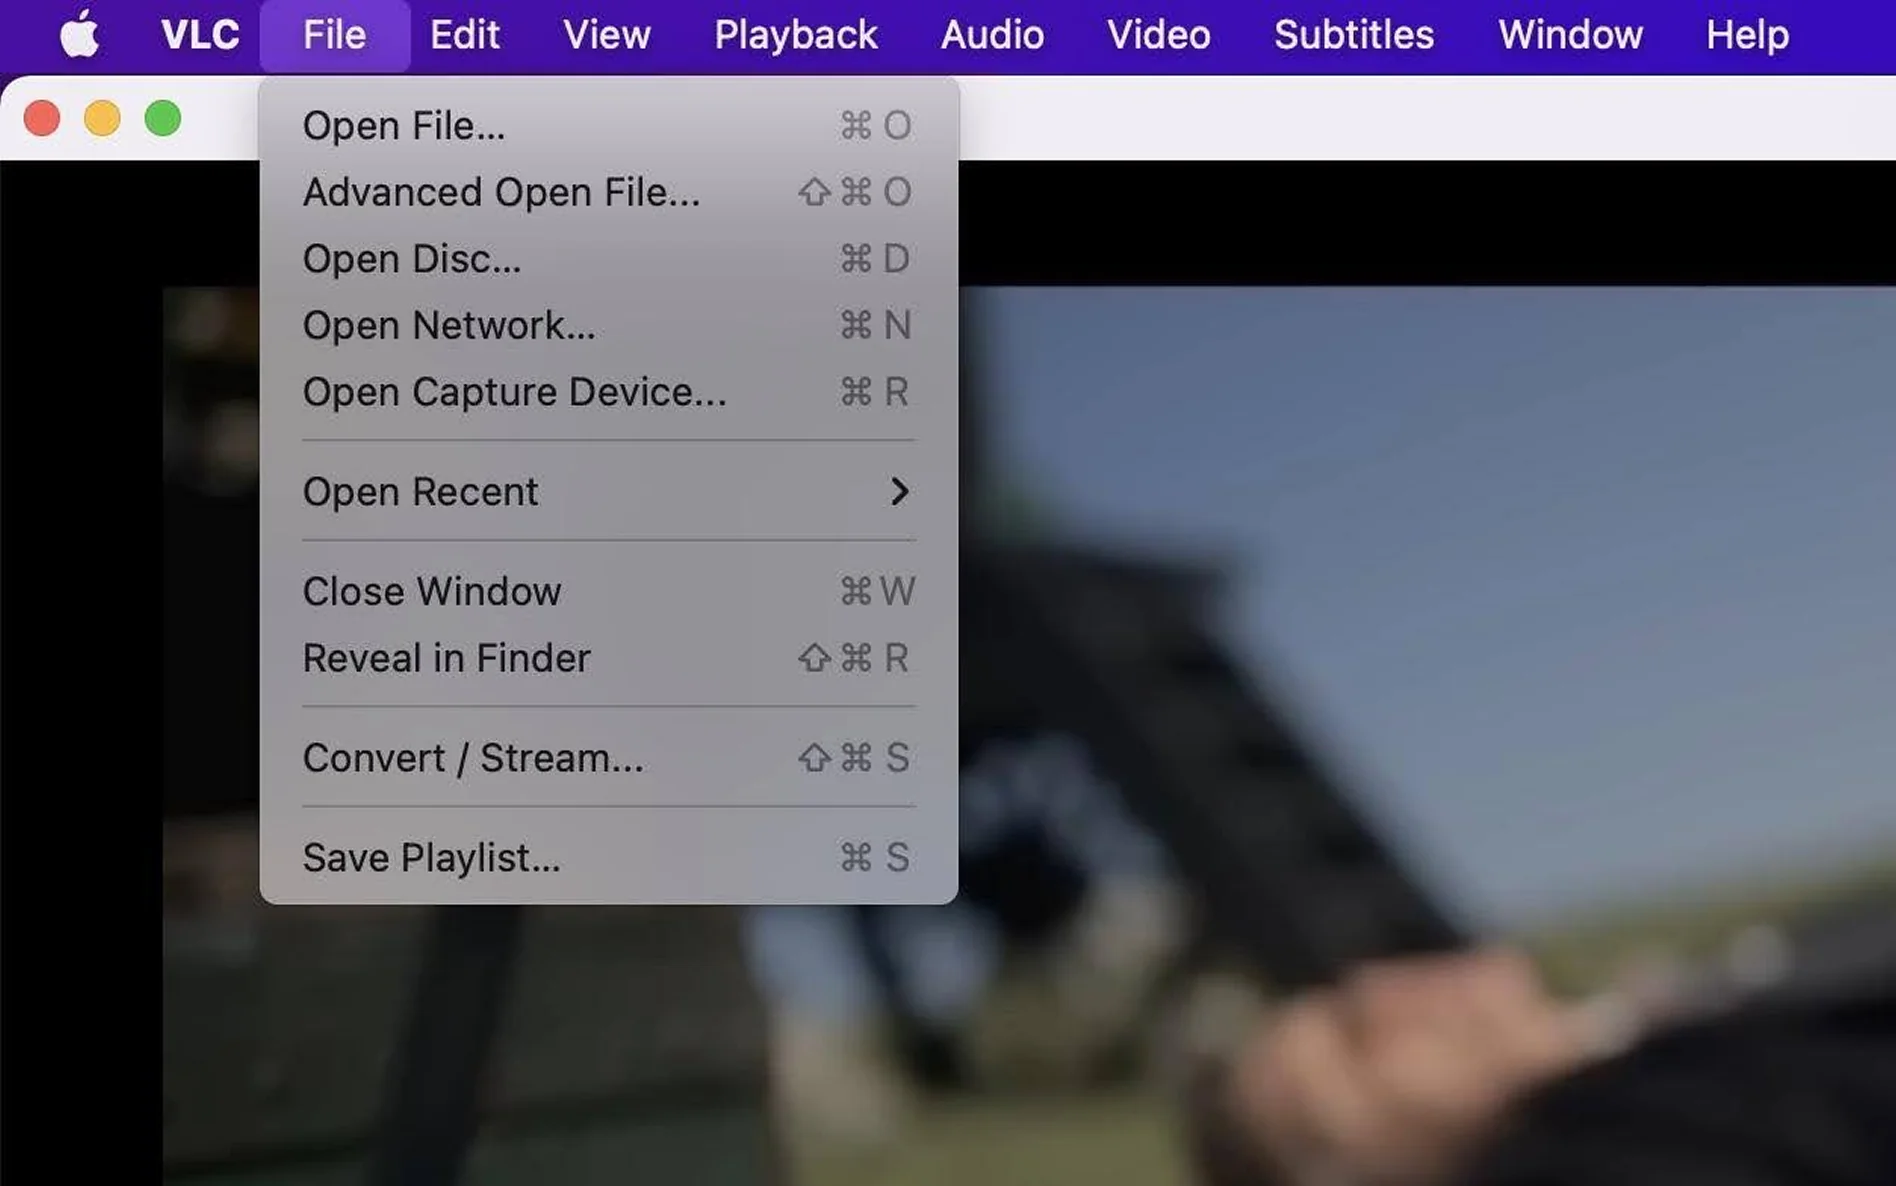
I am always using VLC for conversions, too. It is just a simple and easy tool. If you want to convert a file to a different video format then you can, but on Macs they have recently changed the way things work. I like the new method that doesn’t include clicking on the media menu. Version 3.0 has put this in the File menu rather than the Video menu. There are also a load of profiles that people can use to dictate the kind of video they want to convert to. Let’s walk through the process to convert your recorded videos with VLC.
How to convert a video on Windows:
How to convert a video on macOS:
VLC screen recorder alternative
I find VLC to be limited and this recent update took some getting used to. Even though VLC is capable of recording screens and recording video clips from discs, it may not be the best screen recorder option available in all scenarios and there are some other options.
I found it clunky to switch between sources and when I need to switch between recording screen or webcam in VLC, I don’t like going through several steps to get to the right settings in VLC’s Media menu. For this reason alone, many users find themselves looking for alternatives to record screens or webcam feeds.
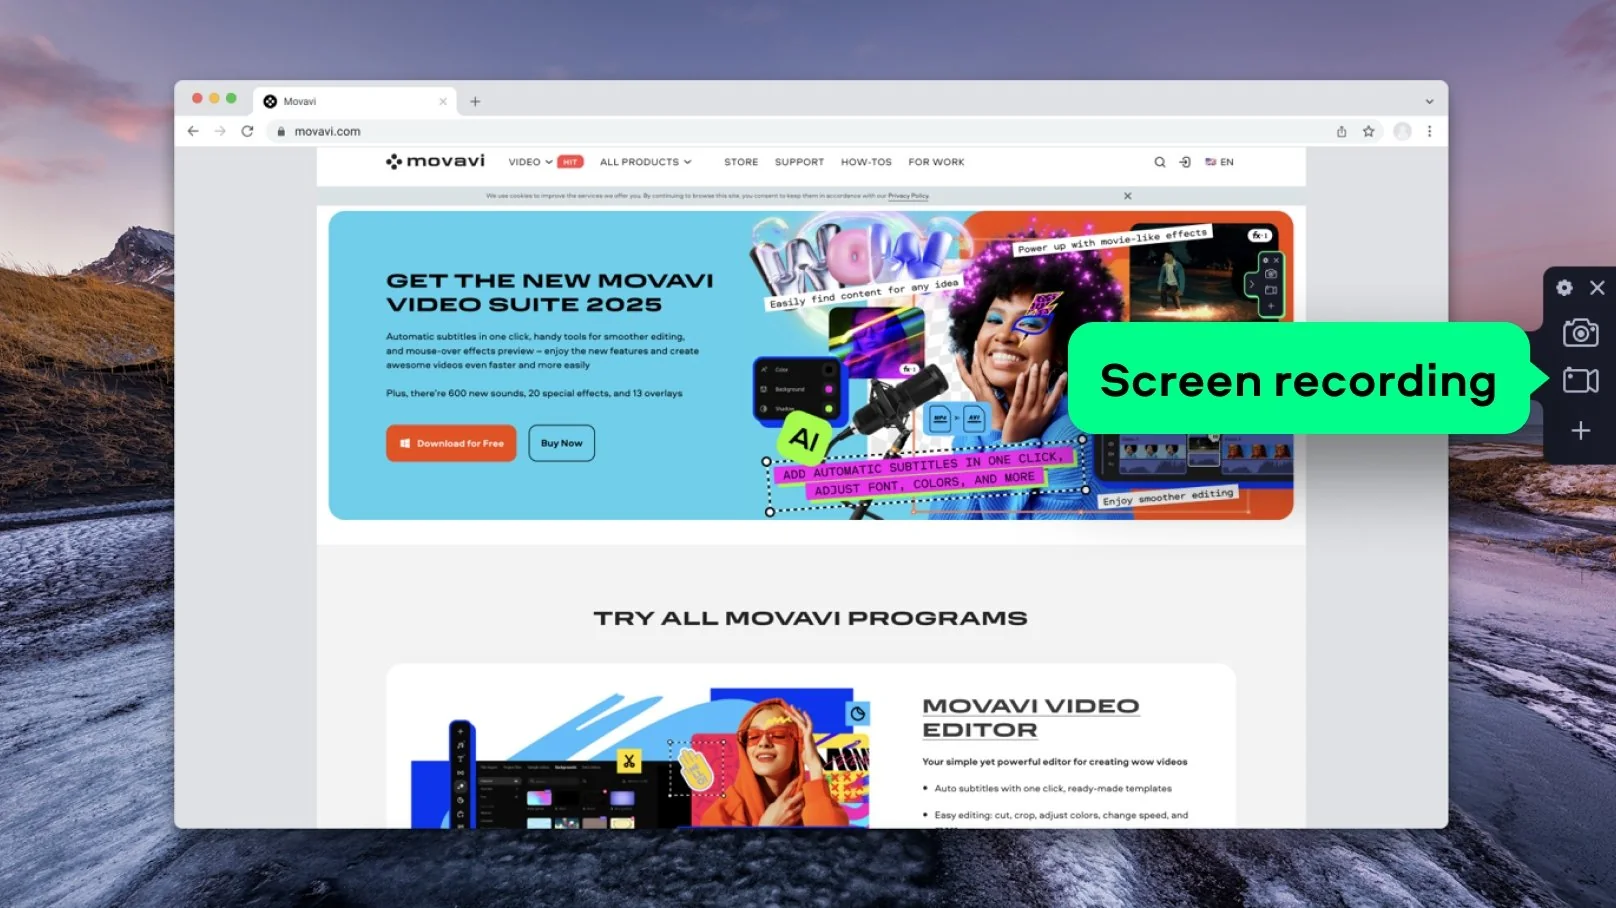
If you’re looking for an alternative to the VLC screen recorder, you might want to consider Movavi Screen Recorder.
Movavi Screen Recorder is a simple-to-use alternative to VLC for your screen recording needs. This software is free to download and is extremely user-friendly, making it a popular choice for many who’ve tried to record screens with VLC. It is intuitive in a way a lot of the other screen recorders aren’t.
Movavi Screen Recorder comes with several convenient features that may be lacking from VLC. The capability to capture different video sizes from your screen, for example, is a big attraction for many users.
I like the option to just record a selected area on the screen. Movavi can automatically detect and record the active window in your screen that you want to record. This is especially useful for recording online presentations. I have used it to capture things like Zoom calls for podcasts. Other benefits of using Movavi include but aren’t limited to:
To record your screen with Movavi Screen Recorder, follow these simple steps:
Step 1. Download and install the app
Download Movavi Screen Recorder. Once you’ve downloaded the software, follow the instructions to install it, and open Movavi Screen Recorder on your desktop.
Step 2 (Optional). Adjust your settings
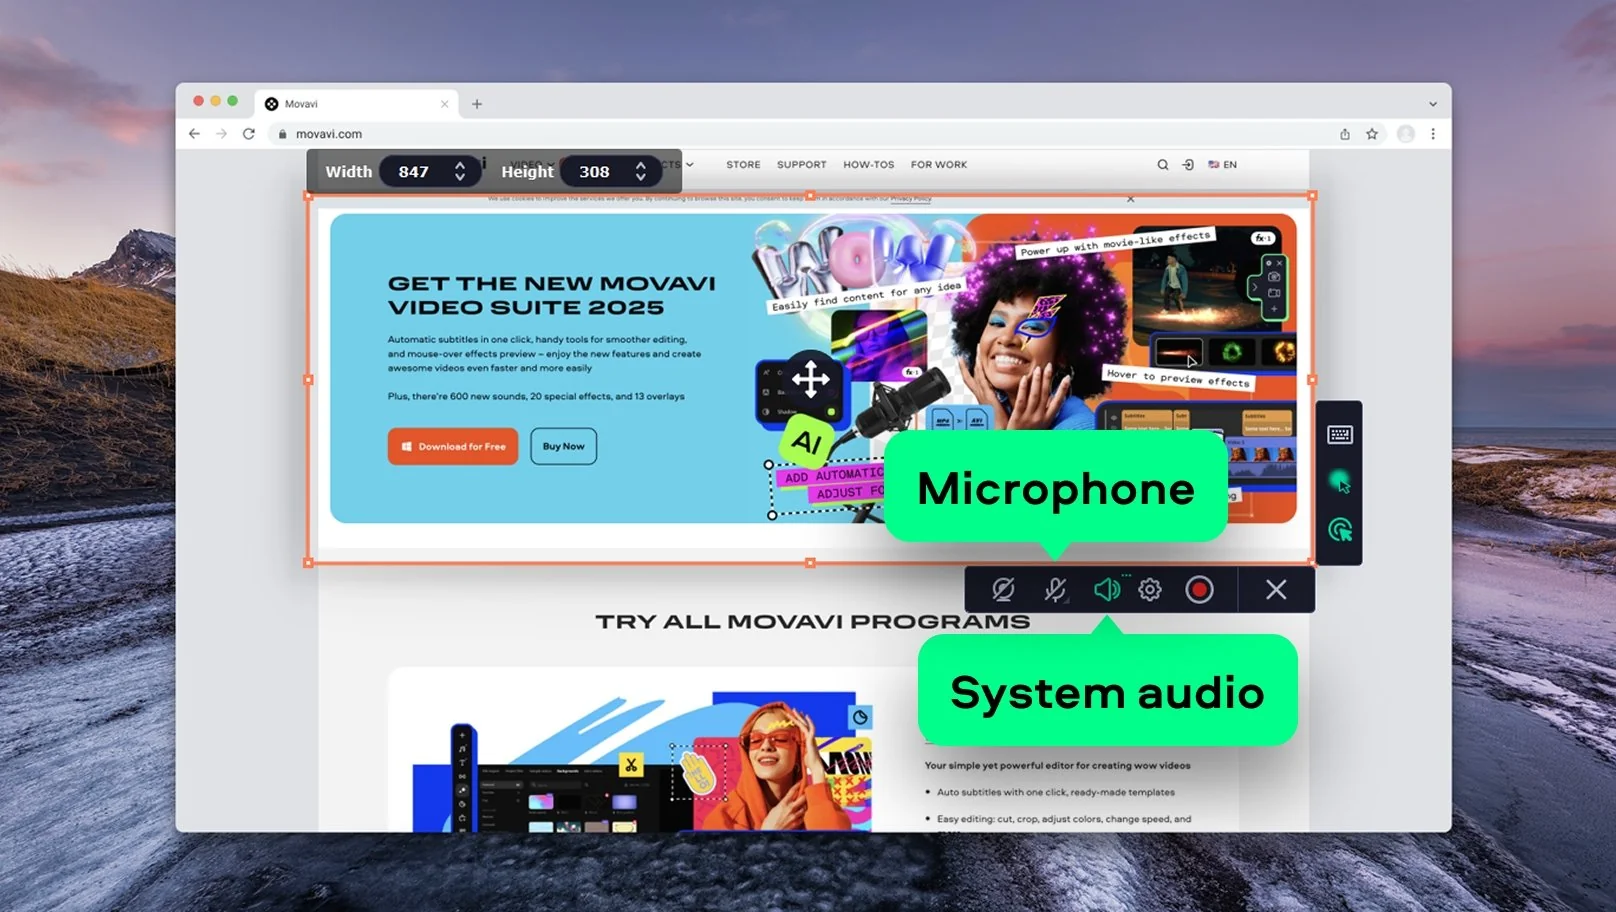
Adjust your settings. If you just want to record your screen quickly, you don’t have to adjust any settings or make any changes to get started. Just skip this step and move on. You can select your microphone, record from your webcam, and activate system audio.
Step 3. Record your screen
Tap the REC button at the bottom right of the display. This will start your recording. When you’re finished, just tap this button again to stop recording. You’ll also notice that there are three other buttons to the left of the REC button.
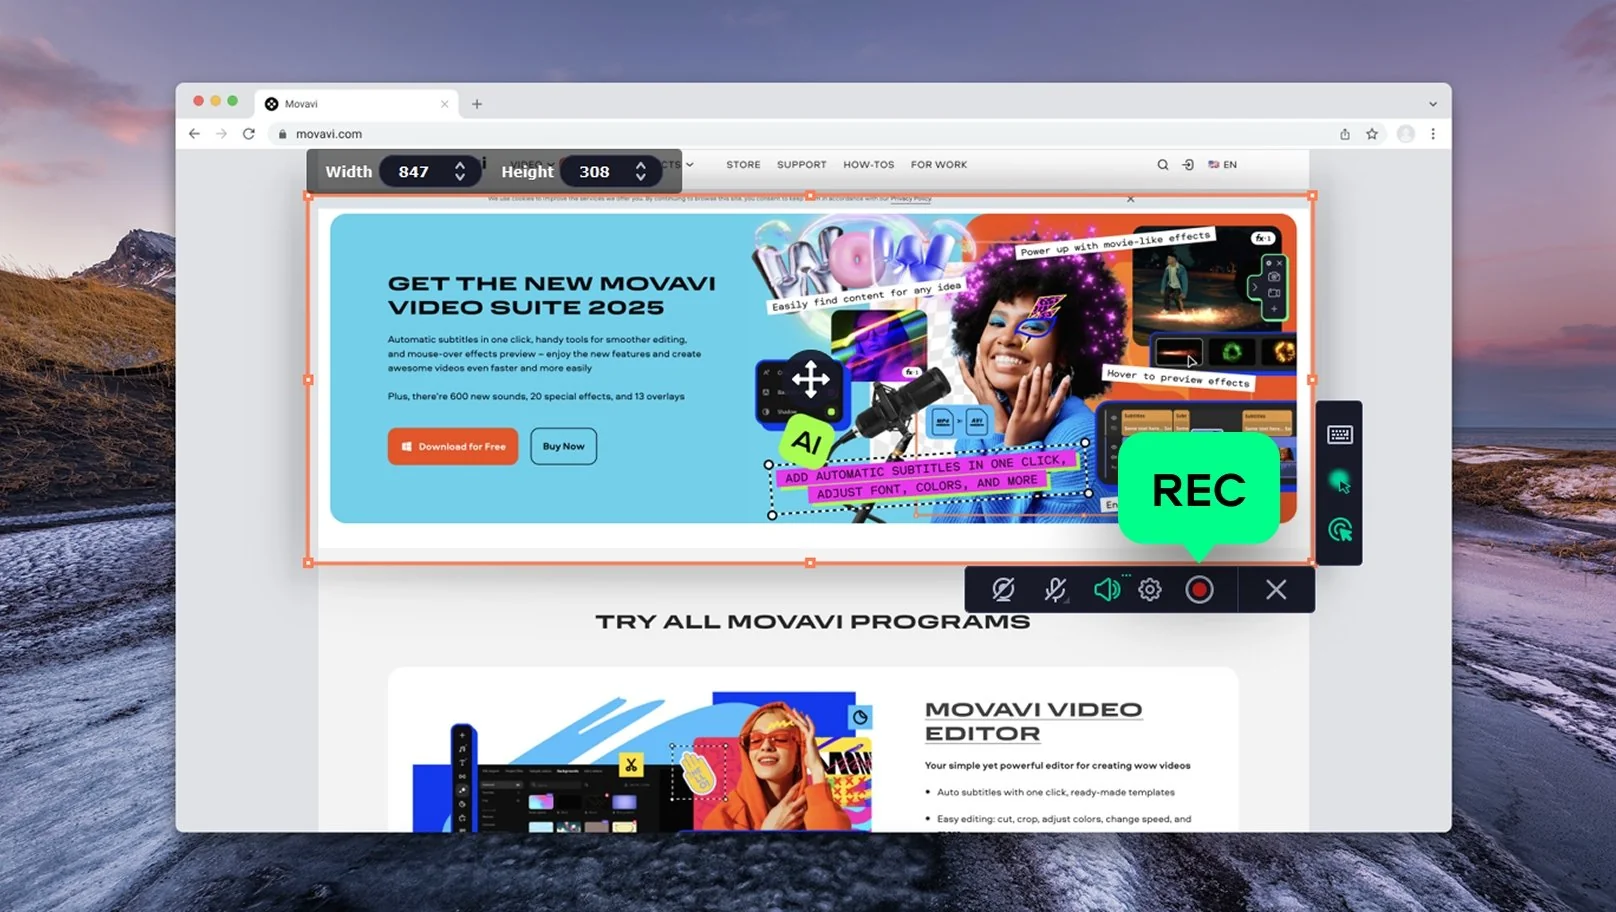
These are Webcam, Microphone, and System Audio. They’ll let you capture video from your webcam and/or audio from your microphone or computer on the fly for fast and easy recording.
Step 4 (Optional). Edit your recording
Make edits to your video. With features to trim your video, control the volume, and make other minor edits, many users won’t need additional editing software after they finish recording their screens.
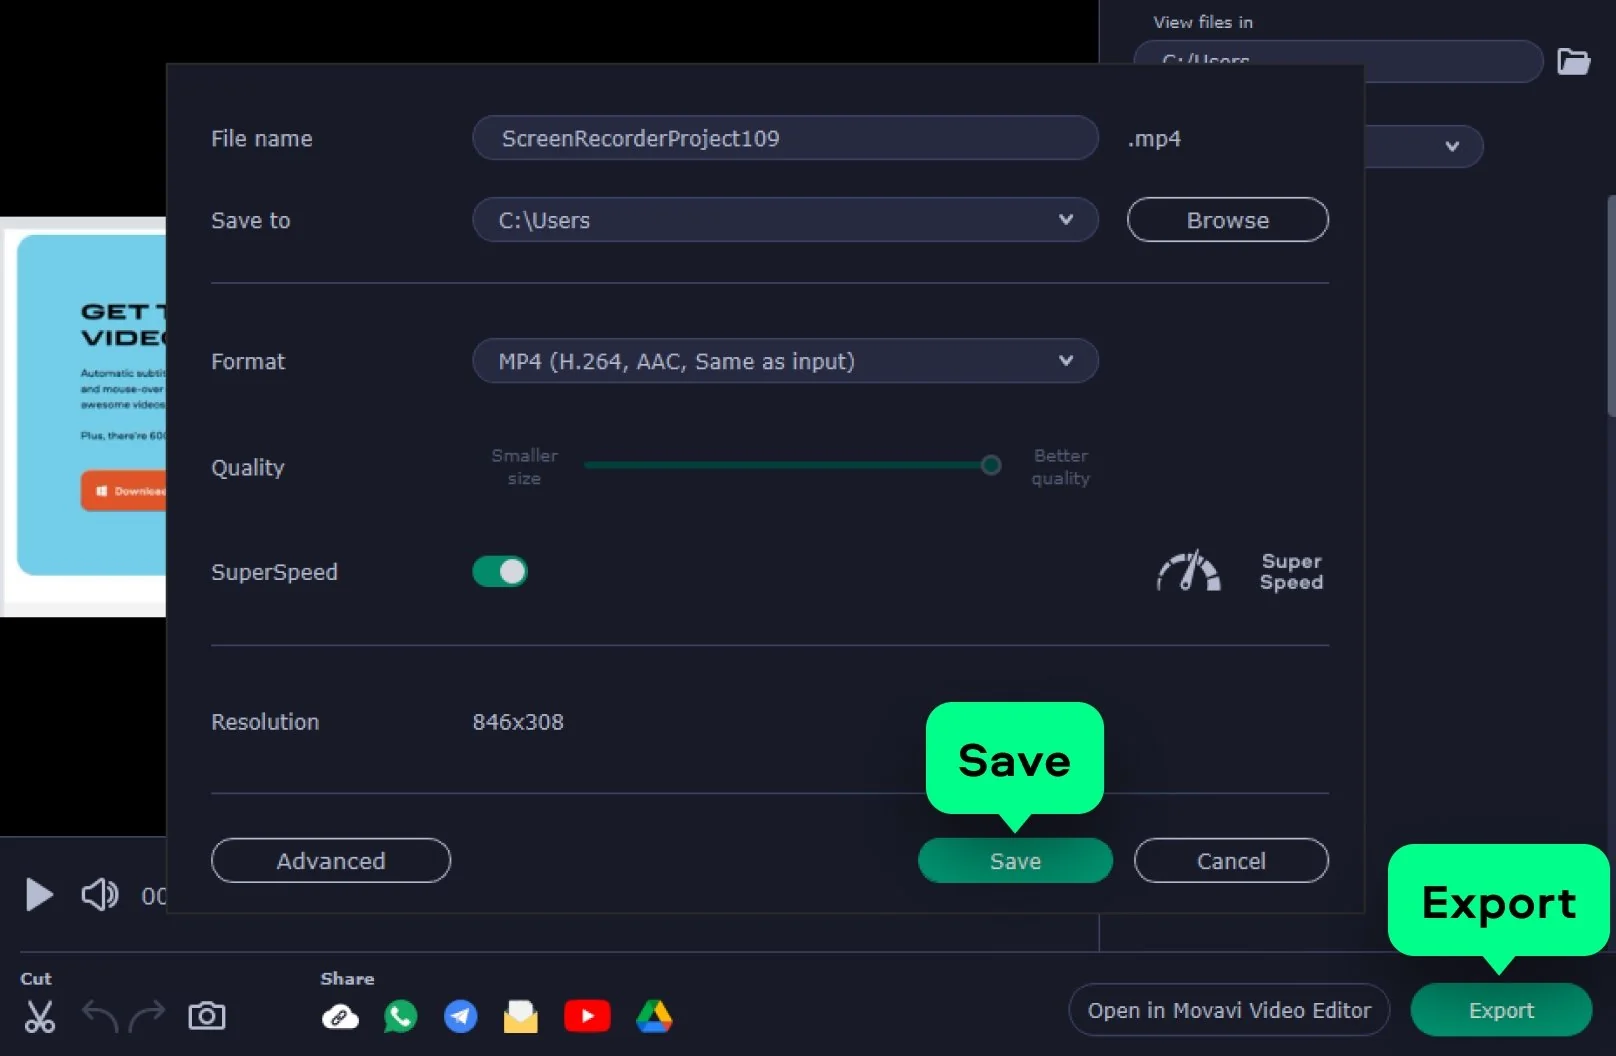
Step 5. Save the result
Save your video. Just click on Export, name your file, and set its destination. And, if you want to go ahead and publish your video or send it to a friend or colleague, hit the Share button for several preset options to share your video.
VLC isn’t always the most intuitive of interfaces. Sometimes it takes a little while to feel your way around and they have also recently made some layout changes. I do think the recording process is fairly easy once you know how to use it. I do find Movavi Screen Recorder is a more robust tool that allows you to perform edits and share your video right from the program. It is more of a useful tool for making.
As you decide which screen recorder will best fit your needs, consider a few questions:
If you’ll only be recording one webcam video or one video from your desktop screen, you may not need a lot of the convenient features that come with Movavi Screen Recorder. However, if you’re participating in regular online presentations, webinars, or live streams, not having these features could quickly become very cumbersome.
Why not try downloading Movavi Screen Recorder for free today to see how well it works for you? The additional features make it an attractive alternative to VLC for all your video recording needs.
Frequently asked questions
Yes, VLC can record a video from a disc, and it has the capability to record a screen or webcam feed as well. Accessing the controls to record with VLC is not the most intuitive process, but once you’ve found the advanced controls, the steps to record videos are fairly straightforward and easy. To get started, you’ll need to go to the Media menu in VLC media player and select Advanced Controls. From there, you’ll also need to choose where you’ll be capturing video from (e.g., webcam or desktop screen).
VLC media player is known for its ability to play multiple video and audio file formats on a Windows or Mac desktop. It also has the capability to record videos and video clips as well, by capturing video playing in the media player, on your desktop, or by capturing your webcam feed. The record button in VLC can be used to record part or all of a video playing within the media player, or users can adjust the settings in VLC’s Media menu to capture recordings from their desktop screen or webcam.
When you use VLC to record a video, it will automatically save the video recording to VLC’s Videos folder. On a Windows 10 computer, this folder is found in your system drive at C:\Users\[username]\Videos. To find the VLC Videos folder on your Mac, hit the cmd key and the space bar at the same time and type “Videos” into the search window. Once you locate the Videos folder, you can move your video files to any folder or subfolder you prefer on your computer.
Yes, it can. Click the Media menu, then Open Capture Device. Here, set Desktop as the capture mode. Select Stream from the drop-down menu. Next, select File in New destination and click Add. Choose the output location and name your file. Set the Profile to Video – H.264 + MP3 (MP4). Finally, click Stream. To finish screen recording in VLC, click Stop.
Go to the Media menu and click Convert / Save. Under the Capture Device tab you can choose the capture mode and choose advanced settings different for each capture mode such as frame rate, aspect ratio, etc.
There are a few solutions you can try:
Restart the sound card on your computer
Change the audio output format
Restart or update VLC to the latest version
Turn off video acceleration in the Tools > Preferences window
If the VLC record button isn’t working, try disabling Windows Defender
Disclaimer: Please be aware that Movavi Screen Recorder does not allow capture of copy-protected video and audio streams.


1.5M+ users already subscribed to our newsletter