Movavi Photo Editor
Easily enhance images and get professional-grade results in a snap.
Movavi Photo Editor
Image restoration with neural networks
Automatic photo enhancement in one click
Effective object and background removal
User-friendly interface with tips
By clicking the download button, you're downloading a trial version of the program.*
How to Shoot at the Golden Hour Time


In this article, Jason Parnell-Brookes explains what golden hour is and gives you some top tips to take better golden shots.
Disclaimer: We use affiliate links to the products mentioned on this page. When you click an affiliate link and make a purchase, we receive commissions. If you want to support our portal, you can use the links. Otherwise, you can find the recommended products using a search engine.
What is golden hour in photography?
What is golden hour? Well, gases in earth’s atmosphere scatter the white light that comes from our sun, and due to the wavelength of blue light, it scatters this most. This is called Rayleigh scattering. That’s why the sky appears blue. When the sun hangs low in the sky at sunrise and sunset the light has to travel through a thicker portion of the atmosphere and scatters the blue light so much that the longer wavelengths of light are more visible – these being reds, oranges and yellows, this is called the ‘golden hour’.
The term ‘golden hour’ is a bit of a misnomer because the length of time you see these warmer colors depends on weather, time of year and your position on the earth’s surface. Too much cloud cover and the light will be concealed from view, too little cloud and the golden tones will be less visible because there’s fewer surfaces to absorb and reflect the light. The best conditions for roaring colors are when there’s broken patches of cloud that allow some light to pass through but also absorb these warmer tones and so amplify the golden effect. If you’re positioned nearer the equator the arc of the sun is the sky is quite steep and as such the ‘golden hour’ is short lived. Contrast that with a position nearer the poles and you may not see sunrise or sunset at all, due to the longer arc. However, there’s opportunity to see incredibly long sunrises and sunsets at the right time of year. Take, for example, spring or autumn just inside the arctic circle, the sun makes it above the horizon, but not by much, resulting in several hours of golden light.
To determine when the golden hour starts we can turn to the internet and smart device apps. Websites such as timeanddate.com act as calculators to provide sun, moon and even night sky information based on your desired location. If you’re in an area where internet connection isn’t possible, you can turn to apps such as PhotoPills or The Photographer’s Ephemeris which also give you offline visual displays of where golden light will start and end for both sunrise and sunsets at given locations. It even takes shadow size and length into account which is great for planning your composition to take good golden hour photography.
Plan your golden hour shoot in advance with weather forecasters such as the Met Office who detail multi-day forecasts. They’re more accurate up to three days before your event, but can be useful estimates for up to 10-14 days out from your shoot. Check for satellite data maps which give visual representation of the cloud cover as it moves across the map, this is especially important to look at the day before because heavy cloud cover means little to no golden light. That said, weather is incredibly hard to predict so sometimes it’s worth heading out just in case there’s a small break in the clouds.
The easiest way to get good shots on smartphones is to tap on the brightest area of your shot, this is usually the sky. Because the sky is much brighter the phone will automatically darken the scene allowing you to capture detail in the brightest sections. If you find the rest of the landscape is too dark, turn on High Dynamic Range (HDR) mode which takes multiple images in one go and composites them together to retain detail in darker areas and bright areas simultaneously.
The best way to take selfies during the golden hour is to work with the lighting. Take portraits side-on to the light or with the light in front of you, lighting your face. Taking selfies with the sunrise behind you is still possible, but because your face is in shade you’ll have to turn on HDR mode if your phone has it. Alternatively, you can use a reflector to bounce the light back onto your face, a simple piece of paper or even someone with a bright white shirt will be able to give you enough light to do this.
Set your camera to Aperture priority mode to have the camera automatically adjust shutter speed to balance exposure. As the sun rises (or sets) and becomes brighter (or darker) the camera will take consistent exposures of your scene without you having to lift a finger. A good feature to use in this mode is exposure compensation. Exposure compensation allows you to adjust the brightness of the shot by up to two or three stops of light. The user sets the desired aperture and then the camera adjusts the shutter speed to balance the exposure. If you find the image is still overexposed in the highlights just dial in some negative exposure compensation. Usually around -0.7 to -1.3 negative exposure compensation works well.

If you are looking for a camera, check out Amazon. It offers lots of great options:
During periods of low light it’s sometimes essential to have a slow shutter speed if you want to keep ISO low to avoid noise. These long exposures mean shooting handheld will give blurry results because of camera shake. So a tripod is required to stabilize the camera and keep shots sharp. If you find yourself without a tripod, the ground or a wall is equally useable, albeit a little less flexible when it comes to composition.
A graduated neutral density filter darkens one side of the frame and can be used to lower the brightness of the sky to get exposed definition in the foreground and sky at the same time. These filters also exist in editing software which can be done after-the-fact, but don’t work on clipped areas as there’s no detail left to recover.
Getting accurate colours is crucial for golden hour photography because it’s the warm golden tones that you’re trying to capture. A white balance preset of Flash or Sunny is ideal for consistently accurate colours. However, if you want a little more warmth in your photos then use a custom white balance of around 6000-6500K.
Author's Bio
Jason Parnell-Brookes is an internationally award-winning photographer. He won Gold in the Nikon Photo Contest 2018/19 and was named Digital Photographer of the Year in 2014. He is also a Masters graduate, qualified teacher and writer.
The golden hour is a time of day when the sun is low in the sky, creating a warm, soft light that is perfect for photography. Whether you are a professional photographer or a hobbyist, you can take advantage of this breathtaking light with Movavi Video Editor. This software offers powerful editing tools and features that will help you create stunning videos from your golden hour photos, making your content stand out. This is a great option for photographers who want to enhance their work and share their beautiful images with the world.
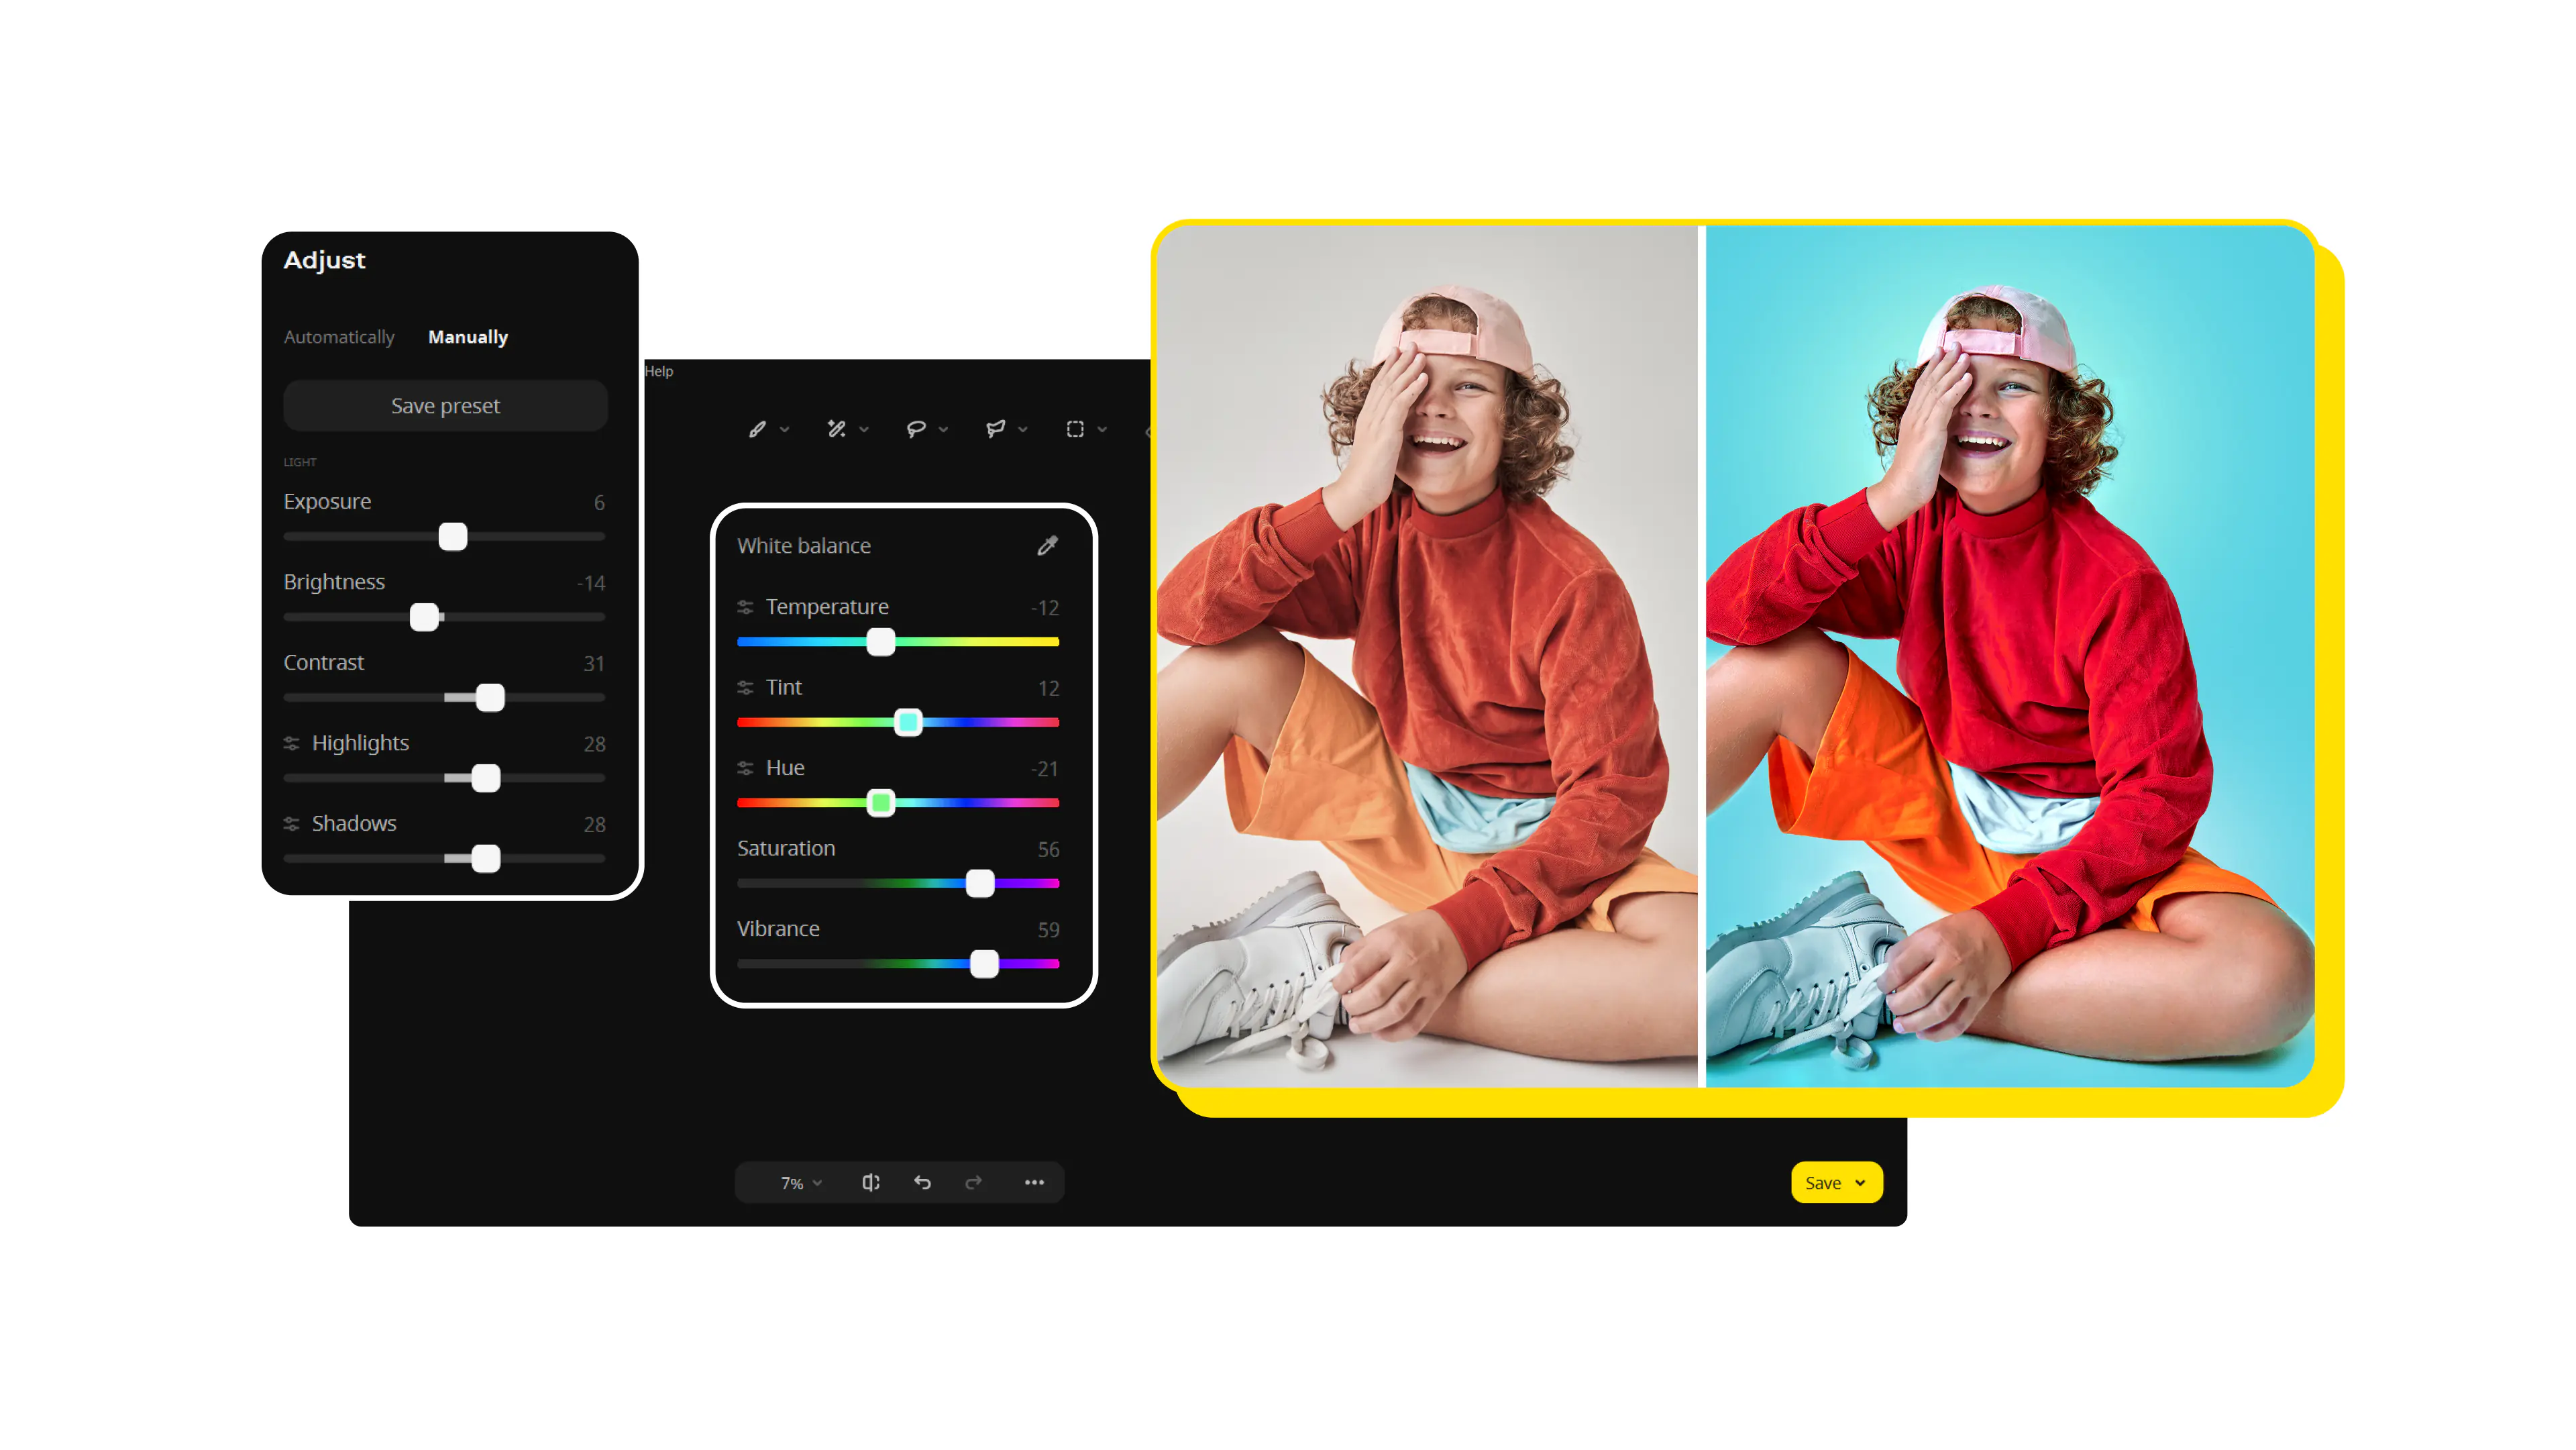
The Golden Hour is characterized by a warm, soft light that creates a golden hue in the sky and on the landscape. This light is ideal for photography because it casts long shadows and creates a sense of depth and dimensionality. You can use Movavi Photo Editor to adjust the color, brightness, and contrast of your golden hour photos to enhance their beauty and create stunning visual effects. This software is perfect for photographers, bloggers, and anyone who wants to edit their photos and create eye-catching visuals.
The Golden Hour occurs twice a day once in the morning, shortly after sunrise, and again in the evening, just before sunset. This period of soft, warm light is a prime opportunity for photographers to capture stunning images. Movavi Screen Recorder can help you record your golden hour photo shoots to document your journey and create inspiring tutorials for other photographers. This software is great for photographers, videographers, and anyone who wants to share their passion for photography with the world.
Golden Hour photography is a popular genre of photography that focuses on capturing the beauty of the light during the Golden Hour. This light creates a warm, soft glow that enhances the colors and textures of the landscape. Movavi Video Editor is perfect for creating captivating slideshows and videos showcasing your golden hour photos. This software is a great option for photographers, filmmakers, and social media influencers who want to showcase their creative vision and connect with their audience through visual storytelling.
For golden hour portraits, the best settings involve a combination of natural light and camera settings. You can use a wide aperture to blur the background and create a soft, ethereal glow around your subject. Movavi Photo Editor can help you further enhance your portraits by adjusting the exposure, contrast, and color balance. This software is perfect for photographers, aspiring portrait artists, and anyone who wants to create stunning images with their golden hour portraits.
See other useful how-to guides
How to create beautiful flat lay photography
What is white balance?
Bokeh effect: what is it?
8 Best Digital Photography Tips and Techniques
Basic Types of Lenses | 6 Types of Camera Lenses Explained
Top 11 Free Photo Editing Apps for Android [September 2025]
How to Make a Blurry Picture Clear [5 Easy Ways] – Movavi
Basic Types of Lenses | 6 Types of Camera Lenses Explained
How to Unblur an Image with AI [5 Easy Ways] – Movavi
8 Best Photo Stitching Software for Making Panoramas [2025]

Have questions?
Join us for discounts, editing tips, and content ideas


1.5M+ users already subscribed to our newsletter