Screen Recording with No Sound: 6 Quick Fixes for All Devices

Edited by
Ben Jacklin
38,058

Recording your screen only to find the audio missing? This happens more often than you'd think. Whether you're on iPhone, Android, Windows, or Mac, the solution usually involves checking a few key settings that get overlooked.

Key takeaways

iPhone issues: Check mute switch, enable microphone audio in Screen Record settings, disconnect Bluetooth devices, or restart if iOS has bugs. Some apps like FaceTime block audio recording entirely.

Android problems: Verify audio source settings (device audio vs microphone), restart the device, or try a different screen recorder app if the built-in one fails.

Windows 10/11 fixes: Run the Recording Audio troubleshooter, update sound drivers, and confirm microphone permissions in Privacy settings.

Mac solutions: Grant QuickTime microphone access, select correct input device (Built-in Mic), and check Sound input levels in System Preferences.

App restrictions: Copy-protected content from Apple Music, Netflix, or video calls from WhatsApp automatically mute audio during recording for legal/privacy reasons.

Universal solution: Use dedicated screen recording software where you can explicitly choose system audio, microphone, or both sources before starting.

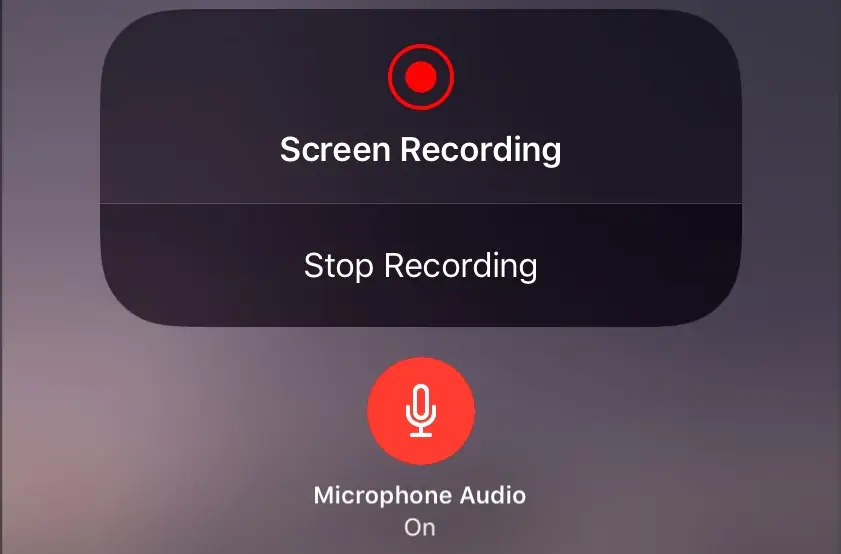
iPhone screen recording doesn't record sound

Apple's built-in screen recorder works well, but several settings can prevent audio from being captured properly.

Your iPhone is on mute

When the physical mute switch is activated, your iphone won't capture any system sounds during screen recording. This includes app audio, notification sounds, and even media playback.

Check the side of your device – if you see an orange indicator in the mute switch, flip it to the opposite position. The recording will now capture system audio properly.

Microphone audio is turned off

By default, Screen Recording might not capture your voice commentary. This setting gets easily missed when you're recording in a hurry.

Open Control Center by swiping up (or down on newer models). Long-press the Screen Record button until additional options appear. Tap the Microphone Audio icon – it should turn red to indicate it's active. Now your recordings will include both system audio and your voice.

Bluetooth interference blocks audio output

Connected Bluetooth headphones or speakers can redirect audio away from the recording. Even if you're not actively using them, the connection might interfere with audio capture.

Go to Settings > Bluetooth and disconnect any paired audio devices before starting your screen recording. This forces audio to route through the phone's speakers and into the recording.

iOS bugs require troubleshooting

Software glitches occasionally affect the screen recording feature, especially after iOS updates.

First, restart your device completely. If that doesn't work, reset all settings by going to Settings > General > Reset > Reset All Settings. This won't delete your data but will restore system preferences to defaults, which often fixes audio capture issues.

Your iOS version needs updating

Older iOS versions sometimes have known bugs with screen recording audio. Apple regularly patches these issues in system updates.

Check Settings > General > Software Update. If an update is available, install it and test screen recording again. Recent updates have specifically addressed audio capture problems.

Certain apps block audio recording

Apps with copy-protected content intentionally prevent audio recording. Apple Music, Spotify, Netflix, and similar services will mute audio as soon as screen recording starts.

The same applies to video call apps like FaceTime, WhatsApp, and Zoom. These apps block audio recording for privacy reasons – there's no workaround for this restriction.

Android screen recording has no sound

Android devices vary significantly between manufacturers, but most audio issues stem from similar causes.

Audio source is set incorrectly

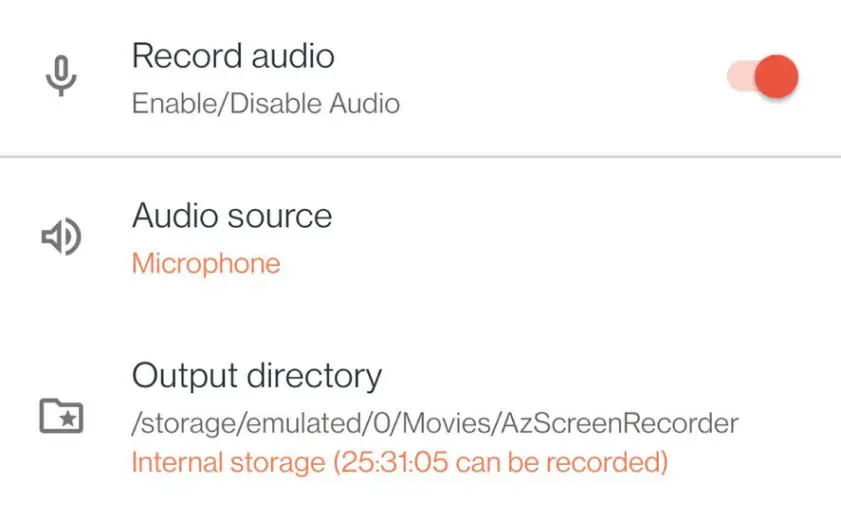
Android screen recorders typically offer two audio sources: Device audio (system sounds) and Microphone (your voice). The wrong setting explains why my screen record has no sound in most cases.

Open your screen recorder settings and look for Audio source or Sound settings. Choose Device audio to capture app sounds and media, Microphone for voice commentary, or Both if available.

The built-in recorder has limitations

Some Android manufacturers restrict their built-in screen recorders, preventing system audio capture due to copyright concerns.

Try a third-party app like AZ Screen Recorder or Mobizen. These apps often bypass manufacturer limitations and provide more reliable audio capture. Check the app's audio settings to ensure both system and microphone audio are enabled.

Device needs a restart

Android's audio routing can get confused, especially if you've used Bluetooth devices or external speakers recently.

Restart your android device completely. This resets audio services and often resolves intermittent recording issues. Test screen recording immediately after restart for best results.

App permissions are blocked

Your screen recorder might lack permission to access the microphone or capture system audio.

Go to Settings > Apps > [Your Screen Recorder] > Permissions. Ensure Microphone access is enabled. Some devices also have a Media recording or Audio capture permission that needs to be granted.

Windows screen recording not working with audio

Windows 10 and 11 have built-in screen recording through Xbox Game Bar, but audio setup isn't always straightforward.

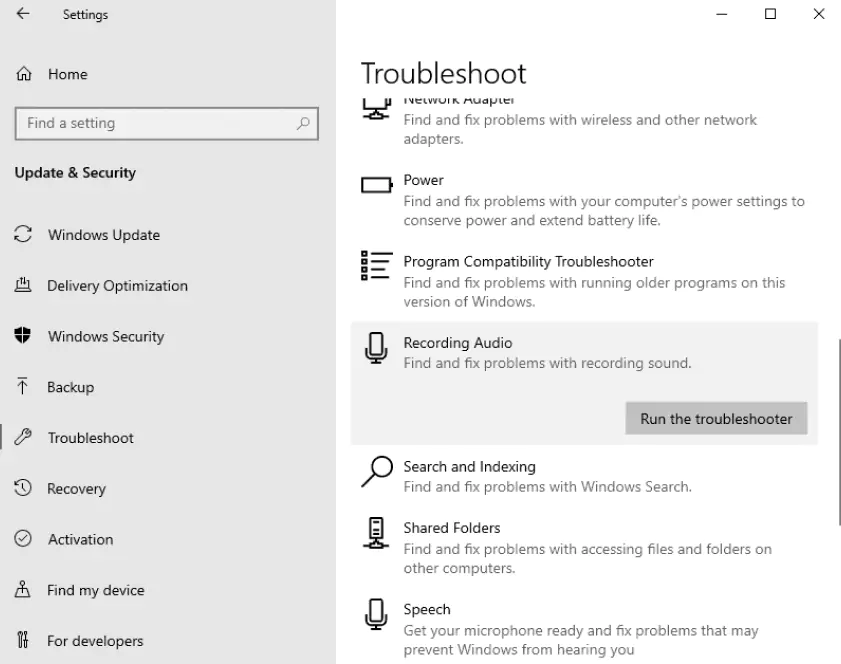
Run the Recording Audio troubleshooter

Windows includes automatic diagnostics for audio problems that can fix common issues without manual intervention.

Type "troubleshoot" in the Start menu and select Troubleshoot settings. Choose Recording Audio and run the troubleshooter. It will automatically detect and fix microphone and system audio problems that affect screen recording.

Sound drivers need updating

Outdated audio drivers frequently cause recording issues, especially after Windows updates.

Right-click the Start button and select Device Manager. Expand Sound, video and game controllers and right-click your audio device. Choose Update driver and let Windows search automatically. Restart after updating.

Check microphone privacy settings

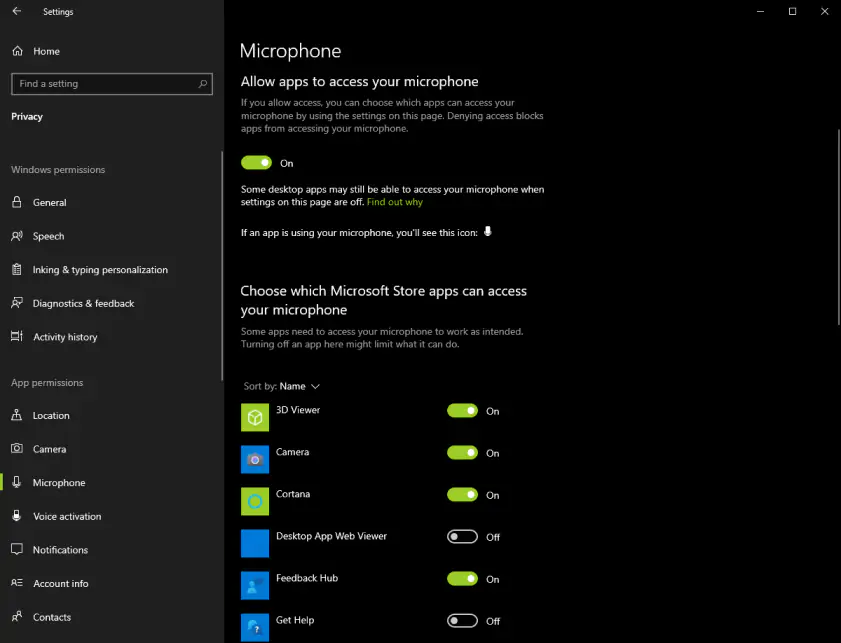
Windows 10 and 11 strictly control which apps can access your microphone, and these permissions affect screen recording quality.

Go to Settings > Privacy & security > Microphone. Ensure Allow apps to access your microphone is enabled. Scroll down and verify that Xbox Game Bar (or your preferred screen recorder) has microphone permission.

Select the correct audio input

Multiple audio devices can confuse Windows about which microphone to use during recording.

Right-click the speaker icon in your taskbar and select Open Sound settings. Under Input, choose your preferred microphone device. Test it by speaking – you should see the input level bars moving.

Mac screen recording without sound

macOS QuickTime is reliable for screen recording, but audio setup requires specific permissions and settings.

Grant microphone access to QuickTime

macOS security features prevent apps from accessing your microphone without explicit permission.

Open System Preferences > Security & Privacy > Privacy. Select Microphone from the sidebar and ensure QuickTime Player has a checkmark. If not, click the checkbox and authenticate with your password.

Choose the correct input device

Macs often have multiple audio input options, and selecting the wrong one results in silent recordings.

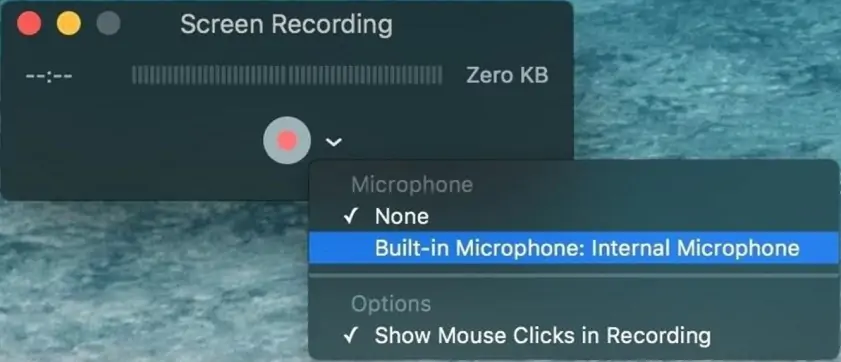
In QuickTime Player, go to File > New Screen Recording. Click the dropdown arrow next to the record button and select Built-in Microphone under the microphone section. This ensures your voice will be captured during recording.

Check system sound input levels

Low input levels can make your voice inaudible in recordings, even when everything is configured correctly.

Open System Preferences > Sound > Input. Select your microphone and speak normally – the input level bars should move actively. Drag the input volume slider to increase sensitivity if the levels are too low.

Reset Core Audio if needed

macOS audio services occasionally need resetting when screen recording stops working entirely.

Hold Shift + Option and click the speaker icon in your menu bar. Select your preferred audio input and output devices. If problems persist, restart your Mac to reset Core Audio completely.

Why some apps don't allow audio recording

Certain applications intentionally block audio capture, and this limitation affects all screen recording software.

Copy-protected content restrictions

Streaming services like Netflix, Hulu, and music apps implement digital rights management (DRM) that detects screen recording attempts. When recording starts, these apps automatically mute their audio output.

This happens at the system level – no screen recorder can bypass these restrictions. The apps communicate directly with your device's audio system to prevent recording copyrighted material.

Video call privacy protection

Communication apps like Zoom, Teams, WhatsApp, and FaceTime block audio recording during calls to protect participant privacy. This prevents unauthorized recording of sensitive conversations.

Some apps display warnings when screen recording is active, while others silently mute audio. This behavior is intentional and cannot be circumvented through settings or third-party software.

System-level audio blocking

Modern operating systems cooperate with apps to enforce audio recording restrictions. When a protected app is active, the system prevents screen recorders from accessing that audio stream.

This explains why you might record a video call successfully but find the audio completely silent. The visual recording works normally, but audio is blocked at the operating system level.

Professional screen recording solutions

Built-in tools work for basic recording, but dedicated software offers more reliable audio capture and better control over recording settings.

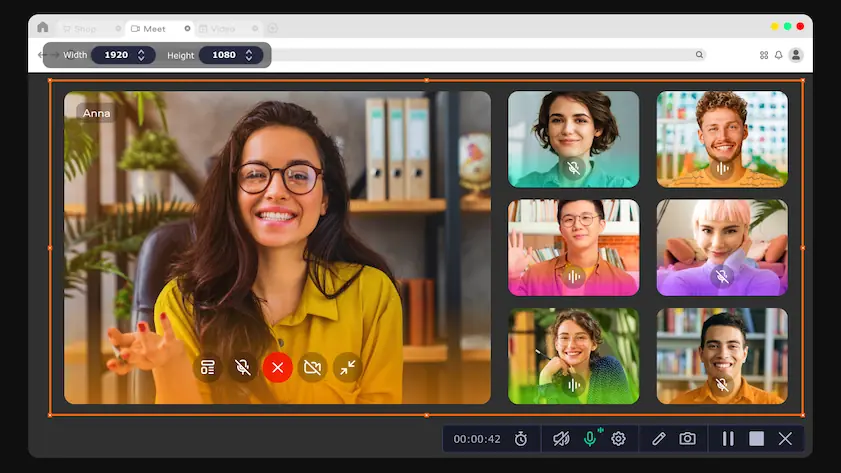
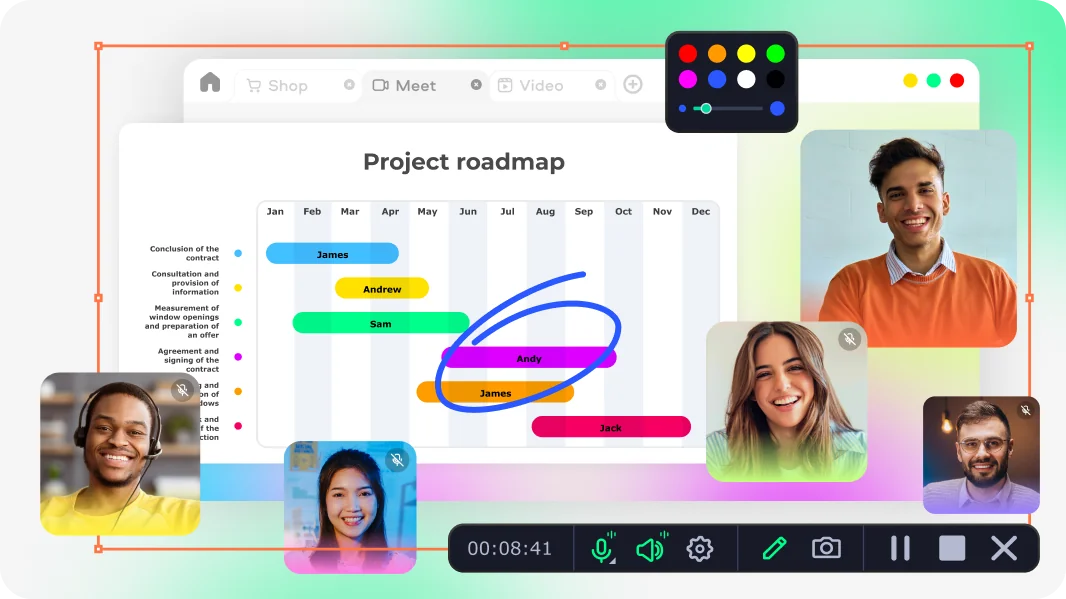
This screen recorder handles audio capture more reliably than built-in system tools. You can explicitly choose to record system audio, microphone input, or both simultaneously.

The software works around common audio routing issues by accessing audio streams directly. It also includes features like cursor highlighting, keystroke display, and scheduled recording that make professional-quality tutorials easier to create.

Pros:
  • Clear audio source selection (system, mic, or both)

  • Bypasses common audio routing problems

  • Includes editing tools for immediate cleanup

  • Scheduled recording for unattended capture

Cons:
  • Requires purchase after free trial period

  • Cannot bypass DRM restrictions on protected content

  • File size can be large with high-quality audio settings

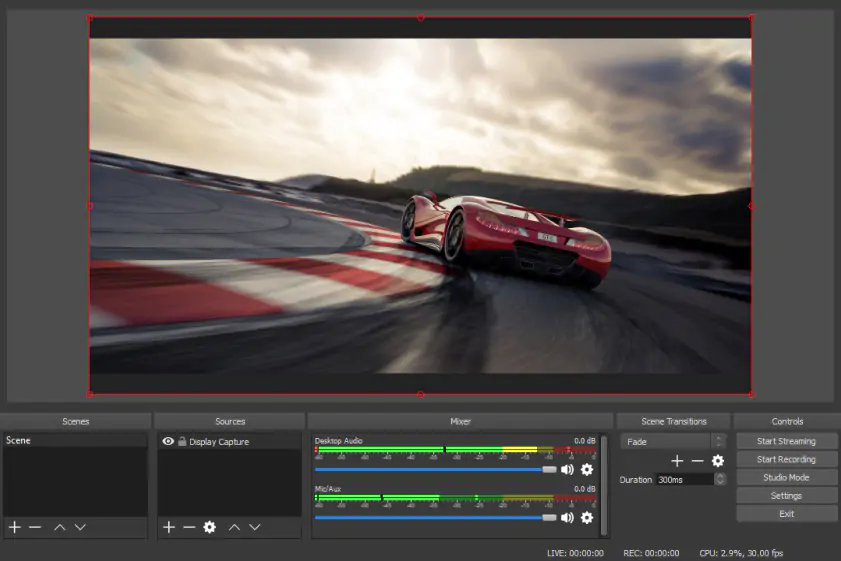
This open-source solution provides professional-level control over audio sources. You can monitor audio levels in real-time and adjust settings without stopping your recording.

OBS handles multiple audio inputs simultaneously and includes noise suppression features that improve voice recording quality. The learning curve is steeper, but the results are worth it for serious content creators.

Pros:
  • Completely free with no time limits

  • Professional audio mixing capabilities

  • Real-time audio level monitoring

  • Extensive customization options

Cons:
  • Complex interface requires learning

  • Resource-intensive on older computers

  • Setup takes time for optimal results

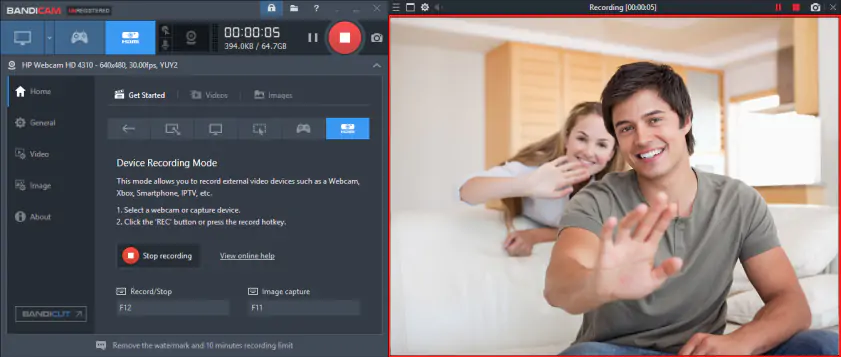
Bandicam specializes in high-quality screen recording with minimal performance impact. The audio capture system works reliably across different Windows versions and handles multiple audio sources well.

The software includes built-in compression that keeps file sizes manageable without sacrificing audio quality. It's particularly good at maintaining audio sync during long recordings.

Pros:
  • Low CPU usage during recording

  • Excellent audio-video synchronization

  • Built-in compression reduces file sizes

  • Reliable performance on older hardware

Cons:
  • Windows-only (no Mac or mobile versions)

  • Watermark in free version

  • Limited editing features compared to alternatives

Choosing the right solution for your needs

Different recording scenarios require different approaches. Here's how to match your situation with the best tool:

Recording type

Best solution

Why

Quick iPhone demos

Built-in screen recording

Simple setup, no extra apps needed

Tutorial videos

Dedicated software (Movavi Screen Recorder, OBS Studio)

Better audio control, editing features

Gaming footage

OBS Studio or Bandicam

Low performance impact, high quality

Business presentations

Built-in tools + external mic

Professional audio with simple setup

Live streaming prep

OBS Studio

Real-time monitoring, multiple sources

For most users, start with your device's built-in recorder and upgrade to dedicated software only if you need specific features or encounter persistent audio problems.

The key is understanding that audio issues usually stem from settings, not software limitations. Most problems can be fixed by checking permissions, selecting correct input devices, and understanding which apps block recording entirely.

Movavi Screen Recorder
The perfect way to record anything from your screen

Disclaimer: Please be aware that Movavi Screen Recorder does not allow capture of copy-protected video and audio streams.

Frequently asked questions

Why does my screen recording have video but no sound?

This typically happens because audio permissions are disabled, the wrong input device is selected, or you're recording an app that blocks audio capture. Check your screen recorder's audio settings first – ensure both system audio and microphone are enabled if you want both sounds and voice commentary.

Can I record audio from video calls on any device?

Most video call apps (FaceTime, WhatsApp, Zoom, Teams) intentionally block audio recording for privacy reasons. This restriction applies to all devices and cannot be bypassed with different recording software. The video will record normally, but audio will be silent.

How do I fix screen recording when it suddenly stopped capturing audio?

Restart your device first – this resolves most temporary audio routing issues. Then check if any Bluetooth devices are connected and disconnect them. Finally, verify that your recording app still has microphone permissions, as system updates sometimes reset these settings.

What's the difference between system audio and microphone audio in screen recording?

System audio captures sounds from apps, games, music, and videos playing on your device. Microphone audio records your voice commentary. Most screen recorders let you choose one, both, or neither. For tutorials, you typically want both; for app demos, system audio alone might be sufficient.

Why do streaming apps like Netflix mute during screen recording?

These apps use digital rights management (DRM) to protect copyrighted content. When they detect screen recording, they automatically mute their audio output. This happens at the system level and affects all screen recording software equally – there's no workaround for this restriction.

Is there a way to test if my screen recorder will capture audio before starting a long recording?

Yes, record a short 10-second test first. Play some music or speak into your microphone, then stop and check the recording. This reveals audio issues immediately and saves time on longer recordings. Most screen recorders show audio level indicators while recording, which also help confirm everything is working.

Have questions?
If you can’t find the answer to your question, please feel free to contact our Support Team.
Join us for discounts, editing tips, and content ideas

1.5M+ users already subscribed to our newsletter

By signing up, I agree to receive marketing emails from Movavi and agree to Movavi's Privacy Policy.