
Step 1. Download and install Movavi Screen Recorder
Obtain the latest version of Movavi Screen Recorder from the official website. Run the installer and follow the on-screen instructions to complete the installation.
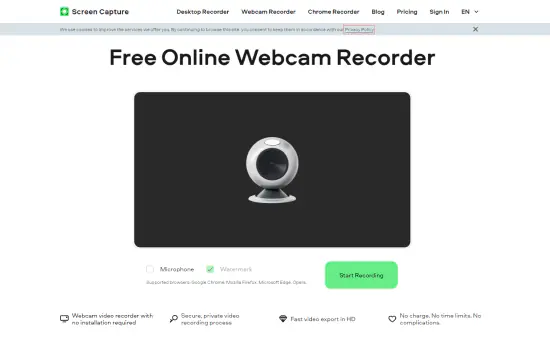
Supported browsers: Google Chrome, Mozilla Firefox, Microsoft Edge, Opera
If you're wrestling with your PC to capture video, you're in good company. Honestly, some of these tools feel like they were designed by aliens who've never actually seen a computer, but I’ve been deep in the trenches, testing them all out.
Did you know the first commercially available video camera weighed about as much as a small child? We've come a long way since that behemoth.
After slogging through the muck, I've hand-picked the top 10 powerful programs that actually make capturing your screen or webcam video a breeze, not a brain-melter. Whether it’s a quick tutorial or a professional video screen grab, these tools have you covered. How to record screen on Windows 10/11 or Mac? Read on to discover!
Here’s a quick snapshot of the top video capture tools I’ve tested personally. I’ve highlighted what they’re best for, whether they capture system audio, and how you can get them running.

When selecting products to include in our reviews, we research both demand and popularity.
All products mentioned in this article have been tested by Movavi Content Team.
When testing, we aim to highlight the best features of a product and what it’s best suited for.
We study user reviews from popular review platforms and make use of this information when writing our product reviews.
We collect feedback from our users and analyze their opinions of Movavi software as well as products from other companies.

Why I picked it: It's incredibly user-friendly, making it a snap to capture high-quality video without a steep learning curve. The integrated editing tools are a real time-saver for quick tweaks. Do you want to make video without a headache? Go, get Movavi!
Best for: capturing from multiple sources
OS: Windows, macOS
Movavi Screen Recorder works on Windows and macOS, providing an immediate answer to how to record the screen on PC.
I tested version 24.6.1 and saw it does more than just record your screen: you can grab webcam + microphone + system audio in one go, draw on video while recording, show keystrokes and cursor effects, schedule recordings, and export in HD or 4K. Noise reduction is now built in.
With its surely intuitive interface, the app is jam-packed with nifty features like scheduled recordings, customizable capture areas, and real-time annotations. The software supports high-definition exports and integrates with platforms like YouTube and Google Drive for seamless sharing.
So, I decided to test Movavi Screen Recorder on my Windows 11 setup, and I was genuinely impressed by its performance. Recording a webinar with a webcam overlay, system audio, and microphone input was straightforward.
The built-in noise reduction feature effectively minimized background hum without compromising voice clarity. Utilizing the scheduling function, I set up a recording to start while I was away, and it executed flawlessly.
The annotation tools, including drawing shapes and highlighting keystrokes, enhanced the instructional quality of my content. With Movavi, it’s easy to figure out how to clip windows or snip video windows, so you don’t have to record your entire desktop when you only need one app
Even when pushing the software to capture in 4K resolution with multiple audio sources, the final export maintained sharpness, though preview performance lagged slightly.
Effective noise reduction for clear audio
Reliable scheduling for unattended recordings
User-friendly interface with intuitive tools
Supports 4K exports with multiple audio sources
Performance may decrease on lower-spec systems during high-resolution captures
The free version includes a watermark and limited features, requiring you to buy a full version to unleash your creativity to the fullest
Obtain the latest version of Movavi Screen Recorder from the official website. Run the installer and follow the on-screen instructions to complete the installation.
Open the application and navigate to the Preferences menu. Here, you can configure settings such as output folder, cursor effects, and audio input sources.

Here you’ll find different options. For example, in the General tab, you can choose to hide the recording panel. To select the folder for output videos, go to the Files tab. Open the Effects tab to change the cursor settings. Click OK when you’re finished.

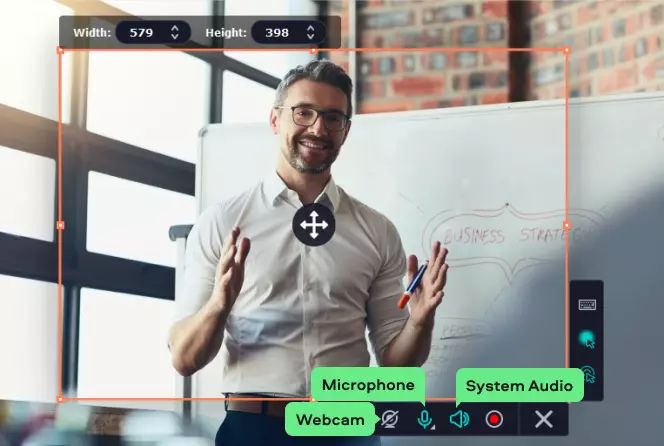
Click on the Screen Recording button. Use your mouse to draw a frame around the area you wish to record. After you click Screen recording and select the capture area, the recording panel will appear on the screen. Toggle the System Audio, Microphone, and Webcam buttons to enable or disable audio and video inputs as needed.
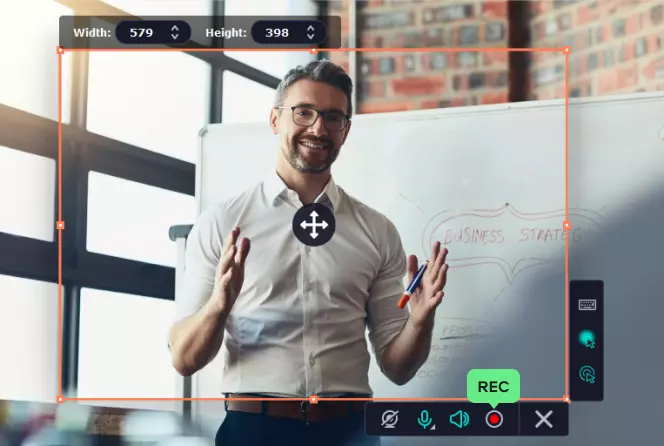
Click the REC button to begin recording. A countdown will precede the start of the capture.
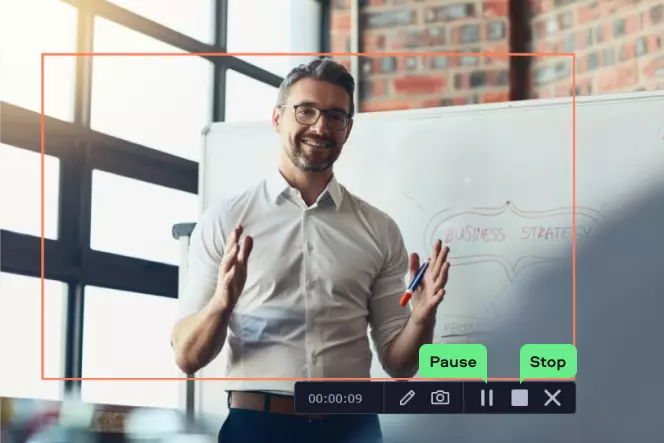
During recording, you can click Pause to temporarily halt and Stop to end the session.
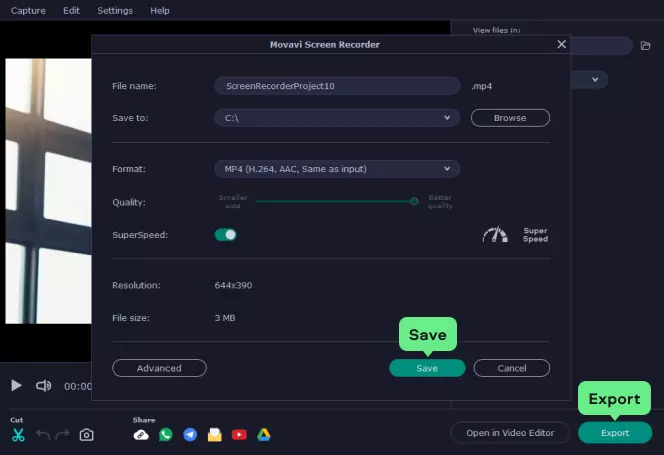
After stopping the recording, use the built-in editing tools to trim, cut, or annotate your video.
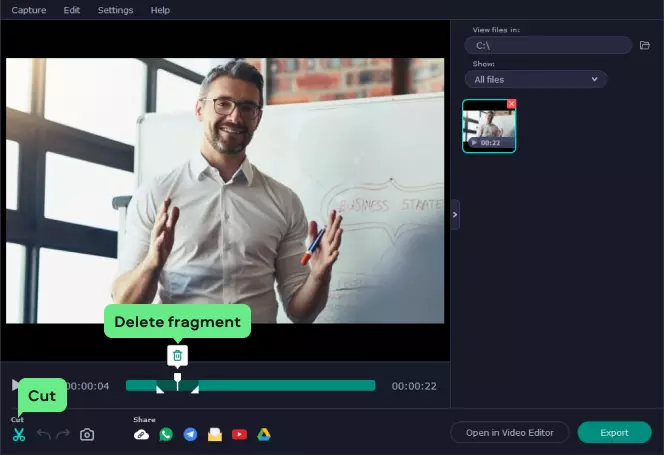
Once satisfied, click Export to save your video in the desired format and resolution.
Why I picked it: Since it resides right on computer (if it’s Windows), you can start recording gameplay or app windows instantly without any downloads. It's the ultimate quick-and-dirty solution for impromptu captures.
Best for: gamers to make a video recording
OS: Windows
Xbox Game Bar is Windows’ built-in recorder, perfect for gamers or anyone needing a quick, no-fuss capture. Updated in 2025, it’s lighter, faster, and integrates smoothly with Windows 10 and 11. If you’re hunting for a simple Windows capture, Xbox Game Bar may deserve a try.
I used it for short gameplay clips, app demos, or bug reports—it’s instant, reliable, and free. While it won’t replace multi-source tools like Movavi for complex projects, it’s ideal for fast recordings.
When checking out this app, I captured a few quick app demos and gameplay snippets. Pressing Win+G opens the overlay instantly. Starting a recording with Win+Alt+R is just as quick, and you can toggle the mic mid-recording with Win+Alt+M. Clips save automatically to Videos\Captures. For short, shareable content or troubleshooting, it’s hassle-free and precise.
Built into Windows, no install required
Quick hotkeys and background recording options
Free, light, and responsive
Limited editing tools
Not suited for multi-source professional workflows
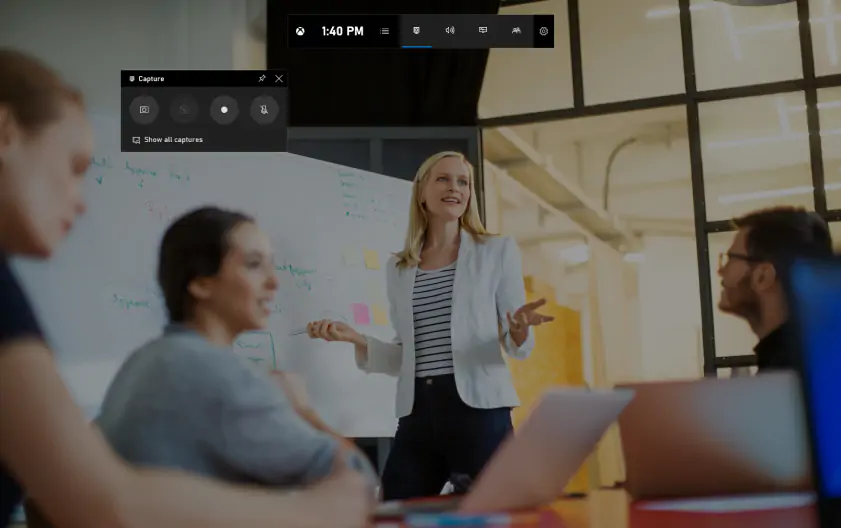
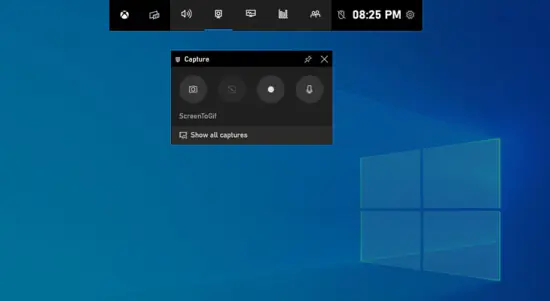
Open the app or game you want to record. Press Win+G to launch the Game Bar overlay.
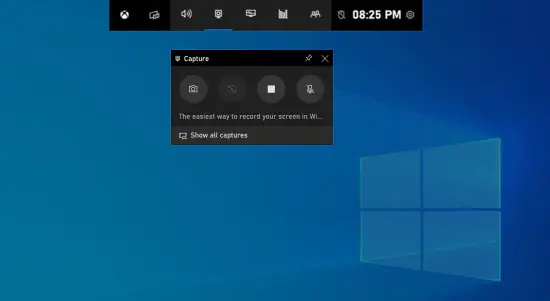
In the Capture widget, press Start Recording or Win+Alt+R. Toggle your microphone with Win+Alt+M if needed. Play or use your app until finished.
Press Win+Alt+R again to stop. Your video is saved as an MP4 in Videos\Captures. You can open it directly from there or move it to cloud storage for easy sharing.
Why I picked it: If you're all about buttery-smooth footage, this one nails the 60 fps mark for crisp, fluid captures. It’s a solid choice for getting that professional-looking motion.
Best for: flexible screen recording
OS: Windows, macOS
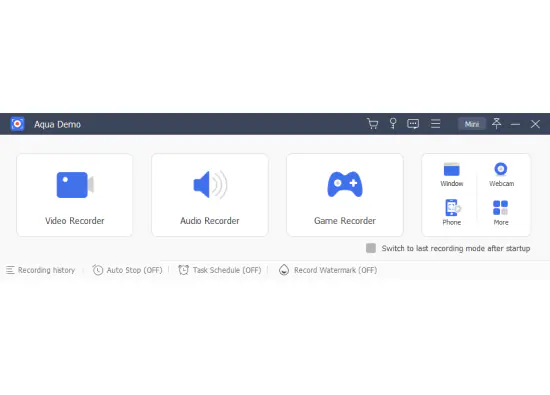
AceThinker Aqua Demo is a nimble screen recorder for Windows and macOS that gets straight to the point: capturing your screen, webcam, and audio in high quality. I tested version 3.7.1 and found it surprisingly smooth for 1080p at 60 fps, though pushing high bitrates demanded some CPU and disk muscle.
The app supports flexible capture areas, GPU acceleration, and multiple output formats, making it handy for quick tutorials, gameplay clips, or online meetings. Its clean interface means you’re not buried under menus—start recording almost immediately.
During my hands-on session, I captured a short gameplay clip with webcam overlay and system + microphone audio. The real-time drawing tools were intuitive, letting me annotate key moments on the fly.
Custom capture areas made it easy to focus on the action, while frame rate adjustments kept the motion crisp. While the free version limits some advanced features, the core recording experience was reliable and fast.
Straightforward interface with minimal setup
Flexible capture area and multiple resolutions
Supports 60 fps for smooth recordings
Basic annotation and trimming tools included
Free tier locks advanced features
High-bitrate captures can be resource-intensive
Download Aqua Demo from the official site and run the installer.
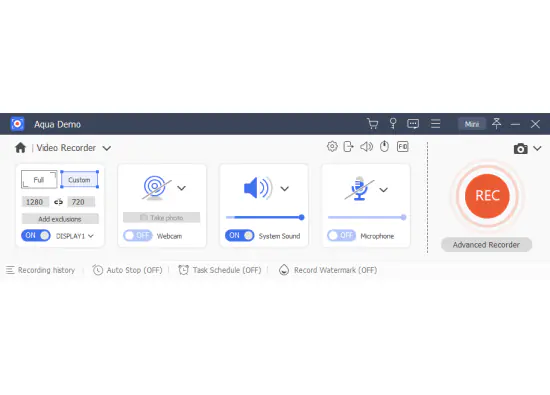
Open the Video Recorder window and choose Full or Custom capture mode.
Hit the Rec button to begin. Use Pause or Stop as needed. Preview your recording, then save to your preferred location in the desired format.
Why I picked it: It’s the absolute king for anyone who wants serious control over their recordings and streaming setup. This free, open-source powerhouse lets you customize everything to perfection.
Best for: free capture and streaming
OS: Windows, macOS, Linux
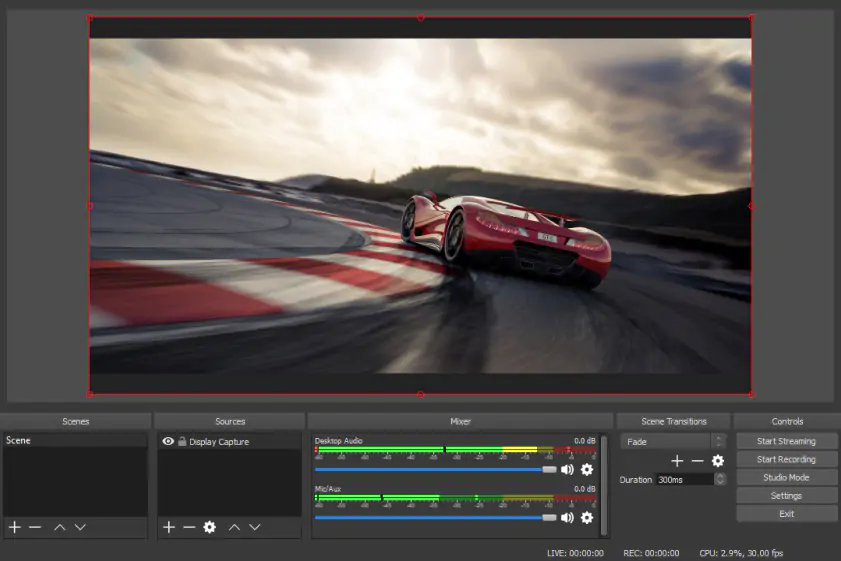
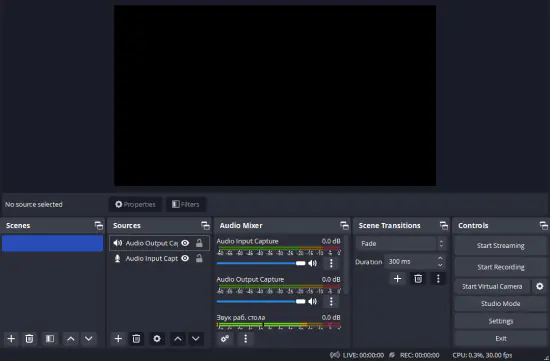
OBS is the Swiss Army knife for capture and streaming: free, open-source, and flexible. It is perfect if you want to record gameplay and stream simultaneously. It supports scenes, layered sources, multitrack recording, hardware encoders, and a huge plugin ecosystem.
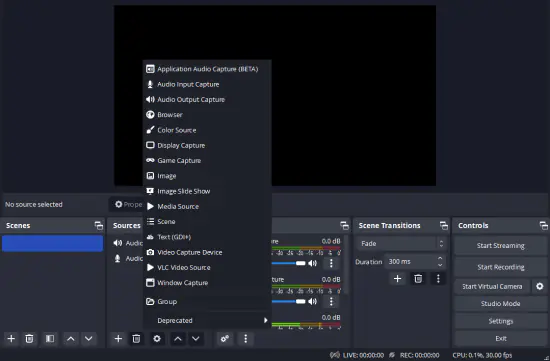
I put OBS through several tests. I built a scene with gameplay, a webcam overlay, and a window capture. I tested NVENC hardware encoding, toggled multitrack audio, and used the new Hybrid MP4 recording format introduced in recent releases. OBS is powerful if you accept a bit of setup time. Recent OBS releases added UI polish, multitrack output, and hybrid MP4. See the OBS 30.x release notes for details.
Completely free and extensible; massive community
Advanced encoding options, including hardware NVENC/AMD and multitrack recordings
Ideal for streaming and complex multi-source captures
Steep learning curve for beginners
The interface is less friendly than paid alternatives
Download OBS from obsproject.com and install.
Add Sources: Display Capture for full screen, Window Capture for apps, Video Capture Device for webcam. Use Scenes to switch presets.
In Settings → Output, choose recording format, encoder (use NVENC/AMD if available), and record path. For multitrack audio, check the Tracks options.
Click Start Recording. To stop, click Stop Recording. Use the Studio Mode to preview scenes before switching.
Why I picked it: This free option is surprisingly robust for straightforward screen and webcam captures. It delivers exactly what you need for basic recording with no limit like in many other free tools.
Best for: Windows capture and editing
OS: Windows
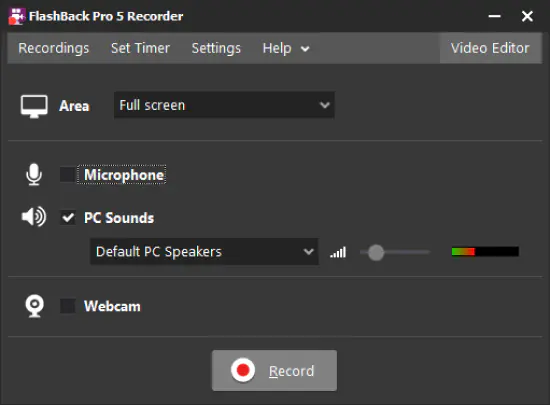
FlashBack Express is a straightforward Windows recorder that focuses on ease of use: record area, webcam, and mic, and trim clips. The Express edition remains free for basic capture but limits some export and editing features to paid tiers.
FlashBack has had regular updates in 2024–2025. Recent improvements enhanced stability, amended editing tools, and added features like text, shapes, transitions, and AI-assisted subtitles.
When tinkering with this app, I recorded a 10-minute tutorial with webcam and system audio. Trimming was simple and reliable. The program did not create weird artifacts, but the editing is basic. For polished edits, you still need another editor.
No watermark or time limit in the free version for basic captures
Scheduling and easy trimming
Export options are limited in Express; pro features are behind a paywall.
Not ideal for advanced multi-track or 4K workflows.
Download the installer from the official site. Run the setup and follow the prompts to install. The software supports Windows 10 and 11 and launches automatically after installation.
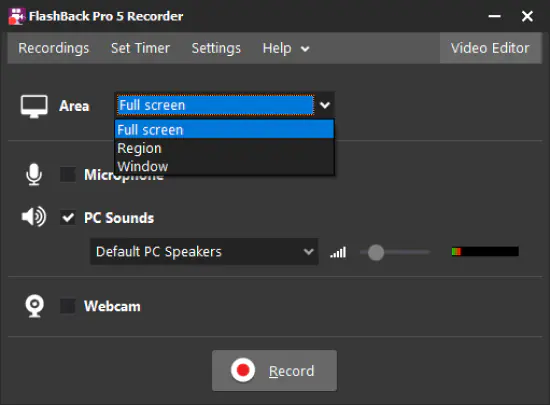
Open FlashBack Express. Choose to record your full screen, a specific region, or a window. Enable your microphone and webcam if needed. Adjust audio settings and set your preferred language before starting.
Click the Record button or press Ctrl + F12 to begin. When finished, press Ctrl + F12 again to stop. A preview window will appear, allowing you to trim and edit your video. You can save it locally or upload it directly to platforms like YouTube.
Why I picked it: Beyond just capturing video, it's a fantastic all-in-one tool for screenshots and quick recordings with annotation features. It makes it easy to mark up your captures right away.
Best for: integration with ChatGPT
OS: any, works in Google Chrome
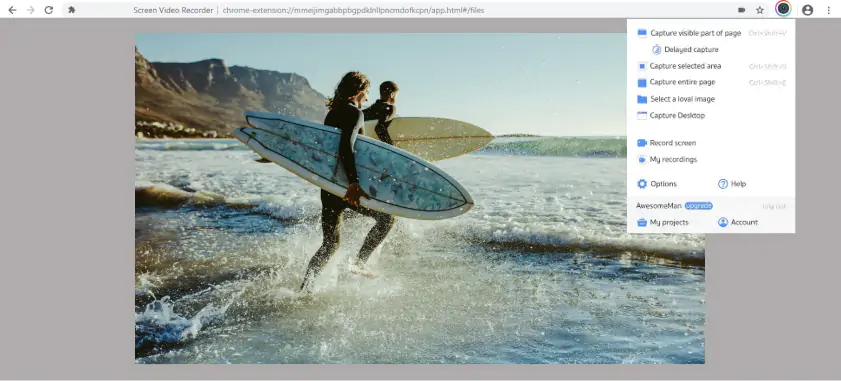
Awesome Screenshot & Screen Recorder is a versatile Chrome extension for quick tab captures, webcam recordings, and instant sharing. I tested it by capturing a browser tab alongside my webcam simultaneously. It’s speedy, intuitive, and integrates directly with tools like Trello, Slack, and Google Drive.
System audio capture and long recordings can be hit or miss due to browser limits, but for short clips and tutorials, it’s rock-solid. The extension is actively maintained, with over 2 million users and a 4.6-star rating on the Chrome Web Store.
I used it for a few quick how-to GIFs and short annotated clips. The extension’s simplicity and annotation tools made creating shareable content effortless. It’s not a replacement for full desktop recorders like Movavi, but for fast, browser-based tasks, it’s perfect.
Lightweight and easy to add; no desktop installation needed
Quick sharing and annotation tools built in
Integrates with popular work tools (Slack, Trello, Google Drive)
Limited export formats
Browser-based, so system audio and long recordings may be unstable
Go to the Chrome Web Store or the Awesome Screenshot website and click Add to Chrome. The extension installs instantly, and a small icon appears next to your address bar. No bulky installation—everything runs right from your browser.
Click the extension icon. You’ll see options to capture a single browser tab, your full desktop, or a webcam overlay. Adjust settings like resolution or annotations if you want, then select the recording type that fits your task.
Hit Record to start. A floating toolbar gives you pause, stop, and annotation controls. When you’re done, click Done—your video pops up ready for review. Quick clips can be shared instantly with apps like Trello or ChatGPT, while longer recordings can be saved to Google Drive for safe storage.
Why I picked it: This is your go-to for using your built-in webcam for straightforward video capture on Windows. It’s simple, reliable, and requires zero extra software.
Best for: simple overlay for Windows 10
OS: Windows
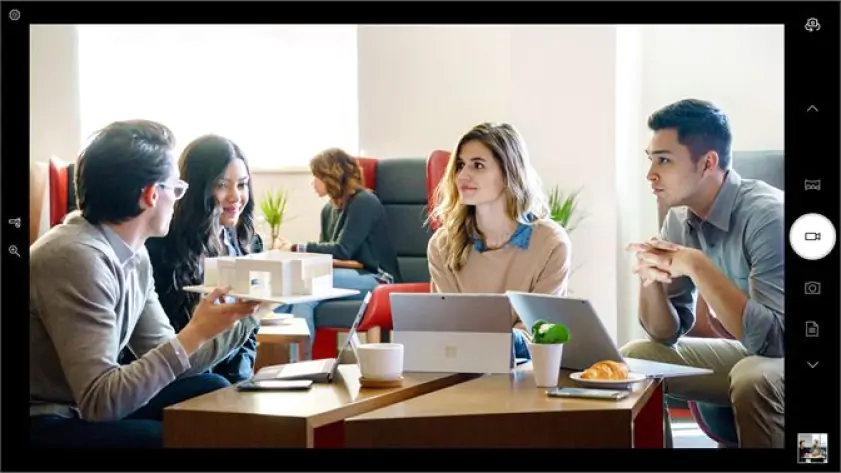
If you just need to grab webcam footage or do a simple overlay recording, Windows Camera is a surprisingly capable built-in option. I tested it on my Windows 10 laptop to record a quick tutorial for a small project, and it handled everything without extra installs.
The app has a clean, no-frills interface that lets you start recording almost immediately. I particularly liked the timer, which gave me a few seconds to get into position before the recording kicked off.
Windows Camera automatically backs up clips to OneDrive. So I could access my recordings on my tablet and phone, which is handy for cross-device workflows. I played around with the pro controls, too, adjusting exposure and ISO, and it made my webcam shots look more professional than I expected.
Recording in 4K gave crisp, detailed results, though my SSD filled up faster than usual. For short demos, team calls, or quick content snippets, it’s effortless. Just remember that complex audio setups can be a little finicky, so you may need to tweak permissions in Windows Settings.
Built-in timer for better setup control
Automatic OneDrive backup for easy access
Simple interface and quick start for webcam captures
Pro controls for exposure, ISO, and basic video tweaks
Supports up to 4K video capture
Some microphone setups may not record cleanly
Not ideal for complex multi-source projects
Open the Windows Camera app from the Start menu.
Select the camera icon to choose your video input (webcam or integrated camera). Adjust settings if needed—exposure, resolution, or timer. Press the Record button to start. Press Stop when finished.

Review your clip in the app. If audio or video looks off, check permissions in Windows Settings. Videos are automatically saved to the Camera Roll folder and backed up to OneDrive if enabled.

Why I picked it: It's a convenient web-based tool that lets you record your screen directly from your browser, no installation needed. The simplicity of just jumping online and hitting records is its biggest win.
Best for: easy online capture
OS: any, works online
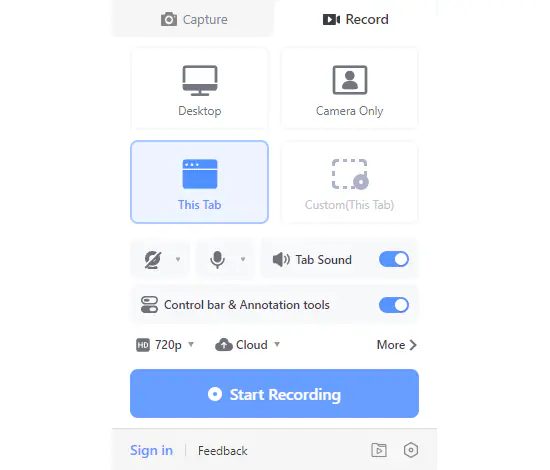
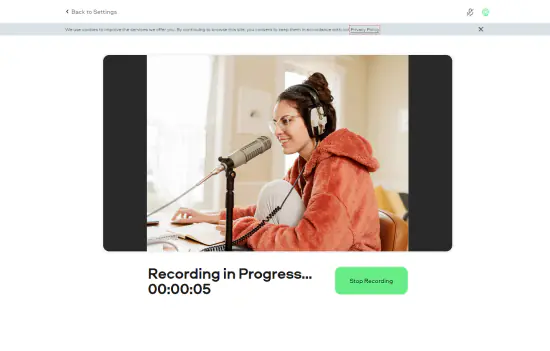
Screencapture.com is a reliable, browser-based webcam recorder. It offers a straightforward solution for quick video captures without the need for installation. Accessible via major browsers like Chrome, Firefox, Edge, and Opera, it caters to users seeking simplicity and efficiency.
I recently utilized Screencapture.com to record a brief instructional video for a client presentation. The process was a piece of cake. I accessed the site, granted necessary permissions, and began recording within moments. The interface is intuitive, and the video quality met expectations.
However, the free version does overlay a watermark on the final video. Professional users could not love this very much!
No installation required; entirely web-based
Supports HD video recording with optional audio and webcam capture
User-friendly interface suitable for quick recordings
Secure and private recording process
The free version includes a watermark on recordings
Limited advanced features compared to desktop applications
Firstly, you need to navigate to Screencapture.com.
Click on Start Recording and grant the necessary permissions for webcam and microphone access. Adjust settings to include or exclude audio and webcam as needed.
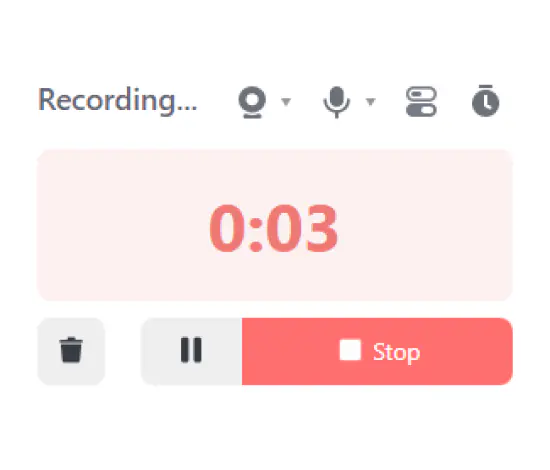
Click Stop Recording when finished. Download the recorded video to your device.
Why I picked it: This is the standout for recording high-quality interviews and podcasts remotely. It captures separate audio and video tracks for each participant, producing professional results.
Best for: separate audio tracks
OS: any, works online (apps for iOS and Android devices are also available)
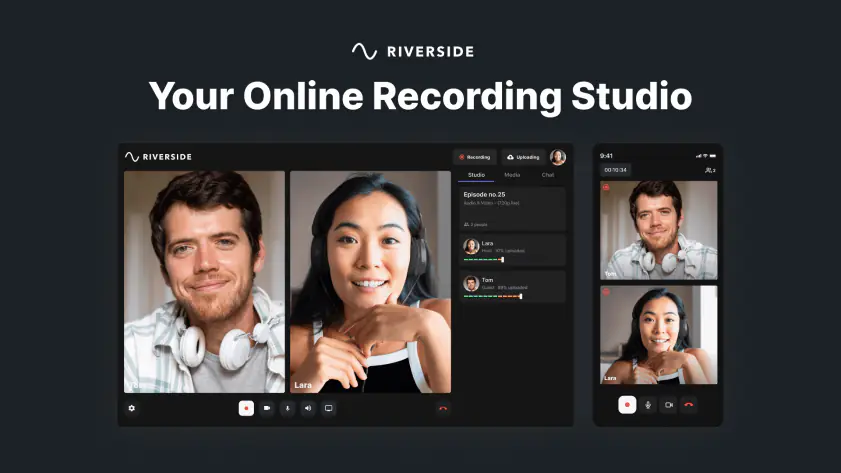
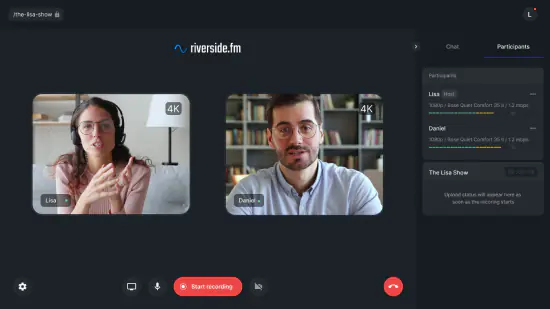
Riverside.fm has evolved into a full-featured online studio for recording podcasts, interviews, and video content in studio quality.
I gave this app a good look-over and found it pretty versatile. You can record up to 4K video, capture separate audio tracks for each participant, and even use AI tools for live transcription and post-recording editing.
The new AI-assisted editor makes cutting, annotating, and captioning clips almost effortless, and multi-layout clips help create content ready for TikTok, Instagram, or YouTube without losing quality.
The interface is clean and intuitive, and the platform supports both desktop and mobile workflows seamlessly. During a 30-minute podcast test, the recording stayed smooth, with each audio track isolated for post-production tweaking.
Works online and on mobile devices for ultimate flexibility
Up to 4K video and a separate audio track recording
AI transcription, Magic Clips, and text-based editing tools
Multi-layout clip creation for social media
Some users find advanced editing options limited compared to full desktop editors
Requires a stable internet connection for high-quality multi-person sessions
Sign up or log in on Riverside.fm (desktop browser or mobile app).
Create a Studio (recording session) and invite participants. Configure your inputs: cameras, microphones, and system audio. Preview your settings to ensure everything looks right.
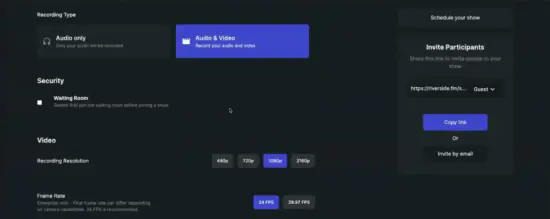
Click Record to start; each participant’s audio is captured separately. Stop the recording when done. Use the online Studio interface to edit, add captions, or create social-ready clips. Share or export in your preferred format.
Why I picked it: It's designed specifically for making and sending quick, personal video messages, especially for sales and marketing. The focus is on easy creation and instant sharing to connect with your audience.
Best for: analytics
OS: any, works in Google Chrome
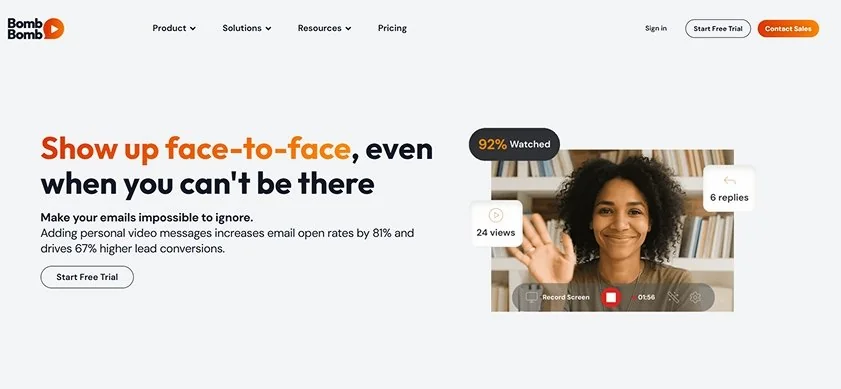
BombBomb is a slick, browser-based video messaging and screen recording tool aimed at professionals who need to create and track videos fast. It captures your webcam, screen, or both, directly from Chrome, and stores your videos in a central library with view analytics.
I used it to record a short sales demo and send it via Gmail. The moment the recipient clicked play, I got instant feedback through BombBomb’s tracking. Beyond just recording, the platform allows trimming, basic editing, and branding with your company logo and colors. Handy for marketing or internal communications.
While it’s lightweight and intuitive, it’s more of a communication and outreach tool than a full-featured production recorder. For quick, tracked clips, BombBomb is excellent; for multi-source 4K tutorials, I still rely on Movavi or OBS.
Captures both webcam and screen seamlessly
Tracks video opens and engagement
Integrates with Gmail, Outlook, and CRM platforms like Salesforce
Basic editing and trimming in-browser
Mobile support for recording on the go
Only a 14-day free trial; full features require a paid plan
Not designed for long-form, professional multi-source recordings
Add BombBomb Video to Chrome from the Web Store.
Click the BombBomb icon, choose camera, screen, or both, and launch the recorder.
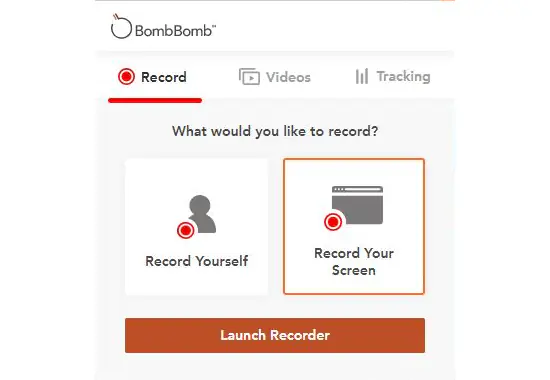
Hit Record, perform your video, then click Stop when finished. The video uploads automatically. Send via email, embed, or copy a link. Use the analytics dashboard to see who viewed your video and for how long.
Of course, we do not have to record videos using the computer as the central hub. You can just as easily use a phone or a traditional camera. So, how do you record with a phone or a camera?
There are a lot of different ways to do this depending on what equipment you are using. Of course, the simplest method to make a recording is to film using your front-facing camera.
The best way to ensure that you record what you need is to take a test recording before you create the real thing. You should make a simple recording to check that the footage is working before you take a video for real.
Once you’ve successfully tested your recording, then you can try the real thing. It isn’t necessarily possible to get it the first time, but with most software options you can always just delete and start again.
If the video is on your phone or camera, you need to create a backup. Upload to a cloud storage to make sure you don’t lose the video. If you’re using a camera, then you may need to upload from an SD card or other storage format.
Most of us are familiar with making a recording on a phone or camera, but the purpose of the video should be considered. If you’re just sending a quick note to a colleague, then you might just use the front-facing camera on your iPhone. If you want to make a more in-depth recording, you might consider things like lighting and an external microphone to create a quality recording with audio.
You've got the software, but to really make your videos shine, you need to think beyond just hitting record.
First things first: be laser-focused. Don't let your viewers get lost in a digital maze. Most of these recorders let you zero in on just the window you need – it’s like a spotlight for your content.
And for the love of all that is holy, silence your notifications.
Nobody needs a pop-up about a sale on cat sweaters when you're trying to demonstrate rocket science. Seriously, a quick test run of everything you plan to show beforehand is non-negotiable.
Make sure that the audio is crisp, and you actually know how to hit the record button without fumbling.
When you're capturing, go HD or go home. If your video looks like it was filmed on a potato, your audience will just click away. Details matter, especially when you're showing someone how to do something.
And speaking of getting to the point, keep it brief. Ramble on, and you're just eating up hard drive space and annoying your viewers.
A concise video is a powerful video. Finally, don't skip basic editing. You don't need to be a Hollywood wizard, but a quick trim, maybe adding a text callout? That's amateur hour stuff. A little polish goes a long way to making your video look like you actually know what you're doing.
Still wondering how to record screen on Windows or Mac? Here’s how to pick the right tool for the job without blowing your budget or your mind.
First up, check those system requirements like your life depends on it. Seriously, is your rig going to choke trying to run this thing? It’s a complete waste of time and potentially money if your computer can't handle it.
And yeah, price matters. If you’re just sending a quick clip to your buddy, a free option with a watermark is totally fine. But if you're aiming for something that looks like it belongs on a professional site, you may need to open your wallet a little.
Crucially, make sure it can capture what you need. Are you recording a webcam feed? A specific app? Your entire screen? Don't get a tool that's built for games if you're trying to record a business presentation.
And once you’re done, how easy is it to share? Nobody wants to wrestle with uploading and sending. A smooth sharing process is key, especially if you’re making videos for others.
Finally, consider the editing bells and whistles. While you don't need a full-blown editing suite, the ability to do some quick trims or add text can make a huge difference.
And if you hit a snag, check out the support options. A good knowledge base or responsive customer service can save you a ton of headaches.
Recording your screen or webcam doesn’t have to be a headache. After testing all the major tools, Movavi Screen Recorder outperforms the others. It proved to be the easiest, most reliable option for crisp, professional-looking videos, whether you’re making tutorials, capturing gameplay, or recording meetings.
OBS Studio is unbeatable for multi-source setups and streaming, while Xbox Game Bar and Awesome Screenshot & Recorder are solid, no-fuss choices for quick clips.
Always silence notifications, test your audio and visuals before going live, and consider using hotkeys to speed up your workflow. Keep clips concise, record in HD, and don’t underestimate the power of a quick trim or text overlay to make your video look polished.
With the right tool and a few smart tricks, you can record video clips that look professional without turning your computer into a stress factory.
Disclaimer: Please be aware that Movavi Screen Recorder does not allow capture of copy-protected video and audio streams.

There are multiple methods of recording a video:
Recording your screen
Recording your webcam
Capturing a video with your phone or camera
If you wish to record your screen or your webcam as a video source, Movavi Screen Recorder can be a simple and professional way to do so.
The software and apps mentioned in this guide give you options to capture video for free.
Movavi Screen Recorder is great for capturing from multiple sources, including webcam and screen capture.
Game Bar is a good option for gamers who want to record video and audio from their games.
Windows Camera has a simple overlay and it is easy for Windows 10 users.
Screen recording is simple with Movavi Screen Recorder. Just follow these quick steps:
You can use Game Bar to record both audio and video on your computer.
While in a game, press Windows + G to bring up the Xbox Game Bar.
Select the Circle icon to start recording and the Square to end the recording. If you are using a full-screen mode, you can use the Windows + Alt + G keys together to stop recording.
If you wish to edit, select the Xbox button and open the app, before selecting Captures to start making edits.
Navigate to the camera app on your phone and select the video mode. Point the camera at what you want to capture and tap the recording button. When you are finished, tap Stop to finish recording your video.
Popular
Best Firefox screen-recording apps
How to record a part of a screen on Windows
What is screen recording?
Best screen recorders in MP4
How to record your desktop
Using OBS with Zoom [The easiest way]
17 best screenshot tools for Windows [2026]
8 Best Sites to Download TV Series [2026] – Movavi
14 Best Free Snipping Tools in 2026 [Updated] – Movavi
How to Record a FaceTime Call with Audio [Full Guide]
12 Best Screen Recorders for Low-End PCs – Movavi
7 Best Free Screen Recorders for Windows 7
12 Best Zoom Recording Apps for Any Device – Movavi
22 Best Free Screen Recorders [2026] – Movavi
12 Best Free Screen Recorders No Time Limit [2026] – Movavi
13 Best Free Internal Audio Recorders in 2026 – Movavi


1.5M+ users already subscribed to our newsletter