
If you’re trying to figure out how to record a video on Windows 11 for recording your gameplay or other screen activities, you might want to try Game Bar. It was originally developed for Windows 10, but will do video screen capture with sound on any PC with Windows 10 or higher. The main downside of Game Bar is it can only record one app at a time. It also can’t record the whole screen.

How to Screen Record in Windows 11 with Audio [5 Best Ways]
Try Movavi Screen Recorder:
Record important webinars and meetings
Edit your videos
Share edited recordings with ease
It can be a little daunting when you’re first figuring out how to screen record on Windows 11. Fortunately, there are a variety of easy ways to do screen recording in Windows 11. Here’s a breakdown of five super simple ways to record your screen, and what they are best for.
Special pick: Movavi Screen Recorder

Movavi Screen Recorder is an ideal application for someone first learning how to record screens in Windows 11 with audio. It has a beginner-friendly user interface that lets people record their screen and audio and then edit and share captures easily. Movavi Screen Recorder works on Apple computers as well as on a PC.
Features:
- Show keystrokes and mouse movement in video guides and instructions
- Save anything you need to keep from your screen in HD and 4K
- Draw on your video recordings in real time to explain complex content
- Leave no sound behind – record your computer audio as well as microphone audio
- Keep your colleagues up-to-date with screenshots – capture any part of the screen, edit your screenshot, and then send it via WhatsApp or email

Our goal is to provide you with only verified information. To ensure this, Movavi Content Team does the following:
When selecting products to include in our reviews, we research both demand and popularity.
The team tests all the products mentioned in this article.
When testing, we compare the key characteristics of the products, which include selecting capture area, schedule recording, showing keystrokes and mouse, and other significant features.
We study user reviews from popular review platforms and make use of this information when writing our product reviews.
We collect feedback from our users and analyze their opinions of Movavi software as well as products from other companies.
How to record screen on Windows 11 with audio
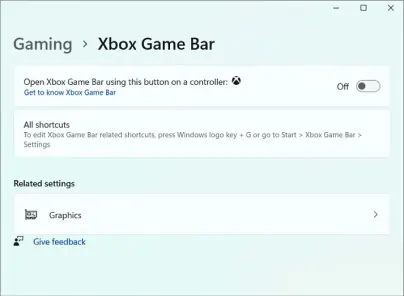
Step 1. Enable Game Bar
You can enable Game Bar by hitting the Windows key + I. This opens the Windows settings, where you can search Xbox. This will give you the option to Enable The Game Bar.
Step 2. Start recording
Open the game you want to record yourself playing or any other program you need to capture. Press Windows logo key + Alt + R to start recording. If you want to turn the mic on and off, hit the Windows logo key + Alt + M. The Windows logo key + G combination will let you pull up the Game Bar control. Hit Windows logo key + Alt + R to stop recording.
How to start screen recording in Windows 11 with Movavi Screen Recorder
Movavi Screen Recorder is a super easy-to-use application that works on Macs and PCs, such as Acer, Lenovo, HP, and Asus.
It lets users have a lot of control over what they record. Movavi Screen Recorder lets you record a specific window, the whole screen, or a specifically selected portion of the screen. Users also get a lot of quality control over video – you set audio quality and frames per second.
One of the features users love is the scheduled recording function. This lets users set a timer to begin and end recording at a specific time. Movavi Screen Recorder also comes with editing features, so you can screen record, edit, and share all with one application.
Step 1. Download and install the program
Once you download the installation file onto your desktop or laptop, follow the on-screen instructions to install the recorder. The process should take a few minutes. Launch the program once it has completed installation.
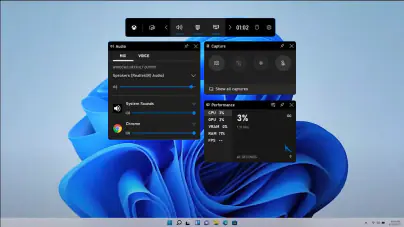
Step 2. Customize your settings
Movavi Screen Recorder comes with a lot of settings. Click on Preferences in the sidebar to pull up your options. Check that the Webcam, Microphone, and System Audio icons are green, indicating they are active.
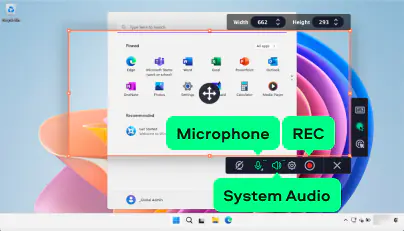
Step 3. Video record your screen
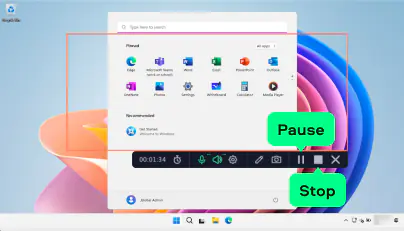
Once you’ve selected your preferences, you can start recording. When you’re ready to record, simply click REC. The recording will begin three seconds after you hit the button. Click the Pause button to pause the recording and the Stop button when you are finished.
If you want to trim the video before you save and share it, just click the button with the scissors icon.
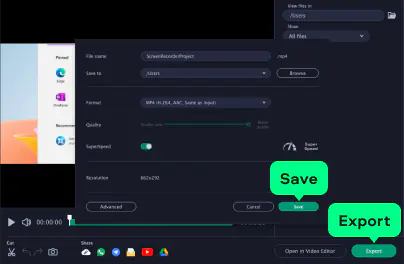
Step 4. Save the video
Once you’ve recorded your screen, click Export to pull up a dialog box. This will let you name the file, choose the destination folder, and choose the output format. Then click Save to save the video.
There are also several icons at the bottom of the screen that will let you share the video instantly.
How to record your screen on Windows 11 with Snipping Tool
If you think the Snipping Tool is only for screenshots, it’s time to rethink that. Microsoft quietly turned this humble app into a lightweight screen recorder – no third-party installs, no extra clutter. It’s not the flashiest recorder out there, but for quick tutorials, bug reports, or demos, it’s surprisingly capable. Whether you’re figuring out how to record a screen with audio in Windows 11 or just need a quick screen capture on your laptop, this built-in tool does the job beautifully. Think of it as Windows’ no-fuss answer to “I just need to show someone this thing on my screen.”
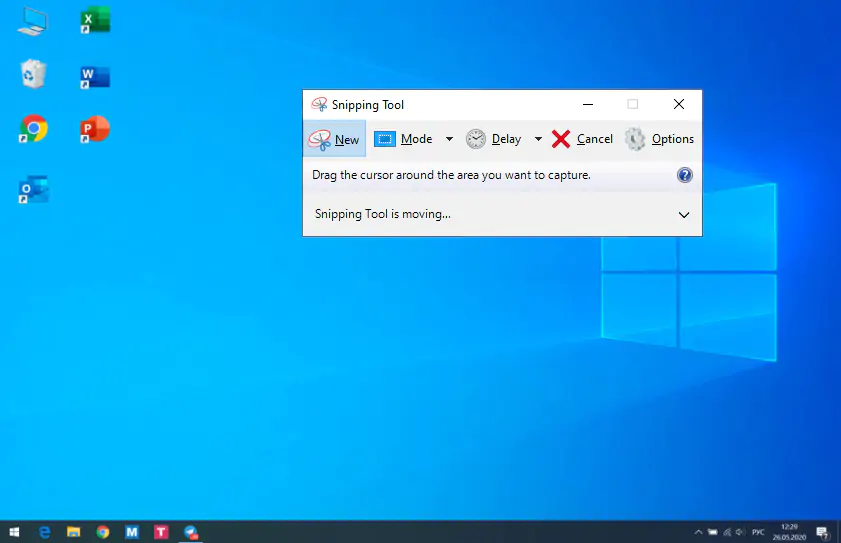
Step 1. Open the Snipping Tool and switch to video mode
Tap the Windows key, start typing Snipping Tool, and open it from the search results. Once the app launches, find the camera icon marked with a red dot at the top – that’s where the screen recording feature lives. Click it, then select New to start setting up your capture.
Step 2. Select the area you want to record
Your screen will dim slightly. Use your mouse to drag and highlight the area you’d like to record – it can be the whole screen or just a portion. Once you’ve framed your section, a floating control bar will appear near the top of your screen.
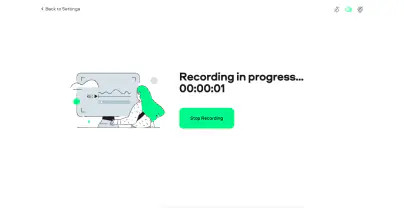
Step 3. Start recording
Hit the Start button, and after a short three-second countdown, the Snipping Tool begins recording everything inside your selected box – clicks, scrolling, movements, all of it. When you’re done, click the Stop button on the toolbar.
Step 4. Review, save, and share
After stopping, your recording automatically opens in a preview window. You can preview your recording, cut off any extra seconds from the start or finish, and hit Save As to keep it as an MP4 in your Videos folder. From that same screen, it’s easy to share the clip via email, chat, or Teams, or send it straight to Clipchamp if you’d like to fine-tune it.
How to screen record in laptop with Windows 11 online
For those learning how to screen record in a laptop with Windows 11, Screencapture.com is an easy online tool that will let you start recording immediately. People who like Screencapture.com like it for its simplicity. However, if you want videos without a watermark, you’ll need to pay for the service.
Step 1. Go to the website
Open your web browser and go to the website.
Step 2. Choose the recording area
The homepage of Screencapture.com allows users to select the microphone, sound, and webcam. There is also a paid option to remove the watermark from the recording.
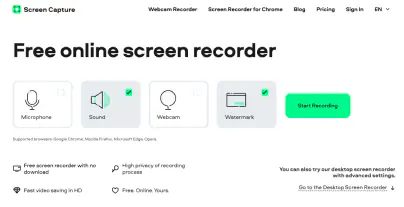
Step 3. Start recording
Once you’ve selected what you want to record, just hit the Start Recording button. This will pull up a window that will let you select whether to record your entire screen, a select window, or a select tab in a window.
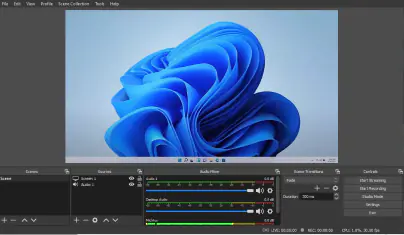
How to record a video on Windows 11 with OBS Studio
Another popular method of screen recording is OBS Studio. It’s especially popular among gamers since it does not have the same limitations as Game Bar. That said, it’s not the most popular screen recording software out there because it’s a bit complex. So we don’t recommend it for people first learning how to screen record on Windows 11. It’s more designed for Twitch streamers and does a lot more than just record screens. Many people may find the extra features confusing and unnecessary.
Step 1. Download and install OSB Studio
Follow the link below to download and install OBS Studio on your PC.
Upon installation, OBS will ask you if you want to optimize it for streaming or recording. If you do not plan on using OSB Studio for streaming, select Optimize just for recording, otherwise you won’t get the best recording features.
Step 2. Add a video source
Once you’ve installed and opened the software, click the + icon at the bottom of the window. For a screen recording, select Display Capture and click OK.

Step 3. Choose a display
For people using multiple monitors, this is where you get to select which monitor to record. If you only have one monitor, you’ll only be given one choice. Your capture can be cut off if the display exceeds the bounds of the canvas, though this is unlikely to occur if you’re just using it to record a presentation.
Step 4. Start recording
Click the Start Recording button to launch the process. Once you’re finished, click Stop Recording.
Once you’ve finished recording, your videos will go to the Videos folder. By default, they get stored as an MKV file, but you can also save it as an MP4 or MOV file by changing Output in the Settings menu.
Best ways to record your screen in Windows 11
- Game Bar – Perfect for gamers or anyone who wants to record app-based activity with minimal setup.
- Movavi Screen Recorder – The top choice if you need high-quality video and audio capture, plus editing tools and flexibility.
- Snipping Tool – Ideal for quick, no-fuss recordings using a native Windows feature – no downloads or setup required.
- Screencapture.com – A straightforward online option when you need to record something fast without installing software.
- OBS Studio – Great for creators who stream or need advanced controls across Windows, macOS, or Linux.
Summary
There are a lot of ways to record your screen on a Windows 11 PC. After reviewing several different screen recording software, we recommend Movavi Screen Recorder for both beginners and professionals. It offers a lot of options with an easy-to-use interface.
Movavi Screen Recorder
The perfect way to record anything from your screen
Disclaimer: Please be aware that Movavi Screen Recorder does not allow capture of copy-protected video and audio streams.

Frequently asked questions
Does Windows 11 have a screen recorder?
Does Windows 11 have a screen recorder?
Yes, all Windows 11 PCs come with Game Bar that can record your screen. However, this app has some limitations. You can try third-party software, like Movavi Screen Recorder, that offers more features while being easy to use.
What is the best program to record my screen on Windows 11?
What is the best program to record my screen on Windows 11?
There are many great programs for Windows 11 that can help you record your screen. Here’s a quick list of our favorites.
- Movavi Screen Recorder
- Game Bar
- Screencapture.com
- OBS Studio
- Screencast-O-Matic
Popular
Best screen recorders for Google Meet
22 BEST Free Screen Recorders without Watermark
15 Best OBS Alternatives [Recording & Streaming] - Movavi
8 Best Sites to Download TV Series [2026] – Movavi
Is OBS Safe? Your Guide to Safe Screen Recording | Movavi
Best laptop screen recorders
How to Record Yourself on Mac [5 Easy Ways] – Movavi

Have questions?
If you can’t find the answer to your question, please feel free to contact our Support Team.
Join us for discounts, editing tips, and content ideas


1.5M+ users already subscribed to our newsletter