
Movavi Screen Recorder
The perfect way to record anything from your screen
Disclaimer: Please be aware that Movavi Screen Recorder does not allow capture of copy-protected video and audio streams.

Try out Movavi Screen Recorder:
Take high-quality screenshots and add annotations
Create scrolling screenshots
Easily save and share your pictures
Taking screenshots and recording videos of screen activity can be incredibly useful, but some Windows 11 users have been running into challenges since the update from Windows 10. So, let’s walk through a few methods for how to screenshot in Windows 11.
Special pick: Movavi Screen Recorder

If you’re trying to find out how to take a screenshot in Windows 11 the easy way, we recommend Movavi Screen Recorder. This affordably priced screen-recording and screenshot software is extremely user-friendly and includes features for editing images and videos after you capture them. It enables users to add annotations to screenshots and create scrolling screenshots as well. Plus, you can capture webcam footage, screen activity, system sound, and microphone sound all at the same time.

When selecting products to include in our reviews, we research both demand and popularity.
All products mentioned in this article have been tested by Movavi Content Team.
When testing, we aim to highlight the best features of a product and what it’s best suited for.
We study user reviews from popular review platforms and make use of this information when writing our product reviews.
We collect feedback from our users and analyze their opinions of Movavi software as well as products from other companies.
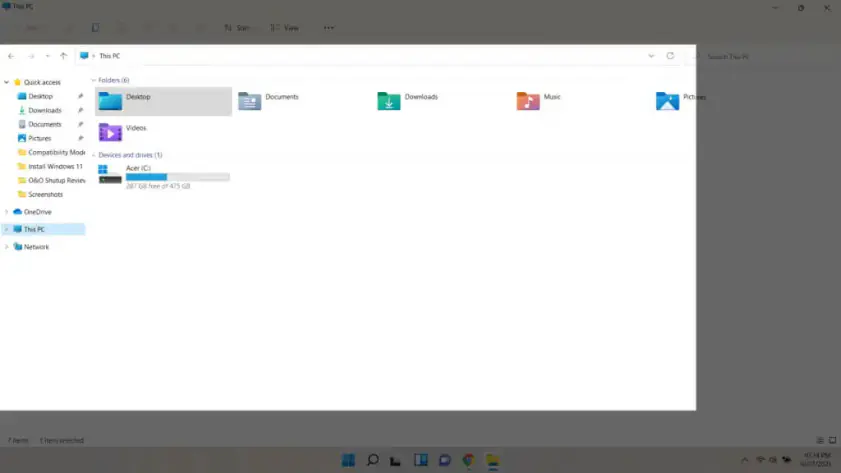
If you want to know how to take a screenshot in Windows 11 and you want to capture the whole screen, the easiest method is to locate the Print Screen (PrtScrn) key on your keyboard to use the Windows 11 screenshot shortcut. If you’re working on a desktop, you’ll find this key at the top of your keyboard, to the right of the function keys. If your computer is a laptop, PrtScrn might be a secondary function of another key. If that’s the case, you’ll just need to press the Function key (Fn) at the same time that you press PrtScrn. In either case, when you use this feature, your full screen will be copied to your clipboard. You can now paste the screenshot into your Paint app and save the image as a JPG or PNG file.
When you use the PrtScrn key, your screenshots won’t automatically save to your computer. However, the auto-save feature makes it possible to save screenshots on a PC without a lot of extra steps. So, whether you’re using an ASUS or HP laptop, a Samsung desktop, or any other Windows 11 computer, if you want to auto-save a screenshot, simply press the Windows (Win) key and the PrtScrn key at the same time. This will send your screenshot to the Screenshots folder, located in the Pictures folder.
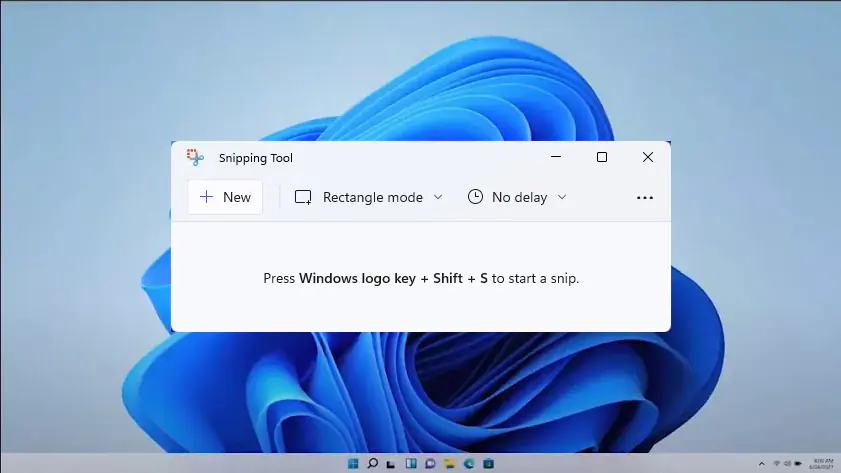
Now, let’s talk about how to take a screenshot in Windows 11 when you only need to capture part of the screen. This feature can be accessed with a three-button shortcut key combo: press Win + Shift + S at the same time to launch the Windows 11 Snipping Tool. When you hit these hotkeys together, your screen will become dim, and you’ll see a menu pop up at the top of your monitor. This menu includes four buttons that allow you to take different types of partial or full-screen screenshots. For our purposes in this section, we’re only interested in the customizable partial screenshot options: Rectangular Snip and Freeform Snip.
To take a rectangular screenshot of a custom area of your screen, select Rectangular Snip and then draw a box around the area that you want to capture. If a rectangle feels too restrictive for your screenshot purposes, choose Freeform Snip and draw any shape you want around the area that you want to capture. When you’re done blocking off your screenshot, the Snipping Tool will automatically copy your screenshot to your clipboard. Now, you can paste it into the Paint app to save it as an image, or you can paste it into a Word document, an Excel spreadsheet, or into an email message (or anywhere else you want to use it). You can also skip this step by clicking on the prompt that pops up after you take the screenshot. This will allow you to make simple edits and markups to your screenshot, and you can save it to your preferred destination, as well.
Now, let’s walk through how to take a screenshot in a laptop on Windows 11 (or on a desktop) when you want to capture a specific window. You can, of course, choose to capture a screenshot of an area of your screen around the window you want to screenshot. This image can then be cropped in the Snipping Tool or another photo editor. However, the Snipping Tool app also includes a Window Snip feature that lets you choose individual windows to capture. To use the app, press Win + Shift + S together to open the Snipping Tool and select Window Snip from the menu at the top of the screen. Select the open window that you want to screenshot, and the app will grab it without capturing the taskbar.
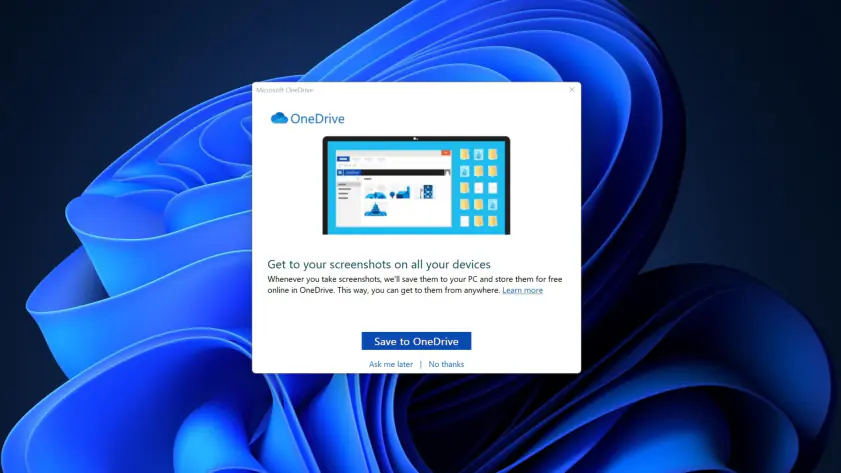
What if you need access to your screenshots when you’re away from your desktop? Saving them to the cloud can be extremely convenient, and fortunately, there’s an easy way to do that with OneDrive. To do this, we need to discuss how to print your screen in Windows 11 and automatically save to the OneDrive cloud.
Find the OneDrive cloud icon on the taskbar and right-click on it. Go to Settings and open the Backup tab. Locate and check the box marked Automatically Save Screenshots I Capture to OneDrive. When you do this, you won’t have to worry about the auto-save function or ensuring that you add your screenshots to images or documents. They’ll automatically save to a folder in your OneDrive cloud. This is an especially useful option if you need to grab and save screenshots on the fly. If, for example, you’re livestreaming or giving a live online presentation, you’ll want to be able to hit a single button to save your Windows 11 screen captures without taking extra steps.

Snip & Sketch was introduced in Windows 10, and a lot of users loved it. With the Windows 11 update, Microsoft meshed Snip & Sketch with the new Snipping Tool. You can still easily access Snip & Sketch to take and edit a snapshot of your screen. To do it, just follow these easy steps:
Go to the Start menu and open Snip & Sketch.
Click on the New button at the top of the Snip & Sketch panel. If you opened Snip & Sketch by pressing Win + Shift + S simultaneously, this step is not necessary.
Choose the type of screenshot you want to take (rectangular, freeform, window, or full-screen) from the menu at the top of the window.
Depending on the type of screenshot you choose, you’ll now use your mouse to draw the area that you want to capture, select the window, or just take a screenshot of the whole screen.
When you’ve taken your screenshot, a notification will appear at the bottom of the screen. Click on it now.
Make any annotations and/or edits that you want, then save or share your screenshot.
Some users have had challenges using the Snipping Tool app to take a screenshot on their PC in Windows 11. While there was a glitch in the update from Windows 10 to Windows 11, Snipping Tool is still accessible in Windows 11. If you’ve been having trouble getting Snipping Tool to work because of an expired certificate error, try updating your operating system to Windows 11 version KB5008295. If this doesn’t work or if you don’t have time to update your computer right now, follow these steps to get around the error:
Go to the Start menu and click on Settings.
Choose Time & Language and navigate to Date & Time.
Toggle off the Set time automatically feature.
Go to Set the date and time manually and change the date to any day before October 31, 2021.
Search for Snipping Tool and launch the app, or press Win + Shift + S at the same time to launch it.
Select the type of screenshot you want to take and either draw your capture perimeter or choose the window you want to screenshot.
Take your screenshot and click on the notification at the bottom of the screen to make edits and/or annotations.
Save your screenshot.
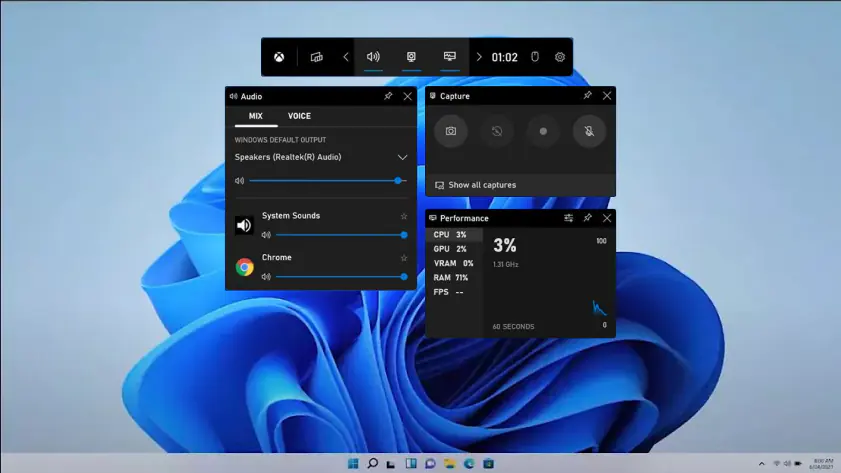
What if you want to take a screenshot of game play on your Xbox? Fortunately, Game Bar has a built-in screenshot tool that can help. To use Game Bar to take a screenshot, follow these steps:
Press Win + G at the same time.
Go to the Capture window.
Click on the camera icon to take a screenshot.
Your screenshot will automatically save to the Captures subfolder of the Videos folder.

Taking and editing a Windows 11 laptop or desktop screenshot is easy with Movavi Screen Recorder. The software offers a streamlined approach to taking both still screen captures and video screen recordings. To get a screenshot with Movavi Screen Recorder:
1. Download Movavi Screen Recorder. Follow the installation prompts and launch the program.
2. Next, click the camera icon.
3. Choose the type of screenshot you want to take:
To take a full-screen screenshot, click on any unoccupied area of your screen.
To make a screenshot of part of the screen, click and hold the left mouse button and drag it over the area that you want for your selection.
To take a screenshot of a window, hover the cursor over the window until a frame appears around it, and then click to take the screenshot.
4. After you take your screenshot, you can click the Editor button to annotate or edit it by selecting the tool you want to use and making any desired changes to the image.
Once you’re happy with your edits, you can choose what you want to do next. At the bottom of the screen, click on the Share, Copy to clipboard, or Save screenshot.
Taking a screenshot on a Surface tablet is as easy as 1-2-3:
Touch the Windows logo touch button.
With the Windows button held, press the volume-down button on the side of your tablet.
Your screenshot will automatically save to your device in the Screenshots subfolder of the Pictures folder.
Whether you’re a Windows 11 pro or you’re still getting used to the update, taking screenshots of all or a selective portion of your screen should be a quick and easy task! Try one or more of the methods we outlined here, and see which one is easiest and most natural for you. For the most features and the quickest screenshots and recordings, we recommend checking out a free trial of Movavi Screen Recorder.
Disclaimer: Please be aware that Movavi Screen Recorder does not allow capture of copy-protected video and audio streams.

In Windows 11, screen snips are automatically copied to your clipboard. When you take a screenshot, you’ll see a notification with a preview of the screenshot appear on your screen. To make edits and/or save the image, click on this notification. After you’re done editing your screenshot, you can save it to your preferred destination.
Windows 11 does have Snipping Tool, but it is no longer visible in the Start menu. To access it, hold down Win + Shift + S. This will allow you to take a screenshot of part or all of your screen without searching for an application, but Snipping Tool may not work if you don’t have the KB5008295 update for Windows 11.
Popular
Best screen recording software
What is a screencast
How to Record a Zoom Meeting [3 Easy Ways]
How to Fix OBS Lagging [12 Quick Ways]
8 Best Descript Alternatives For Your Every Need [2026]
17 Best Free Screenshot Tools to Use [2026] – Movavi
How to Record Your Screen on Windows 10 – Movavi
Complete Guide to a Virtual Onboarding – Movavi
How to take a scrolling screenshot
13 Best Free Screen Recorders No Time Limit [2026] – Movavi


1.5M+ users already subscribed to our newsletter