Split-Screen Video Editor – Make a Side-by-Side Video in Minutes

Movavi Video Editor is a practical split-screen video editor for Windows and Mac that lets you combine multiple clips into a single frame without technical complexity.

Arrange footage visually in the preview window, match audio levels between clips, and export a polished split-screen video ready for any platform.

Trusted by 70 million creators worldwide

70M+

users

190+

countries

15+

updates per year

10,000+

effects to choose from

Key features of the split-screen video editor

Everything you need to create side-by-side videos and multi-clip layouts – precisely and without guesswork.

Visual layout editor – arrange clips directly in preview

Movavi Video Editor lets you position, resize, and align each clip directly inside the preview window rather than entering numbers in a panel. You drag the corners of each video to set its size, nudge it into the right position, and see the split-screen result update in real time. Equal side-by-side halves, an uneven primary-and-secondary split, or three videos in one frame – all set up by eye rather than by formula.

Multi-track timeline for independent clip control

Each video in the split screen lives on its own timeline track, so you can trim, adjust colour, or change the volume of one clip without affecting the others. This makes it straightforward to sync two clips that start at different points in time, match their brightness so they look consistent on screen, and cut out dead sections without disturbing the layout.

Per-clip audio control and background music

Split-screen videos frequently have an audio imbalance. For example, one clip is recorded with a close microphone and another is recorded from a distance. Movavi's per-clip volume controls and the dedicated audio track let you level both sources, add a music bed underneath, and fade audio in and out at the start and end. The result plays back at consistent loudness rather than lurching between quiet and loud clips.

Transitions, filters, and text overlays

Add titles, lower-thirds, stickers, and visual effects to the split screen composition as a whole or to individual clips within the frame. A transition at the start or end of the entire video gives the split screen a polished entry and exit. Colour filters let you grade both clips toward a consistent look so a side-by-side video does not feel like two unrelated pieces placed next to each other.

Why use Movavi as your split-screen video maker

Three reasons Movavi is the practical choice for putting two videos side by side.

What you see is what you get

Most split-screen tools require you to type pixel values or percentages to position clips. Movavi works visually: you drag, resize, and position everything in the preview window and the result looks exactly as you see it. This removes the trial-and-error of adjusting numbers and re-rendering to check the output, which saves significant time on a project that involves two or more video layers.

Split screen and full edit in one workflow

Movavi is a complete video editor, not just a layout tool. Once the split screen is set up, you can trim unwanted sections, apply colour correction, add music, place title cards, and export without switching applications. The full editing toolkit is available for each clip on the timeline, so a split-screen video can be as polished as any single-track edit.

Fully functional offline

Movavi Video Editor operates completely on your computer with no waiting in processing queues, no restrictions on file size, and no need to be online. A 500 MB clip that might take several minutes to send to a web-based tool gets handled locally in a matter of seconds.

How to put two videos side by side with Movavi – 5 Steps

From two separate clips to one finished side-by-side video in under ten minutes.

Step 1. Upload your files to the splitter

Launch Movavi Video Editor and add the videos you want to combine. The app supports a wide variety of video formats, including MP4, MOV, AVI, and more.

Drag files onto the timeline so each clip sits on its own track and can be adjusted independently.

Step 2. Add clips to the timeline

Place one clip on the main track and position the second clip above it. Make sure both clips overlap in time so they can appear on the screen together.

Step 2. Create split screen video on PC or Mac.

Step 3. Open the Position tool

Select the second clip on the timeline, click Tools, and open the Position settings. This section controls how multiple videos are arranged inside the frame.

Step 3. Create split screen video on PC or Mac.

Step 4. Choose a split-screen layout

Pick a layout that divides the frame into equal or uneven sections. You can place videos next to each other, stack them vertically, or display several clips at once within the same screen.

Step 5. Export the video

Fine-tune the size and position of each clip in the preview window, then preview the result. Click the Export button, choose your export settings, and save the finished split-screen video.

Step 5. Create split screen video on PC or Mac.

Who uses a split-screen video maker

Side-by-side video layouts serve a wide range of content formats and professional needs.

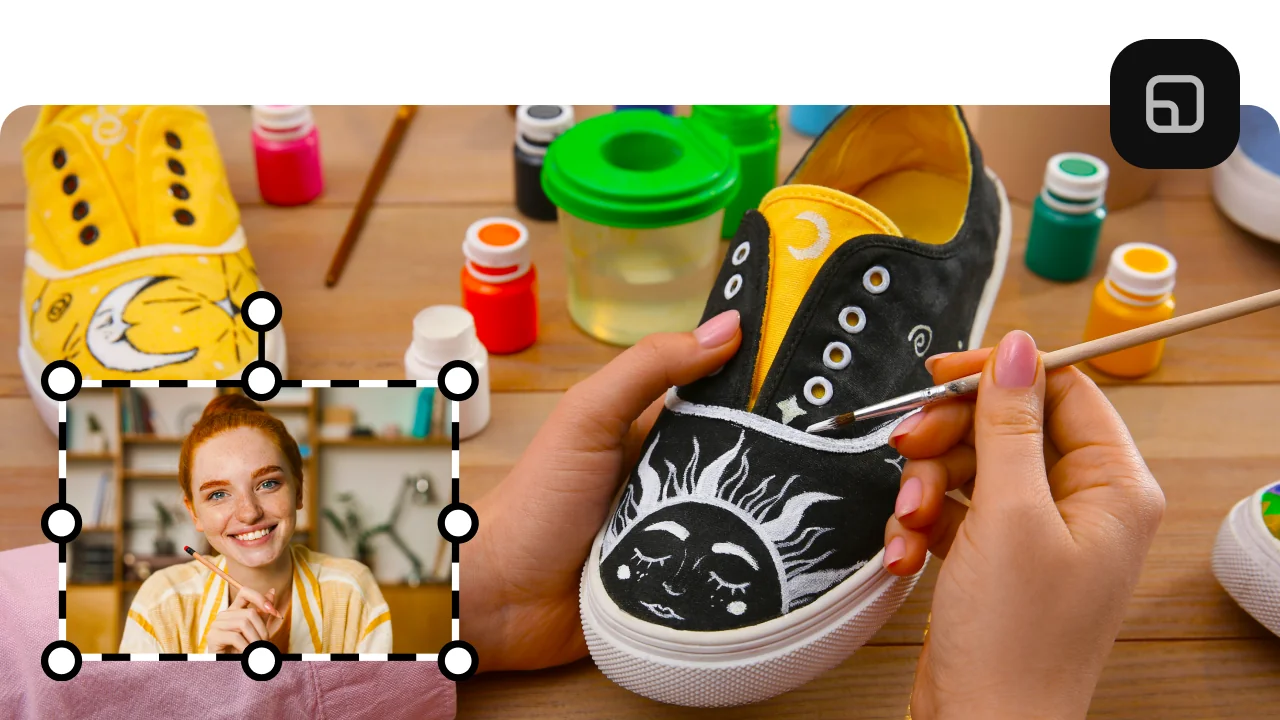
Reaction and commentary creators · CONTENT CREATION

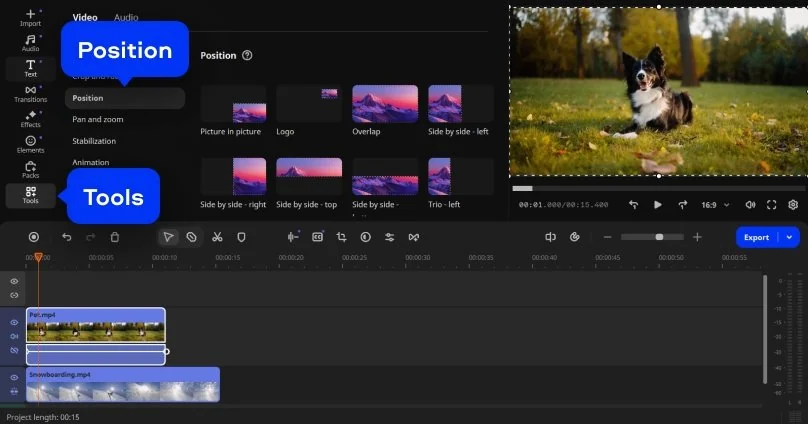
YouTube and social media creators who film themselves reacting to other videos use split screen to show both the original clip and their response simultaneously. Movavi's visual layout tool makes it fast to size the primary video larger and keep the reaction camera in a smaller secondary frame – the standard format that audiences expect for reaction content.
Fitness and tutorial instructors · EDUCATION

Fitness coaches and tutorial creators frequently need to show a before-and-after, a correct-versus-incorrect technique comparison, or two camera angles of the same movement at once. A split-screen video maker that handles independent clip trimming and audio control lets instructors produce clean comparison videos without needing a dedicated video production team.

Marketing and product teams · BUSINESS

Brand and marketing teams creating product comparison videos, testimonial reels, or campaign recap content use split screen to present two perspectives or two products simultaneously. Movavi's colour matching tools and title overlays let a small internal team produce a consistent, on-brand split-screen video that looks deliberate rather than thrown together.

Frequently asked questions

Common questions about split-screen video editing and putting two videos side by side.

How do I put two videos side by side on an iPhone?

The most accessible ways to put two videos side by side on an iPhone are CapCut, iMovie, and KineMaster. In CapCut: open the app, tap New Project, add your first clip, then tap Overlay > Add Overlay and import the second clip. Resize and reposition both clips in the canvas until they sit side by side. In iMovie on an iPhone, the Picture in Picture and Split Screen options under the video overlay menu handle basic two-clip layouts. For more precise control over frame size and position, desktop software like Movavi Video Editor gives you more layout flexibility than mobile apps, since the split-screen video editor preview allows direct drag-and-resize positioning of each clip.

How do I put 2 videos in one screen and play them one by one?

Playing two videos in the same screen sequentially (one after the other rather than simultaneously) is different from a side-by-side video layout. To play them one by one in the same export, the simplest method is to place both clips end-to-end on the same timeline track in Movavi Video Editor so the second clip follows the first automatically in the exported file. If you want them to look like they share a split screen but alternate focus, use the split-screen layout and apply opacity or a crop mask to fade one side while the other is active. For a simple sequential result with no simultaneous playback, a basic video editor merge (clip A on the timeline, then clip B immediately after) achieves what most people need without any multi-track setup.

Is there an app to put two videos side by side?

Yes, several apps are designed specifically to put two videos side by side. On desktop, Movavi Video Editor is one of the most accessible split-screen video makers for Windows and Mac. It uses a visual drag-and-resize interface, supports multiple clips per frame, and includes a full editing toolkit for audio, colour, and titles. On mobile, CapCut and InShot are the most popular options for editing videos on iOS and Android phones. Both apps are free with optional paid upgrades. In a browser, Kapwing and Clideo let you arrange two clips in a split-screen layout online without installation, though they limit file size and add watermarks on free plans. For the most consistent results with large files or complex layouts, a desktop split-screen video editor like Movavi Video Editor gives the most reliable output.

How do I put two videos in layout?

To put two videos in a layout using Movavi Video Editor, follow these steps.

  1. Import both clips and place them on separate timeline tracks so they overlap in time.
  2. Select the upper clip, open Tools > Position, and choose a layout preset that divides the frame the way you want – equal side by side, stacked vertically, or uneven.
  3. Drag the clip edges in the preview window to fine-tune the size of each frame.
  4. Repeat the Position step for the lower clip if needed to fill the remaining frame area.
  5. Once both clips are positioned, adjust audio levels, add any titles or colour corrections, preview the full video, and export.

The entire process from two separate clips to a finished layout typically takes under ten minutes for a standard-length video.

Join us for discounts, editing tips, and content ideas

1.5M+ users already subscribed to our newsletter

By signing up, I agree to receive marketing emails from Movavi and agree to Movavi's Privacy Policy.