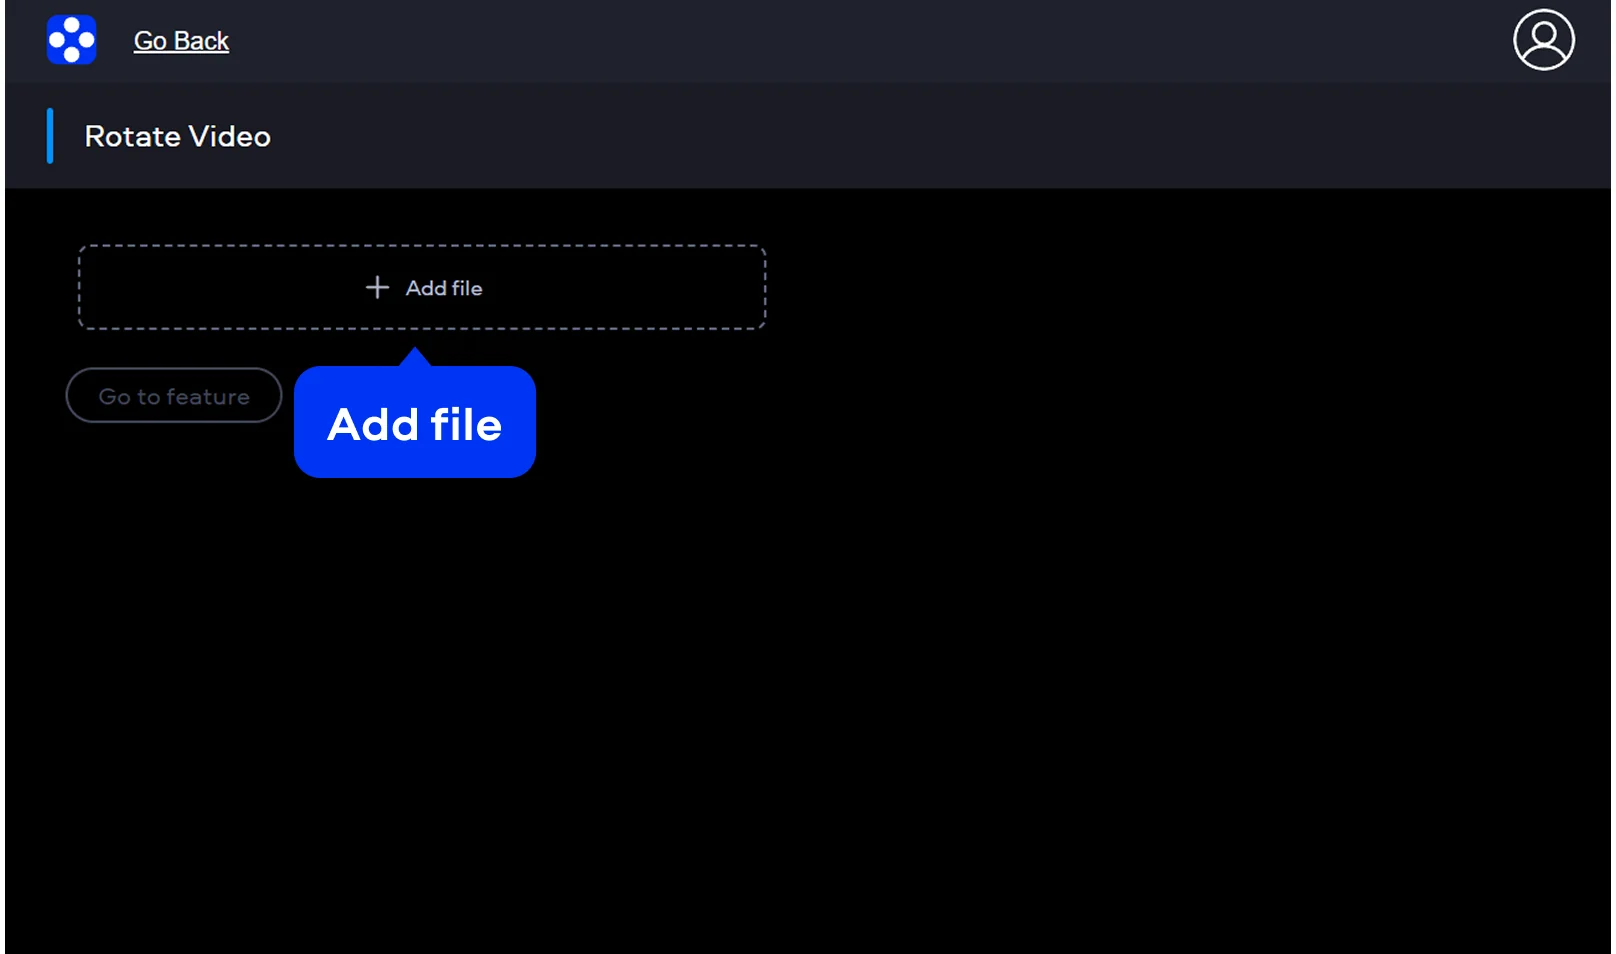
Step 1. Add your video
Click Add File and upload your video to the free subtitle maker. Then, press Go to feature, and the tool will prepare the file. After that, your video will appear in the editor, ready for subtitles.
I’ve learned this the hard way: a good video without subtitles is like a conversation half-heard. People scroll fast, watch without sound, or simply miss key details. That’s why adding subtitles has become part of my routine. When I need to do it quickly, without opening heavy software or getting lost in timelines, I go straight to Movavi’s online subtitle tool.
What I like about this video subtitle editor is how immediate everything feels. No downloads, no setup, no waiting around. I open the page, drop in my video, and I’m already working. The interface doesn’t try to impress with complexity, it just gives me what I need.
Click Add File and upload your video to the free subtitle maker. Then, press Go to feature, and the tool will prepare the file. After that, your video will appear in the editor, ready for subtitles.
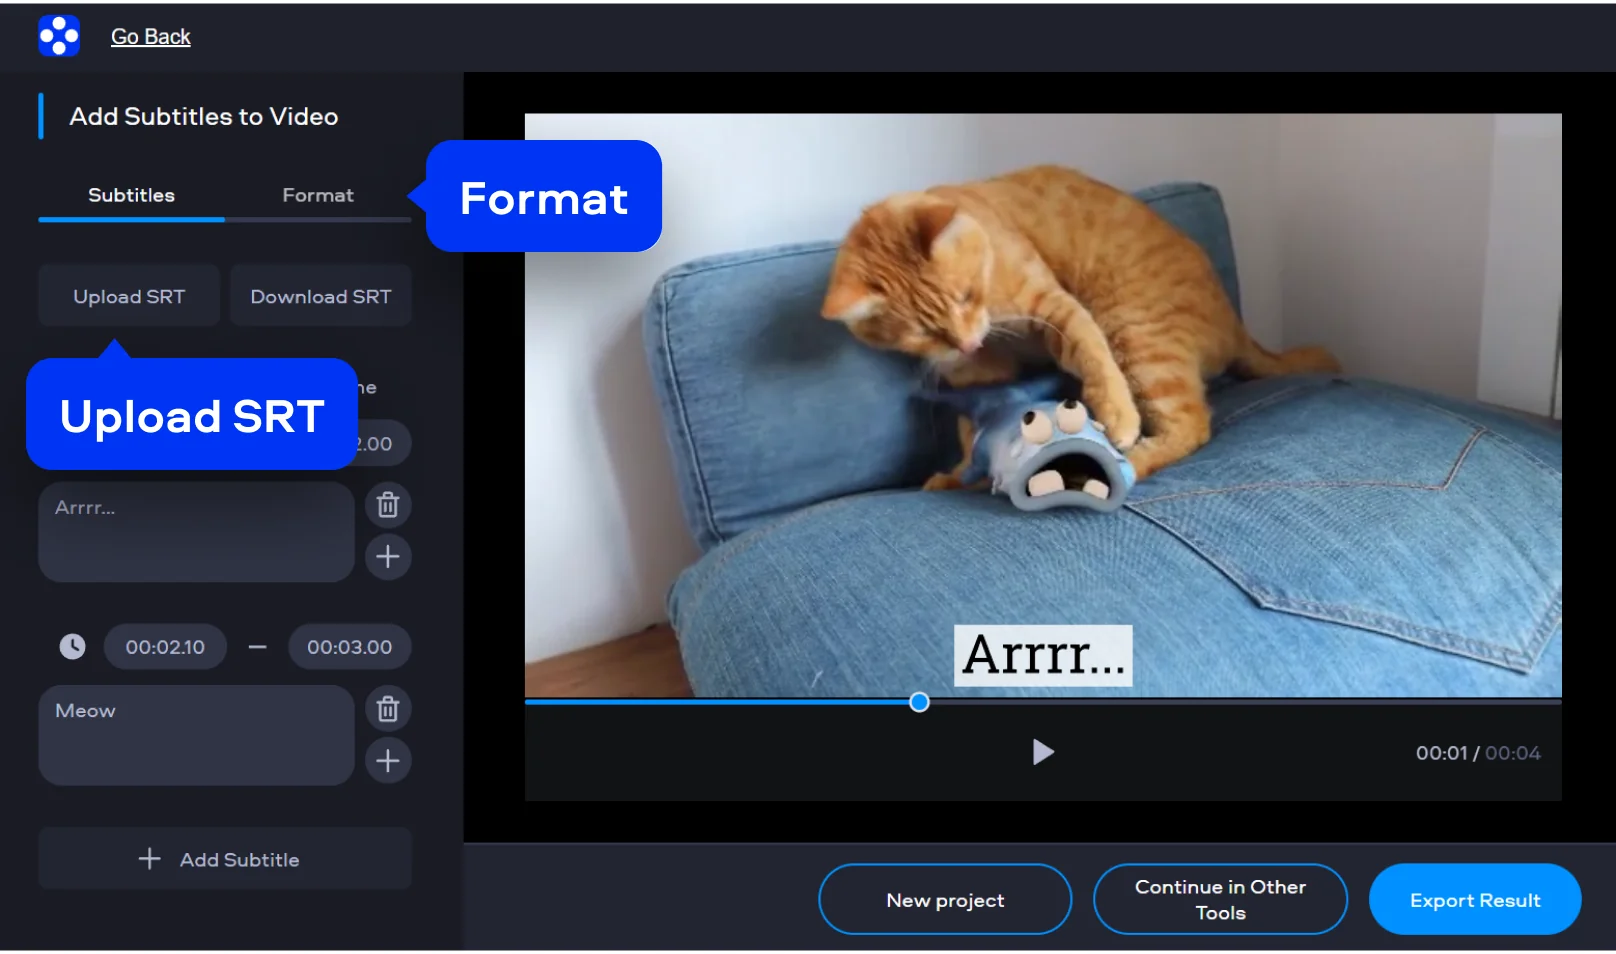
Now, that’s how you add subtitles to a video: enter your text, choose its style and sync it with the video. Adjust timing and placement so subtitles match the speech or action. You can also upload an SRT file with subtitles from your device or download the one you created.
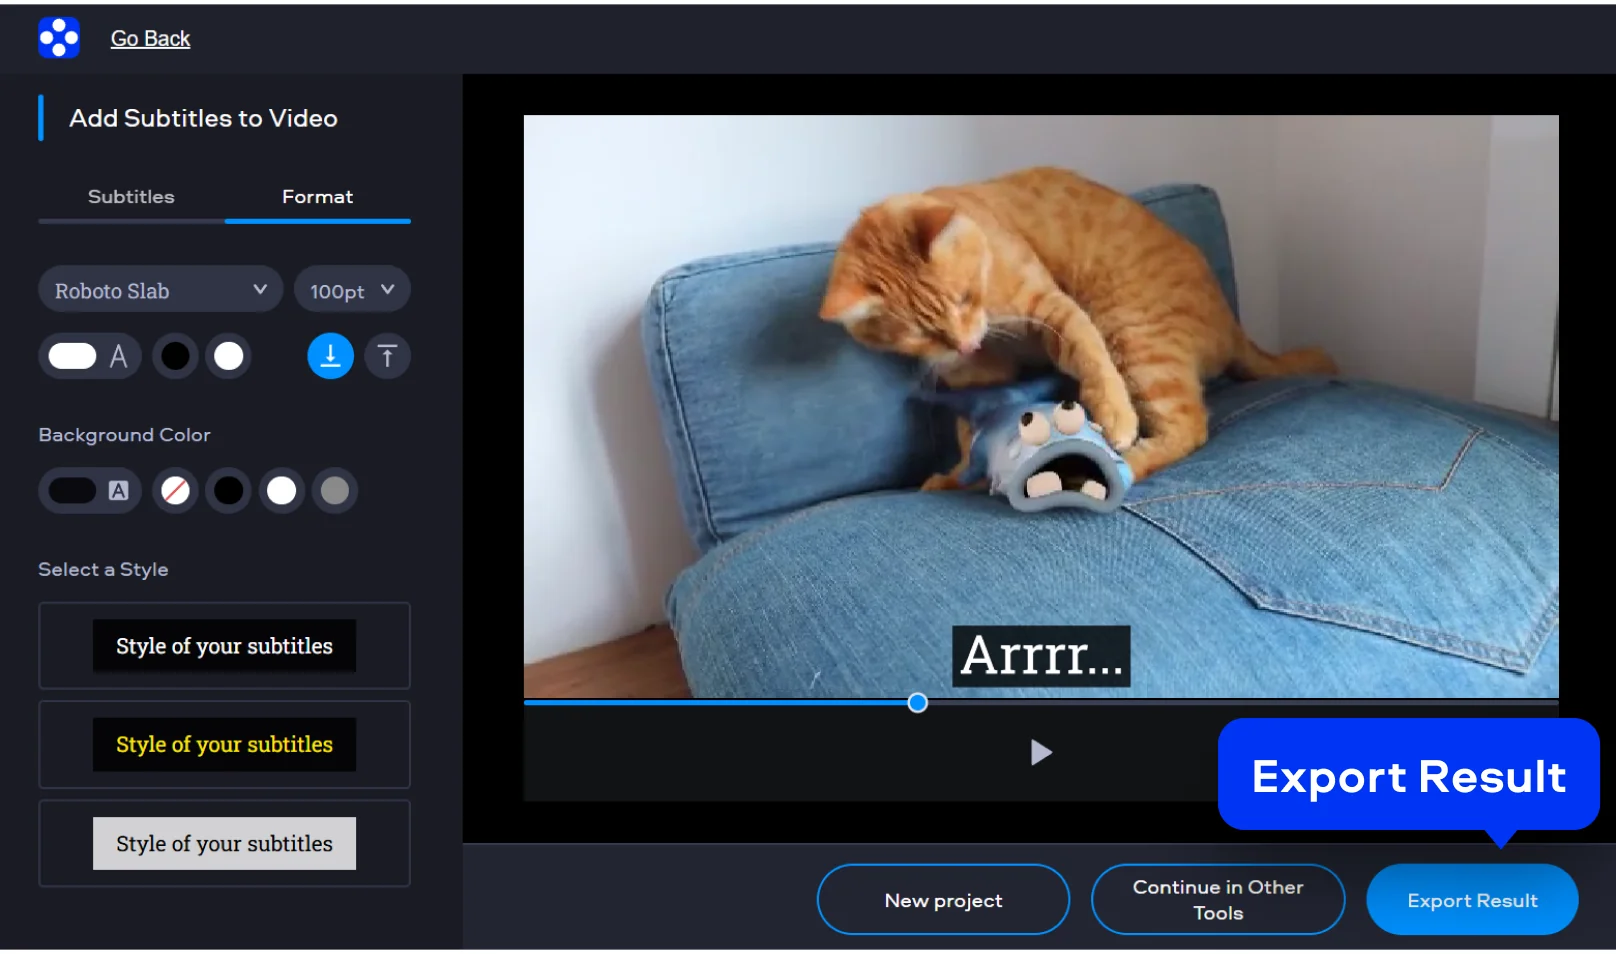
Click Export Result, then press Download, and save the video with subtitles applied on your PC or smartphone.
MP4, AVI, MOV, WMV, M4V
When I want full control over how subtitles look, I switch to Movavi Video Editor to add captions to a video. I drop my video onto the timeline, and from there, everything is visual and precise: if I need hardcore subtitles, I just burn subtitles into a video in a matter of minutes.
I can place text exactly where I want it and control timing down to the second. All popular media formats, like SRT, are supported. In addition, the editor can create subtitles automatically, so it’s a nice transcription software as well.
And then there’s the styling. I can adjust fonts, colors, size, positioning, even create something subtle or something that stands out, depending on the content. For social media, that flexibility matters more than people think. For more complex projects, using an AI video editor can speed up tasks like cutting, arranging, and enhancing your clips before you add captions. Sometimes I also overlay videos, adding reaction shots or extra angles that need their own carefully timed captions.
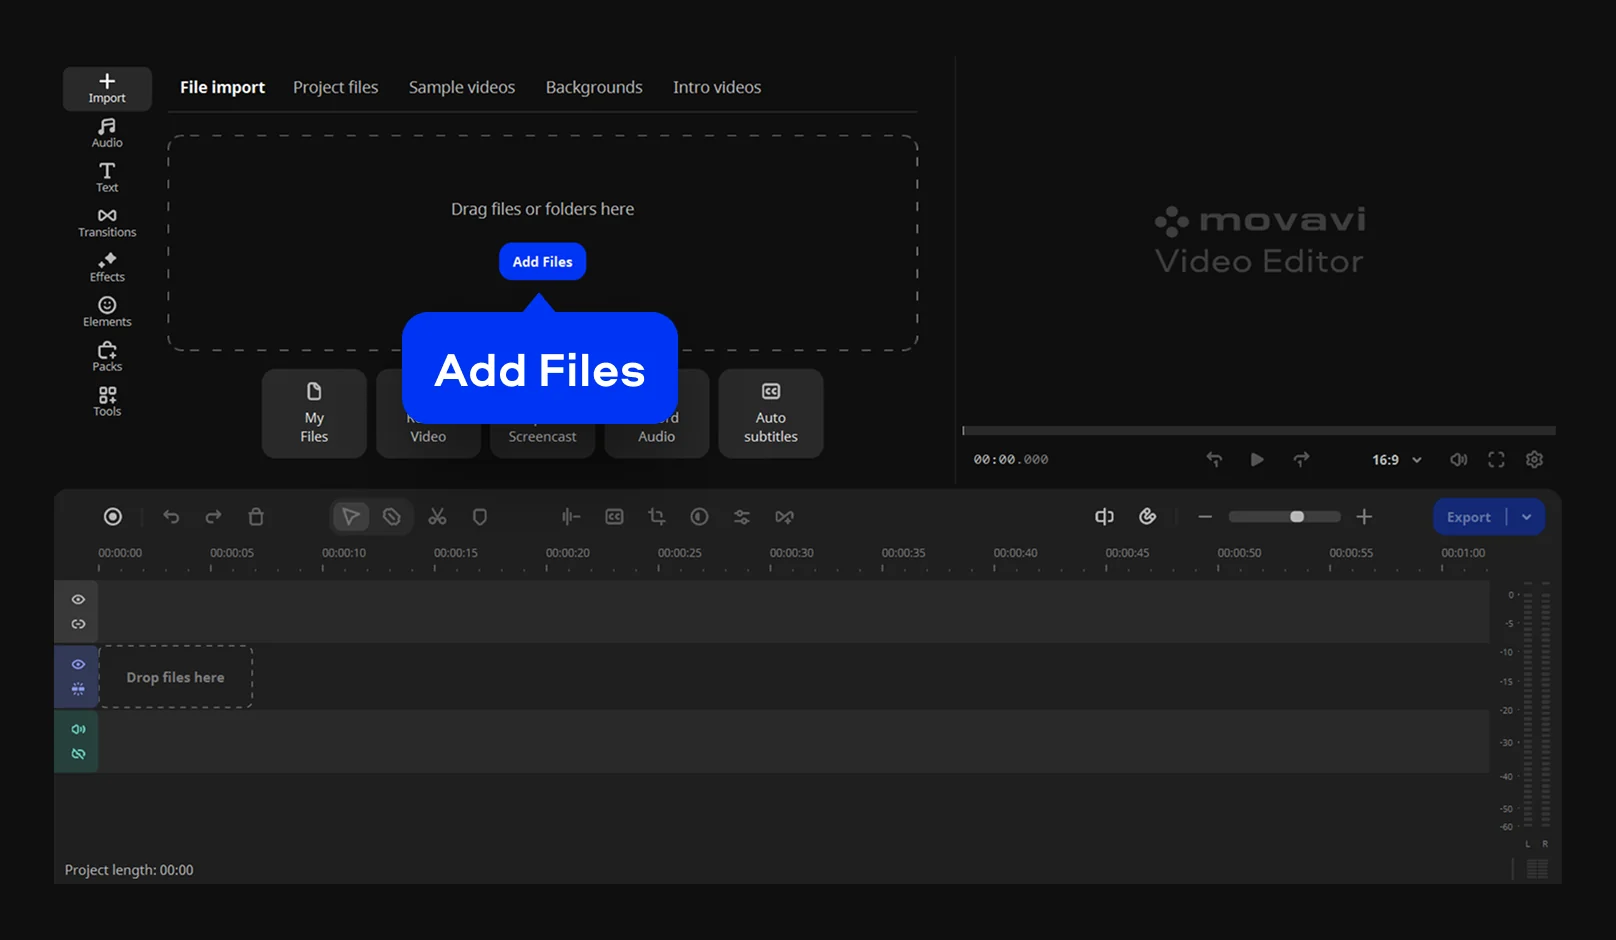
Click Add Files and upload the video you want to edit from your device. You can also drag and drop the file into the program window to start working right away. Popular formats like MP4, MKV, AVI, MOV, or WMV are supported, so no conversion is needed.
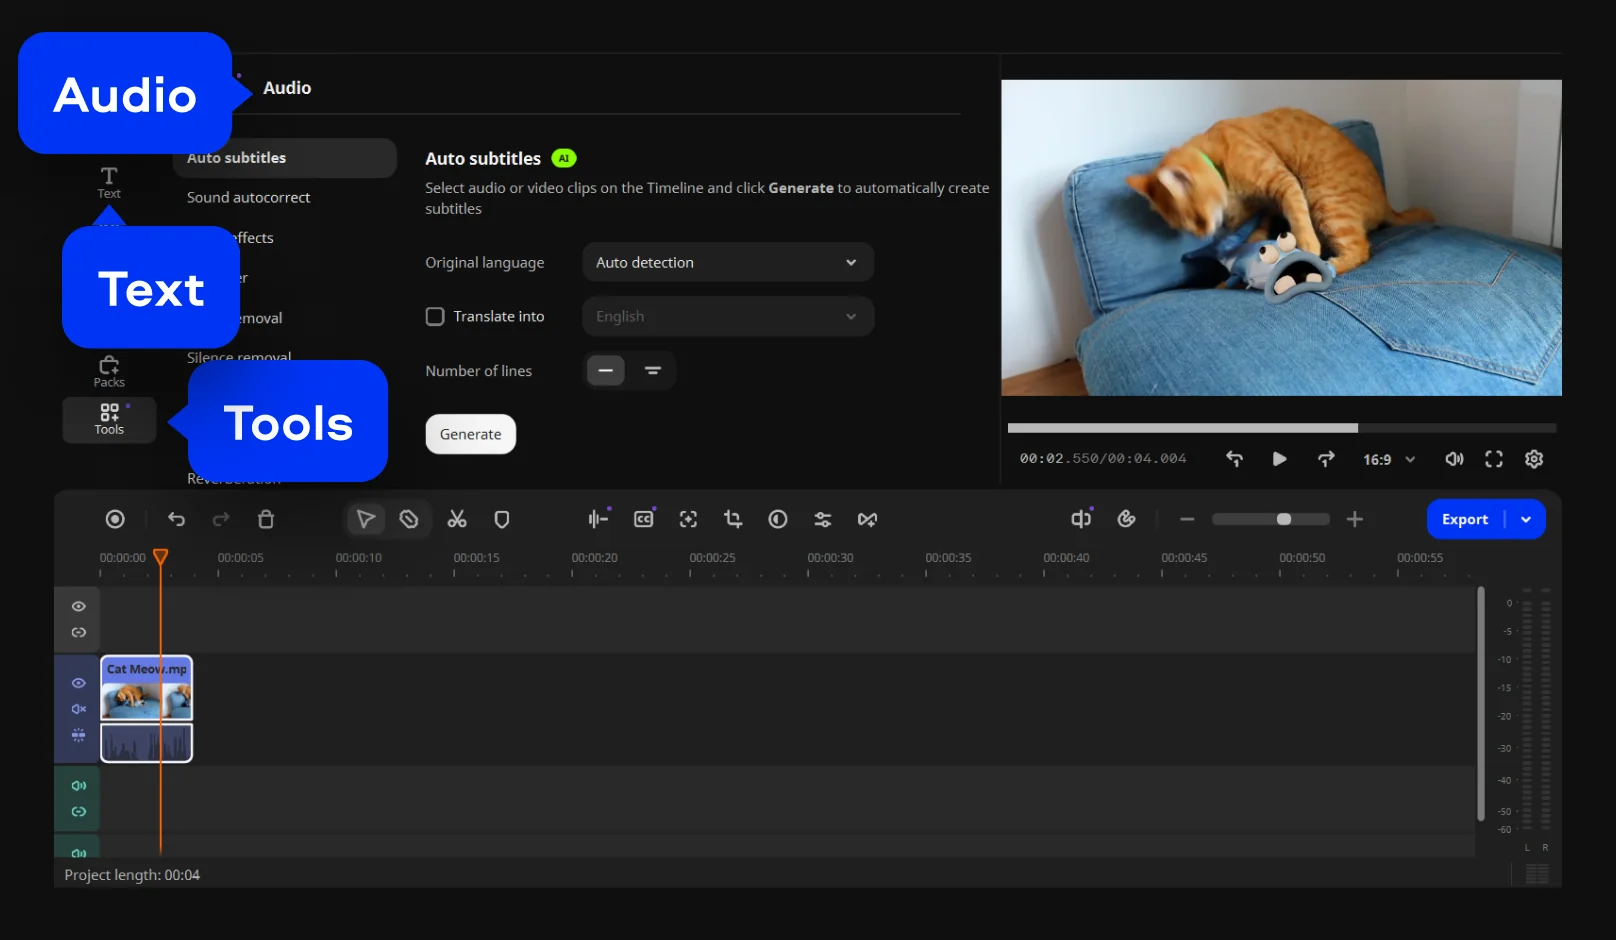
Click Tools, open the Audio tab, and click Auto subtitles to create subtitles automatically.
To create subtitles manually, open the Text tab. Choose the appropriate text preset, set precise timings, and type the text directly in the editor to match the video content accurately.
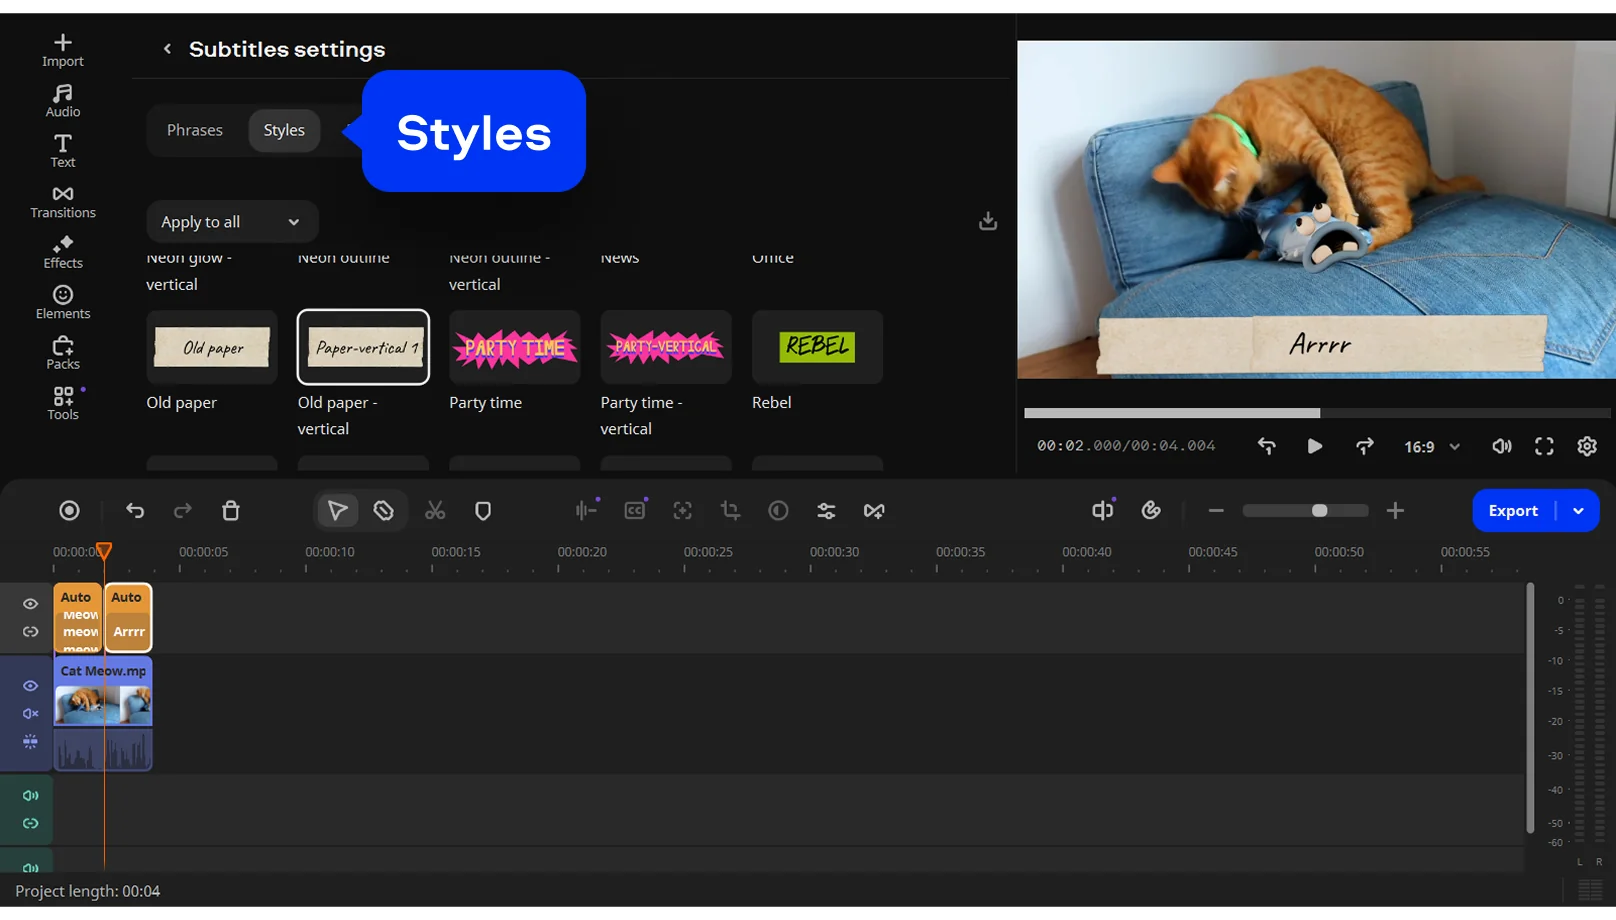
Adjust the font, size, color, style, and position of your subtitles. Preview changes to ensure the text stays readable and looks consistent throughout the video.
Click Export, choose the preferred output settings, and start the export. Your video will be saved with embedded subtitles, ready for sharing or publishing online.

3GPP, 3GPP2, ASF, AVI, DivX, FLV, SWF, M2TS, M2T, MTS, TS, MKV, MOV, MP4, MPG, MPEG, MPE, M1V, MOD, TOD, MWV, M4V, MXF, OGV, QuickTime, RM, RMVB, WebM, WTV
Online slideshow maker
Compress a video
Video speed changer
Video cutter
Loop a video
Reverse a video
How to create automatic subtitles – Movavi
Add Text to a Video Online for Free Without Extra Tools
How to Add Subtitles to MKV [Windows & Mac] – Movavi
Free Online YouTube Video Editor
MP4 Video Editor – Edit Videos Online for Free

We’re the #1 choice for millions of people from all around the world. Join our thriving community and create stunning content with incredible ease.
70M+


Automatic subtitles appear when a tool listens to the audio and writes out what it hears. It usually gets the idea right, but details slip. A word shows up too late. A sentence feels odd once it is on screen. With Movavi Video Editor, subtitles can be added manually or automatically using AI.
CapCut does let users add captions for free in popular formats, like VTT subtitles, and for simple videos that is often enough. Once templates or effects are involved, things can change. Some options are limited.
Subtitle AI listens to the audio. It follows the voice, the pauses, and the rhythm, then places text where it thinks it belongs. The first version is usually usable, but rarely final. Several editors offer this feature, including Movavi Video Editor for desktop, which can generate subtitles from the audio track. After that, the text can be tweaked and retimed so it feels more natural.
Free subtitle apps are easy to find. Most are built for quick jobs. Short clips, social posts, simple edits. Most online subtitle tools that run in a browser let users add subtitles to video for free, which is handy when installing another app is not something you want to do.
Yes – it works on both Android and iPhone, and it’s free to use.
Yes. All features are available for free – no payment required.
No. You can export videos without a watermark.


1.5M+ users already subscribed to our newsletter