ซอฟต์แวร์การตัดต่อทั้งหมด
สำรวจเครื่องมือวิดีโอและภาพถ่ายของเรา เรามีตัวเลือกที่เหมาะกับคุณที่สุด
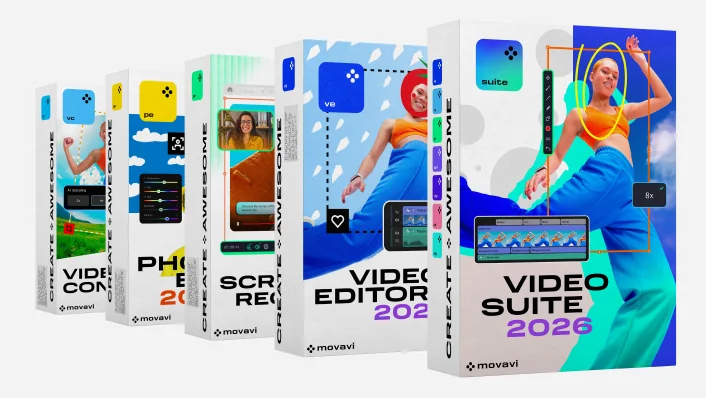
รับ Movavi Video Suite ใหม่ล่าสุด
ชุดสร้างวิดีโอที่สามารถทำทุกอย่างให้คุณ: โปรแกรมตัดต่อวิดีโอ โปรแกรมแปลงมีเดีย โปรแกรมบันทึกหน้าจอ และอื่น ๆ อีกมากมาย
รับ Movavi Video Suite ใหม่ล่าสุด
ชุดสร้างวิดีโอที่สามารถทำทุกอย่างให้คุณ: โปรแกรมตัดต่อวิดีโอ โปรแกรมแปลงมีเดีย โปรแกรมบันทึกหน้าจอ และอื่น ๆ อีกมากมาย
ลองใช้โปรแกรม Movavi ทั้งหมด
โปรแกรมตัดต่อที่เรียบง่ายแต่ทรงพลังสำหรับการสร้างวิดีโอสุดว้าว
โปรแกรมแก้ไขภาพที่ชาญฉลาดและเรียบง่ายสำหรับการสร้างภาพสุดว้าว
โปรแกรมแปลงไฟล์ที่ใช้งานง่ายสำหรับการเปลี่ยนรูปแบบวิดีโอ รูปภาพ และเสียงในไม่กี่วินาที
เครื่องมือจับภาพหน้าจอที่ไม่ยุ่งยากเพื่อช่วยให้โครงการมีประสิทธิภาพมากขึ้น
โปรแกรมทั้งหมดและ 10,000 เอฟเฟกต์ของ Movavi ในแพ็กเดียว เพื่อการสร้างวิดีโอและรูปสุดว้าว
ซอฟต์แวร์การตัดต่อทั้งหมด
สำรวจเครื่องมือวิดีโอและภาพถ่ายของเรา เรามีตัวเลือกที่เหมาะกับคุณที่สุด
ตัด
ครอบตัด
ตัดหัวท้าย
หมุน
ปรับขนาด
ย้อนกลับ
การทำให้มีความเสถียร
ปรับสี
ไตเติ้ลโอเวอร์เลย์
เพิ่มฟิลเตอร์และการเปลี่ยนผ่าน
ใช้ LUT และโอเวอร์เลย์
แทรกอินโทรสําเร็จรูป
ใช้โครมาคีย์
ปรับปรุงคุณภาพเสียง
สร้างวิดีโอท่องเที่ยว
บันทึกความทรงจําของครอบครัว
ยกระดับวล็อกของคุณ
สร้างความประทับใจให้กับผู้ชมของคุณ
รับยอดถูกใจมากมาย
ได้ผู้ติดตามมากขึ้น
สร้างวิดีโอที่พวกเขาจะหลงรัก
70 ล้าน+


กว่า 10,000 เอฟเฟกต์และ 1,500 แทร็กดนตรี
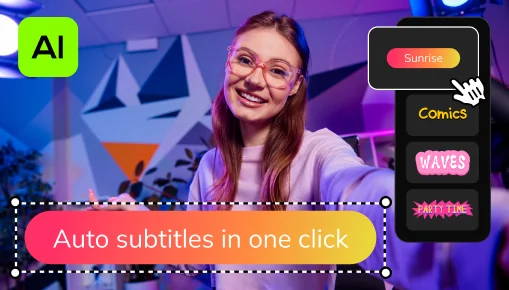
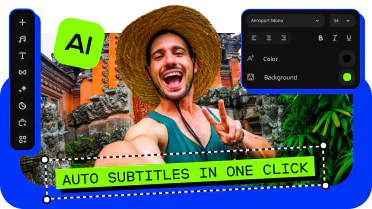
คำบรรยายลอัตโนมัติแบบคลิกเดียว
ให้ AI แปลงคำพูดของคุณเป็นข้อความอย่างรวดเร็ว และสร้างคำบรรยายอัตโนมัติให้กับวิดีโอของคุณได้แทบทุกภาษา เพียงเลือกแบบอักษร สีข้อความ ตำแหน่ง แล้วก็พร้อมใช้งานทันที!
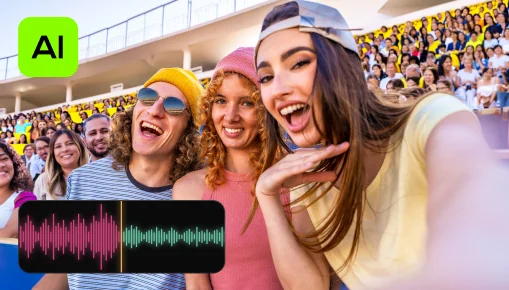
การลบนอยซ์ด้วย AI
ลบเสียงรถ ลม และเสียงรบกวนอื่นๆ ที่ไม่ต้องการออกจากคลิปของคุณโดยอัตโนมัติด้วย ตัวลดเสียงรบกวนที่ใช้ปัญญาประดิษฐ์ สร้างวิดีโอที่มีเสียงคมชัด ซึ่งผู้ชมจะต้องชื่นชอบอย่างแน่นอน

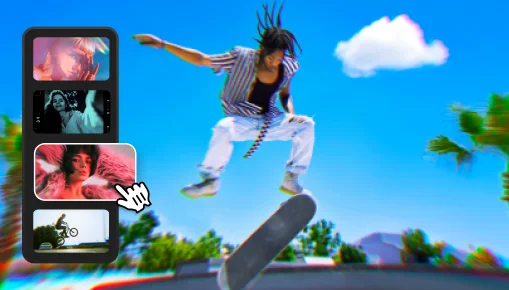
การติดตามการเคลื่อนไหวด้วย AI
เพิ่มความสมจริงในวิดีโอของคุณด้วยกราฟิกเคลื่อนไหวเพิ่มเติม เพียงคลิก แล้ว AI จะแนบรูปภาพ วิดีโอ อีโมจิ หรือมีมเข้ากับวัตถุในวิดีโอของคุณอย่างรวดเร็ว

การลบเสียงรบกวน
ตัดช่วงหยุดที่ไม่ต้องการออกโดยอัตโนมัติ หรือปรับแต่งความยาวของช่วงหยุดและระดับเสียงที่ต้องการด้วยตัวเอง คุณจะประหยัดเวลาและข้ามขั้นตอนการลบที่น่าเบื่อได้ เพื่อให้คุณโฟกัสกับความสนุกได้เต็มที่
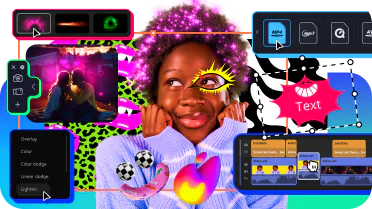
เอฟเฟกต์ปรับแต่งได้
เพิ่มความโดดเด่นให้วิดีโอของคุณได้ในคลิกเดียวด้วยเอฟเฟกต์สมจริงใหม่ ๆ ตั้งแต่ฝุ่นละออง แสงสลัว ไปจนถึงสไตล์เรโทรและ VHS เอฟเฟกต์ทุกแบบสามารถปรับแต่งได้อย่างเต็มที่ จึงเข้ากับคลิปใด ๆ ได้อย่างลงตัวและเพิ่มเสน่ห์ให้การตัดต่อของคุณ
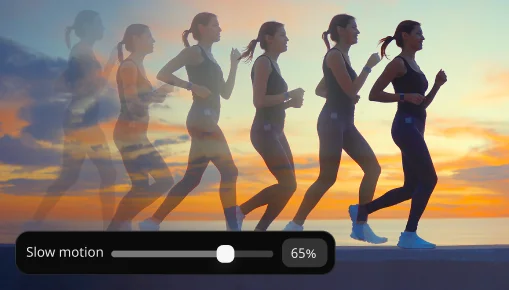
สโลโมชัน
ชะลอความเร็วฟุตเทจของคุณเพื่อให้การเคลื่อนไหวชัดเจนยิ่งขึ้น โฟกัสไปที่รายละเอียดสำคัญ และควบคุมความเร็วและจังหวะในทุกฉาก
มีโปรแกรมตัดต่อวิดีโอฟรีมากมายบนอินเทอร์เน็ต อย่างไรก็ตาม ซอฟต์แวร์ของบุคคลที่สามที่ให้บริการฟรี อาจมีโค้ดที่เป็นอันตรายซึ่งอาจขโมยข้อมูลส่วนบุคคล และข้อมูลทางการเงินของคุณได้
นั่นคือเหตุผลที่เราสร้าง Movavi Video Editor ขึ้นมา – ปลอดภัย 100% และใช้งานง่าย! คุณสามารถลองใช้เวอร์ชันฟรีได้ โดยมีข้อจำกัดดังต่อไปนี้: มีลายน้ำ Movavi วิดีโอ 60 วินาทีหรือเสียงมีความยาวครึ่งเดียว และล็อกคุณลักษณะขั้นสูงบางอย่างเมื่อส่งออกไฟล์ หากคุณถูกใจซอฟต์แวร์นี้ คุณสามารถซื้อใบอนุญาตตลอดชีพ หรือสมัครสมาชิกรายปีสำหรับเวอร์ชันเต็ม แล้วตัดต่อวิดีโอได้โดยไม่มีข้อจำกัด และพร้อมด้วยคุณลักษณะทั้งหมดที่มีอยู่
เราทุ่มเทเพื่อทําให้ซอฟต์แวร์ของเราง่าย และใช้งานง่ายที่สุด บางครั้งเรายังทดสอบกับปู่ย่าตายายของเราด้วยซ้ำไป! ดังนั้น เราจึงสามารถพูดได้อย่างแน่นอนว่า Movavi Video Editor เป็นหนึ่งในโปรแกรมตัดต่อวิดีโอที่ดีที่สุดสําหรับผู้เริ่มต้น
แม้ว่าคุณจะไม่เคยพยายามตัดต่อวิดีโอมาก่อน แต่คุณจะใช้โปรแกรมตัดต่อของ Movavi อย่างเชี่ยวชาญได้ ภายในเวลาไม่ถึง 20 นาที ด้วยอินเตอร์เฟสที่ทําตามง่าย คําแนะนําเครื่องมือที่มีประโยชน์ และทีมสนับสนุนของเรา ที่พร้อมเสมอที่จะช่วยเหลือคุณ และอํานวยความสะดวกในการสร้างสรรค์ของคุณ
หากคุณต้องการโปรแกรมตัดต่อวิดีโอ ที่มีตัวเลือกดาวน์โหลดฟรี Movavi Video Editor เป็นตัวเลือกที่ดีเลิศ เพราะเป็นโปรแกรมตัดต่อวิดีโอฟรี ให้ลองดาวน์โหลดและทดลองใช้ แม้ว่าคุณจะต้องซื้อเวอร์ชันเต็มหลังจากผ่านไป 7 วัน แอปนี้มีพรีเซ็ตอินโทรที่ยอดเยี่ยม เอฟเฟกต์และการเปลี่ยนผ่านที่สะดุดตามากมาย และอินเตอร์เฟสที่ใช้งานง่าย ที่ให้คุณมุ่งเน้นไปที่การสร้าง แทนการอ่านคู่มือที่มีความซับซ้อน
ลองเลย หากคุณต้องการดาวน์โหลด และใช้งานโปรแกรมตัดต่อวิดีโอง่ายๆ ทันที
ดาวน์โหลด Movavi Video Editor
ดาวน์โหลด Movavi Video Editor สําหรับ Mac
หากคุณกําลังทํางานกับซอฟต์แวร์ตัดต่อวิดีโอระดับมืออาชีพ แม้กระทั่งการเพิ่มการเปลี่ยนผ่านวิดีโอที่ง่ายที่สุด ก็อาจใช้เวลาหลายชั่วโมง ในการลองผิดลองถูกและค้นหาคําแนะนําเพิ่มเติม ซึ่งไม่ใช่ประสบการณ์ที่น่ารื่นรมย์อย่างแน่นอน
ด้วย Movavi Video Editor การเพิ่มการเปลี่ยนผ่านจะใช้เวลาประมาณ 3 วินาที คุณเพียงแค่ลากและวางการเปลี่ยนผ่านที่คุณต้องการระหว่างคลิป ใช่แล้ว ทำได้ง่ายมากๆ หากต้องการเรียนรู้เพิ่มเติม เกี่ยวกับการเปลี่ยนผ่านประเภทต่างๆ ให้ไปที่ลิงก์ด้านล่าง:
(บทความเป็นภาษาอังกฤษ)
หากคุณได้อ่านคําตอบข้างต้น คุณอาจเดาได้ว่า ซอฟต์แวร์ใดที่เราจะแนะนําที่นี่ แต่นี่ไม่ได้ล้อเล่นนะ Movavi Video Editor เป็นทางเลือกที่ยอดเยี่ยมสําหรับ iMovie ในแง่ของฟังก์ชันการทํางานและใช้งานง่าย เพียงแค่ลอง แล้วคุณจะเห็นสิ่งที่เรากําลังพูดถึง
หากต้องการเรียนรู้เพิ่มเติม เกี่ยวกับสิ่งที่เทียบเท่า iMovie สําหรับ Windows กรุณาอ่านบทความด้านล่าง:
ทางเลือก iMovie สําหรับ Windows (บทความเป็นภาษาอังกฤษ)
พบกับ Movavi Video Editor 2026 รุ่นใหม่ เร็วขึ้นและอัดแน่นด้วยเอฟเฟกต์
เร่งความเร็วการตัดต่อด้วยเครื่องมืออัตโนมัติ และลองใช้เอฟเฟกต์ใหม่ที่ปรับได้กว่า 40 แบบ ประหยัดเวลาและเติมความว้าวให้ทุกวิดีโอของคุณ ตัดช่วงหยุดที่ไม่ต้องการออกโดยอัตโนมัติ ใช้เอฟเฟกต์จากคลิปหนึ่งไปยังทุกคลิปได้ทันที และเพลิดเพลินกับสไตล์ซับไตเติลอัตโนมัติใหม่กว่า 30 แบบ
ทำให้การตัดต่อเป็นเรื่องง่ายด้วย Movavi Video Suite 2026
Movavi Video Suite รุ่นใหม่ อัดแน่นด้วยฟีเจอร์ที่จะทำให้การสร้างวิดีโอเป็นเรื่องง่าย! ข้ามงานที่น่าเบื่อด้วยเครื่องมืออัตโนมัติอันทรงพลัง รับมือกับทุกโปรเจกต์ได้อย่างง่ายดายด้วยเอฟเฟกต์นับร้อย การแปลงไฟล์ที่รวดเร็วทันใจ และโปรแกรมบันทึกหน้าจอที่ใช้งานอย่างสะดวกสบาย
อ่านเพิ่มเติม
รับแอปและเอฟเฟกต์ล่าสุดทั้งหมดในคราวเดียว ด้วย Movavi Unlimited 2026
ทำให้การตัดต่อวิดีโอและภาพถ่ายของคุณรวดเร็วยิ่งขึ้นด้วยเครื่องมืออัตโนมัติแบบใหม่และประสิทธิภาพที่ดีขึ้น สร้างวิดีโอที่ดึงดูดความสนใจ บันทึกหน้าจอที่ให้ข้อมูล แปลงไฟล์สื่อเป็นรูปแบบใดก็ได้ และสร้างความบันเทิงด้วยเอฟเฟกต์มากมาย
อ่านเพิ่มเติม
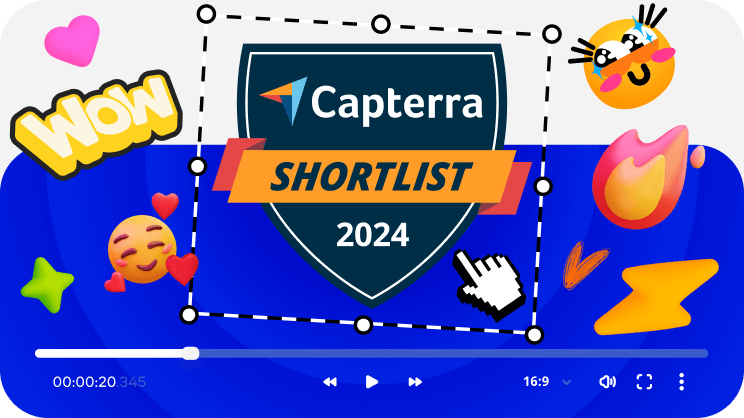
โปรแกรมตัดต่อวิดีโอของเรา เป็นหนึ่งในโปรแกรมที่ดีที่สุดอย่างเป็นทางการ ในปี 2024!
Movavi Video Editor อยู่ในรายชื่อผู้เข้าชิง Capterra ปี 2024! หากคุณยังไม่ได้ลองใช้ซอฟต์แวร์ตัดต่อวิดีโอของเรา ลองใช้ตอนนี้ แล้วดูว่า เหตุใดจึงเป็นหนึ่งในซอฟต์แวร์ที่ดีที่สุด
Microsoft® Windows® 10/11 รุ่น 64 บิต พร้อมแพตช์ปรับปรุงล่าสุด และการติดตั้งเซอร์วิสแพ็ก
Intel®, AMD®, หรือโพรเซสเซอร์แบบดูอัลคอร์ที่เทียบเท่า, ความเร็ว 1.5 กิกะเฮิรตซ์ขึ้นไป
Intel® HD Graphics 2000, NVIDIA® GeForce® ซีรีย์ 8 และ 8M, Quadro FX 4800, Quadro FX 5600, AMD Radeon™ R600, Mobility Radeon™ HD 4330, ซีรีย์ Mobility FirePro™, Radeon™ R5 M230 หรือการ์ดรุ่นที่ทำงานเร็วกว่านี้ พร้อมไดรเวอร์ปรับปรุงล่าสุด
ความละเอียด 1280 × 768, 32 บิตสี
4 กิกะไบต์
พื้นที่ว่าง 400 เมกะไบต์สำหรับการติดตั้ง / 600 เมกะไบต์สำหรับการทำงานตามปกติ
จำเป็นต้องมีสิทธิ์ของผู้ดูแลระบบสำหรับการติดตั้ง
เข้าร่วมกับเรา เพื่อรับส่วนลด เคล็ดลับการตัดต่อ และไอเดียเนื้อหา


ผู้ใช้มากกว่า 1.5 ล้านคนสมัครรับจดหมายข่าวของเรา