[7 Quick Fixes] Audacity Not Recording Sound

Try Movavi Screen Recorder!

  • Record your microphone and system audio
  • Schedule your recordings
  • Easily trim and share your files

Edited by Ben Jacklin
13 376

Audacity is a solid audio editor, but like any program, it has bugs from time to time. If Audacity is not recording sound for you, here are 7 quick fixes.

Method

Description

Update your Recording settings under Preferences and ensure Play other tracks while recording (overdub) and Detect Dropouts are enabled

Ideal sample rate settings are at 44.1 kHz, but you may need to adjust to get a solid recording

Special pick: Movavi Screen Recorder

If Audacity is not recording audio, then try an alternative! If you need to record sound and your screen, then Movavi Screen Recorder is a great option. It has an easy-to-use interface with a solid range of features. The software even has a noise reduction feature, so you don’t need to worry about intrusive sounds. And the recording scheduler is a huge plus!

Our goal is to provide you with only verified information. To ensure this, Movavi Content Team does the following:

  • When selecting products to include in our reviews, we research both demand and popularity.

  • The team tests all the products mentioned in this article.

  • When testing, we compare the key characteristics of the products, which include selecting capture area, schedule recording, showing keystrokes and mouse, and other significant features.

  • We study user reviews from popular review platforms and make use of this information when writing our product reviews.

  • We collect feedback from our users and analyze their opinions of Movavi software as well as products from other companies.

disclaimer_person

A few reasons Audacity won't record from your computer

There are several factors that can influence Audacity not recording computer sound, regardless of your OS – Windows 10, Windows 11, macOS, etc. So don’t get discouraged if one troubleshooting fix doesn’t work.

It could be something as simple as giving Audacity permission to access your microphone. The software prompts you to make a choice when you first install the program, and many users click No in haste to get moving on a project. 

Your microphone and sound settings can also block computer audio from coming through to the program. And Audacity sometimes displays an "Error opening recording device" message, which typically shows an improper input or enabled sound device. 

And here are a few more reasons Audacity won't record from your computer:

  • Audio host feature settings – MME
  • Incorrect sample rate selection  
  • Outdated software version
  • Plugins – bad ones or good ones with improper settings

What to do when Audacity is not recording computer sound or a microphone

1. Change the recording settings in Audacity

If Audacity is not recording desktop audio or your device, it’s best to check you didn’t overlook something simple. Sometimes one setting in Audacity is off that causes the program to block your computer or mic. 

  1. Click Edit and then PreferencesAudacity and then Preferences on a Mac – to access the menu.
  2. Once in the menu, click Recording on the left menu.
  3. Ensure that Play other tracks while recording (overdub) and Detect Dropouts are enabled.
  4. After you enable your settings, close and open Audacity and see if it will record your track.

2. Adjust the sample rate

If Audacity is not recording a microphone, try this fix. Based on your device, you may need to adjust your recording to a different sample rate to ensure recording. Higher sample rates will enhance your capture, but if you can’t record at all, it doesn’t do you any good.

To adjust, follow the same path as above, but you’ll go to the Audio Settings menu instead. Under Quality, you’ll see dropdown menus for Project Sample Rate, which adjust for the specific project, and Default Sample Rate, which keeps your settings for each new project. 

Most users agree that the ideal sample rate setting is 44.1 kHz. But you may need to play with the settings a little to match up with your recording device. Check the manual for your recording device, as the manufacturer often includes sample recommendations.

3. Check your audio host settings

If Audacity won’t record sound from your computer or device, you could have an issue with your host settings. The audio host acts as an interface between your device and Audacity and varies based on your OS.

Windows users have three options for audio hosting:

  • MME. This host has the most compatibility, so it’s the program default. 
  • Windows DirectSound. These host drivers are newer than MME and include an option to reduce latency by bypassing the kernel mixer.
  • Windows WASAPI. This is the most recent interface that is helpful for recording "loopback" devices like your computer.

Users sometimes cause problems by changing their host settings by accident, or a system error switches the host. To fix it, you may need to change host settings. To do that, you can either find the Audio Host dropdown menu on your toolbar – it’s the menu that contains the three settings listed above. Or you can click the Audio Setup box and then hover over Host

Note, this is a fix for Windows only. Mac users can only use Core Audio, and the majority Linux users will only use ALSA as their audio host.

4. Windows sound settings

This fix influences your entire system. So if you’re not picking up sound regardless of your program or device, this could be your solution. Follow these steps:

  1. Under your Control Panel, click System and then select Sound.
  2. Click the Recording tab and find the Microphone icon. Click it to activate. 
  3. You can also check the volume settings and test to be sure it’s loud enough for a solid recording.

5. Windows Privacy & Security settings

This setting affects any recording device you plug into your system. So if Audacity has no sound while recording, follow these steps to unlock things.

  1. Under the Start menu, click Settings and then Privacy & Security.
  2. Next click Microphone.
  3. Then, make sure the box for Allow Apps to Access Your Microphone is switched on. You can use the settings to block or allow individual applications as you need.

6. Software Playthrough fix

Having the Software Playthrough setting on can cause an input delay – the sound stalls when it travels from your device to your headphones and system. If Audacity is recording sound, but it doesn’t record correctly – echos and delays – try this fix. 

Click Transport, select Transport Options, and then click to remove the check mark for Software Playthrough.

7. Restart or reinstall Audacity

If Audacity is still not recording audio after trying these fixes, it’s time to resort to the classics. You could have some software issues from your initial installation or an update, so from here, it’s best to just reset everything. Try restarting the program first. And if it still won’t record, consider uninstalling and reinstalling the program. 

If you choose to reinstall, we highly recommend downloading the latest file directly from the Audacity homepage as opposed to a third-party site. Just make sure you have enough space for the file.

Audacity not working? Use an alternative!

If Audacity has no recording device detected or sound at this point, it may be time to try another program. With Movavi Screen Recorder, you can record both video and sound from your computer or any device with ease.

Feature

Audacity

Movavi Screen Recorder

OS

Windows, macOS, Linux

Windows & macOS

Audio-editing tools

Separate voice over audio channel

Screen recording

Best for: anyone looking to record professional-grade video and audio from their computer

Movavi Screen Recorder

OS: Windows, macOS

G2 rating: 4.5 out of 5, 50 reviews

Movavi Screen Recorder is a comprehensive, user-friendly tool for recording video and audio from your computer screen or an external device. Users can capture any part or the entirety of a screen, record system audio or microphone input, and incorporate webcam footage.

It also provides basic editing capabilities, options for scheduled recording, and the flexibility to export videos in various formats or directly share them on social media platforms.

Key features:

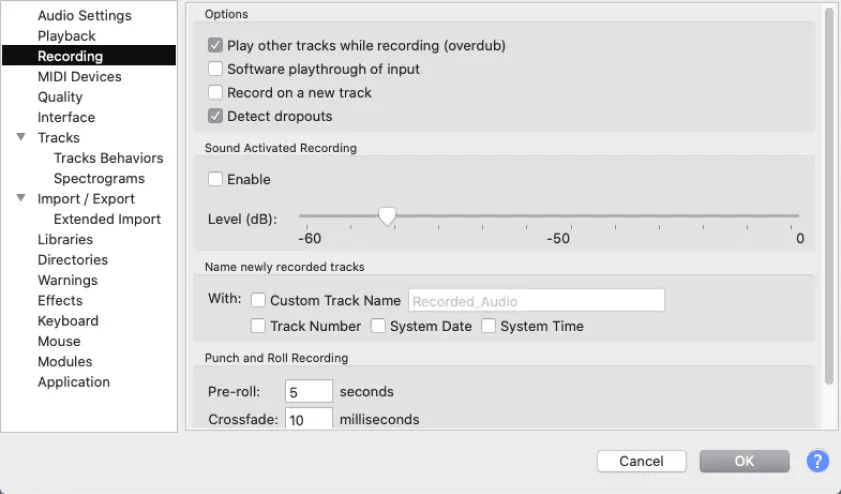
  • Record all sound in high quality – music, speech, audio effects – to enhance video tutorials and presentations
  • Overlay the webcam preview and change its size and shape
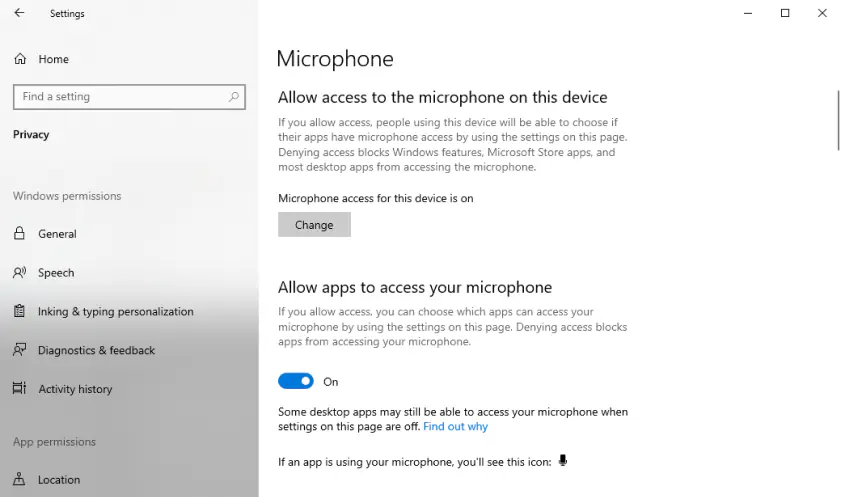
  • Get crisp, clear sound in your videos: reduce background noise from traffic, wind, or stray chatter your microphone picks up
  • Draw on your videos while recording live
  • Schedule recording of any meetings, webinars, or live events – even when you’re away
  • Share links to your videos or upload them directly to the cloud and social media

Summary

If Audacity is not recording sound from your computer, don’t worry! The fixes above should get you going in no time. And if it still won’t record, Movavi Screen Recorder is a top-tier Audacity alternative that will get your project back on track.

Movavi Screen Recorder

The perfect way to record anything from your screen

Disclaimer: Please be aware that Movavi Screen Recorder does not allow capture of copy-protected video and audio streams.

Frequently asked questions

Why is Audacity not recording anything?

Here’s a list of common issues of Audacity not recording anything:

  • Audio permissions
  • Sound and mic settings
  • Host settings
  • Old software version
  • Plugin is blocking sound
  • Bad sample rate

Why does Audacity stop recording?

The most common reason Audacity stops recording is because the Sound Activated Recording setting is on. This causes the program to stop recording once the level drops below the Sound Activation level setting. Turn it off and try again.

How do I fix a delayed recording in Audacity?

If Audacity is not working correctly, try these steps to run a latency test:

  1. Click Edit > Preferences. And under the Recording tab, check Play other tracks while recording (overdub) and uncheck Software playthrough of input
  2. Under the Audio Settings tab, set the Latency compensation to zero and check that the Buffer length value is at the default setting.
  3. Ensure that your Snapping Toolbar is off.
  4. To run the test, turn off any other applications. 
  5. Click Generate and then Rhythm Track.
  6. Set the Number of Measures to 2 and set the Beat Sound to Ping. Click OK and select the entire track.
  7. Press Shift and click Record new track in the Transport Toolbar.
  8. Zoom in to compare the top track and the delayed version below.
  9. With the Selection Tool, drag a selection starting at the start of the click in the top track and ending at the start of the delayed click in the second track.
  10. Click Edit, choose Preferences, and then open the Audio tab, and enter the negative of the latency number in the Latency Compensation box.

Have questions?

Have questions?

If you can’t find the answer to your question, please feel free to contact our Support Team.

Join for how-to guides, speсial offers, and app tips!