
Movavi Screen Recorder
The perfect way to record anything from your screen

Try Movavi Screen Recorder!
Record a video of yourself and your screen
Capture your screen with audio
Easily edit and share recorded videos
For Mac users, whether you want to create a tutorial, document a bug you’re experiencing, or record a video message for someone, it’s easy to do once you find the tools. In this guide, we’ll detail several ways on how to record yourself on a Mac.
Editor’s choice: Movavi Screen Recorder
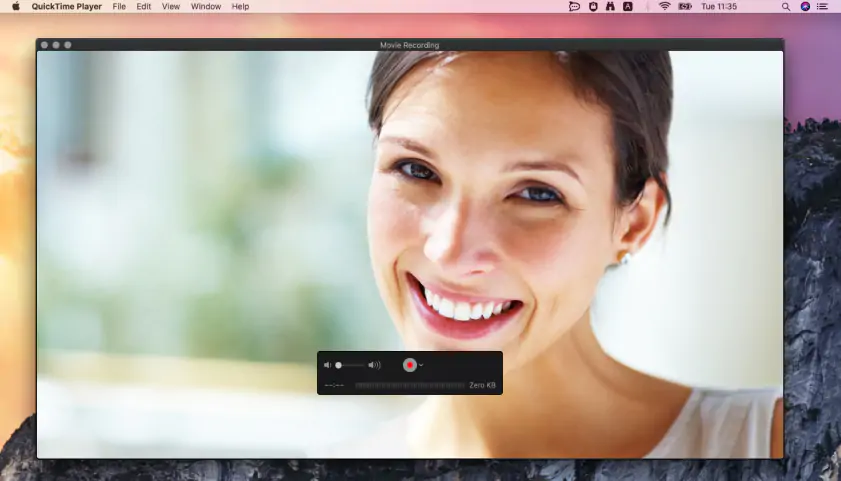
For simple recording: QuickTime Player
For recording with visual effects: Photo Booth

Our goal is to provide you with only verified information. To ensure this, Movavi Content Team does the following:
When selecting products to include in our reviews, we research both demand and popularity.
The team tests all the products mentioned in this article.
When testing, we compare the key characteristics of the products, which include selecting capture area, schedule recording, showing keystrokes and mouse, and other significant features.
We study user reviews from popular review platforms and make use of this information when writing our product reviews.
We collect feedback from our users and analyze their opinions of Movavi software as well as products from other companies.
Best for: simple camera video recording on a Mac and screen recording
The quickest method to answer “How to record a video of yourself on Mac?” is with QuickTime Player, the standard multimedia player for Apple devices, including MacBook Air and MacBook Pro. Before anything else, make sure your webcam or camera is already set up.
Read the instructions below on how to record a video on a MacBook of yourself using QuickTime Player:
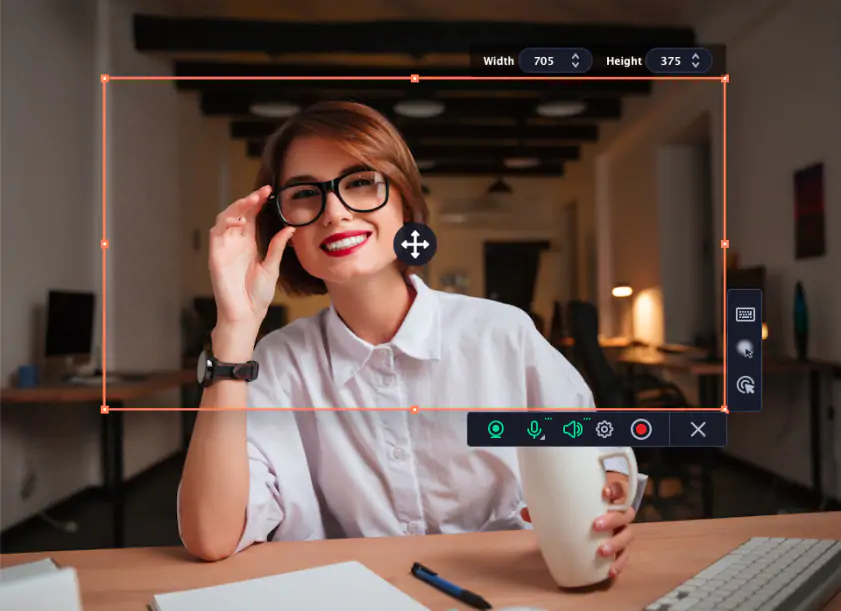
Best for: simultaneous camera and screen recording
Key features:
Perhaps you want to record a demonstration or a lecture. In this case, you need to record both a video of yourself and your screen. This can be done through our Movavi Screen Recorder. It is a simple and easy-to-use screen-recording software that can record footage of you and your screen.
Here’s how to record a video on a Mac of yourself and your screen with Movavi Screen Recorder:
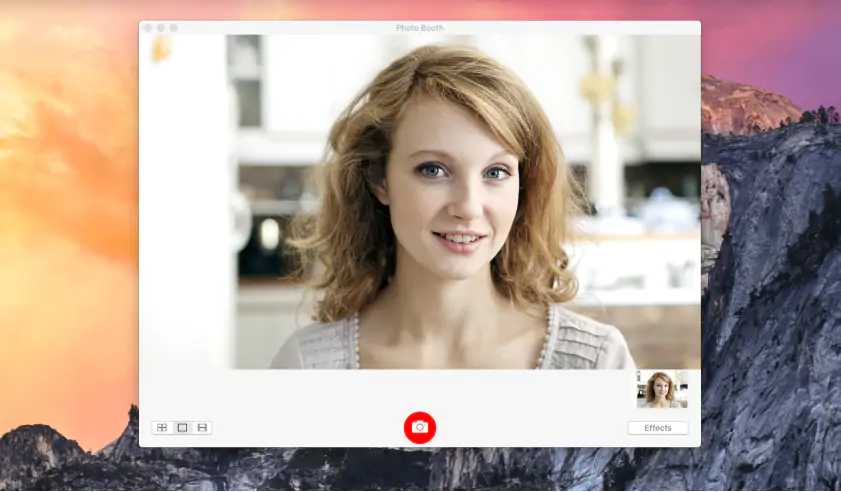
Best for: webcam recording with stylized effects
If you want your recorded video to have effects or filters, then the best way is to use Photo Booth. This is a software specifically developed for a Mac’s built-in camera. With it, you can take pictures and videos and stylize them with a range of special effects. Here’s how to take a video on Mac of yourself with Photo Booth:

Best for: recording and editing camera footage
If you want to make some edits to your video right after recording, you can use iMovie. It is primarily a video-editing program for Mac, but it can also be used to record videos. You can cut the video, make transitions, alter it with special effects and add music.
Read on to discover how to record on a MacBook a video of yourself with iMovie:
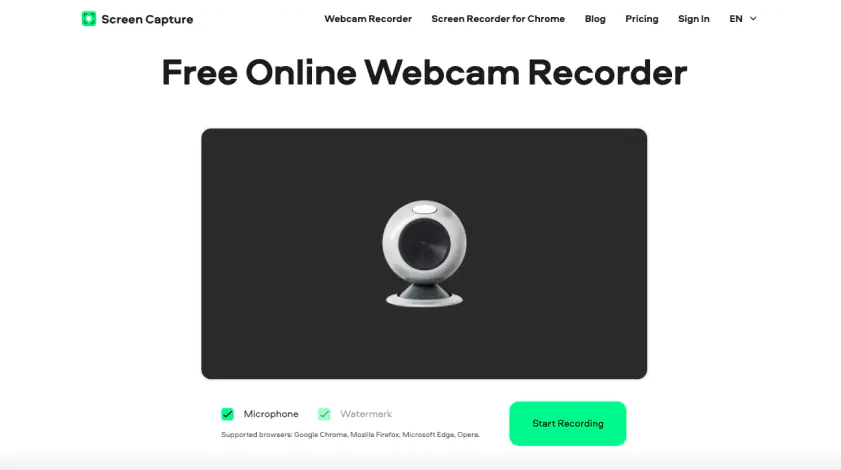
Best for: online camera and screen recording
If you don’t want to use any software or do not have space on your Mac to download, you can still film a video of yourself on a Mac through online means with Screen Capture. It is a free online screen recorder by Movavi that allows you to record both screen footage and webcam footage.
Wondering “How do I take a video of myself on my Mac online?” Just follow the steps below:
Go to the Screen Capture website.
Make sure to check the Microphone option.
To begin, press Start Recording. To end, click Stop Recording.
If you’re happy with your video, choose Download. If not, you can record again by clicking New Record.
If you don’t know how to make a MacBook webcam recording, here are some advice you can use to achieve a better result:
Find a good spot.
Set your camera at the eye level.
Frame yourself well.
Put the light source in front of your face.
Finding a good spot
The location you’re recording in makes a huge difference in how you’ll sound and look on video. Minimal background noise and absence of echoes will make sure your voice sounds clear. Finally, find a spot with no distracting background: do a couple of test shots to find the best one.
Setting your camera
When recording a webcam, it’s crucial to set the camera at the eye level. This way, viewers will have a natural feeling while watching the video, as if you’re talking to them in person.
Framing
Good framing is essential to properly present yourself to the audience. Make sure you are in the center of the frame. Generally, it’s good to have the top of your head and mid-chest visible while leaving some space above the head, so that the frame doesn’t feel cluttered.
Lighting
There are a couple of simple rules for lighting that work in almost any situation. First, if recording indoors, find a room with plenty of natural light. When recording outdoors, try to avoid direct sunlight. Secondly, if you’re using additional light sources, put them in front of you, so that your face is evenly lit.
Hopefully, this article answers, “How do I record myself on a Mac?” It’s easy to record yourself on a Mac since it has several built-in tools available. It is also compatible with recording software like Movavi, which can record both yourself and your screen at the same time. Depending on what you need to record, each tool has its features that you can benefit from.
You can do so with Movavi Screen Recorder.
First, download and install the software.
Open it up and click the video camera icon on the panel.
Drag the orange frame around the area of the screen you want to capture.
Turn on Webcam and Microphone.
Lastly, hit the REC button.
Before recording yourself, make an outline of what you want to record. Take as much time as well to practice so that you will lessen mistakes while recording.
It’s important to do a camera test and a microphone test before making a full recording, because you don’t want to put in all that effort only for your camera or microphone quality to ruin it. Lastly, choose a recording software that’s accessible and easy to use.
If you want to know more, check this article.


1.5M+ users already subscribed to our newsletter