Movavi Video Editor
Create awesome videos easily

Movavi Video Editor
Trim, cut, crop, and rotate videos
Add titles, stickers, and transitions
Apply visual effects
By clicking the download button, you're downloading a trial version of the program.*
What Is a Storyboard? Make Your First Storyboard in 7 Steps

Essentially, a storyboard is a visual way to organize and plan out each of the shots for a video. As a result, many storyboards look a lot like comic books, but their main purpose isn’t to highlight the artist’s skills – it’s to help directors and creators ensure that they have everything they need to get started shooting their videos.
A storyboard comprises numerous thumbnail images which outline the flow of your video. Each picture has some explanatory notes to help a reader make sense of the storyboard. You can use storyboarding software to create one or hand-draw your board.
While scripts are text-based, storyboards are visual representations of your video. Although it takes time to create one, the benefits are numerous.
They simplify the planning of your video.
You can find a clear vision of the video.
You'll have a more relaxed time editing the end product.
You reduce the chances of making mistakes.
You can share your ideas with clients or colleagues with ease.
Why do you need a storyboard?
If you’re new to creating videos and films, you might wonder why you need to know how to make a storyboard. If you have a script and a camera, why can’t you just jump into shooting the footage you need for your video? Almost all experienced video makers use storyboards. Let’s walk through just a few of the top reasons you should always create a storyboard before you start making a video.
Storyboards help you convey your vision
Whether you’re proposing your idea for a video to a group of investors or you just need to show your creative team what you want to do with your opening shot, a storyboard is a huge help! You may be working alone on your first videos, but – if you continue to create and edit videos – you’re likely going to be collaborating with others at some point. If you have a clear visual representation of your vision for your video, you can save a lot of time and frustration. Imagine how much easier it is to show someone a storyboard than to try to explain exactly what you want to see and hear for each shot and scene.
Plus, if you continue making videos, you may get to the point that you need to approach investors or pitch a video idea to a production company. Professional producers and investors want to know that they’re working with someone who knows what they’re doing. You can’t present your idea for your big project without a solid storyboard.
Save time with a detailed storyboard
A lot of new creators think that storyboarding is a waste of time, but almost all of them learn that storyboarding actually saves time. Yes, it’s an additional step that you have to take before you start shooting, but consider this. You may have a script or screenplay, and you may have an idea of what you want each shot to look like, but have you seen how the shots fit together and how your video will transition from one scene to the next?
Storyboarding gives you a framework for your video. With a complete storyboard, you can easily make a full shot list and check off each scene as you finish filming. This will ensure that you don’t have to go back and shoot anything again. Likewise, since your storyboard will show you how your video will flow from one shot to the next, it will also give you a chance to see places where transitions may not work as well as you imagined. This will allow you to make changes to the script and storyboard to ensure a better video. And you won’t waste time on shots that you would just have to edit out later.
Storyboards make post-production easier
If you’ve completed even a single video project, you know that the work isn’t done when you finish filming. In fact, editing your video and adding effects can be even more work than actually shooting your video. With a storyboard, you can easily put each video clip in order and follow the instructions you laid out in the pre-production process to create a polished, professional-level video.
If you’re working with a team, this is even more relevant. Let’s say, for example, that you wrote the script and shot the video, but you won’t be doing the actual editing. Consider how much time your team could waste re-editing scenes that don’t quite match your vision. Your editor doesn’t want you hanging around, looking over their shoulder while they work. And you don’t want to waste that time. Instead, give them the tools they need to succeed the first time. A storyboard is one of those tools. In fact, some editors will tell you that a good storyboard is just as important as good video editing software.
As you create your storyboard, you need to be clear on the details that you will use. You want to include just the right amount of information to effectively communicate your message without wasting much of your time and energy.
The ideal storyboard has enough images to tell the story from start to finish in a sensible manner. Provide a well-characterized thumbnail for every significant scene in the video. Define the characters, settings, and props on each image to give an easy time to your audience.
Factor in the transitions and position of the camera as you draw the pictures. Write additional notes when you feel the need to clarify essential details. The idea is to maintain the flow of your storyline.
Types of storyboards
Before we dive too deeply into the topic of how to make a storyboard, let’s explore the three main types of storyboards that you might use for your next video project.
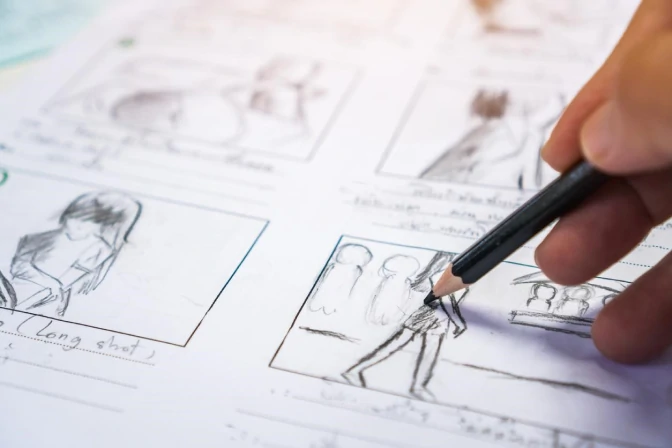
1. Traditional storyboards
Traditional storyboards look a lot like comic books. They’re drawn with pencil or pen on paper, illustrating each of the scenes or shots in a video or movie. Some traditional video storyboards are very detailed and look like works of art, while others are made up of simple sketches with stick figures and labels for different components of each scene. Also, many traditional storyboards don’t include frames for every single shot. Instead, they give you an idea of the flow of the video or movie. This approach is typically better for simpler videos and/or videos where you don’t need to communicate a lot of information about your shots to your production and post-production teams.
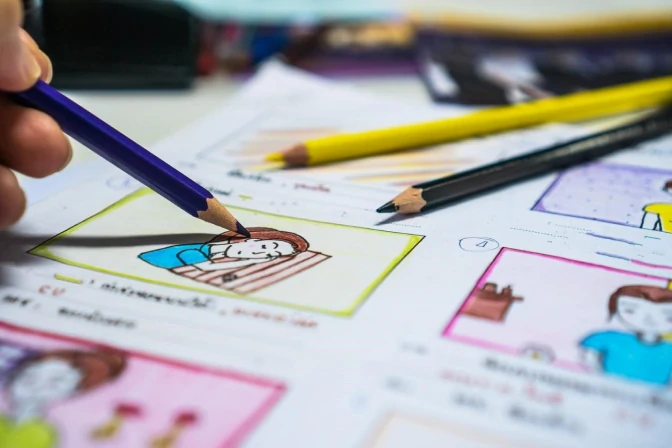
2. Thumbnail storyboards
Thumbnail storyboards may appear similar to traditional storyboards, as they may be done with pen and paper. However, thumbnail storyboards are always highly detailed and include every aspect of each shot in each drawing. This level of detail, with a thumbnail or drawing for each individual shot, makes shooting a video extremely easy. All you have to do is follow the storyboard, and you’ll have all the footage you need. Plus, when it’s time to edit your video, you’ll have a step-by-step guide for every scene. Whether you’re the one doing the editing or you assign that to one of your collaborators, a detailed storyboard will help you make a better video.
3. Digital storyboards
Digital storyboards are great for video creators who want to know how to make a storyboard for a video if you aren’t great at drawing. Using specially designed storyboard software, digital storyboards can be as detailed or as minimal as you like. They allow you to set up each shot on your computer and add labels, script copy, and action notes for each frame. Basically, with a digital storyboard, you can create a thumbnail storyboard with a lot less work than drawing out each frame.
However, if you go this route, it’s important to note that not all digital storyboard programs have the same capabilities. Some require you to draw your storyboards in a digital format. Some will animate your storyboards for you. Others have different pre-drawn elements to choose from as you put your storyboards together. All of them make it easier to create and share your video’s storyboard than trying to draw an old-fashioned pen-and-paper storyboard.
How to make a storyboard
Making a storyboard does not require a lot of artistry or advanced knowledge of videos. These simple steps should help you transform your idea into a storyboard that will serve you well.
Before you get down to business, you need to have a good idea of what you hope to achieve with the video. With clear goals for the project, you can make informed decisions as you work on the board. Proper preparation is a prerequisite for success in any area, and this should be the case when you choose to go down this road.
Think about your target audience and the message you intend to convey. These key aspects will help you decide the tone and language to use for the video. Your words should tell the story. Do not leave room for second guesses.
Set the most appropriate time frame for the video with the target audience in mind. The publishing channel will also influence the content and nature of your video. Once you take care of all these factors, you'll be in an excellent place to create the storyboard.
Run all the ideas for the video with a friend or colleague. The goal is to find out how you can blend all your ideas into one compelling story. Write down everything that crosses your mind and identify what you will include in the video. This choice will ultimately influence how you create your storyboard.
As you do this, try to visualize the ideas in storyboard sheets. Keep in mind the sequence of events for your story. Then, you will be able to figure out the outline of the storyboard. At this stage, you'll need to point out the principal characters, the setting, and theme of your video, as well as how the props and characters interact.
From this point onward, creating the storyboard should be more straightforward.
With the flow of the story in mind, sketch a suitable timeline that will guide your storyline Identify the start point, critical transitions, and end of the story. Fill all the gaps in the timeline to ensure that you create a seamless flow. While at it, ensure that you simplify the plot without taking away its tension.
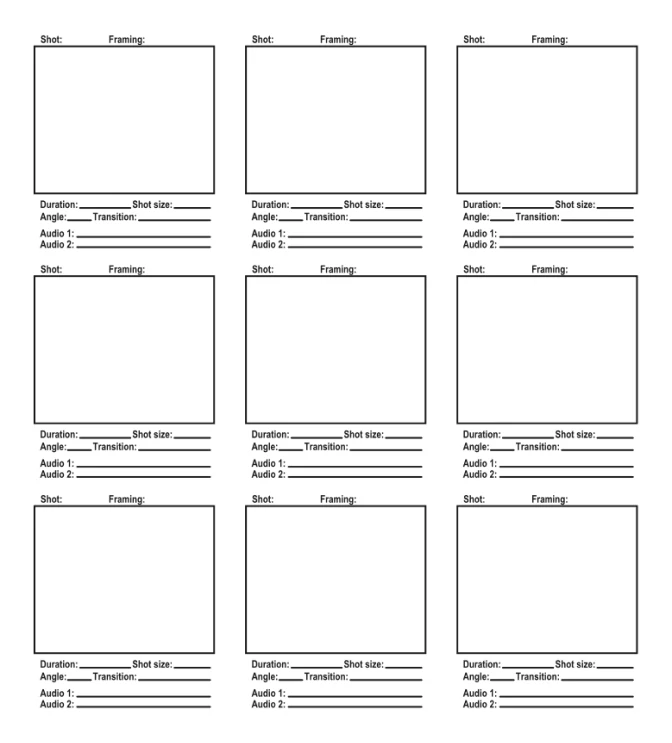
The layout of most storyboards includes a series of boxes. Free storyboard templates, which provide examples for you to follow, are a suitable alternative if you are not keen on drawing your boxes. Choose your preferred format before you start drawing. Ensure that the boxes on the storyboard paper do not take up all the space – you still need to include additional notes.
Like you'll handle an animation book, deal with one scene at a time. Storyboards do not need any fancy artistic details. With storyboard software or basic sketching, you will be good to go. Drawing by hand is much simpler and allows you to convey your message more practically.
You can always opt for stick figures if your drawings don't appeal to you. Ensure that the desire for perfection doesn't get the better of you at this stage.
Here's a template you can use for your storyboard:
5. Include additional notes
Briefly describe everything that is taking place in each frame with a few notes under the boxes. Add any useful notes that will guide the production process. Details like camera angles, texts-on-screen, and special effects are suitable for this part. Base these notes on the contents of your script.
As you create the storyboard, don't rule out any valuable changes to the story. Be open to new ideas at all times as long as they don't change the flow of your ideas.
Get a colleague to analyze your complete storyboard and provide honest advice. They'll help you know whether the board communicates effectively. You'll also discover possible oversights and areas that you can improve.
The revision step may turn out to be vital as you look at your story from a different angle. The right feedback should help you keep in check any mistakes before you get into the production stage.
Assess the feedback you receive and make appropriate changes where necessary. You don't have to buy every idea your friends give you. Implement only what is sensible. The storyboard should give you an idea of what to expect during production.
The best storyboarding software
Best choice for team collaborations: Miro
A collaborative tool for storyboards, flowcharts, and other visualizations.
Best free storyboard drawing tool: Storyboarder
Easy-to-use freeware for drawing traditional and thumbnail storyboards.
Affordable storyboard creator: Plot
A reasonably priced program with options to add collaborators and storyboards.
Most intuitive online storyboard creator: StudioBinder
A great tool for creating digital storyboards online without downloading any software.
Most powerful online storyboard creator: Milanote
A robust storyboard tool with script import and shot planning capabilities.
Summary
With the storyboard, you should have an easy time selling the idea to potential clients or bringing all the members of your team on board with your plans. As it provides the overall picture of your video project, the storyboard is an excellent tool for clearing any differences you may have had while brainstorming. Working as a team to create the storyboard is also a great alternative.
With this information in mind, you should have an easier time making your next video. To get the best results from the whole process, you'll need to put in the time and effort. A storyboard provides a clear picture of the video project and helps you stay on course during production. If you want to make a video, try doing a montage with Movavi Video Editor.
Movavi Video Editor

Frequently asked questions
You don’t have to be able to draw to create useful storyboards. If you can draw a stick figure and a box, you can create a storyboard that you can use for your videos. If you want more detailed, professional-looking storyboards that can help you with collaborative videos, you can also use storyboard software to create digital storyboards.
You don’t have to storyboard every single shot for every type of video. If you’re working on your own or if you don’t need to communicate detailed information to your team for every shot, you can add notes and avoid storyboarding every shot. However, the more in-depth your storyboard is, the easier the shooting process will be. Planning out every shot with your storyboard could save you a lot of time reshooting missed shots later on.
Typically, the script comes before the storyboard. In some cases, video creators will sketch out their storyboard in the process of planning a new video, but most creators will start with a script. When you begin with a script, you’ll have the basic structure of the video in your head and on paper before you start drawing or using software to create your storyboards.
Popular
How to make a home movie
How to add filters to your video
How to make a video montage
Top 10 Best Slow-Motion Video Apps
Top 5 Pinnacle Studio Free Alternatives for Windows and Mac
Top 11 Free YouTube Intro Makers | Create YouTube Intro Online
How to Add Music to a Facebook Story – Movavi
Top 7 Best FLV Editors in 2025 | Try for Free
Top 6 Best Graphics Card for Video Editing in 2025
How to Trim Videos in the VLC Media Player on Windows and Mac

Have questions?
Join us for discounts, editing tips, and content ideas


1.5M+ users already subscribed to our newsletter