
Movavi Photo Editor
Easily enhance images and get professional-grade results in a snap.
Movavi Photo Editor
Image restoration with neural networks
Effective object and background removal
Automatic photo enhancement in one click
User-friendly interface with tips
How to Choose the Best Free Photo Editor for Mac
Key takeaways
What a great time to be alive! A decade ago, getting magazine-grade shots from your phone was a pipe dream: you’d need a studio, lights, tripod, maybe even a hawk pulling your shutter. Now? Everyone’s a photographer. I’ve personally tested all six apps I’m about to lay out. I slogged through big RAWs, edited midnight shots, tweaked portraits, and pushed every slider. The result: a handpicked list of the top free (or freemium) photo editors for Mac. The ones that effectively withstood the torture trial.
These brands aren’t just names on a page. I’ve worked with them, compared their quirks, and saw which ones shine when the pressure’s on. Buckle up! We’re about to find the one you’ll actually want to use.
My top picks
Comparison Table: the Best Free Photo Editor for Mac
Top 6 best free photo-editing software for Mac
Why I picked it: Hands down, this one grabbed me with its mix of powerful tools and smooth responsiveness. Editing feels clean, quick, and honestly fun, which is rare in free apps. Perfect for casual edits and serious tweaks alike.
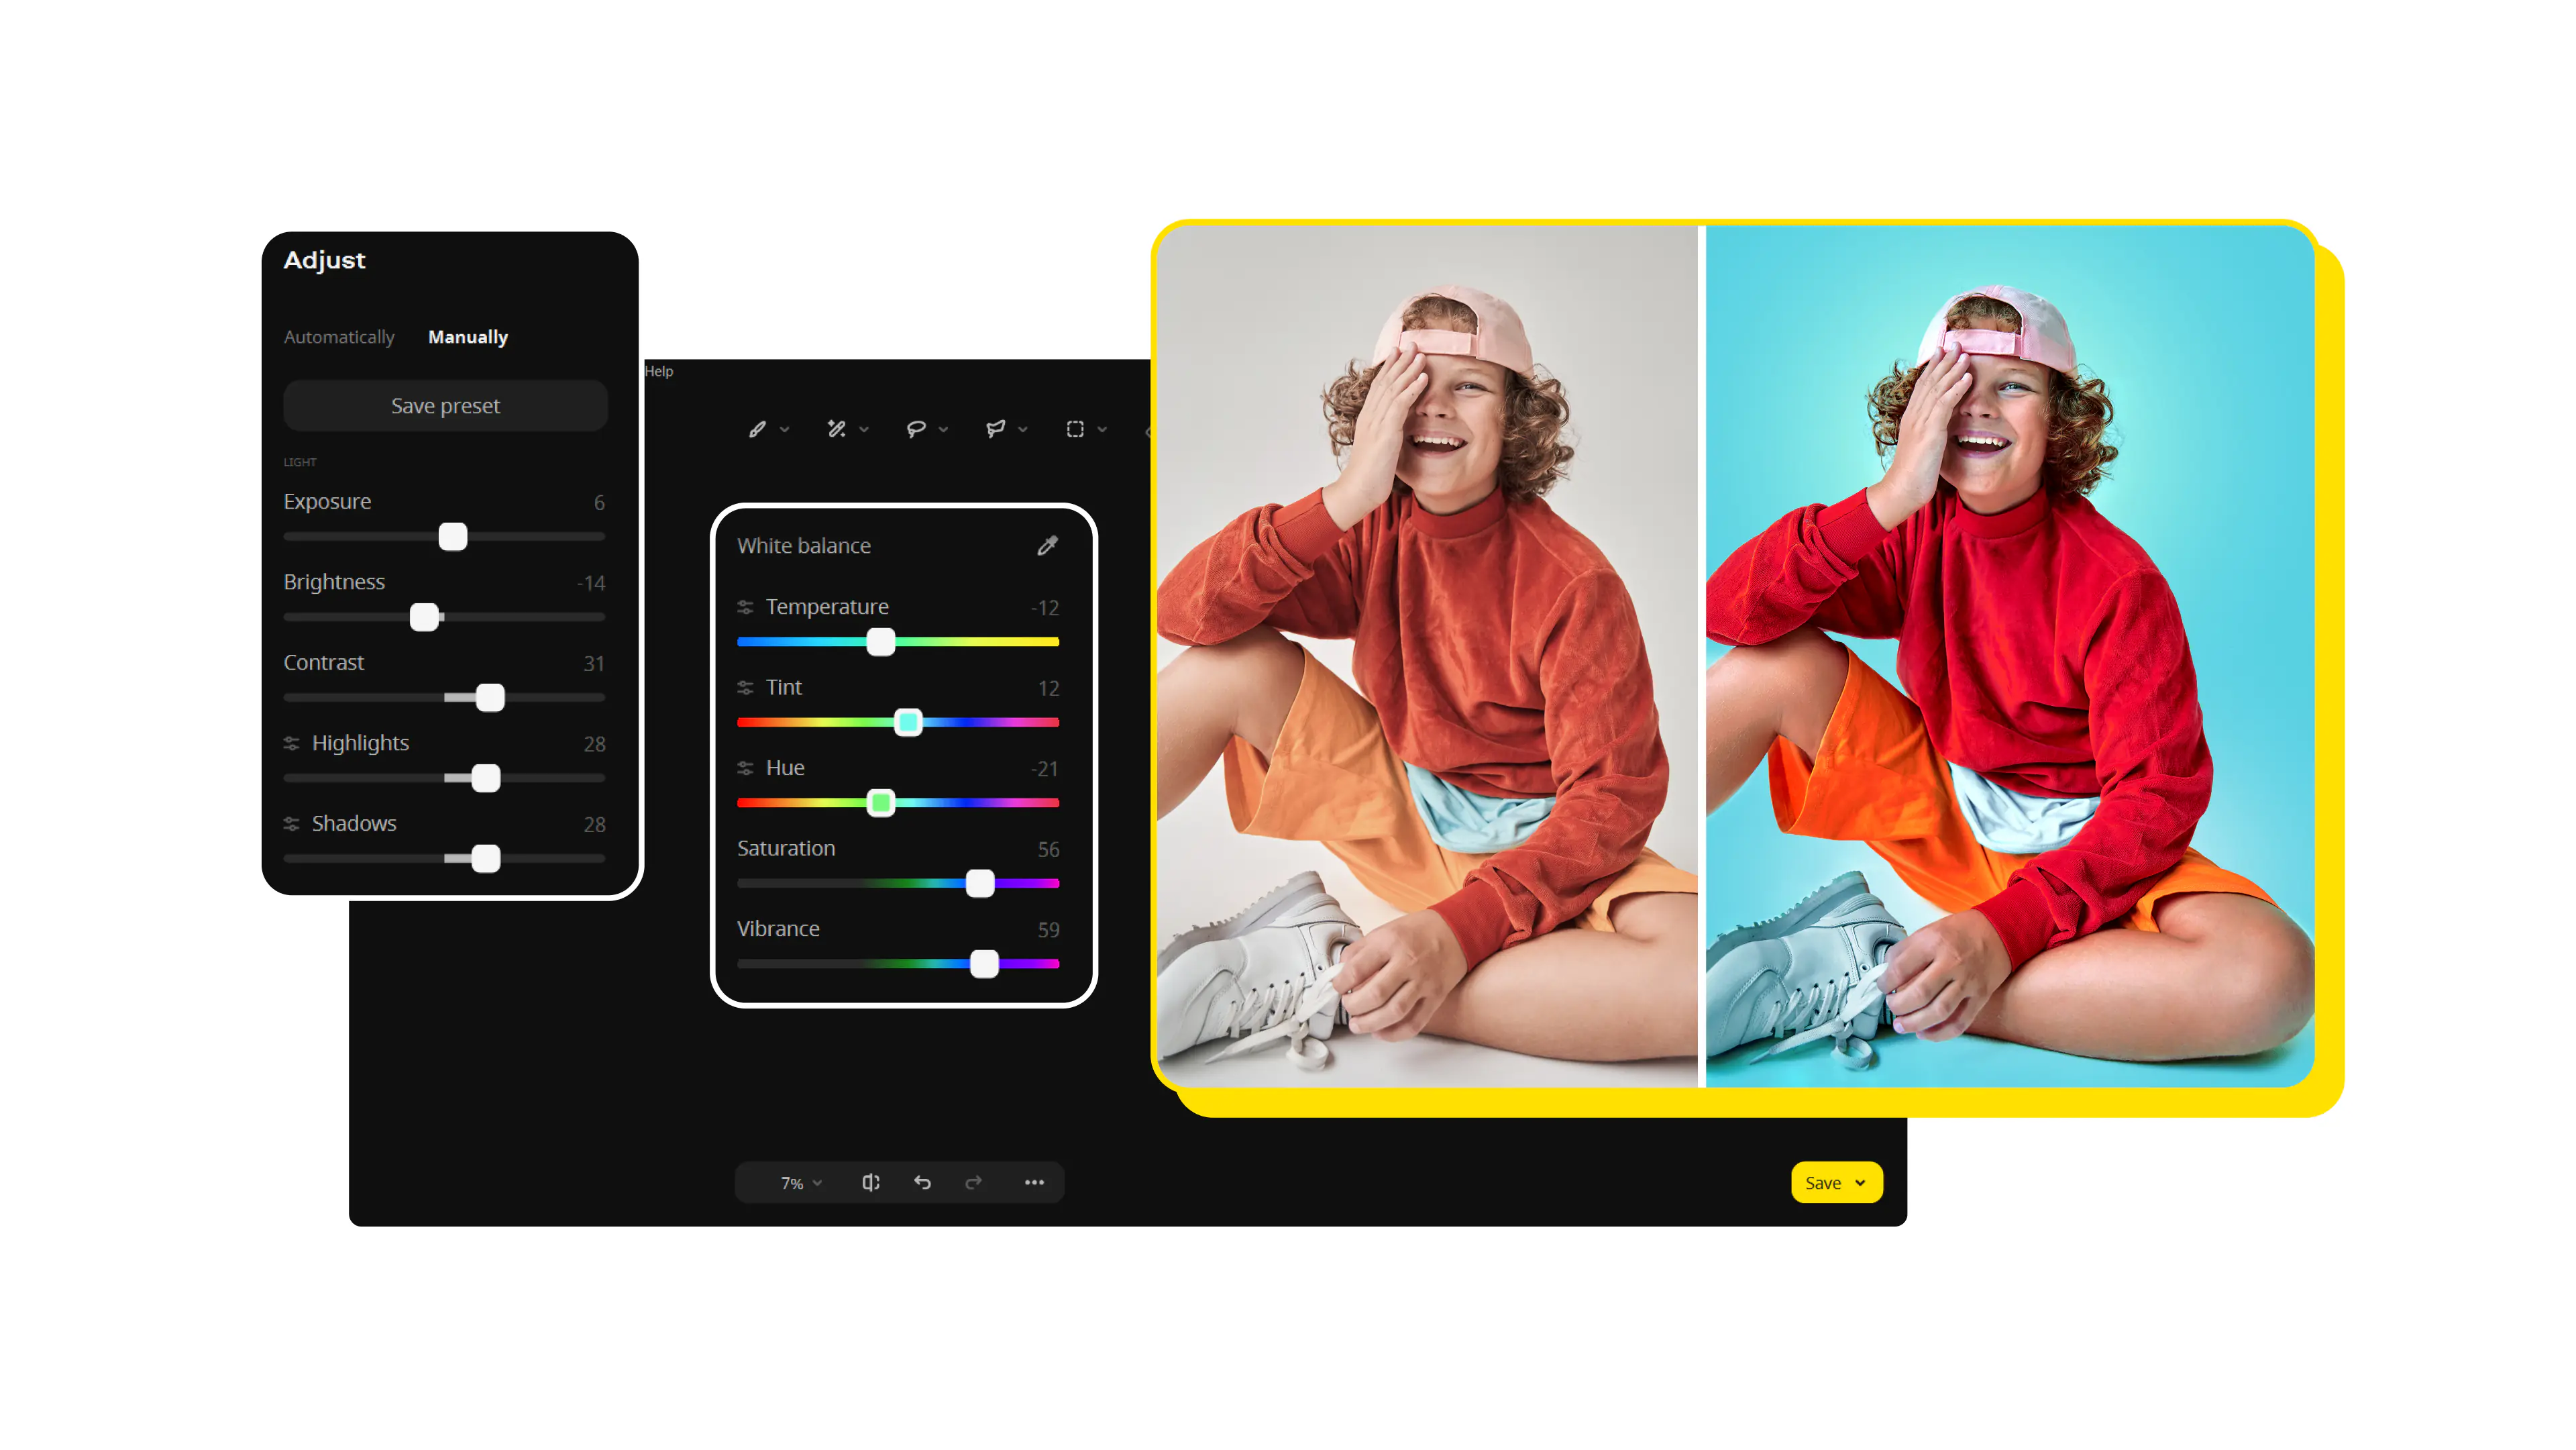
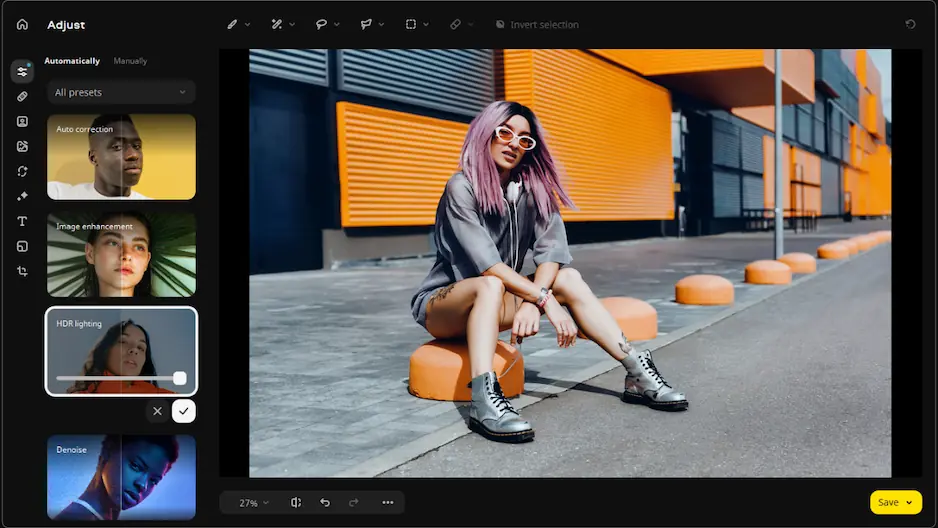
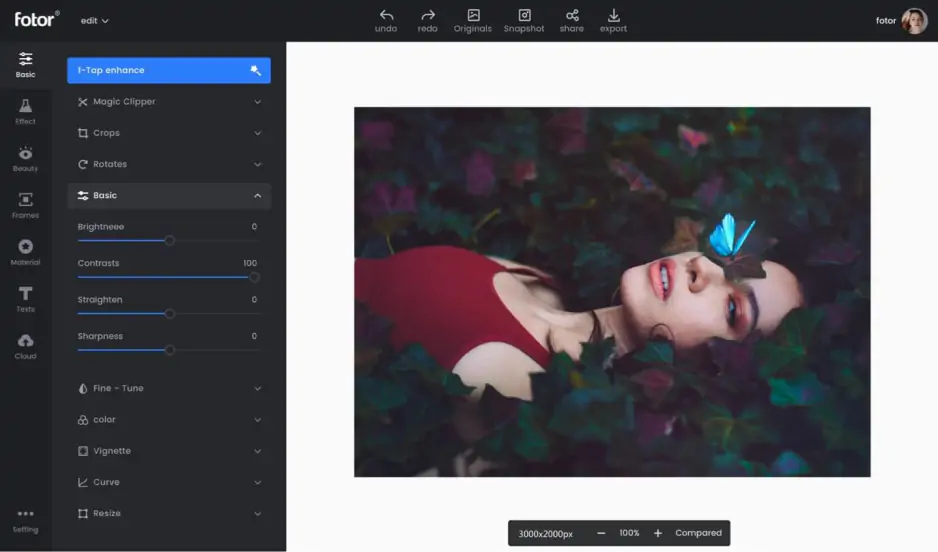
Movavi Photo Editor delivers the goods when it comes to the best free photo editor for Mac experiences. You can remove blemishes, clear out unwanted objects, and even restore old scanned photos. Version 2026 has taken its capabilities to a brand-new level. Now, there are assets like smarter automatic enhancements, improved neural network restoration for images, a pack of juicy resets, and a galore of other nifty revamps.
It undoubtedly meets the definition of the best photo editor for Mac. You can effortlessly remove unwanted objects, swap backgrounds, and retouch portraits with just a few clicks. The software also provides some professional instruments.
Automatic color correction, noise reduction, and the restoration of old photos, including colorization of black-and-white images - the platform has it all. Garnished with 100 effects and filters, you can also add creative flair to your photos. The interface is a pleasure to use, too. Free trial access lets you test everything without a catch.
Jumping into this wondrous software, I found the interface appearance super snappy. Image fixes, like portrait touch-ups or object removal, felt almost effortless. I ran old family file restorations, and they came out impressively clean. The app never lagged, even on heavy edits. What’s not to love?
How to edit a photo with Movavi Photo Editor:
Automatic photo enhancement in one click
Effective object and background removal
Neural network-based image restoration
Free trial lets you explore all core features
Full version requires purchase to unlock all features
Limited advanced batch editing
Occasional prompt for trial upgrade
Could still have more creative filters
2. Apple Photos
Why I picked it: Apple Photos caught my eye for its robust decluttering feature and flawless integration with macOS. Want quick access to your snaps without jumping through hoops? It’s ideal for you then. Clean, simple, and ready to roll.
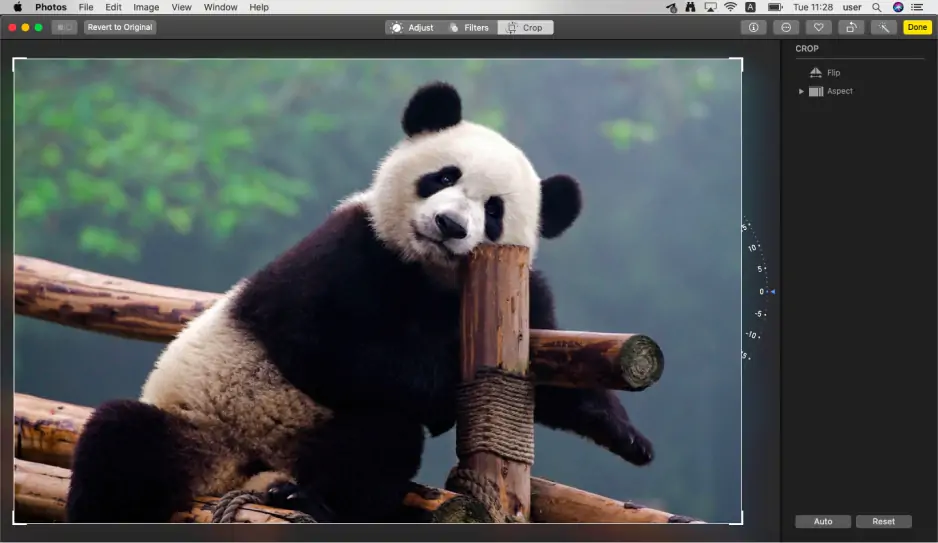
Apple Photos is the native free photo editor for Mac. It’s definitely designed to help users organize, find, and lightly tweak their images. You can retouch image blemishes, adjust colors, crop, and add filters with ease. The Mac-only app supports iCloud syncing, so yes - all your files stay updated across devices. It’s not packed with complex editing tools like professional software. But it offers enough for everyday fixes and minor enhancements. The interface is sleek and lovely. With it, the photo management process is rather a joy, not a chore.
Working with this software, I noticed how fast it pulls up the image I need, even in massive libraries. I tried adjusting brightness, cropping, and minor retouching, and everything clicked instantly. The iCloud integration made it easy to move files between my Mac and iPhone. For someone who doesn’t need hardcore editing, this is truly the best photo editor for Mac. Editing is painless, and you can handle batches of photos without slowing down your PC.
How to edit a photo with Apple Photos:
Built-in decluttering and search tools
iCloud syncing keeps all devices up to date
Quick retouch and color adjustments
Free with MacOS
Limited advanced editing tools
Mac-only, not available on older systems
Fewer creative effects compared to dedicated software
No advanced layering or batch processing
3. GIMP
Why I picked it: GIMP is hard to ignore! It fights in the heavyweight open-source ring yet stays entirely free. Packed with power and flexibility, it’s a go-to for those who want serious tools without a price tag.
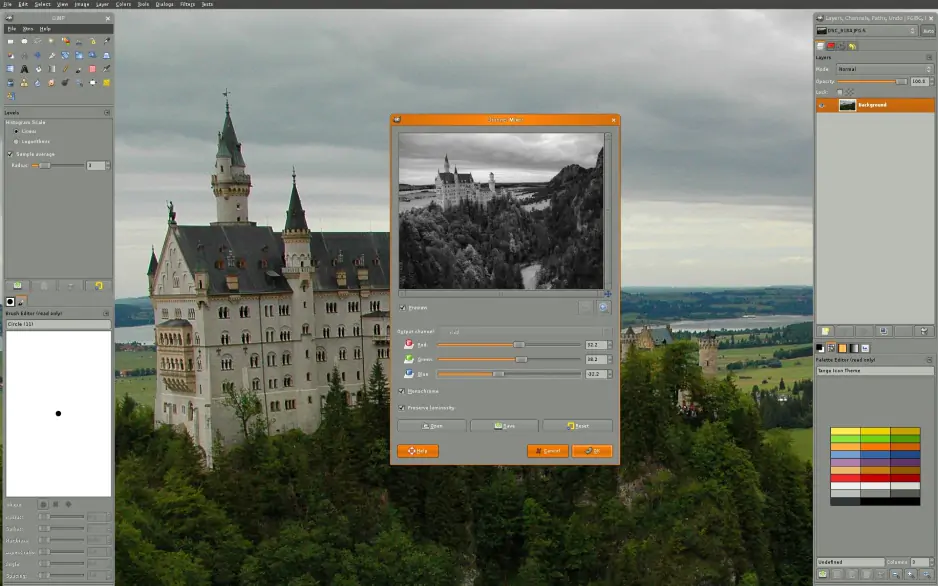
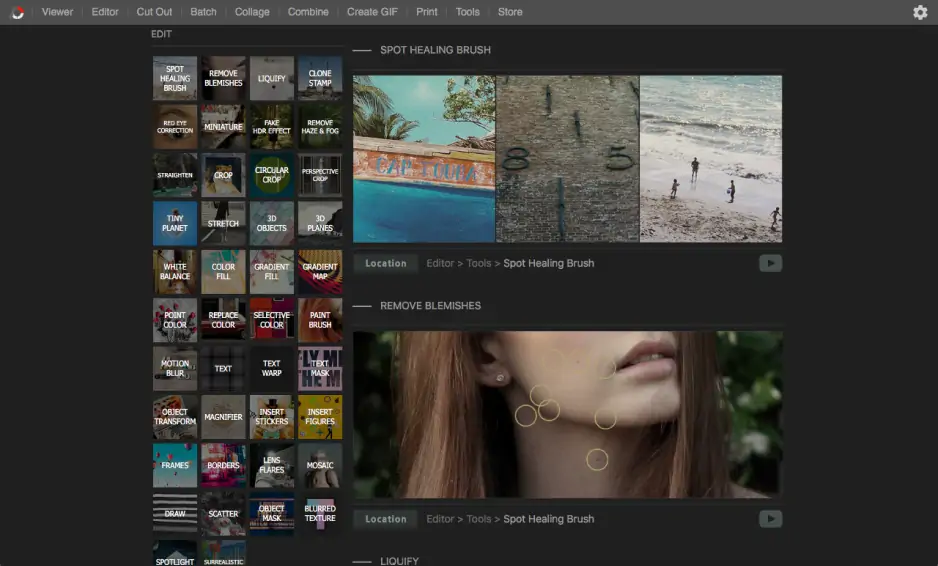
GIMP can be decoded as the GNU Image Manipulation Program. It’s widely hailed as one of the strongest entries among the best free photo-editing software for Mac. It brings core tools like layers, masks, heal/clone brushes, selection tools, filters, and full support for custom plug-ins.
With the release of version 3.0.4 (May 2025), many bugs have been stamped out and performance refined. What GIMP can give you? Well, many things. You can convert file formats (XCF, PSD, JPEG, PNG, TIFF, etc.), script tasks with Python or Scheme, and mold the UI to your needs.
Exploring the offerings of GIMP, I pushed images through color correction, retouching, and compositing. Pleasantly, its toolbox never felt shallow. The learning curve was real, but once I knew where things live (layers panel, tool options, filters menu), work became smoother. I tested the latest micro-release 3.0.4 and found fewer crashes, more stability. Plug-in support (especially G’MIC filters) extended what I could do out of the box. The software held up even on a Mac with many open files.
How to edit a photo with GIMP:
Rich set of editing tools comparable to paid options
Fully free and open source; no paywalls
Strong support for plug-ins & customization
Active development and bugfix releases
Performance is not always snappy; slower than some proprietary tools
Lacks non-destructive workflows for many operations
A feature-rich photo editor with a free trial and an amazing AI capacity. Perfect for beginners or anyone who wants quick, impressive results without a tough learning path.
GIMP
The quintessential photo editor. Free, open-source and packed with advanced tools and endless customization.
Pixlr
Your creative studio where no download is needed. A versatile, web-based editor with smart AI and handy creative tools residing in your browser.
4. Pixlr

Why I picked it: Pixlr struck me as a wild card. A powerful editor that runs in your browser (or via an app), yet still tackles hefty editing tasks. No installs, no fuss. Just jump in.
Pixlr is a web-based platform that delivers a pro-grade image editing suite with tools spanning from basic tweaks to more sophisticated effects. You can remove backgrounds with AI Remove Background, heal blemishes, apply layers, liquify, color correct, and add overlays or filters. Its awesome AI-driven tools (brought to the world in 2025), like smart cutouts and generative fills, make heavy lifting feel lighter.
The editor supports exporting to standard formats, and projects can be saved as native PXZ files. The free version packs a lot, but there’s also a premium tier for extras. Also, history is stored temporarily in-browser, so you gotta export before closing.
When I loaded my photo in Pixlr Editor, the interface felt familiar in a good way: layer panels, tools along the left, filters upstairs. I used the Heal tool to erase a spot and the AI background remover to isolate a subject — both did fine work. Tried a creative filter and overlay, and the output looked sharp. Exporting to PNG took just a click. During a heavier session (large image, many layers), I noticed a slight lag, not terrible, but present.
How to edit a photo with Pixlr:
Strong blend of free & AI-powered editing tools (remove bg, effects)
No installation needed; it runs in the browser
Supports layers, overlays, masks, and more
Export options and native PXZ format for layer retention
Dependent on internet/browser performance (may lag on big files)
History is saved only temporarily (browser cache); if you close without exporting, you lose changes
5. Fotor
Why I picked it: Fotor is an interesting solution for photo editors. It mixes AI magic with a clean browser interface, right in your browser tab. It gives you a lot of punch without needing heavyweight installs or steep fees.
Fotor is an online app that provides both basic and AI-driven tools for photo editing, design, and enhancements. You can do color adjustments, crop, background removal, object erasing, and even upscale images. Its AI Photo Enhancer, Background Remover, and Object Remover are marketed as one-click fixes. The free version gives you a taste, but many advanced features (especially export of AI edits) are locked behind Pro. You’ll also find ample design templates, collage tools, and effects.
When I tossed in a portrait, the AI Enhancer boosted colors and sharpness in seconds—nice balance, not overdone. I used the Background Remover: it did a decent job, though edge areas in complex backgrounds were a little rough. I tried editing multiple photos in a batch (free mode) and saw limits: some edits couldn’t be exported. The interface stayed responsive as long as files weren’t huge.
How to edit a photo:
Strong AI enhancement tools available (auto-fix, remove bg)
No software download is needed. Get the job done in your browser
Has an extensive library of design tools to beautify your photos
Many advanced features are locked behind Pro (cannot export AI edits in free mode)
Ads and watermarks can interrupt free usage
6. PhotoScape X
Why I picked it: PhotoScape X jumped out at me for being a hefty, free “all-rounder” that tries to pack in a lot—filters, effects, basic + advanced edits—without the price tag. I liked that it works on Mac and supports many file formats from the get-go.
This review of the best photo editing software for Mac that come for free will be incomplete without this brand. PhotoScape X is a Mac/Windows app built for both casual and semi-pro editing tasks. It supports tools like blemish removal, retouching, object cloning, layering, color adjustment, collage, GIF creation, and RAW import.
From version 4.2.1 (released Jan 21, 2022), they added new Object Effects (Inner Glow, Emboss, Inner Shadow), extra Image Effects (Outline), support for masks, improved shadows/highlights, plus more sticker/overlay content. On Mac, it includes features such as Editor, Cut Out, Viewer, Collage, and RAW support. Its strengths are in giving you broad creative options without overwhelming you.
When I used PhotoScape X, I edited several portraits. I was dabbling with removing spots, tweaking contrast, layering text; and the tools felt highly responsive. I tested the new object effects (glow/shadow) and they added polish. I also tried batch renaming and cut-out on groups of images; it worked fine for small batches. On a large RAW file (30 MP), performance wasn’t lightning-fast but acceptable. Overall, it gave me a lot of editing deck for a free image tool.
How to edit a photo with PhotoScape X
Lots of editing tools, effects, overlays, filters (Editor + Cut Out + Viewer)
RAW file support (import RAW)
Works on Mac natively + cross-platform design
Some advanced features are missing compared to popular alternatives
Update frequency is low; last major was 2022 v4.2.1
Performance may lag on very large RAW files or intense multi-layer projects
Essential features to look out for
With tons of applications on the market claiming to be the best free picture-editing software for MacBook Pro and other Mac products, choosing the ‘finest of them all’ can get really complicated. Not anymore though.
Listed below are a few features you should keep an eye for while choosing the best free photo editor for Mac.
Ease of use: The app design and ease of use are very important. You do not want to download an app and never use it.
Response speed: Some apps take forever to open and even longer to respond to the command. Be sure to check this out before jumping on the app.
Photo retouching: The essence of getting a photo editor is to help improve your pictures. You have no business with one that does not perform that exact function.
Ads: You will agree that ads get really annoying sometimes, especially when you have got to get in there and finish a project but you have to wait for some seconds or minutes due to incessant ad display. Well, that is what you get with free apps. You can always upgrade to the full version to cut off the ads.
Editing features: I guess this goes without saying. Of course, you have to check out the features contained in the app before clicking download. Some apps only provide basic features that you can get from native apps. Some other apps will ask for some in-purchase to unlock basic features too. We advise you to check out the features contained before deciding on any photo-editing software for Mac.
Advanced functions: Sometimes basic features are just not enough. You need some additional spice to bring the prize home. To qualify as the best free photo-editing software for Mac, such app must come with additional editing tools.
How to choose the best free photo editor for Mac
You’ve seen the features, felt the speed, and watched how each tool handled my test images. Now comes the real question: which one should you pick? It’s not about chasing the “best” — it’s about matching your style, your workload, and your workflow.
If you want speed + punch with minimal fuss, Movavi Photo Editor is my go-to. During testing, object removal and AI cleanup came through clean and fast.
If you’re after full control with zero cost, GIMP is a beast. I tossed it raw files, layer masks, plug-ins, and it didn’t blink.
Need something light, portable, and browser-based? Pixlr held strong under pressure in my trials. It requires no installs, just editing.
For day-to-day amends, Apple Photos does what it needs to, and it’s built right into your Mac.
If you’re vibing with creative filters and background tricks, Fotor’s AI tools delivered fun results when I tested portraits and scenes.
Want a tool that straddles basic + advanced without going overboard? PhotoScape X impressed me with its broad tool coverage like layers, cut-outs, and RAW support. It wasn’t perfect everywhere, but it handled more than I expected.
Pick the platform that fits how you edit (deep vs quick), where you edit (desktop vs browser), and how much patience you have for learning. Use your edit chain: cleanup → tone/color → effects. Start simple. Get messy later. Stay flexible.
Popular
The various types of camera lenses
Best free photo editing software for Windows 10
The best free photo editor for Windows
14 Best Free Logo Design Software for PC [2026]
12 Best Photo Viewers for Windows 10 [2026]
How to Combine Photos in 5 Easy Ways – Movavi
6 Simple Steps to Change the Background of a Picture | Movavi


1.5M+ users already subscribed to our newsletter