Step 1. Download and install Movavi Screen Recorder
Download the correct version for your computer. You then need to install the software and double-click the icon from your applications to launch Movavi Screen Recorder.

How to Record a Desktop Video in 2025
Try Movavi Screen Recorder:
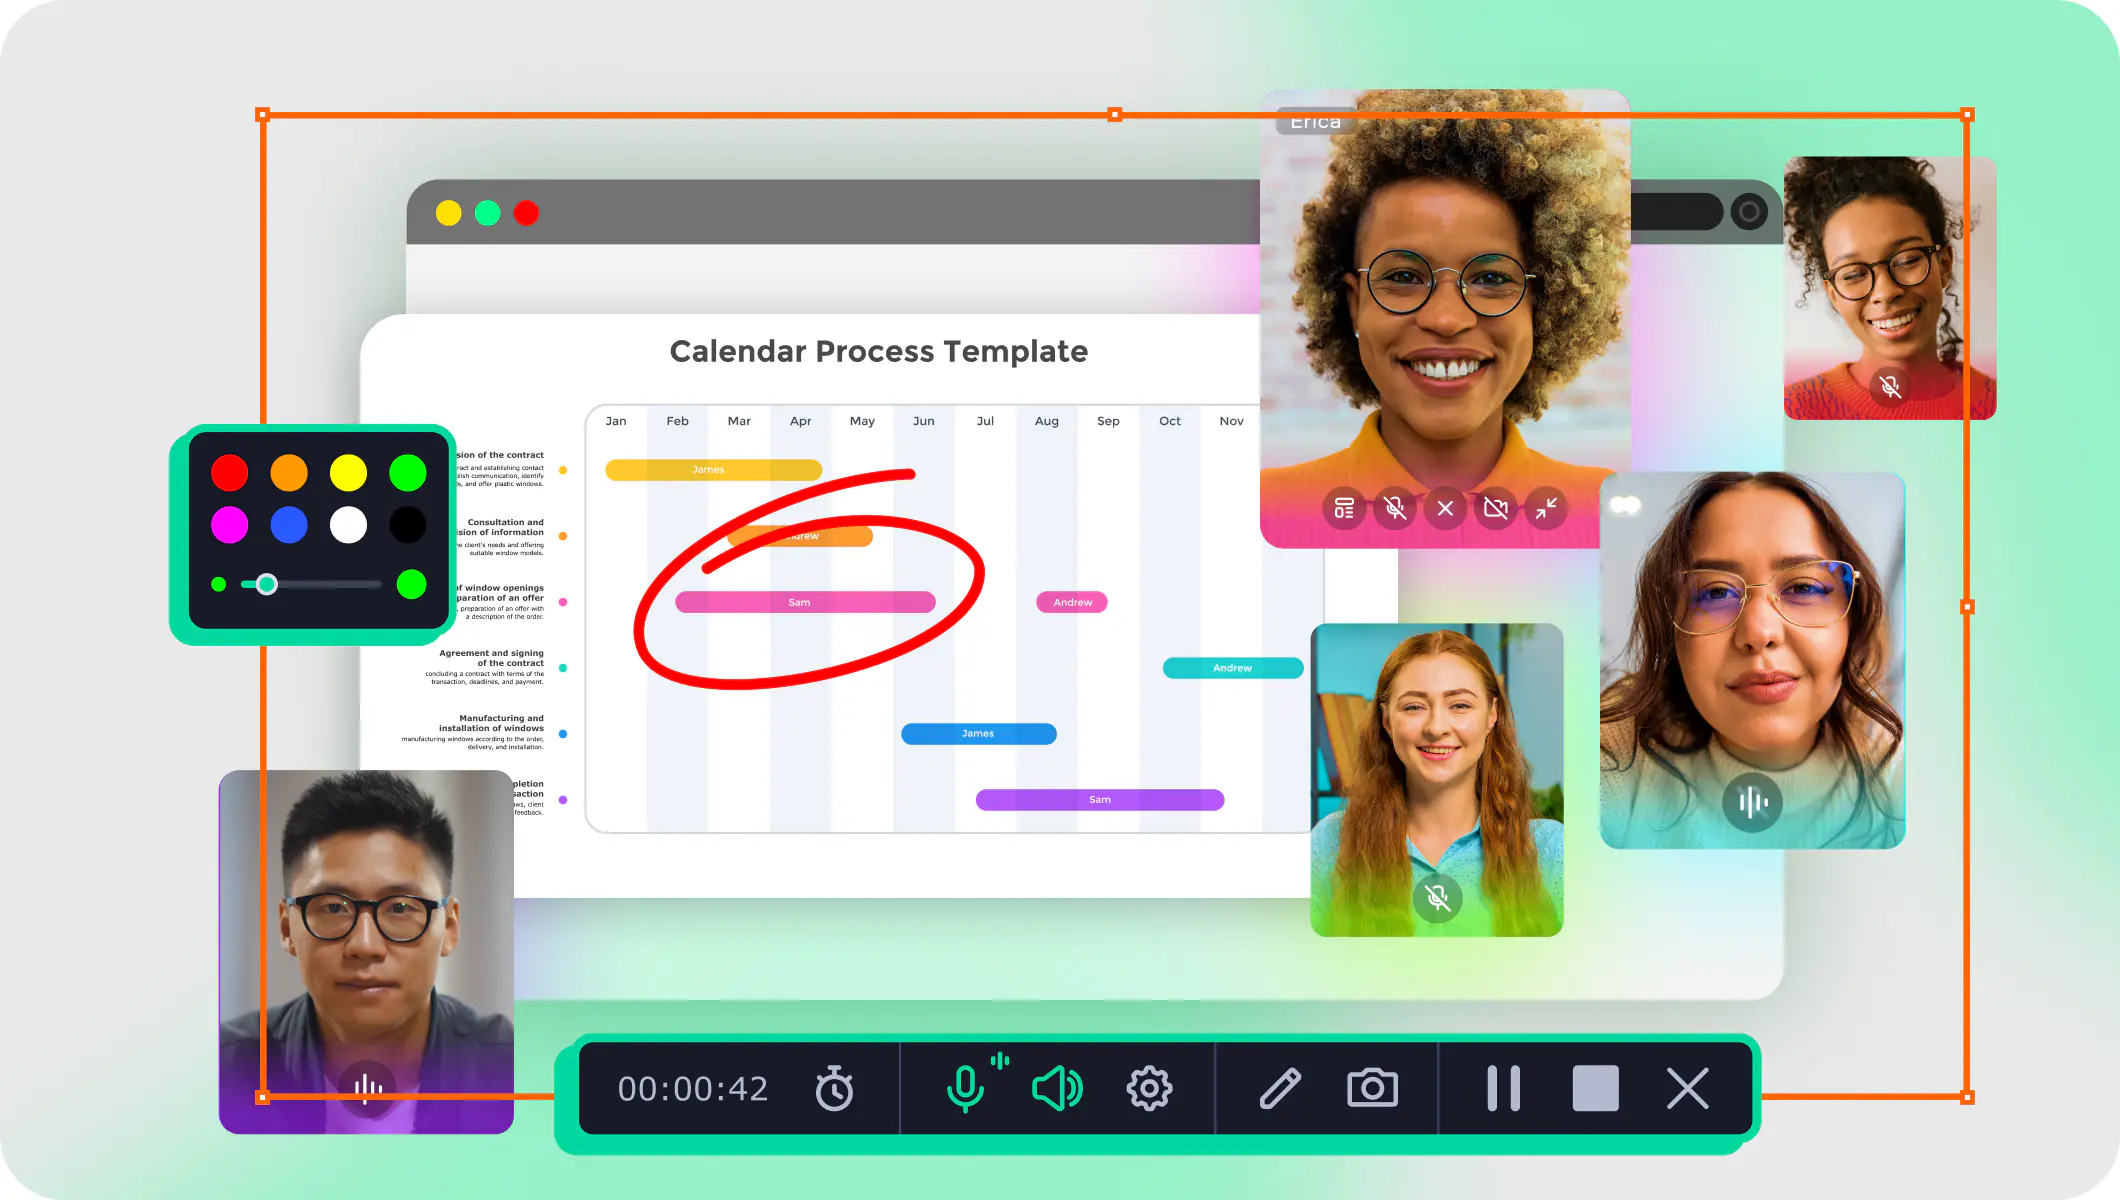
Capture every detail, even keystrokes and button clicks
Capture video in HD and 4K
Use drawing tools to make clear explanations in your video

In this guide, we discuss how to record your desktop video using Movavi Screen Recorder, including options such as scheduling or recording part of the screen, plus annotating your videos.
How to record your desktop screen
Movavi Screen Recorder was made specifically for screen recording and has some excellent features, such as trimming and annotation, and the option to capture a video from your desktop on your PC as well as multiple other sources.
The interface is easy, so even beginners who want to know how to record video desktop activity can use Movavi Screen Recorder to great effect. It is even possible to record videos by scheduling recordings, for instance, if you can’t make it to a seminar or a meeting.
Here’s how to record your desktop screen with Movavi Screen Recorder:
Step 1. Download and install Movavi Screen Recorder
Download the correct version for your computer. You then need to install the software and double-click the icon from your applications to launch Movavi Screen Recorder.
Step 2. Adjust the settings
Click Preferences, which you can find on the sidebar, and you’ll see a lot of different options.
To choose a different output folder, go to the Files tab. If you want to change cursor settings, you can do this in the Effects tab.
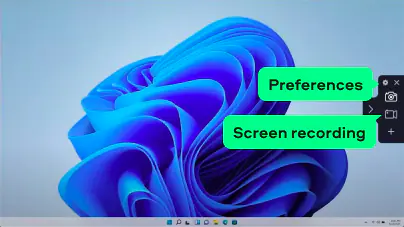
Next, click the Screen recording button, and use your mouse to draw the frame where you want to capture a desktop video. The recording panel will then appear, allowing you to start recording a desktop video. Before you start, click System audio to set up the audio-recording settings. Turn off your webcam or mic if you don’t want to record from these sources.
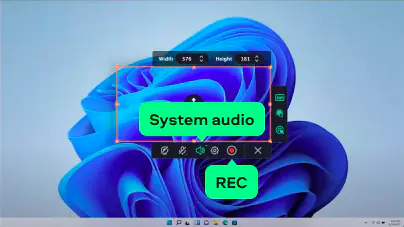
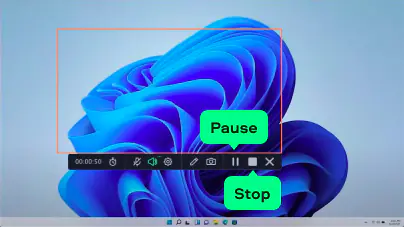
Step 3. Start the screen capture
Click the REC button to record the screen on a desktop. You can hit Pause during the recording if you need to. When you’re finished recording, click the Stop button.
Step 4. Edit and save the video
To trim the video to size, move the cursor at the edge of the unwanted segment and click Cut. Repeat as needed at the end of the video, select the part you want to remove and hit Delete fragment to trim this to size.
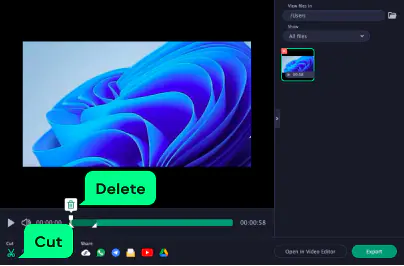
Next, click Export. A dialog box will open giving you options regarding output format, file name, and folder. When all the necessary changes have been made, click Save.

How to record a video on a desktop with audio
We’ve briefly covered how to record desktop video but one of the crucial aspects of this is to make sure you are also recording audio. There are very few instances where you will want to record a desktop video without audio. You may need to record the original audio, for instance, if you are viewing a lecture for college, or you are on a video call and need to record what somebody else is saying.
Pretty much every type of video has some form of audio, which can be crucial to understanding the video. For instance, if you are recording gameplay footage on your desktop, then you will want to ensure you are recording the sounds of the game. If you are recording an important virtual meeting, then the audio may even be more important than the video.
It is also possible that you might need to capture audio from your microphone or other sources. For example, it is possible that you might want to know how to screen-record on a desktop while capturing video and audio from your external microphone and webcam. This is something that is possible with Movavi Screen Recorder, making it easy to do things like gaming commentary videos.
For audio and video capture on a desktop, click the System audio and Microphone icons to choose to record the system audio as well as capturing from an external microphone.
Hotkeys for recording a desktop video
When learning the best way to record a desktop video, you may need to be quick to ensure that you capture the important moments. For instance, if you need to record a meeting or stop recording at a specific time, then it can be distracting to use your mouse or complicated controls.
Luckily, Movavi Screen Recorder has hotkeys that allow you to start and stop the recording. This makes it quick and easy to make the recordings just by hitting a couple of keys, rather than having to navigate through menus.
Start recording
Pause recording
Stop recording
Tips on recording a desktop video
There are a few tips that can help you to ensure that you are getting the best possible results when recording a video:
Summary
We’ve covered a few methods for those wondering how to screen-record on a desktop. There are many different software options for this, but Movavi Screen Recorder provides you with a simple and effective method with a super simple interface and even hotkeys to keep things quick and easy.
Movavi Screen Recorder
Disclaimer: Please be aware that Movavi Screen Recorder does not allow capture of copy-protected video and audio streams.
Many platforms do have an inbuilt recording option, such as QuickTime Player on a Mac, but they may not be reliable with audio, or allow editing and multiple sources like Movavi Screen Recorder, which is why this is recommended software.
To record your desktop, use Movavi Screen Recorder:
If you have a Windows PC, you can use Game Bar.
Popular
How to record a part of a screen
OBS Studio review
How to Mirror iPhone to Windows 10 [7 Ways] – Movavi
12 Best Screen Recorder Chrome Extensions [2025]
How to Screen Record on iPhone 12 [Easy Way] – Movavi
Why Is My Screen Recording Not Working [13 Fixes] – Movavi
15 Best OBS Alternatives [Recording & Streaming] - Movavi
10 Best Streaming Audio Recorders [2025] | Movavi
Best Windows 10 desktop recorders
Top Mac desktop recorders
How to Take a Picture on a Computer [5 Ways] – Movavi

Have questions?
Join us for discounts, editing tips, and content ideas


1.5M+ users already subscribed to our newsletter