
Movavi Screen Recorder
The perfect way to record anything from your screen
Disclaimer: Please be aware that Movavi Screen Recorder does not allow capture of copy-protected video and audio streams.

Screenshot on a Mac Not Working – 11 Fixes (2026)
Try top quickest fixes:
Check keyboard shortcuts
Restart your Mac
Verify screenshot save location
Use Movavi Screen Recorder
Top 5 quick fixes
If your Mac or MacBook screenshot is not working, don’t worry – these are the top five quickest fixes that usually solve the problem within minutes. Most users find that one of these steps restores screenshot functionality instantly.
1. Check your keyboard shortcuts
Open System Preferences > Keyboard > Shortcuts > Screenshots and make sure all the shortcuts (like Command + Shift + 3 or 4) are enabled. If not, simply re-enable them and try again.
2. Restart your Mac
Sometimes, a small system glitch can prevent screenshotting. Click the Apple menu > Restart, allow your Mac to restart, and attempt the shortcuts once more.
3. Verify screenshot save location
If screenshots don’t appear on your desktop, check their save path. Press Command + Shift + 5 > Options, and see where your files are being stored. Change it back to Desktop if needed.
4. Reset NVRAM
NVRAM can store erroneous settings that are in conflict with screenshots. Restart your Mac, then hold down Command + Option + P + R for about 20 seconds during startup. Try taking a screenshot again after a restart.
5. Use Movavi Screen Recorder
When all else fails, Movavi Screen Recorder offers a fast, dependable way of recording and editing screenshots. It even includes scrolling capture, annotations, and instant export options – all just a few clicks away.
Some Mac users face a common screenshot on a Mac not working issue. If you are also facing the same problem, this article can help you with useful solutions.

Movavi Screen Recorder can be a great option when you need to take screenshots on your Mac without any hassle. The application is easy to use, and it comes with great features. Among them is a very useful ability to take scrolling screenshots. It will also let you edit your screenshots with ease.

When selecting products to include in our reviews, we research both demand and popularity.
The team tests all the products mentioned in this article.
When testing, we compare the key characteristics of the products, which include selecting capture area, schedule recording, showing keystrokes and mouse, and other significant features.
We study user reviews from popular review platforms and make use of this information when writing our product reviews.
We collect feedback from our users and analyze their opinions of Movavi software as well as products from other companies.
Wondering “Why is my screenshot not working on a Mac?” Here are some solutions if you face the screenshot not working on a Mac problem.
1. Check keyboard settings
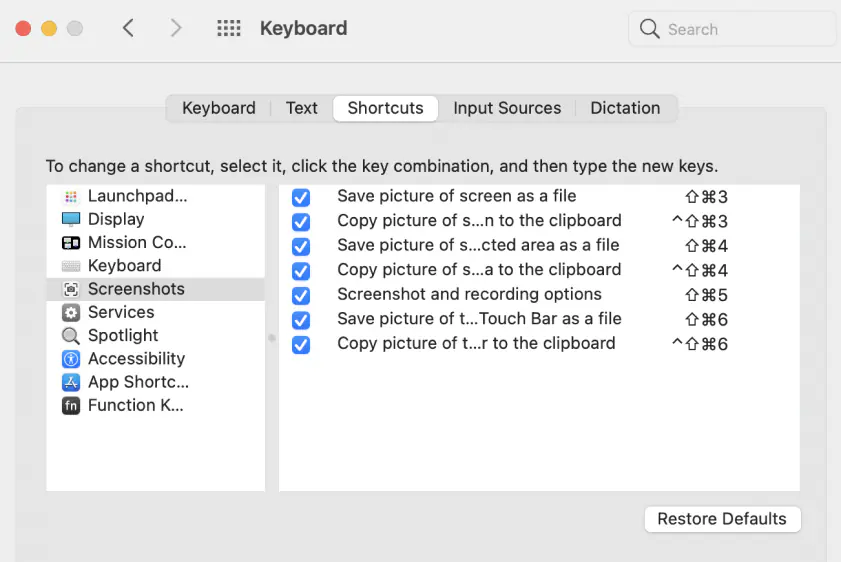
The majority of users take a screenshot on Mac using the keyboard shortcut. Sometimes the keyboard settings might not be right, which can cause a screenshot on your Mac not working. So, if Mac screenshots are not saving to the desktop, you will need to recheck your keyboard settings. Here’s how to fix it:
Click on Open System Preferences using the Dock Apple menu.
Click on Keyboard and then Shortcuts.
You will get a list of options.
Select all the options and save them.
See if you can take screenshots.
Social proof

2. Restart your Mac
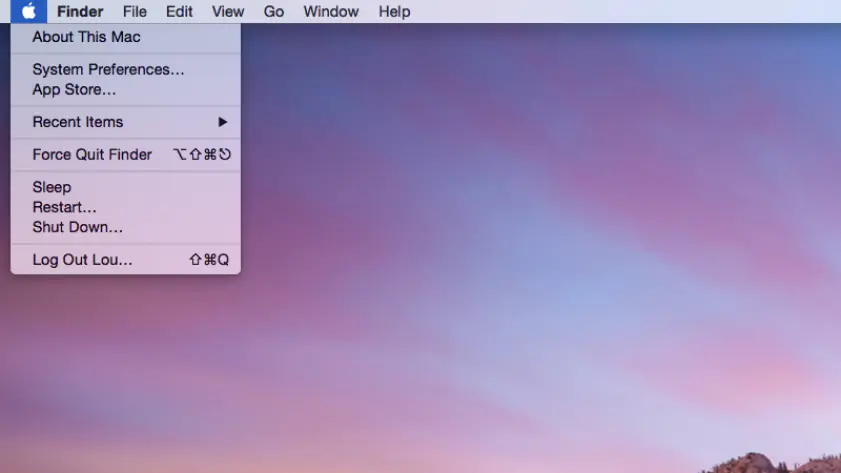
A benign system error might cause a screenshot on your Mac not working. So, restarting the MacBook can help. To restart, click on the apple icon that you can find in the top-left corner of your screen. Click on Restart. It can also help if you check your system for updates.
Go to System Preferences.
Click on Software Update.
Your system will start checking for updates.
If any update is available, click on Update Now.
Social proof
3. Use Movavi Screen Recorder to take a screenshot

If your Mac is not taking screenshots, you can go for Movavi Screen Recorder. It can help you take easy screenshots. Also, the application allows users to record their screens.
4. Reset the NVRAM
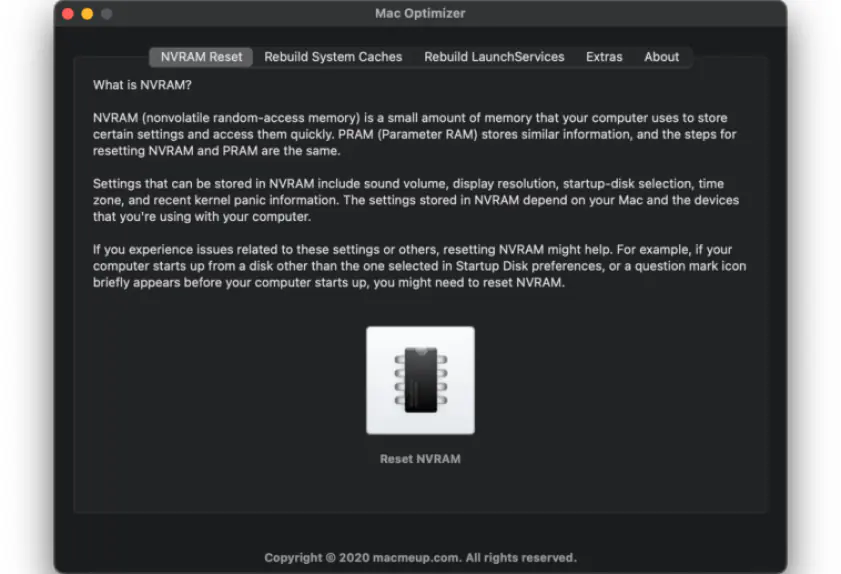
NVRAM is a kind of computer memory that stores basic information about your system settings like time zone, volume, screen resolution, and many more. Resetting NVRAM can solve the issue if you face a problem while taking screenshots on your Mac. Resetting NVRAM is quite a simple task.
Even if a screenshot on your Mac is not working after this, keep reading.
5. Load in a safe mode
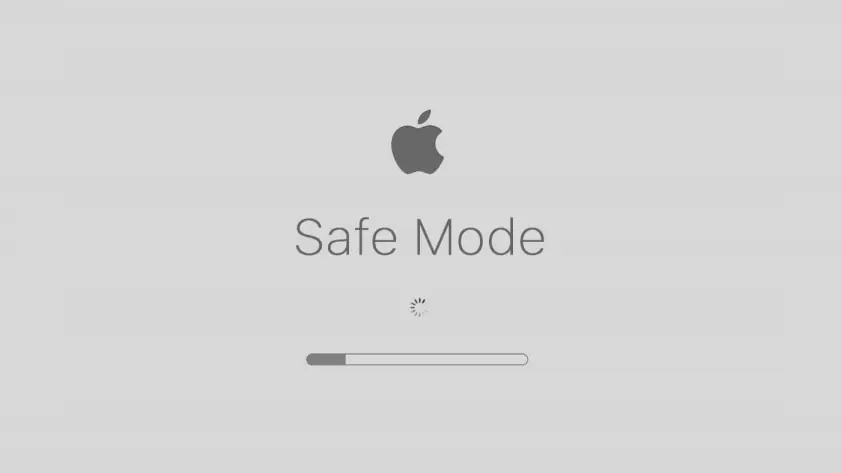
A common reason behind the Mac screenshot not working issue could be the applications you have in your system. Or it could also be due to malware that is not allowing your system to take screenshots. If you want to test this out, you will have to start your system in safe mode to find out if your Mac can take screenshots.
Social proof

6. Check your Mac for malware
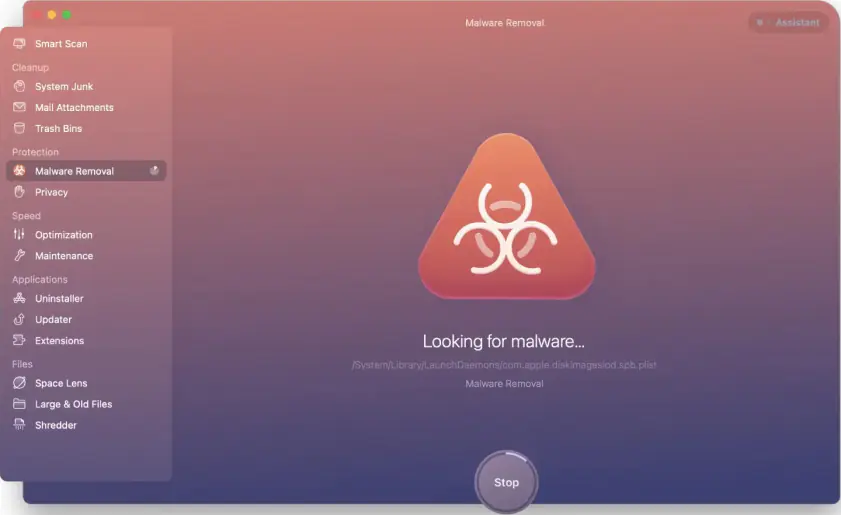
When your system has malware, it might result in a screenshot not working on your Mac. If you feel this might be the case, it is important to take the necessary action as soon as possible. To remove malware from the system:
7. Use Grab to take a screenshot
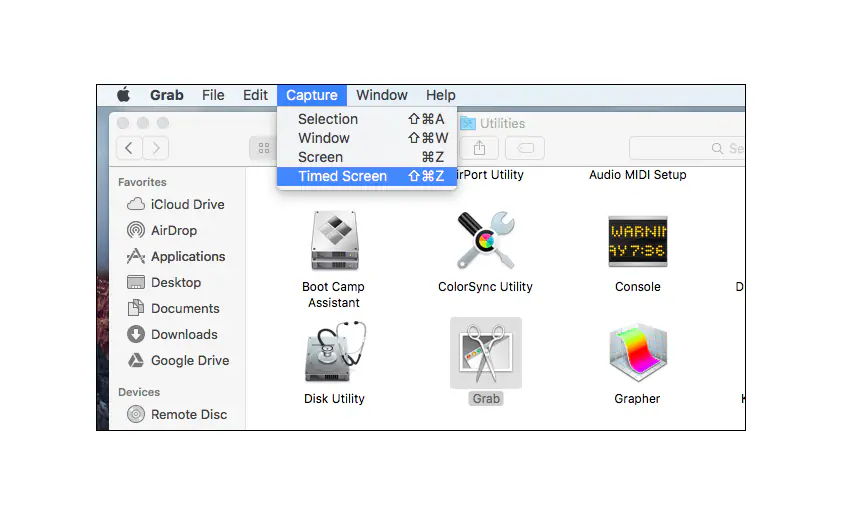
If any previous solutions cannot fix your problem of a screenshot not working on a Mac and you need to take it urgently, you can go for Grab. It is an application that comes in-built with Mac. You can use Grab to take a screenshot of a screen area, an entire screen, or an individual window. Here are the steps to follow.
Go to Applications.
Click on Utilities.
Search and open Grab.
Click on Capture.
You can now take screenshots according to your need.
Social proof
8. Use Preview to take a screenshot
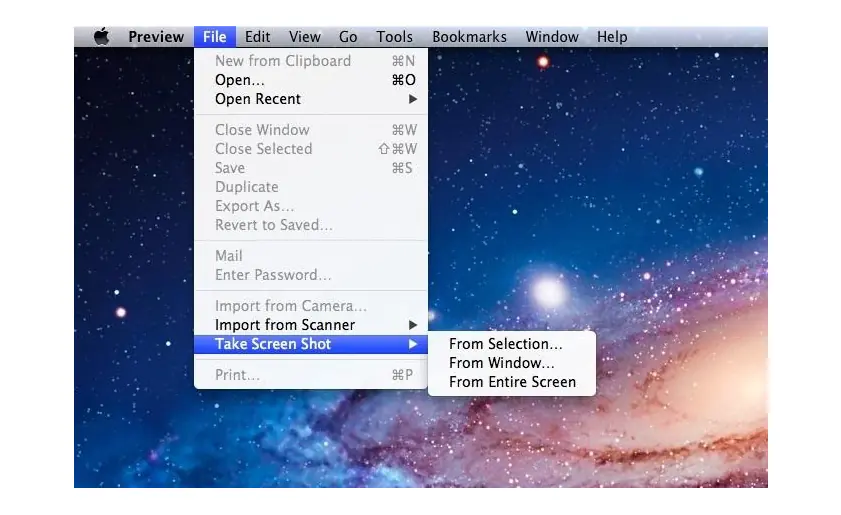
Preview is another default tool you can use if a screenshot on your Mac is not working. It also permits capturing screenshots by clicking on the toolbox icon. Here are the steps to follow.
Click on Preview.
Go to File. A drop-down menu will open.
Click on Take Screenshot.
You will get the option to select a certain area on the screen, capture the entire screen, or capture a window.
Social proof

9. Check the saving location of screenshots
You will know that when you take screenshots on Mac, it’s appearing on the desktop by default. But if you change the saving location by mistake, you will not be able to find the screenshots. However, it doesn’t mean that screenshots on your Mac are not working. Here are the steps to determine the saving location on Mac.
Start by launching the screenshot application from Option.
Find the saving location of your screenshots.
If it is any other location, change it to desktop.
Social proof


10. Move the Preference file
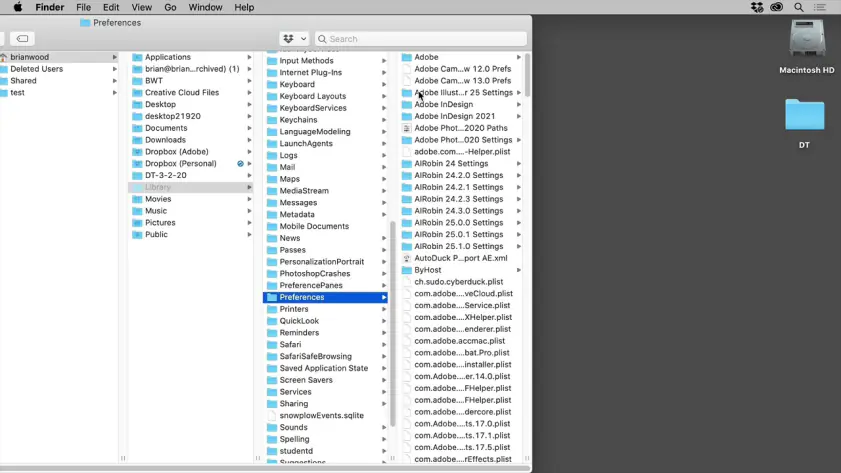
The Preference file can cause macOS screenshot not working. If that is the case, you will need to move it to the desktop and find out if the screenshot function is working or not. Here are the steps to follow.
Start by opening Finder and Go.
Select Go to the folder and enter ~/Library/Preferences/.
You will need to search for the file
-com.apple.ImageCaptureApp.plist.
Now, move this file to the desktop.
Restart the system.
Check if you can take screenshots now.
If your Mac is still not screenshotting, delete the file from the desktop.
11. Check your Dropbox settings
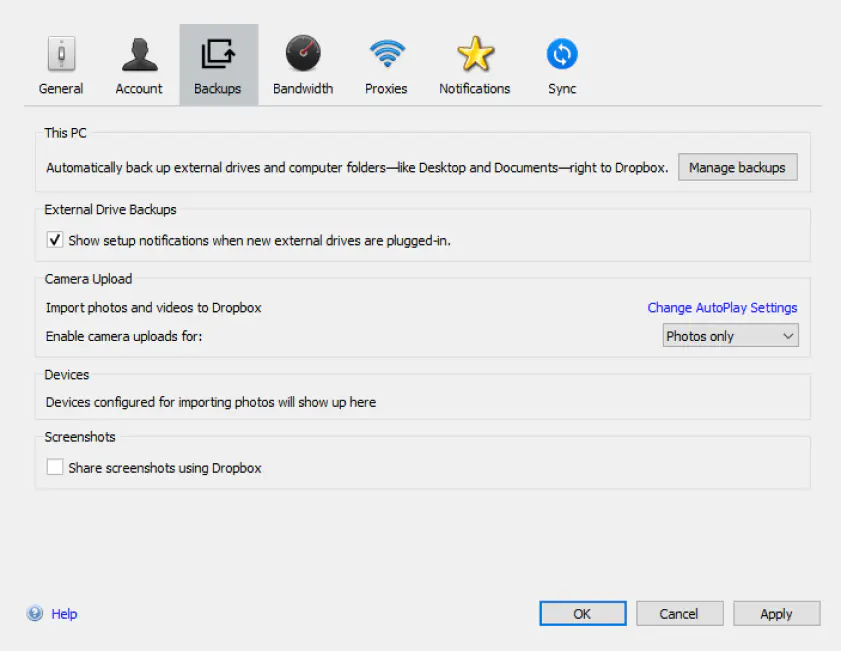
If you use Dropbox on your Mac, you will need to set it up so you can save your screenshots to Dropbox instead of on the desktop.
Social proof


Screenshots on Mac not working can seriously cripple your experience while using the system. Screenshotting can help you save images without large files, create visual stories, and so on. There is good news for you. You will not need to think about how to turn on screenshots on Mac, as it comes as a default feature. You will only need to remember the key combinations to take screenshots.
You can use any of the above combinations according to your need. The tool comes in handy for quick and easy screenshots.
You can also use Movavi Screen Recorder as a screenshot tool for a Mac. Download and install the program and follow the instructions below.
If nothing helps
If you’ve gone through every trick in the book – checked your shortcuts, restarted twice, maybe even pleaded with your Mac – and screenshots still refuse to cooperate, don’t take it personally. Sometimes macOS just decides to be mysterious. For anyone typing ‘why isn’t my screenshot working on Mac’ into search, there are other ways to capture your screen that don’t rely on Apple’s finicky shortcuts.
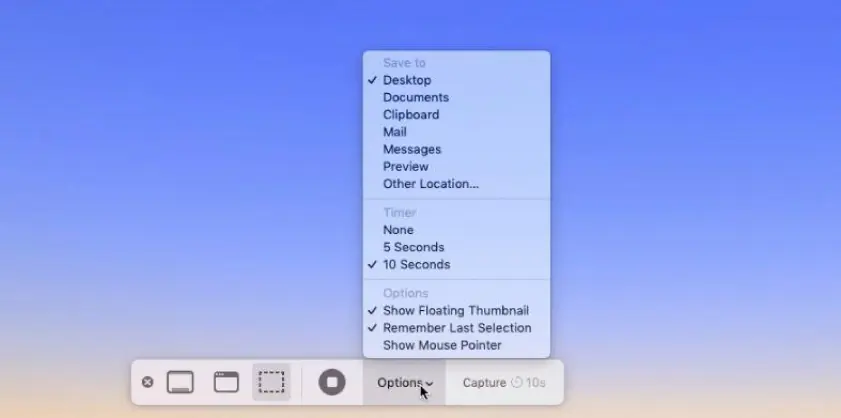
1. Use the Screenshot app directly
This one hides in plain sight. Open Applications > Utilities > Screenshot (or type “Screenshot” in Spotlight), and you’ll get a small toolbar that handles full-screen grabs, window captures, or selected portions. It also lets you set timers and choose where to save the file – no key combos required.
2. Grab with Terminal (yes, really)
It sounds intimidating, but it’s weirdly satisfying. Open Terminal and type: screencapture ~/Desktop/screenshot.png. Press Enter, and voilà – you’ll find your screenshot right on the desktop. You can even use flags like -w to capture a window or -i for interactive mode. Nerdy? Sure. Effective? Always.
3. Record instead of snapping
When screenshots won’t work, try a screen recording. Open QuickTime Player > File > New Screen Recording. It’s not exactly a photo, but you can later pause the video and save any frame you want. Bonus: you capture movement too, so it’s great for tutorials or bug reports.
4. Give CleanShot X a spin
If you’ve decided Apple’s screenshot tool has officially retired, CleanShot X might be your next favorite thing. It’s fast, smooth, and made specifically for macOS. You can capture scrolling content, blur sensitive info, and instantly share your images – no messy settings or lost files.
Taking screenshots on a Mac is not tough as it comes as an in-built feature. But you might sometimes face problems that cause screenshots on your Mac not working for various reasons. You can use the solutions from this article to deal with the problem of Mac screenshot not working. Also, you can use third-party applications like Movavi Screen Recorder for hassle-free screenshots.
Disclaimer: Please be aware that Movavi Screen Recorder does not allow capture of copy-protected video and audio streams.

Frequently asked questions
There is no need to enable the screenshot feature on a Mac as it comes as a default setting. You can use the following combinations to take screenshots.
Command + Shift + 3 – full-screen screenshot
Command + Shift + 4 – area screenshot
Command + Shift + Space + 4 – window or menu screenshot
Why won't my Mac screenshot? There could be various reasons that can cause a screenshot on your Mac not working. Some common reasons are:
Your keyboard settings might be different, which causes shortcuts not working. Check it to ensure that all the shortcut options are perfect.
Your system might have some malware. It might get into your system easily as you download a new program or software.
The saving location of your screenshots might be different. By default, the saving location for screenshots is the desktop.
If you’re wondering ‘why is my Mac not screenshotting,’ chances are it’s due to one of a few common issues. Sometimes, the NVRAM is malfunctioning and needs a reset. In other cases, certain applications may interfere with the screenshot function, or the Preference file might be corrupted.
There are many reasons why your MacBook Air isn’t screenshotting. Dropbox settings might force the screenshots to be saved to Dropbox or there may be a system error that you can fix by restarting the MacBook.
FIrst of all, check if Command + Shift + 3 is enabled. Open Keyboard preferences and open the Screen Shots tab. Make sure the appropriate checkboxes under the Screen Shots tab are checked.
Best screenshot tools for Windows
17 best screen recording software in 2026
12 best screen recorders for Google Meet
12 best video calling apps for PC [2026]
How to Fix OBS “Encoding Overloaded” Issue [2026]
Windows 11 Snipping Tool not Working [12 Fixes] – Movavi
Using OBS with Zoom [The Easiest Way] – Movavi
6 Ways to Record a Webex Meeting in 2026 – Movavi
Best tools for Google Maps screenshots
[SOLVED] NVIDIA Shadowplay Not Recording – Movavi


1.5M+ users already subscribed to our newsletter