Movavi Video Editor
Create awesome videos easily
Movavi's online tool is meant for users who want to edit their files quickly and easily. The app opens in the browser and has an utterly clean interface. To insert subtitles into MP4, it doesn't take much. You upload the file, insert the text, adjust the timing, and export – all without getting lost in complex menus. If the goal is to add subtitles to an MP4 online for free, Movavi is the first consideration.
MP4, AVI, MOV, WMV, M4V
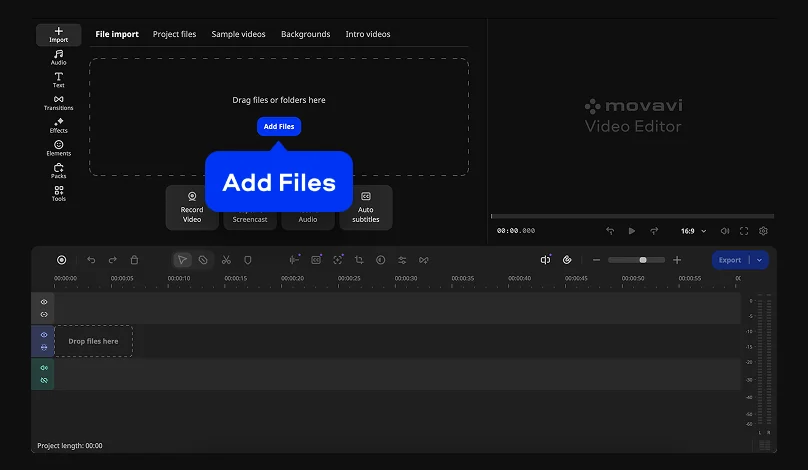
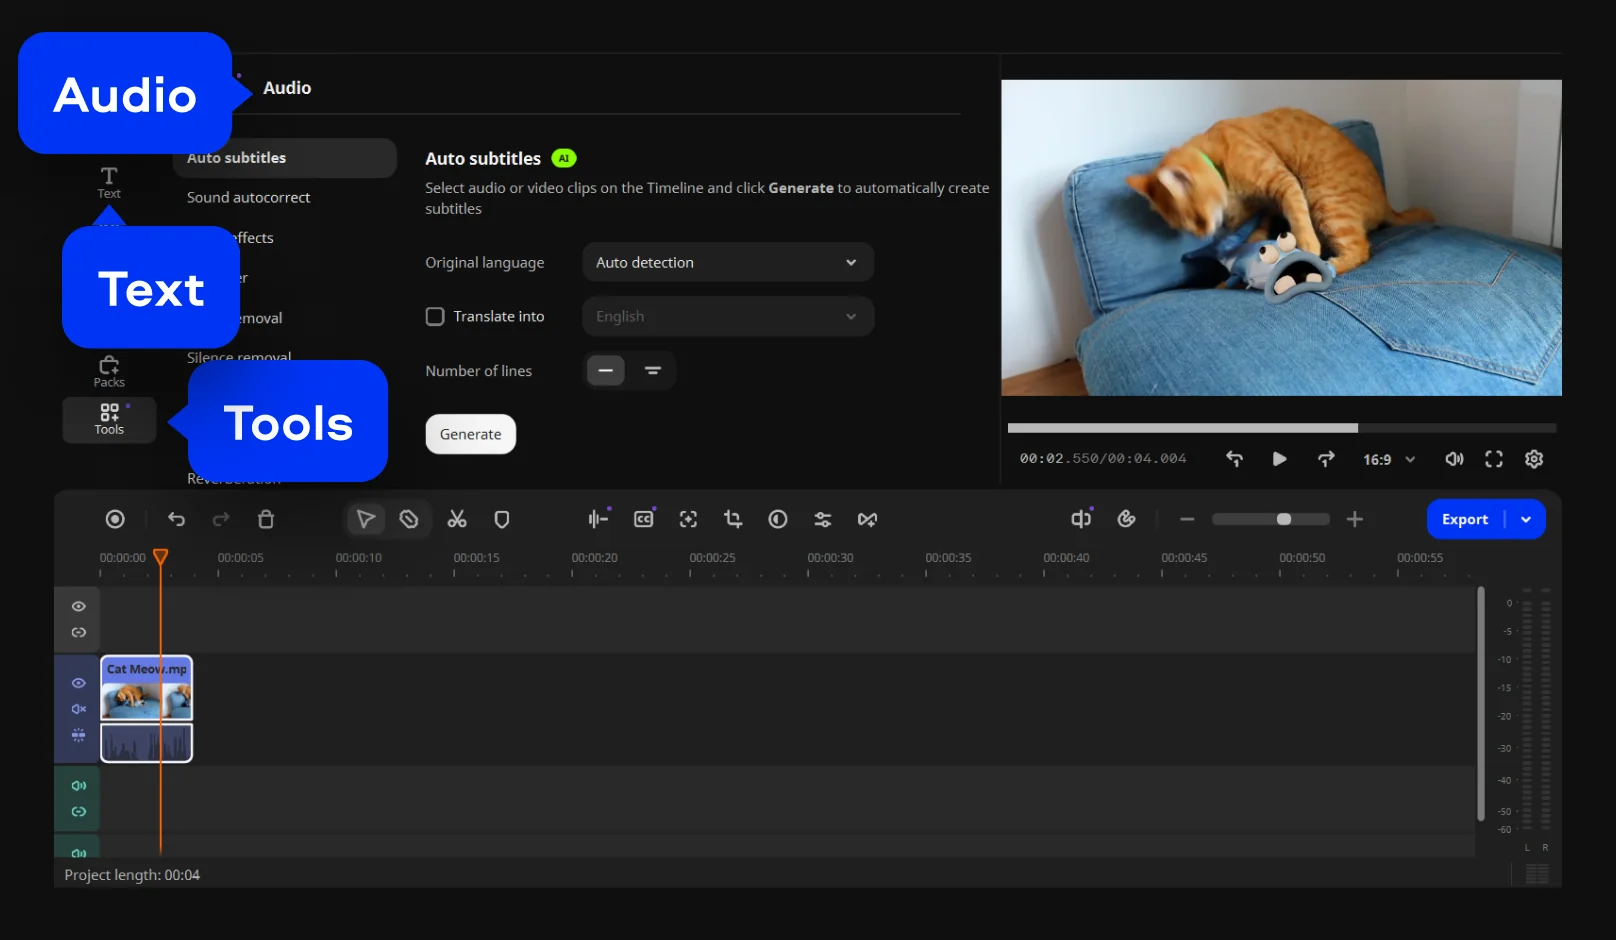
Movavi Video Editor is a more sophisticated solution for editors who need more control. This desktop tool combines video editing and text tools in one simple workflow. You can generate automatic subtitles with AI or type them in the editor. The software contains a rich library with various text styles and creative presets. You can change fonts, colors, and the position of the text on the screen. This editor synchronizes your subtitles with the audio to ensure a professional look.

3GPP, 3GPP2, ASF, AVI, DivX, FLV, SWF, M2TS, M2T, MTS, TS, MKV, MOV, MP4, MPG, MPEG, MPE, M1V, MOD, TOD, MWV, M4V, MXF, OGV, QuickTime, RM, RMVB, WebM, WTV

We’re the #1 choice for millions of people from all around the world. Join our thriving community and create stunning content with incredible ease.
70M+


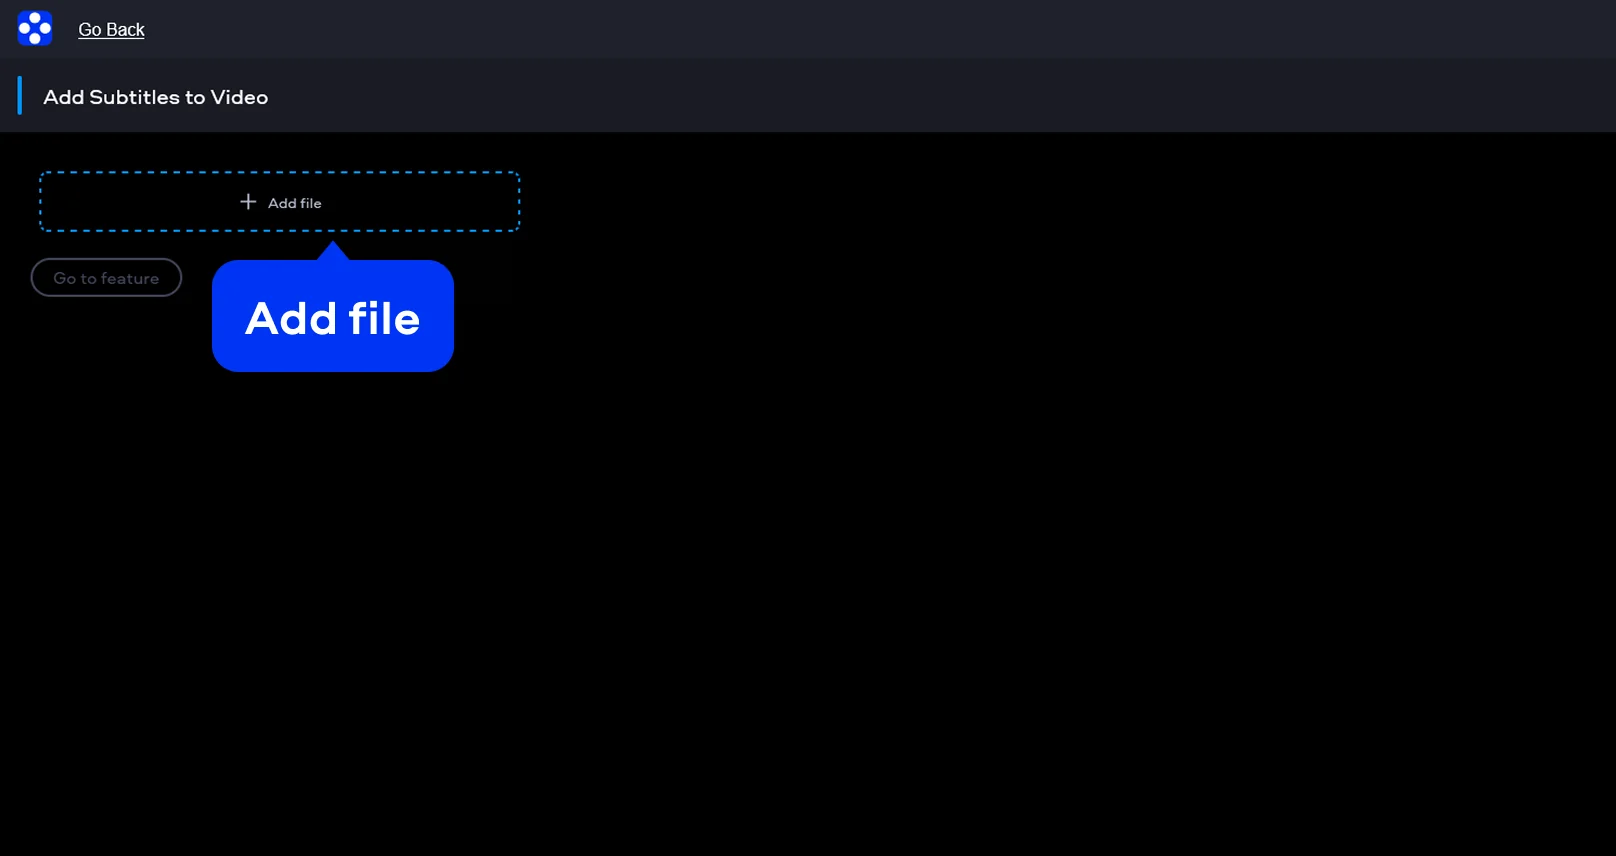
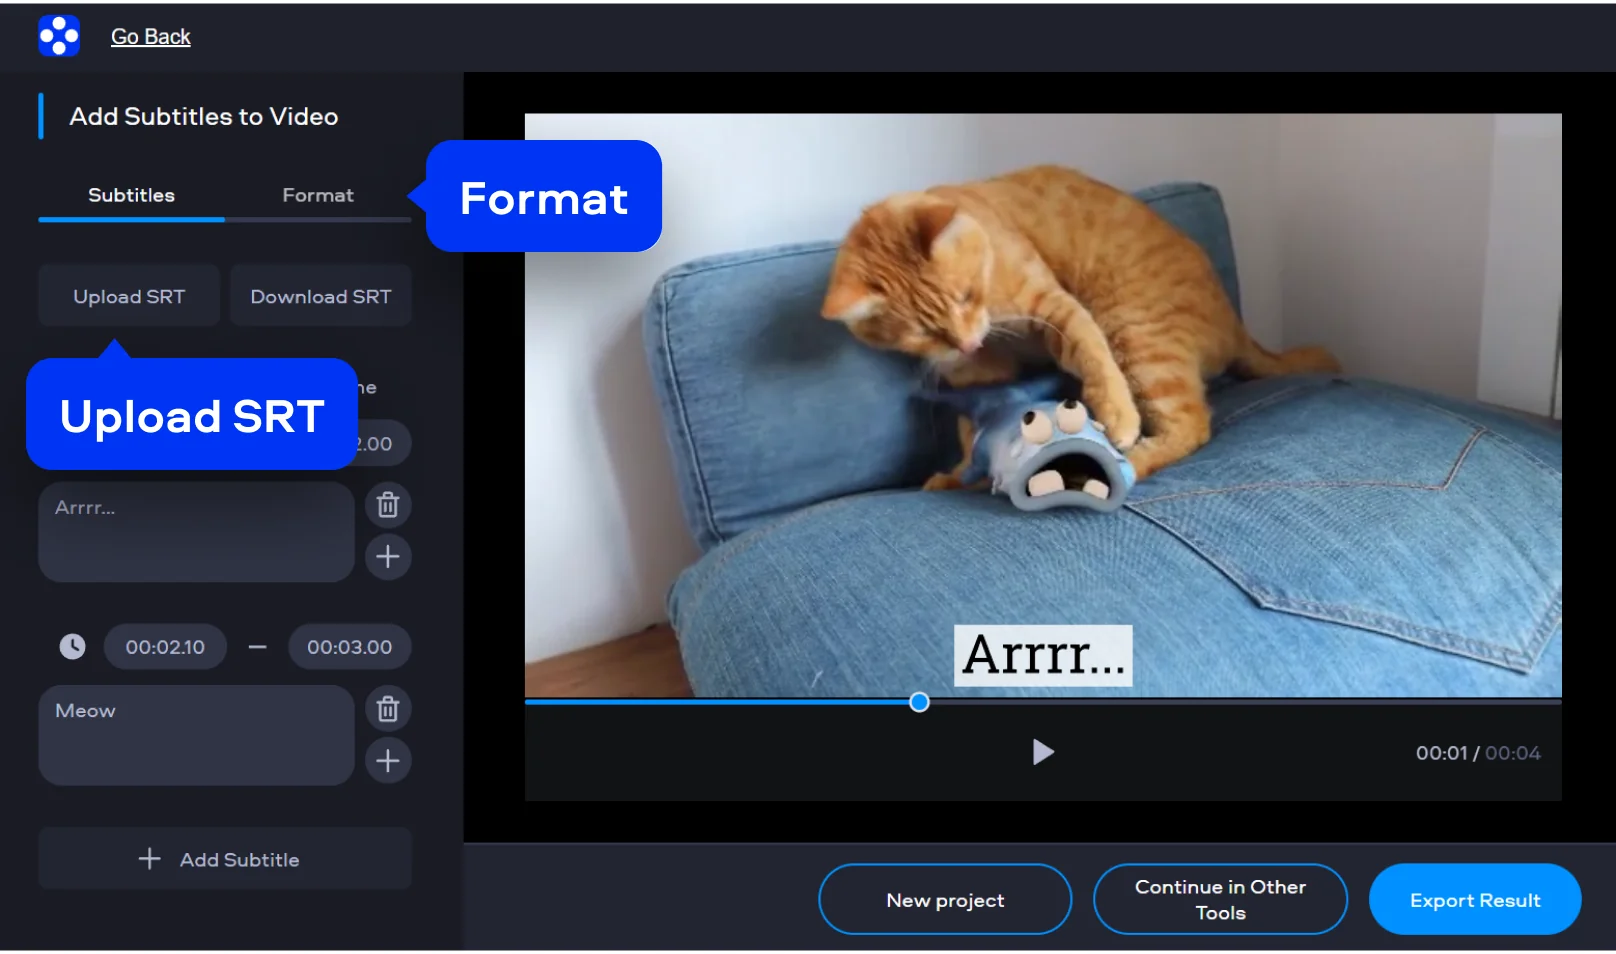
You can use Movavi’s online tool to add subtitles to an MP4 at no cost. Upload your video and then insert subtitles into mp4 manually or add SRT to MP4. It works in your browser’s current tab and does not ask for any installation. You just need a stable internet connection to complete your editing project.
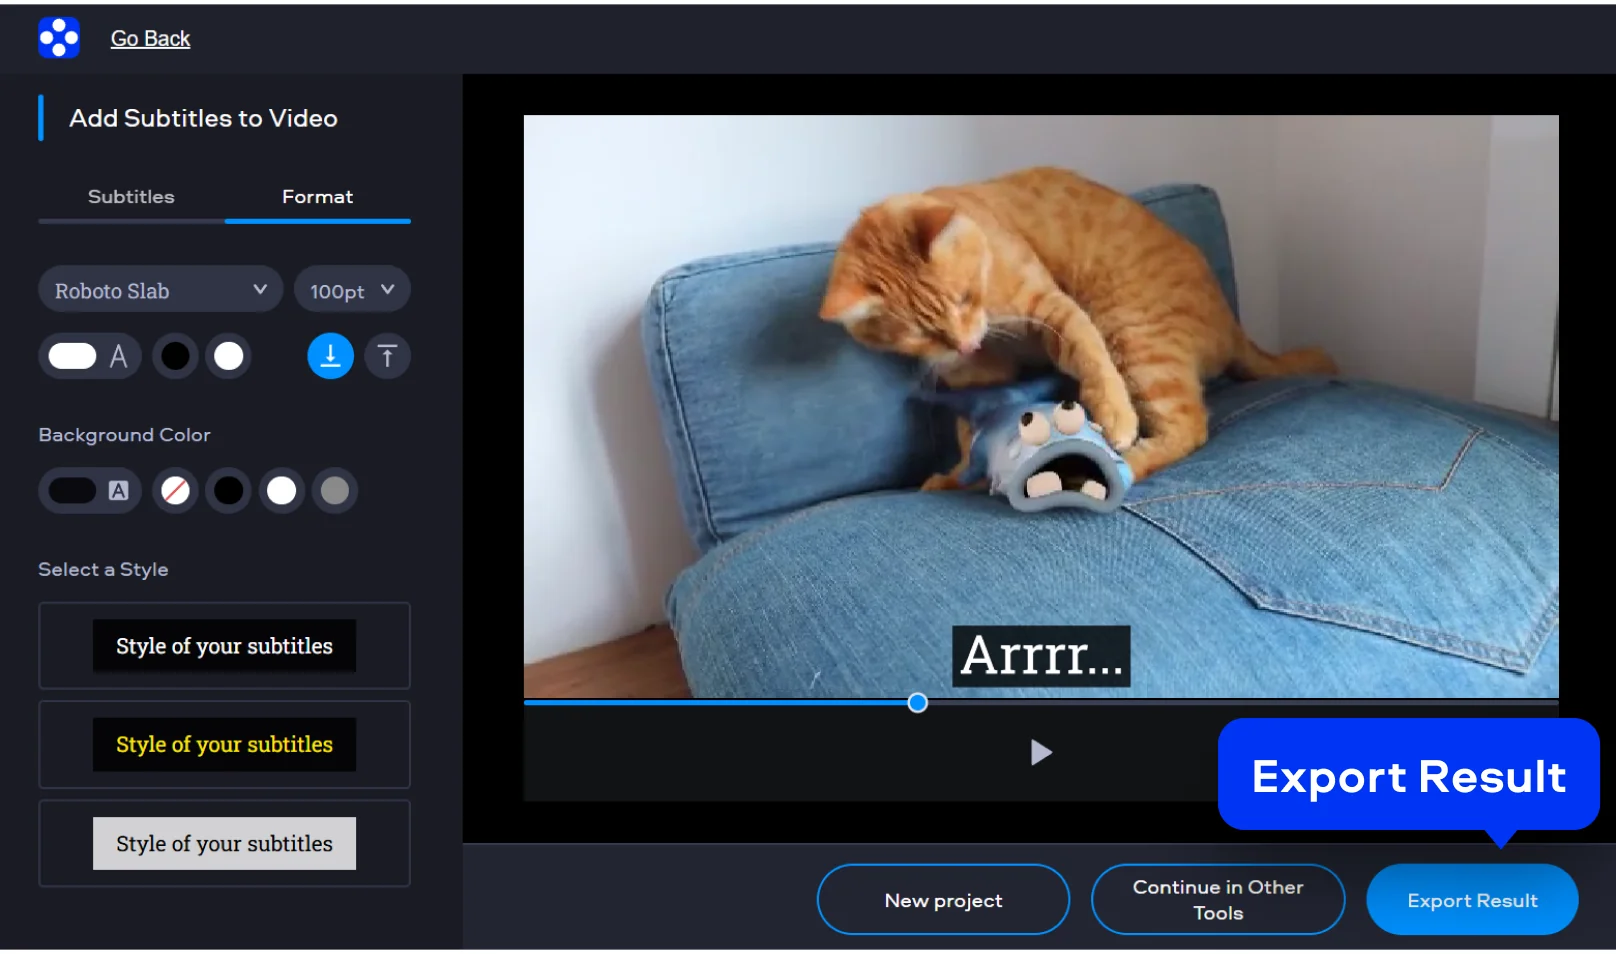
No. When you use the online software, your final movie comes out without a watermark. You can permanently add subtitles to MP4 and get a clean video. It is ready for your audience right after the download. This makes the online version a very practical choice for creators.
Hardcoded text stays on the video and you cannot turn it off. Closed captions are different because the viewer can hide them. When you hardcode subtitles to MP4, the text stays part of the video image forever. This way your text shows up even on players that do not support extra files.
Yes. In Movavi Video Editor, use the Auto subtitles feature to create text fast. You can review the draft and then add captions to an MP4 with one click. It is a huge time saver for long videos. The software listens to your audio and types the words for you.
Yes. Movavi Video Editor gives you full control over the look. You can change the font and color or embed SRT in MP4 with your own style. This makes it easy to insert subtitles into MP4 that look great. You can also move the text to any spot on the screen.
Yes. All features are available for free – no payment required.
Yes – it works on both Android and iPhone, and it’s free to use.
No. You can export videos without a watermark.


1.5M+ users already subscribed to our newsletter