Movavi Screen Recorder
The perfect way to record anything from your screen

How to Screen Record on a Dell Laptop [7 ways]
To record your screen on a Dell laptop, try Movavi Screen Recorder:

Whether you need to record your screen activity to create a presentation to publish online, to screen record your webinar for later reference, or for any other reason – if you’re using a Dell or similar PC, you have a few options. So, let’s talk about how to screen record on a Dell laptop.

Here’s what Movavi’s team does to provide you with verified information:
When selecting products to include in our reviews, we research both demand and popularity.
All products mentioned in this article have been tested by Movavi Content Team.
When testing, we aim to highlight the best features of a product and what it’s best suited for.
We study user reviews from popular review platforms and make use of this information when writing our product reviews.
We collect feedback from our users and analyze their opinions of Movavi software as well as products from other companies.

Best for: One-stop program for pro-level screen recordings
Movavi Screen Recorder is a free-download screen recording program that includes a robust set of video editing tools and effects. This user-friendly software allows video creators to capture footage from their screen and/or webcam and turn it into professional-level videos.
Main features:
To record your screen on a Dell Inspiron, Latitude, or other Dell laptop or desktop, follow these steps:

Best for: Screen recording without downloading additional software
Game Bar (also called Xbox Game Bar or the Windows 10 Game Bar) is a built-in screen recorder that comes with all Windows 10 and Windows 11 PCs. It doesn’t work with computers running older versions of Windows, like Windows 7.
Follow these steps to record your screen with Game Bar:
Open the application you want to record.
If you’re ready to start recording immediately, just press Windows key + Alt + R.
If you want to adjust your recording settings before you start recording, press Windows key + G. A dialogue box will appear asking “Do you want to open Game bar?” Check the box next to “Yes, this is a game” to launch Game Bar.
When you’re done recording, press Windows key + Alt + R again to stop recording. You can find your saved video by going to Videos > Captures.
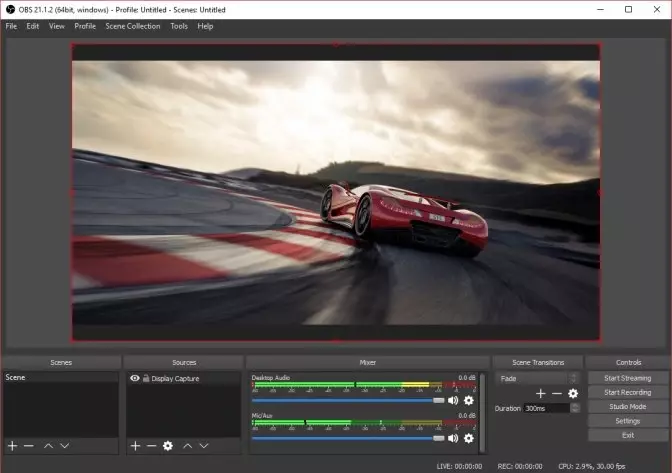
Best for: Open-source screen recording for PC, Linux, or Mac
OBS Studio is a freeware screen recorder available for Windows, Mac, and Linux computers. Recording with OBS Studio is fairly easy, and you can do it by following these steps:
Download, install, and launch OBS Studio.
Download OBS Studio
Click + at the bottom left corner of the screen to start a new screen recording.
In the Sources box, click Display Capture, choose Create new, and name your export file.
Make any adjustments you want to the size and aspect ratio of your video recording window.
When you’re ready, OBS Studio will record the portion of the screen you’ve chosen. When you’re done, click on File to find your saved recording.

Best for: Online screen recording
Screencapture.com is an online screen recorder with free and paid options. Users can easily record their screen with system audio, microphone, and webcam recording, but you’ll need to pay for a Screencapture.com subscription to remove the watermark from your videos.
To capture your screen activity, follow these steps:
Go to Screencapture.com.
Visit Screencapture.com
Select the options that you want (microphone, system audio, webcam, and watermark). You can only remove the watermark if you agree to purchase a subscription.
Click the green Start recording button.
A window will appear that allows you to choose to record your entire screen, a single window, or a single Chrome tab. Choose which one you want and click Share.
When you’re done, save your new recording to your computer.
Best for: Free online screen recording with paid features
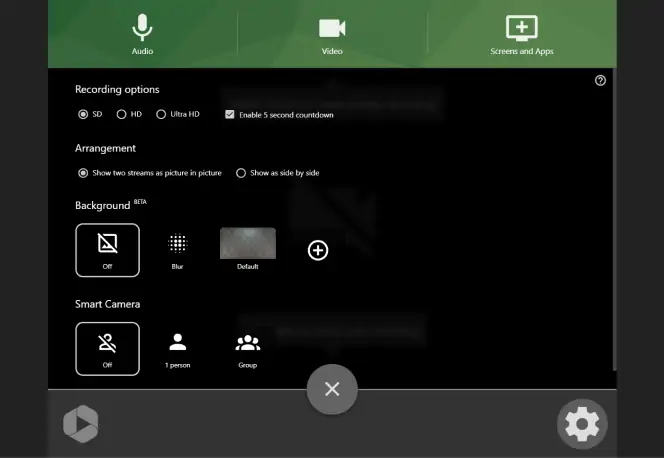
Panopto Express is a free online screen recording platform with paid features. To take advantage of many features, you’ll need to sign up for a Panopto account. With or without an account, you can record your screen in a few steps:
Go to the Panopto website.
Go to Panopto Express
Click on the Screen and Apps button to record your screen.
Choose whether you want to record your entire screen, a single window, or a specific Chrome tab. Click Share.
Click the red record button to start recording.
When you’re done, click the record button again to stop recording. You can now download and save your recorded video.
How to screen record on a Dell computer with extensions
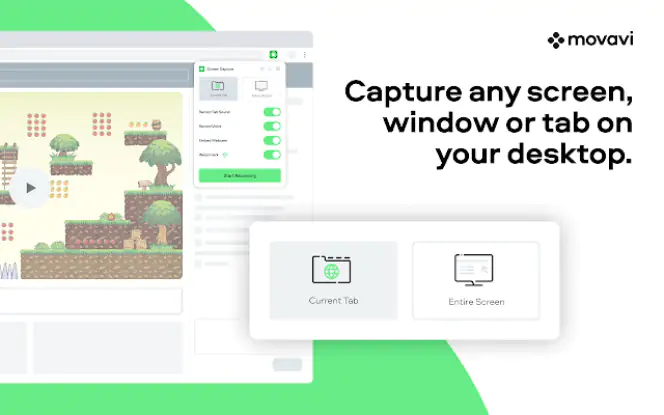
Best for: On-the-fly screen recording and screenshots in Google Chrome
Movavi Screen Recorder for Chrome is a convenient screen recording extension for the Google Chrome browser. Users can record for free or pay a reasonable subscription fee to record videos without a watermark.
Here’s how to screen record on a Dell computer with Movavi’s Chrome extension:
Download the Movavi Screen Recorder for Chrome extension.
Get the extension
Click on the puzzle piece icon and select the green Movavi icon to pin the extension to your browser window for easy access.
Tap the Grant Access buttons next to Record Voice and Embed Webcam to use these features.
Choose what to record by clicking the Current Tab or Entire Screen button.
Click the Start Recording button.
When you’re done, click on the green Movavi icon again and hit the Stop button.
You will be taken to a new tab to download your video and save it to your computer.
Best for: Recording part or all of a screen with Chrome
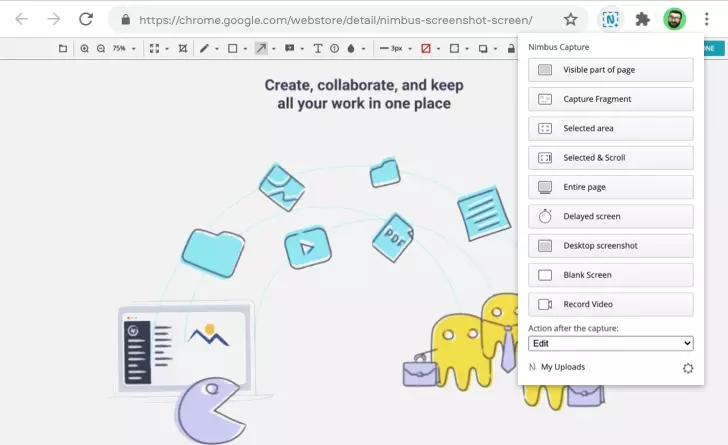
Nimbus is another Chrome extension that allows you to perform Dell screen recording online via the Google Chrome browser. To get started recording your screen with Nimbus, follow these steps:
Download the Nimbus Chrome extension.
Get the extension
Click on the puzzle piece icon at the top corner of your browser to access the extension.
Click the Nimbus icon and select your recording parameters (e.g., Capture fragment, entire page, browser window, etc.).
Start recording your screen. When you’re done, stop recording and download your video.
How to choose the best screen recorder
So, which of these programs should you choose for your screen recording needs? Whether you have a Dell XPS laptop or you need to know how to record your screen on a Dell desktop, all of these programs will do the job. However, not all of them will perform the best for your specific needs. As you consider your options, we recommend keeping a few factors in mind:
User interface: Can you screen record on a Dell laptop with any of these programs? Yes. Are all of them easy to use with intuitive interfaces? Not so much. Take a look at the way each program is set up, and see which one appeals most to you.
Features and tools: If you’re creating videos for professional presentations or online courses, you’re going to need more than just a recorder. Your videos will need intros and outros, smooth transitions, and other edits. If that’s the case, you might want to consider a robust program that does more than just screen recording. Otherwise, you’ll end up needing additional third-party software to create your finished video projects.
Pricing: Everyone loves free software, but it doesn’t always do everything you need. Sometimes, it makes sense to pay for the premium version of a program to ensure that you get everything you need. For software that’s reasonably priced and gives you a lot of features, we recommend trying out Movavi Screen Recorder.
Customer support and documentation: While many of the features and functions of a screen recorder are intuitive, there may be other things you can do with the software that could take your videos to the next level. Choose software that has a large library of documentation and educational material, as well as a strong reputation for customer support.
Best ways to record on a Dell laptop
Conclusion
In this article we looked at various ways to record a Dell laptop’s screen. No different from any other PC, a Dell laptop can be recorded with system sound, microphone, and webcam. This is especially convenient with Movavi Screen Recorder that you can try out for free. As an online service, try Screencapture.com – a safe tool that doesn’t require installation of additional software.
Movavi Screen Recorder
Frequently asked questions
Yes, here’s how to record your screen on a Dell laptop:
Download and install Movavi Screen Recorder.
Download Movavi Screen Recorder
Choose your recording parameters and toggle which features you want to use during your video.
Tap the REC button or press the F10 key to start recording. You can pause your recording by pressing F9.
When you’re finished, hit the Stop button or press the F10 key.
Make any edits you want to your video. Then click Export, choose a file name, and save your video.
Yes, if you have Windows 10 or newer, your Dell comes with Game Bar, a built-in screen recording program. So, if you’re looking for how to screen record on a Dell laptop with Windows 10, this is an option.
See other useful how-to guides
How to take a cropped screenshot on a Mac
What is the OBS virtual camera?
10 Easy Ways to Record Internet Radio [2025]
How to Record a Google Slides Presentation
How to Record a Meeting on Zoom, Skype, and Other Apps
7 Best Screen Recorders for Windows 7 (Free)
How to Clip on a PC: 5 Easy Ways – Movavi
CleanShot for Windows [Free Download] – Movavi
How to Take a Partial Screenshot on Windows 10
12 Best 4K Screen Recorders for Any Device – Movavi
How to screenshot on ASUS laptops
Best screen recorders for a laptop
Unmasking Success: How PC Screen Recorders Empower No-Facecam YouTubers

Have questions?
Join us for discounts, editing tips, and content ideas


1.5M+ users already subscribed to our newsletter