Step 1. Install Movavi Video Editor
Download and install Movavi Video Editor for your PC or Mac.
Use Movavi Video Editor!
NEW: Adjustable video templates for any vibe – made of Blocks
NEW: Blocks – pre-edited video segments you can customize
Fast and easy editing: cut, crop, adjust colors and speed
Auto subtitles, noise removal, hundreds of effects, and more
By clicking the download button, you're downloading a trial version of the program.*

Here’s how to crop black bars out of a video without distortion: add the clip, draw a crop frame around the picture, and export it at the new aspect ratio. In Movavi Video Editor, you drag that frame in a few clicks, and the bars stay out of your export.
Movavi Video Editor is an intuitive video editor with customizable video templates, one-click AI tools, and hundreds of drag-and-drop effects. For this job you need only its crop tool.
This guide fits you if you post travel vlogs and your oldest footage came off a 4:3 camera. It also fits you if you cut brand clips for Instagram or Facebook and a horizontal master has to fill a vertical screen. Both problems have one cause: the clip’s shape does not match the frame it plays in.
An aspect ratio is an image’s width compared with its height, written as width:height. When a clip is narrower than the screen, you get bars at the sides (pillarboxing). When it is wider, you get bars above and below (letterboxing). The bars get in the way during full-screen viewing and on YouTube or TikTok. Call them bars or borders, the fix is the same: you crop black borders out of the frame. Cropping changes the aspect ratio and removes the bars, so the picture can use the whole screen.
Movavi Video Editor, a desktop app for Windows and macOS, plus the video you want to fix. Pick the edition that fits your budget. Movavi Video Editor Free lets you try the crop tool, and its exports carry a 60-second cap, no 4K, and a watermark. Movavi Video Editor Lite keeps the core editing tools and auto crop behind a small watermark. The full version has every feature, with no watermark or export limits.
More than 70 million people use Movavi software. New tools land often, with 25+ updates a year. For ideas on what to make next, Movavi Ideas is a free tutorial hub with new editing ideas every week and a step-by-step tutorial for each one.
Download and install Movavi Video Editor for your PC or Mac.
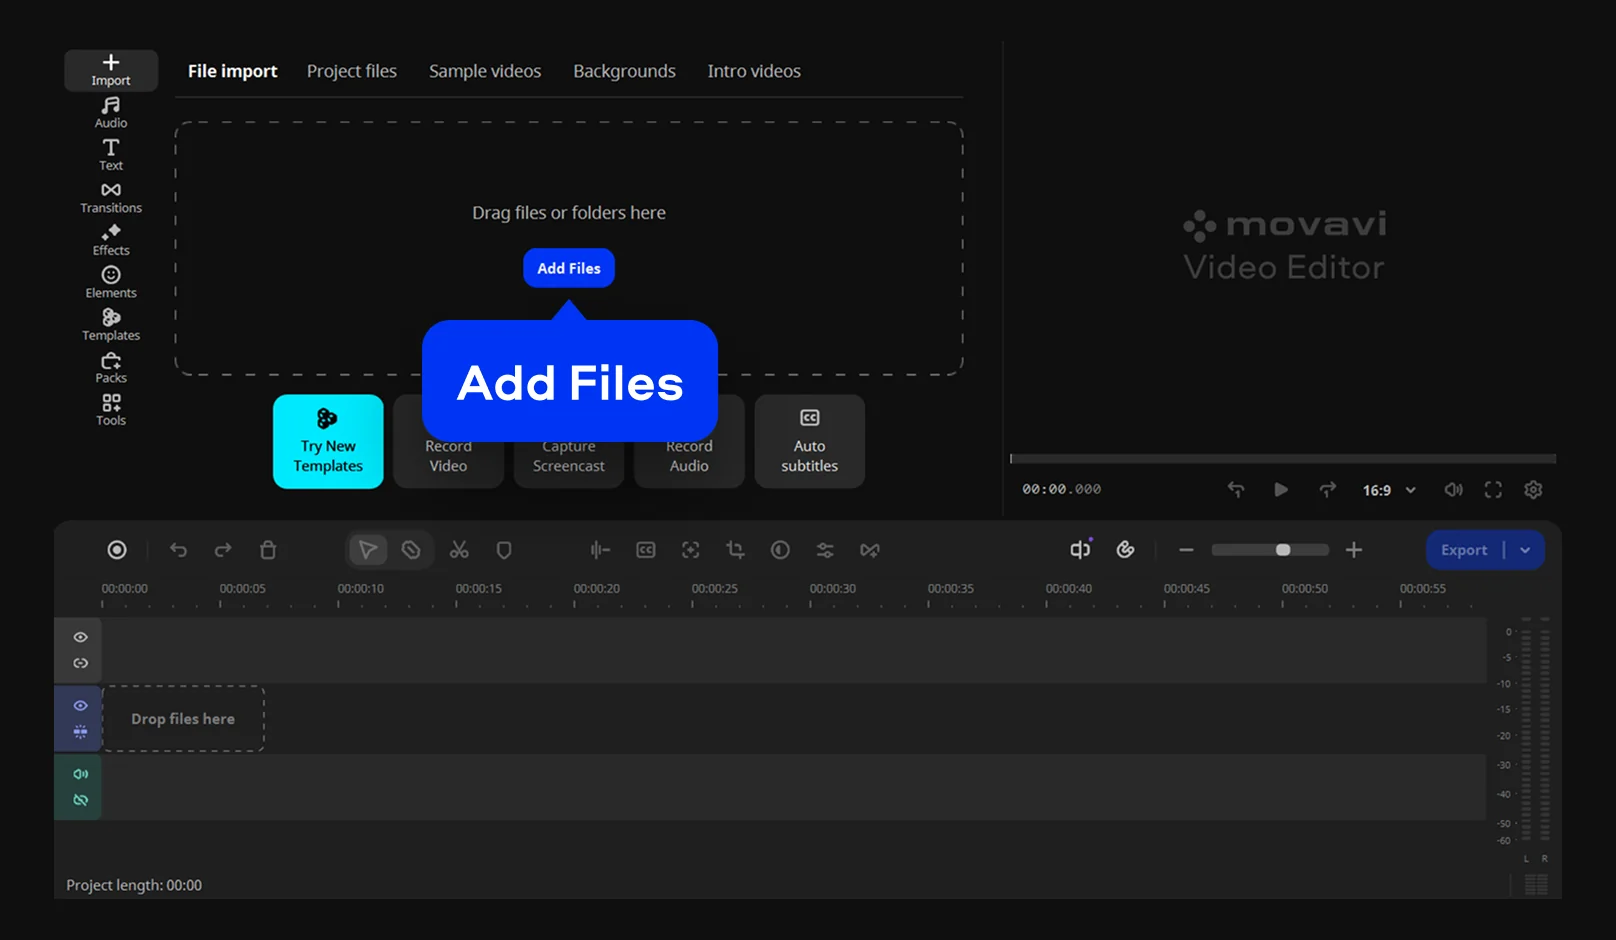
Upload your video to the program and drag it onto the timeline.
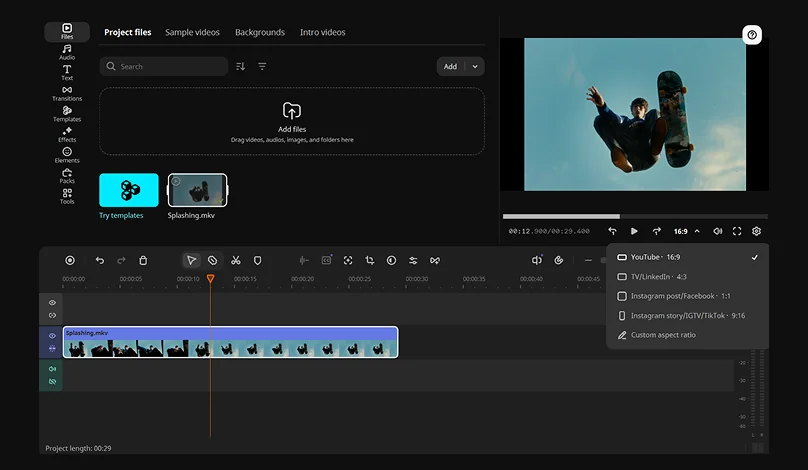
Open the Resolution list under the preview window and choose a resolution marked with the aspect ratio you need.
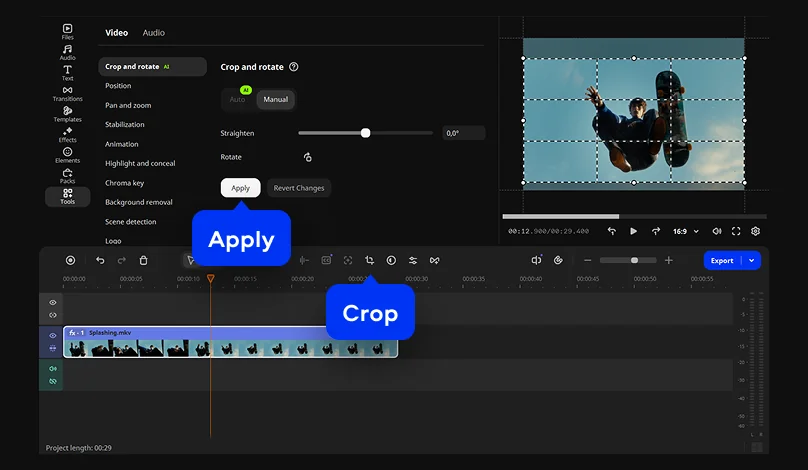
Select the clip on the timeline, then click the Crop button on the toolbar. A cropping frame appears inside the player.
Drag the corners of the frame to change its size, and drag its center to move it. When the frame covers only the picture, click Apply.
Click Export, select the output settings, and hit Start.
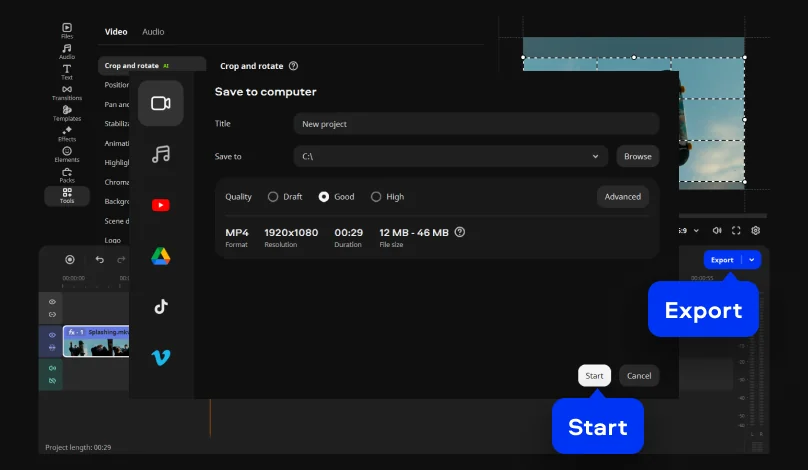
Cropping cuts away the outer edges of the frame. Stretching scales the picture unevenly to fill the screen, so people end up looking short and wide.
To crop videos without distortion, keep the crop frame in the same proportions as the project. Movavi Video Editor does this by default. The trade-off is that everything outside the frame is cut. Drag the frame onto faces and the main subject first.
Pick the ratio for your platform, then crop to it. 16:9 is the standard for high-definition video and 9:16 is the vertical format made for portrait viewing on phones.
Format
Aspect ratio
Where it fits
Horizontal
16:9
YouTube
Vertical
9:16
TikTok, Reels, Shorts
Square
1:1
Square posts in social feeds
Say you make brand clips for Instagram or Facebook and the master is horizontal. Manual mode suits old clips with fixed bars. Auto mode suits a moving subject, so in the Crop tool, choose Auto instead. Auto-tracked cropping follows the speaker or product and keeps them centered while it converts horizontal footage to vertical. One click replaces moving a frame by hand, clip after clip.
Before you export, scan the preview: faces, the product, and on-screen text should sit inside the frame. If you add auto subtitles, you can set their position on screen, which keeps them clear of the edges.
Once the frame is right, style the clip. Movavi Video Editor comes with hundreds of drag-and-drop effects: titles, transitions, filters, and overlays, plus copyright-free music. Drop a retro look on the travel vlog or a bold title on the brand clip. For more themes, the Movavi Effects subscription adds 10,000+ effects and 1,500+ music tracks, and you can preview any of them on your own video for free.
Here’s how to crop a video on other devices.
Open an old 4:3 clip or a horizontal brand video in Movavi Video Editor, crop it to fit, and see how much more screen your picture gets. After that, browse Movavi Ideas for what to make next.
*The free version of Movavi Video Editor may have the following restrictions depending on the build: watermark on exported clips, 60-second video or 1/2 audio length limit, and/or some advanced features unavailable when exporting videos.
Crop changes the edges of the picture; trim changes the length of the clip. Movavi Video Editor also has a Blade tool for splitting a clip at precise points.
Cropping cannot add detail. Zoom-and-crop is enlarging the picture to fill the display, so start from your sharpest source. If a low-light clip is grainy, one-click AI video denoise removes grain while keeping faces and edges sharp.
Set the project to the vertical ratio, then crop with Auto mode so the speaker or product stays in frame. Add auto subtitles afterward; they come in more than 60 designs.
Add the Crop effect (Video Effects, then Transform) to your clip, then set Left, Right, Top, and Bottom in Effect Controls. Premiere® Pro’s Auto Reframe keeps the main subject in frame when you change the format.



1.5M+ users already subscribed to our newsletter