Step 1. Download and install the program
Download Movavi Video Editor from the official website and install.

By clicking the download button, you're downloading a trial version of the program.*

Whether you’re narrating a day-in-the-life vlog, scoring a weekend road trip for the family group chat, or walking your team through a project demo, the audio is often what a video ends up getting remembered for. This guide covers how to add audio to a video – background music, sound effects, or your own voiceover – using Movavi Video Editor.
Movavi Video Editor is an intuitive video editor with customizable video templates, one-click AI tools, and hundreds of drag-and-drop effects. It’s a desktop app for Windows and macOS that runs offline – for PC or Mac, you don’t need a connection partway through a project to import a file, record a voiceover, or clean up the sound. Hover previews and drag-and-drop keep editing simple, and our free Movavi Ideas hub adds a new step-by-step tutorial every week.
If you’d rather skip building a soundtrack from scratch, open one of our video templates instead. Movavi Video Templates is a multi-style library of customizable, pro-looking, modular templates for any kind of video. Each template comes with pre-set transitions, text, and music, and it’s built from Blocks: short pre-edited parts, like an intro or a countdown, where you drop in your own videos, photos, and text. Use a template as is, or reorder, add, or remove Blocks. Several templates come with the full version at no extra charge, and the Movavi Templates subscription unlocks the rest.
Download Movavi Video Editor from the official website and install.
Click Add Files to import your video and drag it onto the Timeline to start your project.
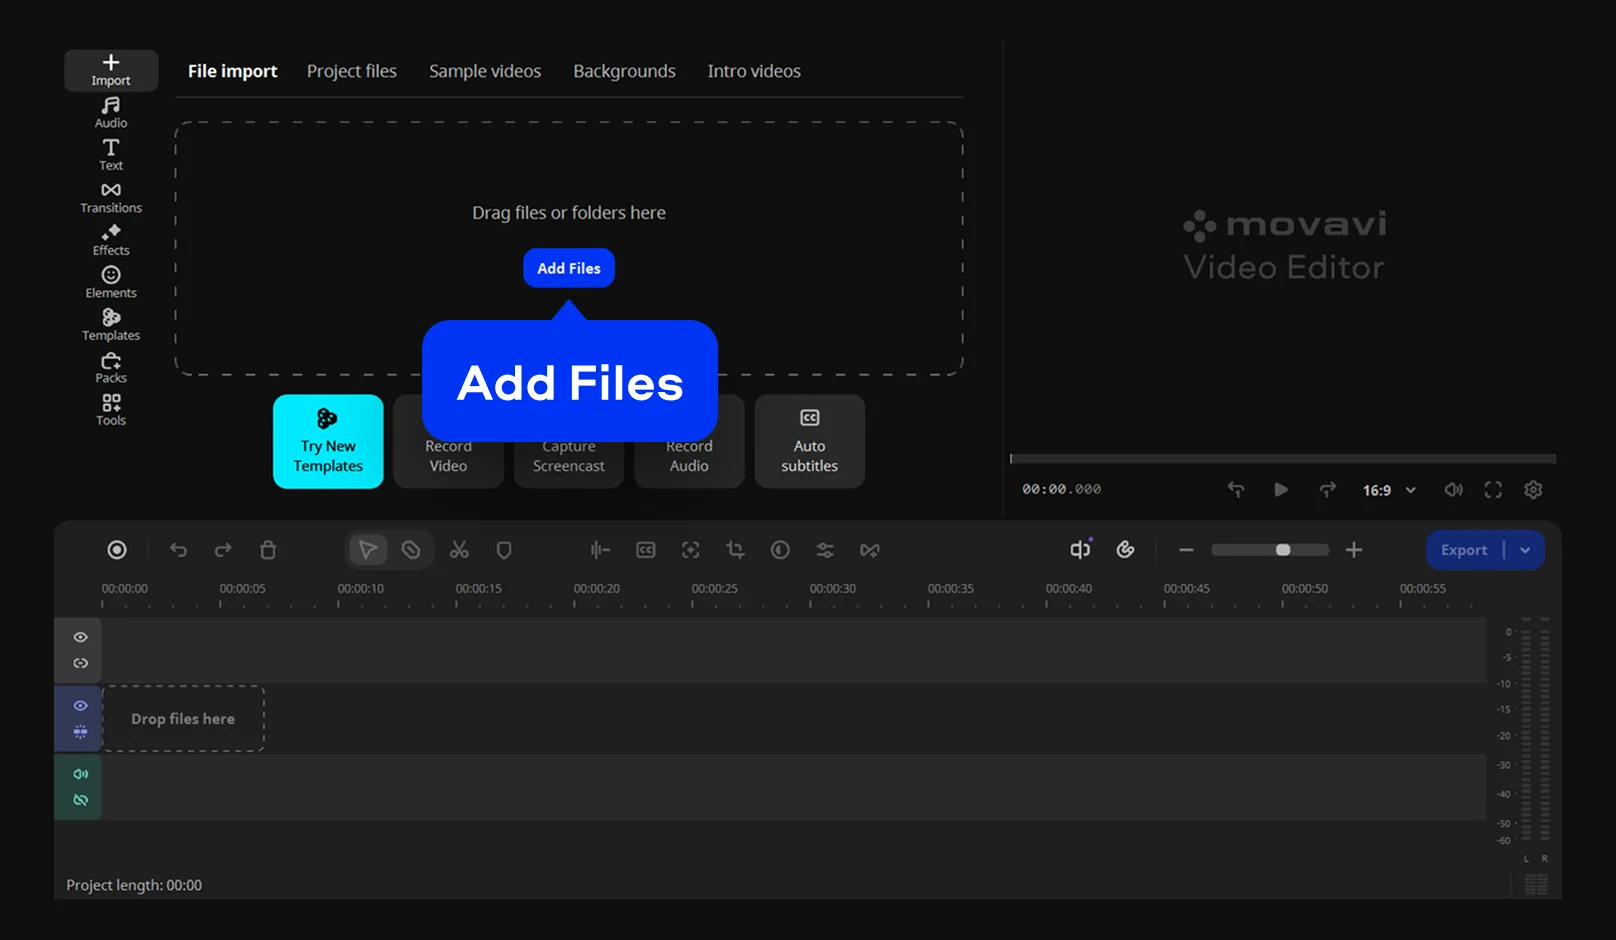
To use a track you already have, import it the same way as your video, then drag it onto the Timeline under your footage. To record narration instead, click Record Audio and capture it straight onto the Timeline from a connected microphone. That means you can talk over the footage as it plays instead of recording separately and syncing it up afterward.
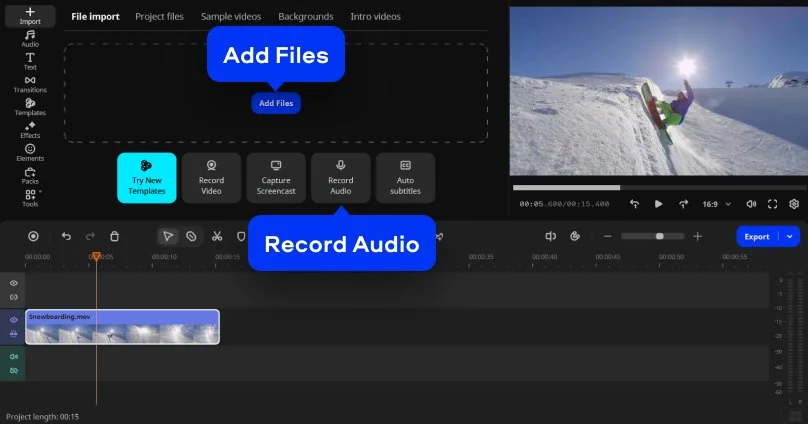
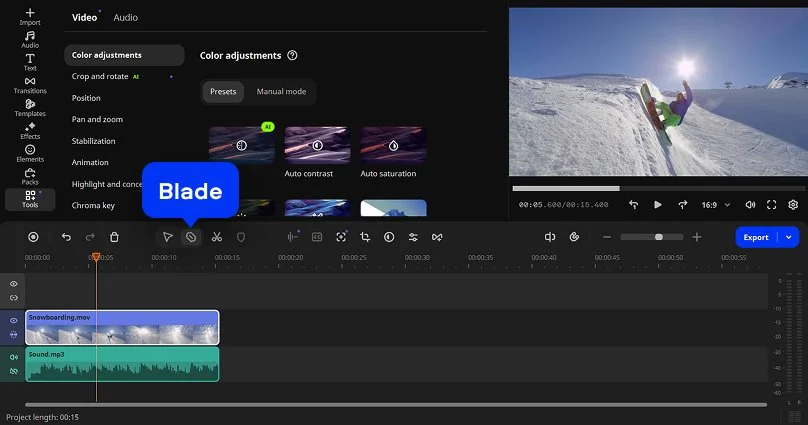
Drag the edges of the audio clip to shorten it, or use the Blade tool.
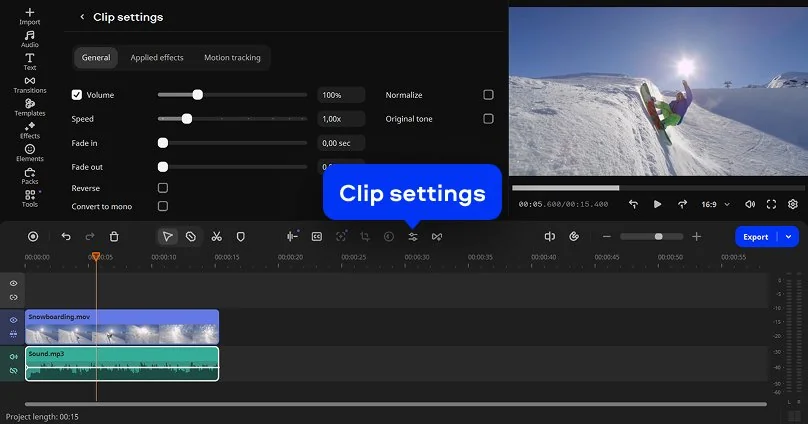
In Clip settings, add a brief fade-in and fade-out so the track doesn’t start or stop abruptly. Use the Volume slider to manually dip the music under your dialogue instead of muting it outright, and apply normalization if you’re mixing clips recorded at different volumes.
If a voiceover picked up fan noise, traffic, or a steady hum, run it through the Noise removal in the Tools menu. The voice stays clear while the background noise drops.
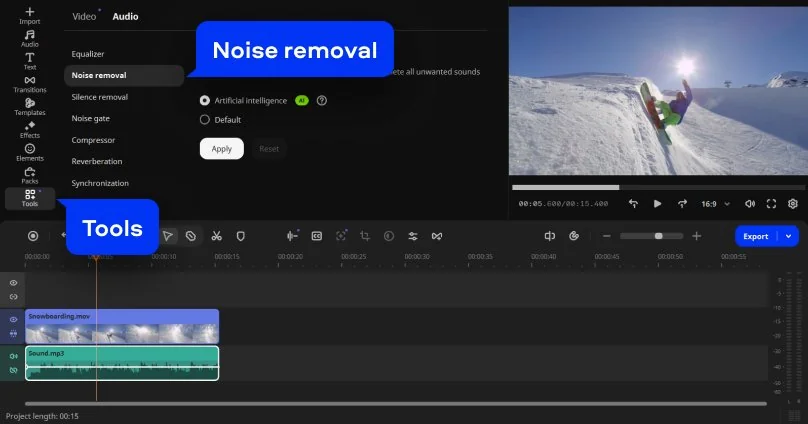
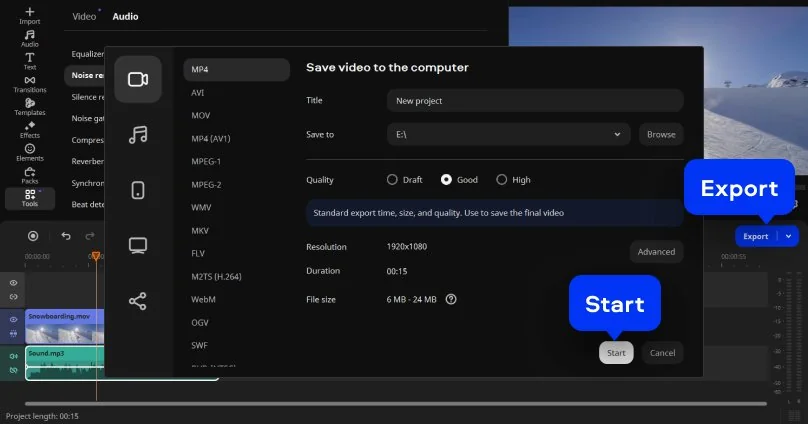
When the mix sounds right, click Export. Set the resolution, quality, and format. Then click Start to save the result.
*The free version of Movavi Video Editor may have the following restrictions depending on the build: watermark on exported clips, 60-second video or 1/2 audio length limit, and/or some advanced features unavailable when exporting videos.

Movavi Video Editor imports MP3, WAV, and FLAC. FLAC keeps the audio quality closest to the original master, while MP3 is the format most royalty-free libraries use by default.
Bring the music in first, then layer narration on top and pull the music volume down under the dialogue with the Volume slider rather than cutting it to silence – that keeps the energy without competing with the voice.
Record it directly onto the Timeline from a connected microphone while the footage plays, instead of recording separately in another program and lining it up afterward.
No. Importing audio, recording narration, and running noise removal all happen locally once the software’s installed, so a dropped connection mid-project won’t interrupt anything.
Download Movavi Video Editor from the official website. The Free edition lets you try the tools in this guide, with a 60-second export cap and a watermark. The full version removes both.



1.5M+ users already subscribed to our newsletter