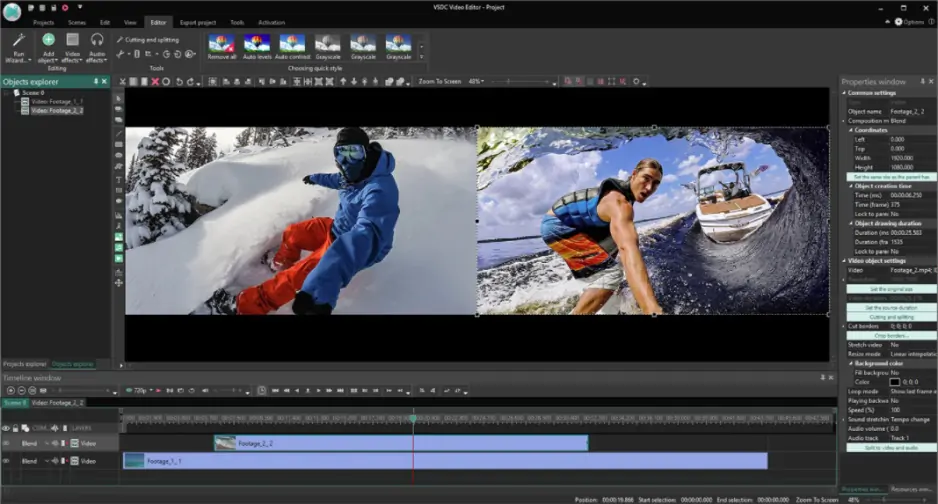
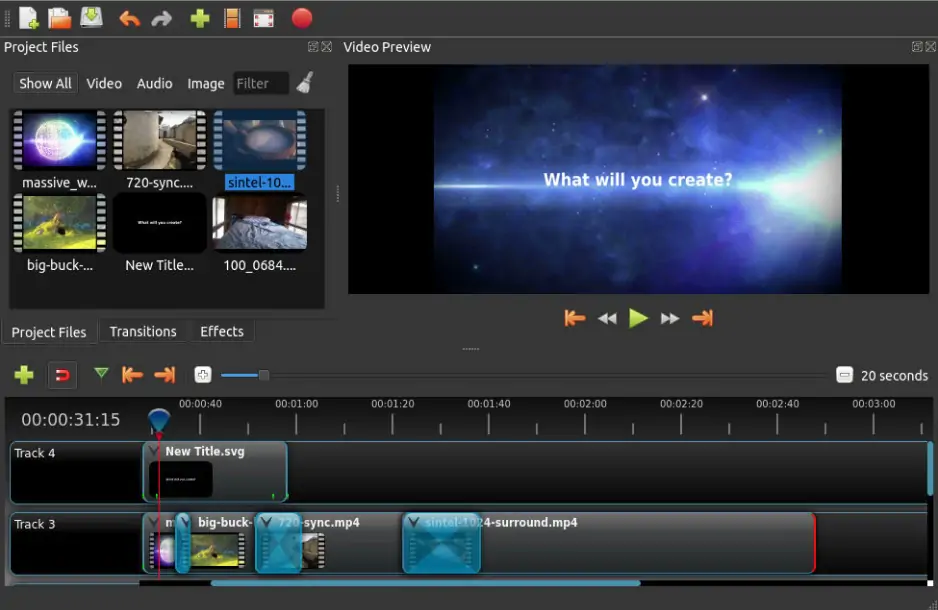
Best Free Video-Editing Software for Windows 7

To boost the volume on your video, use Movavi Video Editor!

  • Edit and enhance videos easily
  • Add stylish transitions, titles, and filters
  • Stabilize and reverse video, equalize sound, and more

By clicking the download button, you're downloading a free version of the program.*

Edited by Ben Jacklin
54 487

Are you looking for the best free video editing software for Windows 7? Then you’ve come to the right place because we’ll be reviewing six of the best editing software that’s ideal for beginners and professional editors. If you’re on a budget, these video editing platforms will help you create professional content for free.

  1. Movavi Video Editor – best for quick grading
  2. OpenShot – best for producing videos and animation on a desktop or laptop for free
  3. Avidemux – best for users editing video files in multiple formats
  4. VideoPad – stabilization across all major platforms
  5. Nero Video – suitable for beginner editors
  6. Lightworks – best for home or business users, social media content creators, and anybody who’s new to video editing, as it’s beginner-friendly.

At Movavi, we’re committed to providing you with verified information only. Here’s what we do to ensure this:

  • When selecting products to include in our reviews, we research both demand and popularity.

  • All products mentioned in this article have been tested by Movavi Content Team.

  • When testing, we compare key parameters, including video and audio trimming, visual effects, stabilization, video quality adjustments, saving and sharing videos, and other significant features.

  • We study user reviews from popular review platforms and make use of this information when writing our product reviews.

  • We collect feedback from our users and analyze their opinions of Movavi software as well as products from other companies.

Movavi Video Editor is one of the best video editors for Windows 7 available. It has all needed basic and advanced editing features. Use it to create small home videos or short clips for social media, like YouTube or TikTok. The video editor also allows you to make elaborate movies with special effects. With this software, you get transitions with sounds as well as a quick movie creation tool. The drag-and-drop operation makes it ideal for beginner editors.

What’s more, you can create multiple video tracks, which is perfect if you plan to create an overlay video. The app also has motion tracking. You also don’t have to worry about format compatibility issues since Movavi Video Editor supports all popular formats as well as high resolutions, and you can change video formats to play on various devices. The program is free to download and you get a free 7-day trial. So you can test out the features and tools the video editor offers. After the trial is up, you can get the full version for your Windows 7 PC.

Pros:

  • User-friendly interface

  • Offers an easy-to-use movie creation tool

  • Has picture-in-picture editing tools

  • Includes transitions, filters, titles, and stickers

  • Has chroma key

  • Can edit vertical videos

Cons:

  • The free trial has some limitations

NEW
in Movavi Effects Store

TIMER Pack

Stylish timers, countdowns, and stickers for your streams, sports videos, and presentations!

Use the packs from Movavi Effects Store
in your Movavi Video Editor!

Open-source video-editing app

OpenShot
Editor's choice

Basic and advanced editing features

Movavi Video Editor

Editor for VR and YouTube

VideoPad

Top free video editors for Windows 7

Below you’ll find reviews of the best free video editors for Windows 7 PCs. Check out all reviews as well as every app’s pros and cons, and choose the one that suits you best.

OpenShot

  • Best for

    Creating animations, short films, and videos for social media

OpenShot is one of the best video editors for Windows 7. It’s a free open-source video-editing app that is feature-rich and ideal for people who want to create professional content on a budget. There are plenty of features to play around with, both for beginners and advanced users. For example, OpenShot has slow motion and time effects to reverse or slow down your videos. Additionally, you can make stunning animated films using the 3D animations feature to create lens flares and moving text.

It’s easy to use OpenShot because it has a drag and drop feature to add videos, audio, and images to your file manager. OpenShot also has a quick Trim & Slice feature to shorten your videos or to edit clips in your content. To download this free video editing software, you’ll need a 64-bit or 32-bit operating system, 4GB of RAM and 500MB of hard disk space. Just visit the official OpenShot website and choose the software version suitable for your computer.

Download OpenShot

Pros:

  • Easy-to-use interface so it’s suitable for beginners

  • A lot of video editing features to create a perfect video

  • Allows you to mix and match video elements

  • Completely free to download and use and has various versions for different systems

Cons:

  • Some editing tools can be a little confusing to use

  • Takes a while to export finished videos to your computer

Avidemux

  • Best for

    Making quick edits, encoding and cutting your video clips

Avidemux is a professional video-editing software for Windows 7 that you can download and use for free on your Windows device. This platform supports a lot of popular video formats, such as AVI, MPEG, DVD, ASF, and MP4. It’s not as feature-rich as other video-editing software on our list, but it is a user-friendly platform ideal for beginner editors. So if you need to make some basic video edits, you should definitely give Avidemux a shot.

With Avidemux, you can copy portions of a video and add filters to your film. Furthermore, you can convert your videos to a smaller size so you can upload them to platforms that require a certain sized video. It also has an encoding feature so you can change the format of your videos and play them on different devices you own.

Download Avidemux

Pros:

  • Ideal for beginners

  • Supports popular video formats, including MP4

  • Offers basic video-editing features and tools

  • Allows you to create custom scripts

  • It’s a completely free video-editing software for Windows 7 with no watermark

Cons:

  • Lacks interesting transitions, titles, and stickers

  • Doesn’t have many advanced features

VideoPad

  • Best for

    Making videos with transitions, music, and narrations

There are two versions of VideoPad, one is free to download for Windows 7 and the other is a paid version. You can create videos for DVD, HD, YouTube, and more. It has over 50 visuals and transitions for you to make professional videos. And it supports all popular video formats such as AVI, MP4, DIVX, and MPEG.

Using VideoPad you can edit videos from a GoPro, webcam, or DV camcorder. Other effects this video editor offers are 3D effects and you can customize the duration of your transitions. VideoPad is also user-friendly because it has a drag-and-drop feature so it’s ideal for beginner editors.

Download VideoPad

Pros:

  • Has professional video templates to use for your movies

  • Allows you to import and mix multiple audio tracks

  • You can add various text and overlays to your video

  • Has interesting title text animation

Cons:

  • Some users reports slow upload speeds

  • Some problems with importing and exporting files

Nero Video

  • Best for

    Disk burning and personalizing movie menus

Nero Video has a paid and free version you can download to your Windows 7 device. It supports 21 languages, including English, Chinese, German, and Italian. This video editor is ideal for making movies or changing video formats. There are over 1000 themes and effects available to you. You can also decorate your videos using Nero LifeThemes Pro.

There are also many transitions you can play around with as well as animations and keyframes. Nero Video also has an Express Mode feature that allows you to edit your videos faster. This platform is easy to use because it has a simple drag-and-drop feature suitable for beginner editors.

Download Nero Video

Pros:

  • Easy-to-use program interface

  • Allow you to transfer files from any device, such as cameras

  • Slideshow creating feature

  • Supports high-resolution videos, including 4K and Full HD

Cons:

  • Doesn’t offer 3D effects

  • No motion tracking tool

Lightworks

  • Best for

    Making professional videos on Windows 7

Lightworks is designed by professional leading editors and boasts 5.5 million users worldwide. The free version of Lightworks allows beginner editors to cut and merge edited video clips. It has a user-friendly interface that includes drag-and-drop features. Furthermore, it has color correction and blend modes.

You’ll also appreciate that this video editor has keyboard shortcuts to make the editing process quicker. Lightworks supports all import formats and there are over 13 trimming features to choose from, such as Roll, Auto Unjoin, and Drag in Black. This video editor also has third-party support from Boris FX, Adobe® After Effects®, Blackmagic Fusion, and some other software.

Download Lightworks

Pros:

  • Customizable layouts

  • Full Unicode support

  • Supports almost all popular import formats

  • Handy drag-and-drop operation

Cons:

  • The free version doesn’t offer timeline rendering

  • No stereoscopic 3D output on the free version

How to edit a video on Windows 7 with Movavi Video Editor

Movavi Video Editor is one of the easiest programs to use when making films or editing videos. To make the process easier for you, we’ve included a detailed step-by-step guide on how to edit a video on Windows 7 using Movavi Video Editor. Take a look at these steps below.

Step 1. Download and install Movavi Video Editor

First, you need to download the program installation file for your Windows 7 PC. After downloading the file, double-click on it and follow the on-screen guide to complete the installation.

Step 2. Upload your file to the video editor

Once Movavi Video Editor is installed, you can launch the program and start importing your files. To do this, simply click on the Add Files button to import the video you want to edit. Your video will be uploaded to the Media Bin. Next, you need to drag and drop your video into the Timeline in the bottom part of the program window.

Step 3. Cut your footage into sections

If you want to remove sections out of your video, simply move the red marker on the video where you want to trim it. Use the Preview window to play the video to see which parts can be cut out. Now place the red marker at the beginning of the segment and click on the Split button. Then place the red marker at the end of the segment and click on the Split button again. Now you can remove this part by clicking on the Delete button.

Step 4. Adjust the video’s colors

You can adjust darker tones in your video by adjusting the colors in your film. Simply select your video track and click on the Color Adjustments button above the video timeline. You can auto-adjust the color or manually do it by moving the sliders to change the tone of your video.

Step 5. Add music, titles, or transitions

You can add music to your video by clicking on the Add Files button to include a track of your choice. The music will be added to the Media Bin. Move your file to a separate audio track on the Timeline.

To add transitions, simply click on the Transitions tab on the left side and drag and drop the transition you like into the position you want in your movie. It’s best to put these transitions in between your video clips for a smooth transition.

If you’d like to add titles to your video, open the Titles tab on the left side and select the type you want. Drag and drop your titles on the Timeline.

Step 6. Apply filters

To enhance your video, you can add filters to each clip or the entire movie. Simply open the Filters tab located on the left-hand corner of your screen to browse through the ones available to you. Click on the filter you want to apply to see how it looks in the Preview window. If you’re happy with the filter, then click and drag it onto your video timeline.

Step 7. Export your video

When you’re done editing your video in Movavi Video Editor Plus, you’ll need to save your project. To do this, click on the Export button. In the Save Video File tab, you can choose which format you’d like to export your video in. To save your video in high definition, you can click on the Advanced tab and open the Resolution drop-down menu and select the one you want.

Then simply click on the Start button to save your video onto your Windows 7 device.

Summary

If you’re a beginner video editor on a budget, then a free video-editing tool that offers plenty of features will be ideal for you. There are many options for you to choose from but it will depend on what editing you want to do. There are video editors that allow you to make videos from scratch or edit existing videos. Choose one of the programs we’ve reviewed above if you want to create professional videos on your Windows 7 device for free.

Program

Key features

Rating

Download

  • Various filters, titles, and transitions

  • Chroma key

  • Stabilization

  • Picture-in-picture

  • Supports popular video formats

  • Easy drag-and-drop tools

  • Unlimited tracks and layers

Movavi Video Editor

Сreate awesome videos easily

*The free version of Movavi Video Editor may have the following restrictions depending on the build: watermark on exported clips, 60-second video or 1/2 audio length limit, and/or some advanced features unavailable when exporting videos.

Have questions?

Have questions?

If you can’t find the answer to your question, please feel free to contact our Support Team.

Join for how-to guides, speсial offers, and app tips!